Our site is getting a makeover! Please bear with us whilst we make improvements

A Guide To Fat Quarters

A Guide To Fat Quarters

So you see a new fabric collection and you’re like…

I LOVE IT

…but how much of it do I need? Can I afford them all? I can’t possibly choose!

Oh yeah, we totally get you.

This is why we offer fat quarter bundles so you can love it, make it & keep it!

Watch our video then check out the written guide below for the full fat-quarter lowdown!

What is a fat quarter?

You might have seen FQ on a tutorial and you’re like… what?!

FQ stands for fat quarter, which is a piece of pre-cut fabric that is made by cutting half a metre of the full fabric width from the bolt and then cut in half vertically, hence ‘quarters’. Most quilting fabrics are 44”/110cm wide, which makes fat quarters around 50cm x 55cm.


A fat quarter cut is a square shape which means you’re getting more scope to make wider things out of it, even though it’s technically the same surface area. 


You may find that some fabrics have a wider width, such as our PUL and Bamboo Velour. We sell this by the fat quarter, however the width can be up to 150cm, so you would get a very generous amount of fabric!


You may find that some fabrics have a wider width, such as our PUL and Bamboo Velour. We sell this by the fat quarter, however the width can be up to 150cm, so you would get a very generous amount of fabric!


Boring Legal Bit: If you follow any tutorial or guidance found in this post, or on this blog, you agree to be bound by our disclaimer which can be viewed here

Where can I buy fat quarters?

Right here at Plush Addict! We sell quilting collections in fat quarter bundles and you can buy any of our fabrics as a fat quarter, as they are cut bespoke for you when you order. We even have a colour matching service, just pop in the order notes which fabrics you’d like us to colour match and we’ll check for you.


Did you learn a lot from this blog? We’d love to hear from you in the comments!

Never miss a guide or tutorial

Click to join our mailing list!

Pin this for later!

Never miss a guide or tutorial

Click to join our mailing list!

How To Use Odicoat Fabric Coating Gel

How To Use Odicoat Fabric Coating Gel

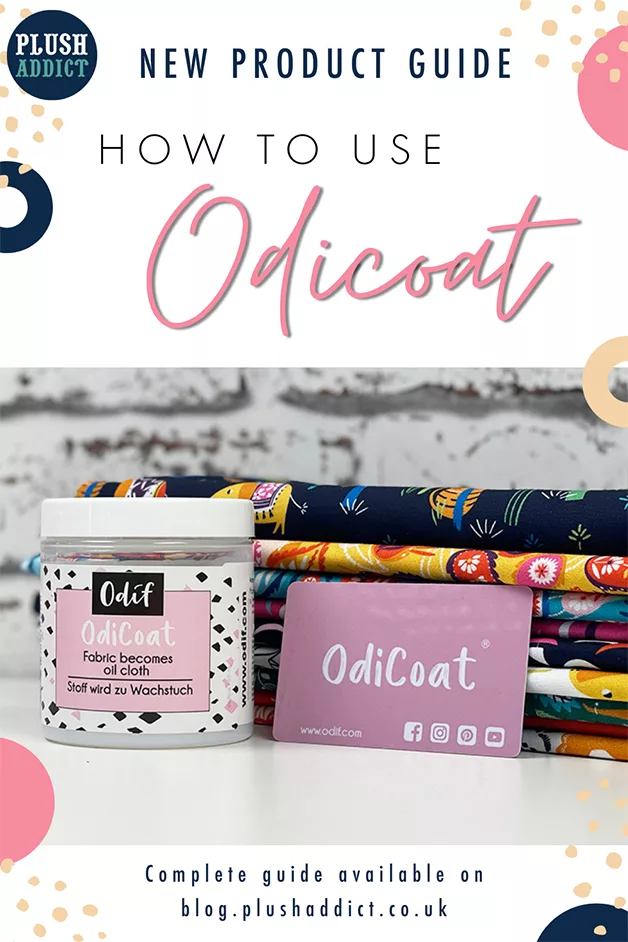
You will learn how to use Odicoat fabric coating gel in this tutorial. In addition, we will be guiding you on its various benefits and uses.

Ever found the perfect fabric with the wrong composition for your project? If the missing element was waterproofing then we have discovered a brilliant solution; Odicoat. This clever gel gives fabrics a waterproof coating that is machine washable.

This isn’t the only use for this clever product, Odicoat also works as a fabric glue; Fabric can be applied to objects for decorative purposes.

A product guide for beginners

There are a few ways to waterproof fabrics, depending on the finish you are looking for.

Below you’ll find both a video tutorial on how to use Odicoat fabric coating gel as well as a more detailed photo tutorial so you can learn all about Odicoat! We hope you this post helpful.. Do let us know in the comments.

You’ll also find a cheeky discount code for your next Odicoat purchase at the end of the tutorial…

Boring Legal Bit: If you follow any tutorial or guidance found in this post, or on this blog, you agree to be bound by our disclaimer which can be viewed here

Why use Odicoat?

Benefits of Odicoat

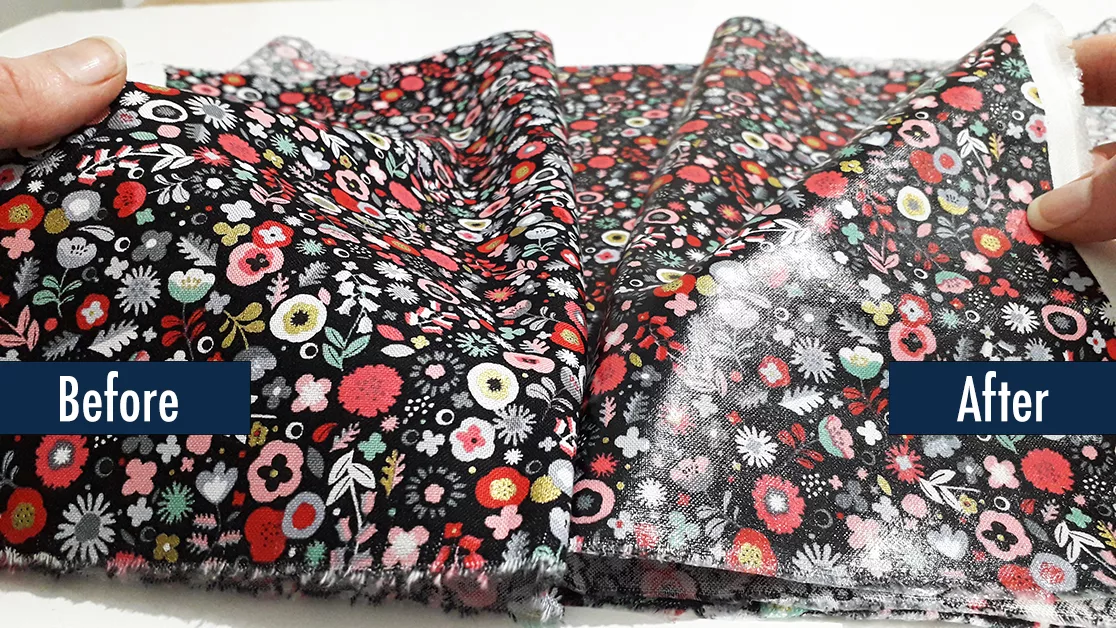
  •  Odicoat leaves fabric with a lightly rubberised feel; think of the finish (3 coats) as a more pliable oilcloth
  • Once application is complete the fabric is machine washable up to 30 degrees
  • Coated fabric is easier to cut, more durable and less prone to fraying
  • The finished fabric can be sewn, as you would PUL or oilcloth fabrics. Check out our full Waterproof Fabric Guide for more info
  • Waterproof fabrics offer greater stain resistance
  • Odicoat is water based, BPA free and acid free
  • Treated fabrics have a little more structure

Uses for Odicoat

  • Aprons
  • Tablecloths
  • Placemats
  • Wash bags
  • Make up bags
  • Embellishing decorative items
  • Outdoor cushions

Additional information

  •  A single coat will give a matt finish, 2 or 3 coats will give a gloss finish:

1 coat – the fabric is protected, water repellent, with a matt finish

2 coats – the fabric is coated, with a gloss finish

3 coats – the fabric is waterproofed, with a high gloss finish

  • Fabrics coated with Odicoat should only be washed at 30o
  • Prepare your fabrics as per manufacturers care advice before applying Odicoat
  • Use clips or pin within the seam allowance – pin holes will remain visible
  • Treated fabrics will have less drape
  • We recommend testing the suitability of Odicoat on spare pieces of the project fabric/ hidden area of an object before proceeding
  • Not suitable for thick velvet, suede or embossed fabrics
  • Foods must not make direct contact with Odicoat treated items
  • Odicoat is made in France by Odif

Disclaimer

  • Odicoat should only be used for it’s intended purpose
  • Follow the usage instructions
  • Always wash hands after use
  • Not for consumption
  • Keep out of the reach of children
  • Odif cannot be responsible for dangerous storage conditions or misuse

How to apply Odicoat

You will need:

Here we used:

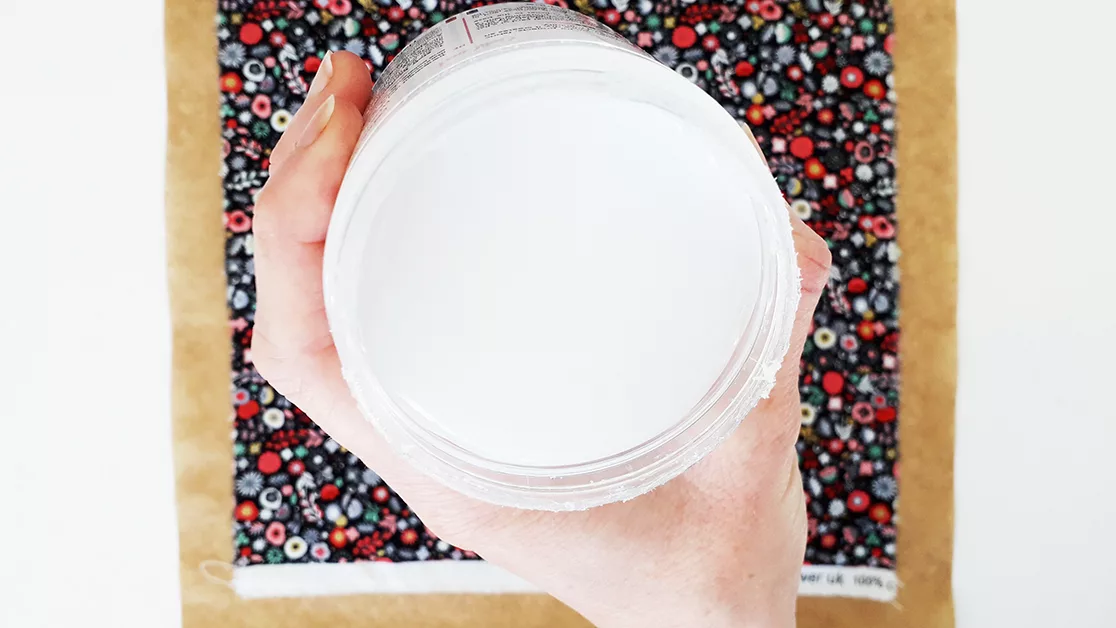
1. Before cutting fabrics to size, in case of shrinkage, apply the Odicoat to the right side of the fabric: Place your fabric right side up on a protected surface (greaseproof or plastic sheeting are ideal)

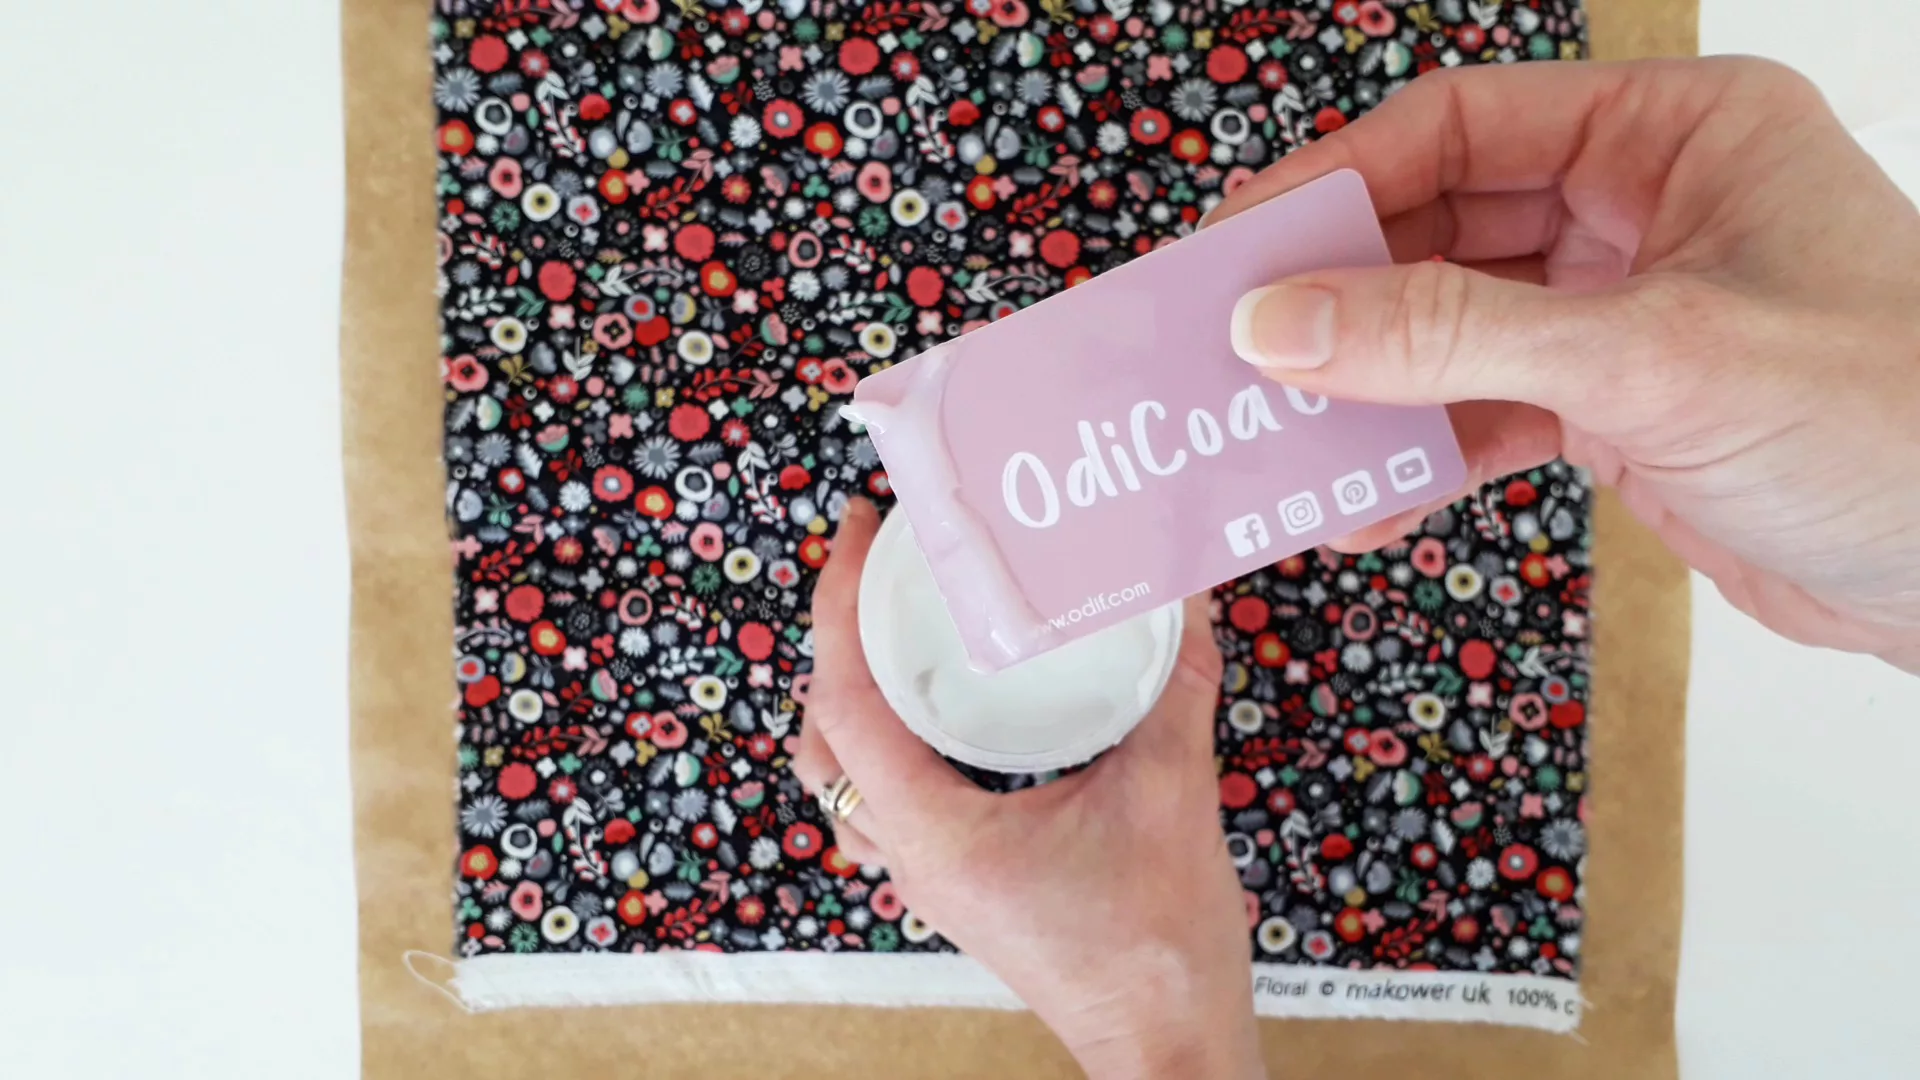
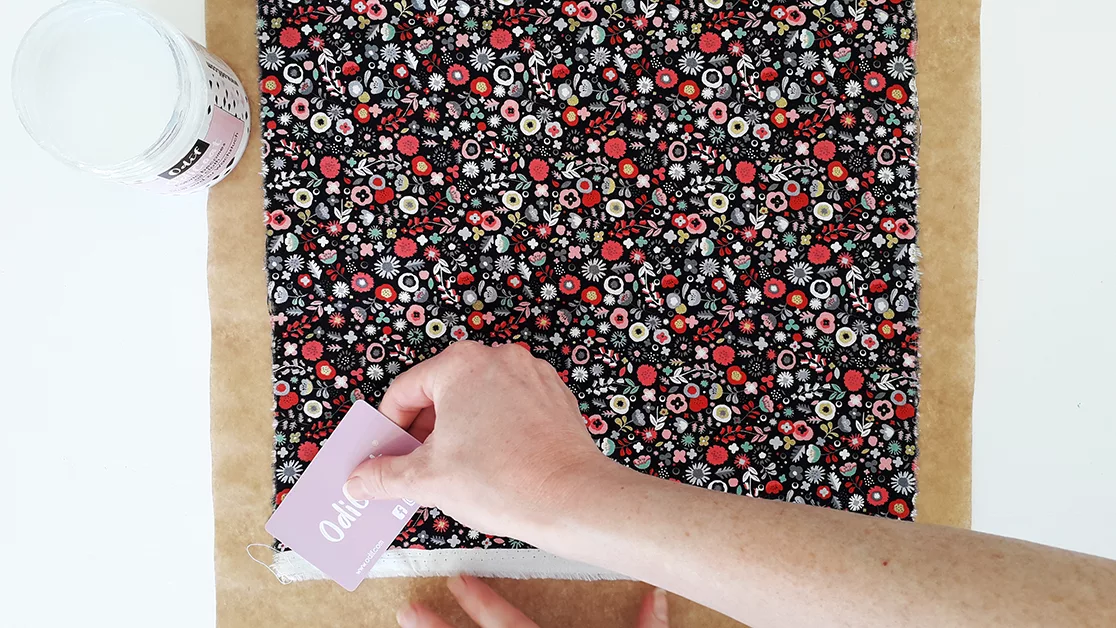
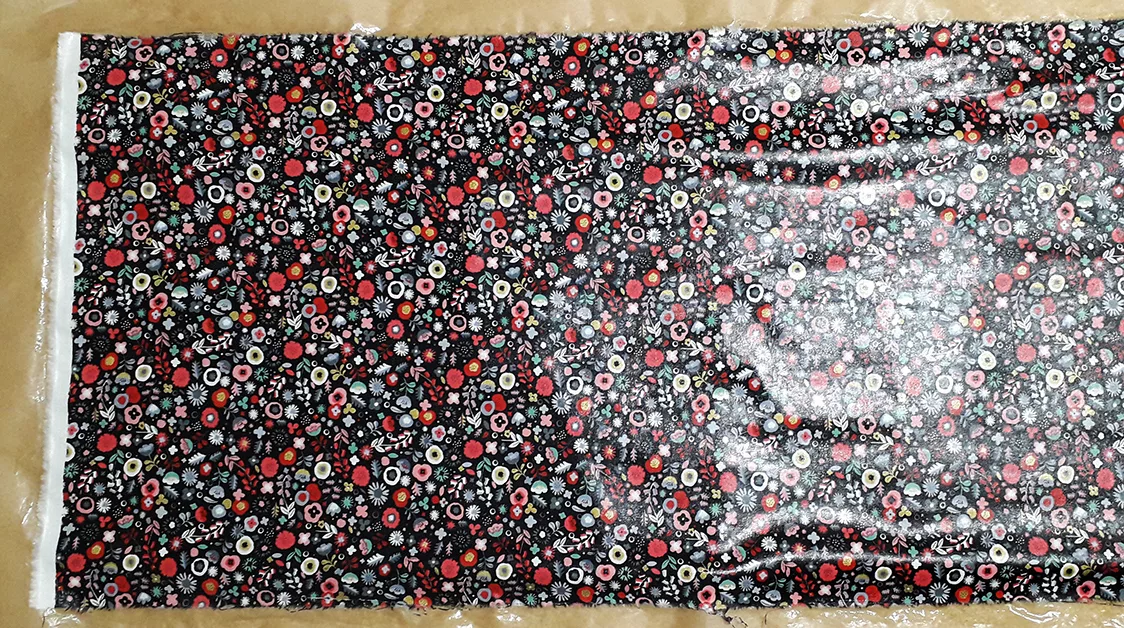
2. Using the card provided spread a thin layer of Odicoat onto the fabric; start from one corner and work outwards. Go back over the fabric with the card spreading out any thick patches/ streaks. Avoid moving the fabric until it is dry to prevent Odicoat getting onto the wrong side

3. Wait until the Odicoat is touch dry (20 to 30 minutes), cover with greaseproof and dry iron, heat setting 1/satin

4. Apply a second coat, as per steps 2. And 3. A third coat can be applied if required

5. Allow 24 hours for the Odicoat to cure fully then carefully peel the fabric off

How to use Odicoat as a glue

Odicoat can be used to stick fabric to wood, cardboard, metal, glass, ceramic, pottery, Styrofoam and stone. Once applied the Odicoat will give a water-resistant, satin finish:

1. Apply Odicoat to the back of the fabric being adhered with a flat brush

2. Position the fabric on the chosen surface

3. Apply another coat of Odicoat over the fabric

4. Wait 1 hour

5. Apply a second coat (optional)

6. Wait 24 hours


Check out our video below!

And you’re finished, well done!

Pin this for later!

We hope you found this tutorial useful!

A Zipper Guide: Everything You Need To Know About Zip Types

A Zipper Guide: Everything You Need To Know About Zip Types

Welcome to this zippy edition of my sewing Substack I get SO many questions about zips… Separating zips… Close-ended zips… invisible zips… continuous zips… I hear ya! What zip do you need where and what exactly do those numbers mean?! This zipper guide has everything you need to know about zip types.

As simple as they might seem, zippers are the backbone of functionality and style in many sewing creations. But not all zippers are created equal, and choosing the right one can be the difference between a project that’s just good and one that’s great.

By the end of this installment, you’ll be equipped with the knowledge to not just choose the right zipper, but to do so with confidence and creativity.

And if reading isn’t your thing… You can watch a video I did talking you through all the different zip types here, but please leave me a comment or a ❤️ below if you’ve found this post helpful, I’d really appreciate it!

The Anatomy Of A Zip

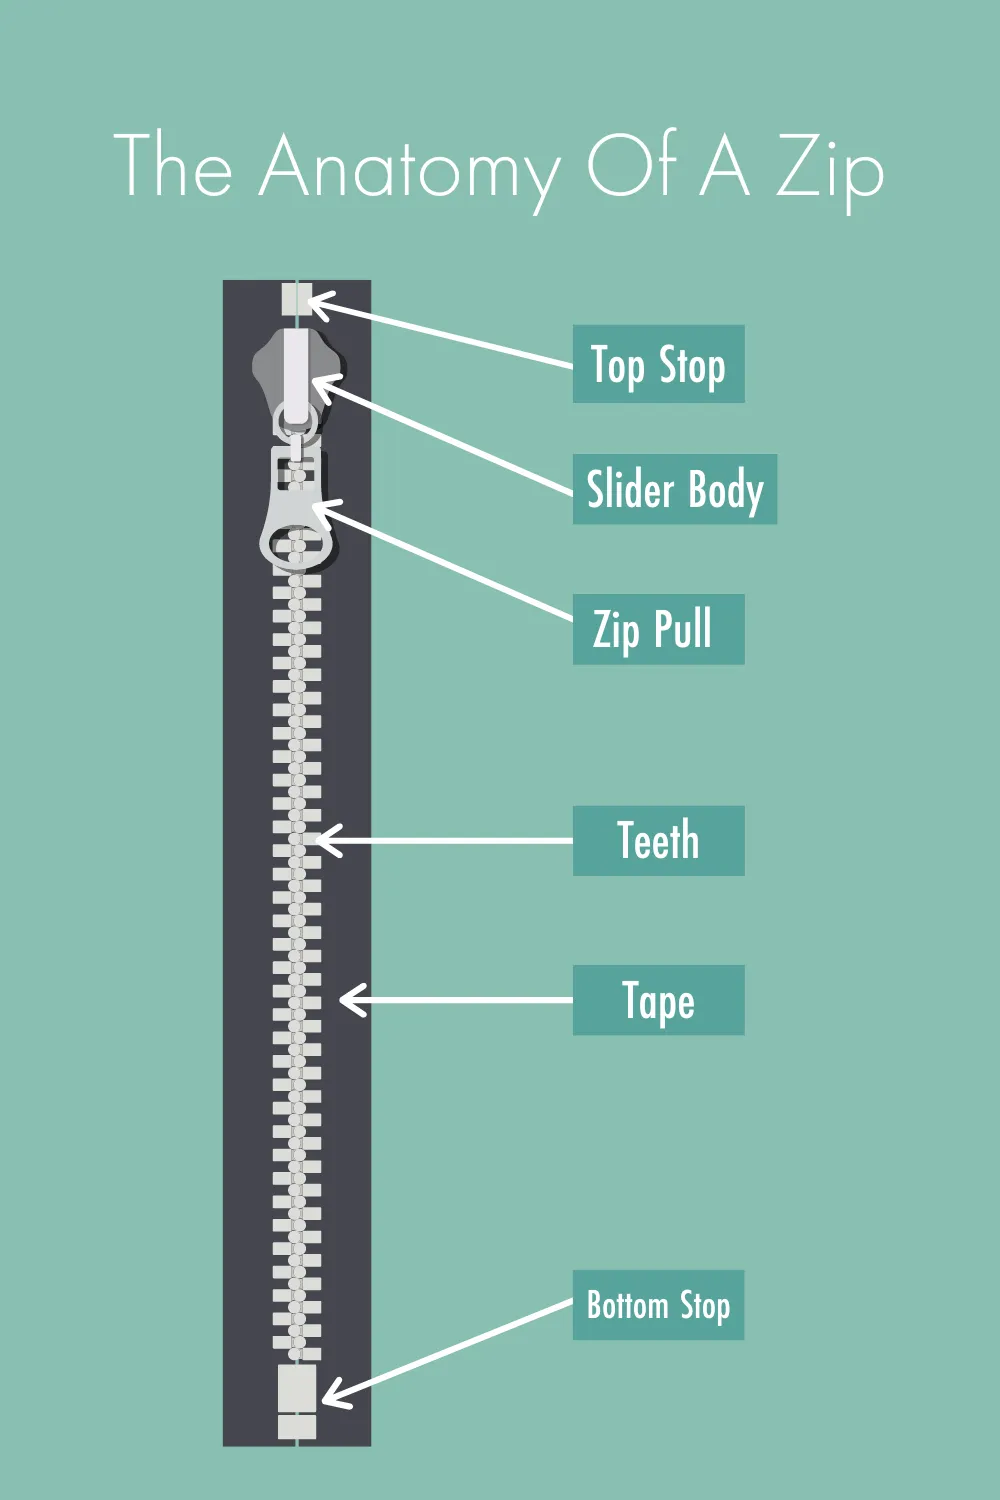
First, let’s talk about the anatomy of a zip… You might find some of these terms in a tutorial and it’s useful to be aware of the parts, and the functions they serve in your zip

Top Stop: A small bar at the top that stops the slider from coming off of the top of zipper tracks.

Bottom Stop: A small bar at the bottom that stops the slider from coming off of the bottom of the zipper tracks.

Slider Body: The most common part of the zip, it separates and joins the tracks as you slide the pull tab up and down.

Pull Tab: The second part of the slider body, used to pull the zipper up and down.

Zipper Tape: This is the fabric part that gets sewn on to your project. The zipper teeth are attached to the zipper tape

Retainer Box: Secures it together and stops the slider from coming off of the bottom – this only applies to separating zips.

Insertion Pin: Holds the opposite side of the zipper in the retainer box – this only applies to separating zips.

Different Types Of Zips

Now you know your top stop from your slider let’s talk about the two basic zips types: Closed-ended zips & open ended zips…

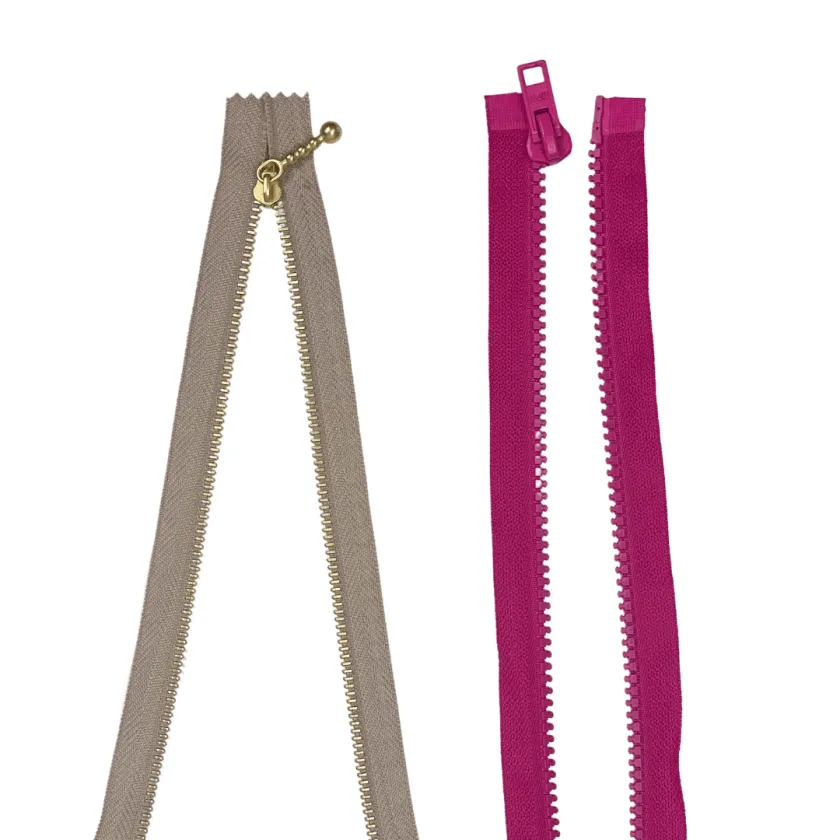
On the left we see a closed-ended zipper – the zip is permanently closed on one end

On the right we see an open-ended or separating zipper. The zip completely separates in two. These zips are often found in jackets, coats and other garments.

(Left: close ended zip – Right: open ended zip)

What is a closed-ended zip?

Closed-ended zips are a great jumping off point into the world of sewing zips – and they’re one of the easiest to get the hang of.

It has a bottom stop which is a metal bar that goes across both sides of the bottom of the zipper and holds it together in one piece.

These kinds of zips are really versatile as they come in a wide range of both colours and sizes

They can be used in making pouches, bags, dressmaking, cushions and lots more.

What is a separating or open-ended zip?

Does pretty much what it says on the tin, this zipper separates at the bottom – great for fastenings that require opening/closing.

Separating zippers are usually found in jackets and coats.

You can cheat and use these zips in place of a closed ended zip if you like the style… you simply just treat them as you would a closed ended zip and bury the separating end in a seam or cover with a zip tab!

What type of zip do I need?

The 4 most common types are nylon coil zip, plastic moulded zip, metal zip and invisible zip.

What type of zip do I need?

A nylon coil zip is one whose teeth are made from nylon, rather than hard plastic or metal. Made how it’s named, nylon monofilament is coiled and then stitched or woven into the zipper tape.

Nylon teeth zips are great to use as you can usually sew right over the teeth without your needle breaking!

(Nylon coil zip)

Nylon zippers are also really flexible compared to other zip types. They have strong horizontal strength, this is ideal because they’re easily fixed if broken.

These are the zips of choice for luggage and outdoor products due to their strength, you’ll likely find them on suitcases, backpacks, tents or jackets! Thanks to this bad boy you can overpack your suitcase and STILL close it shut without ripping the whole thing apart!

Nylon zippers are also very forgiving if you sew over them – it’s unlikely your needle will break if it’s a size 80 or stronger.

What does an invisible zip look like?

As the name might imply – these are (almost!) invisible! These zips are also known as concealed zips.

Usually with very fine teeth, they’re sewn into the seam in garments to give a clean finish – with only the pull tab showing (if installed correctly!).

You ideally need an invisible zipper foot to insert this zip type more easily and accurately.

Where to use a moulded plastic/chunky zip?

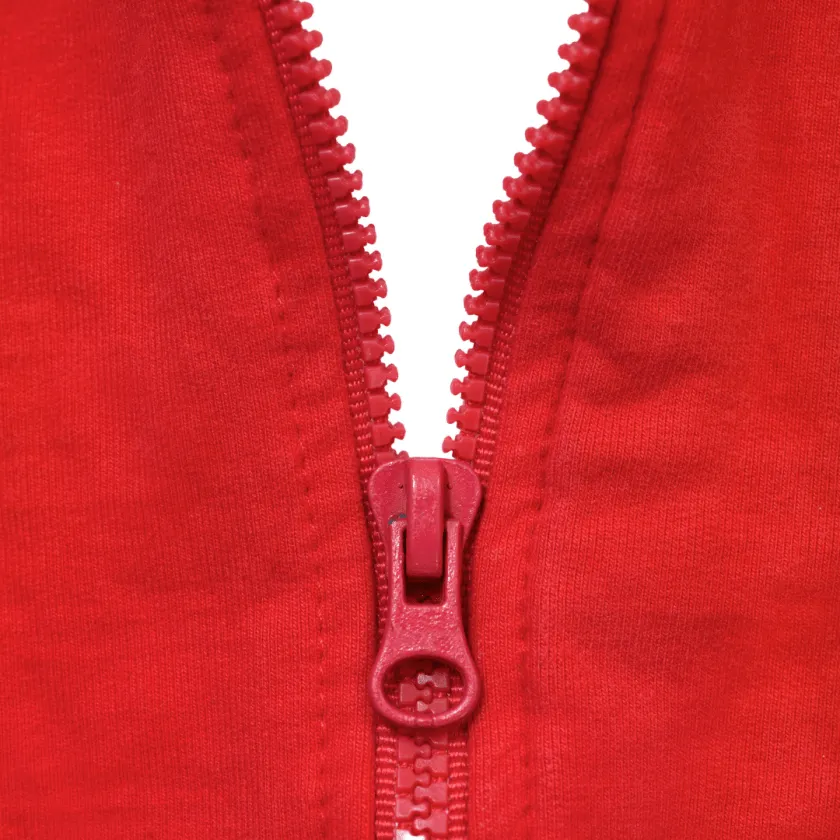
These zippers are usually constructed from acetal polymer plastic and have symmetrical teeth that interlock together. They also have more substantial & defined zip teeth than other zips – hence the name chunky! These are most commonly seen on clothes like jackets and also handbags.

Sadly, if one of the teeth breaks over time it’s very difficult to fix.

However the shape of the teeth makes them slightly stiffer/stronger than nylon coil ones – it’s a balance!

Plastic moulded or chunky zip

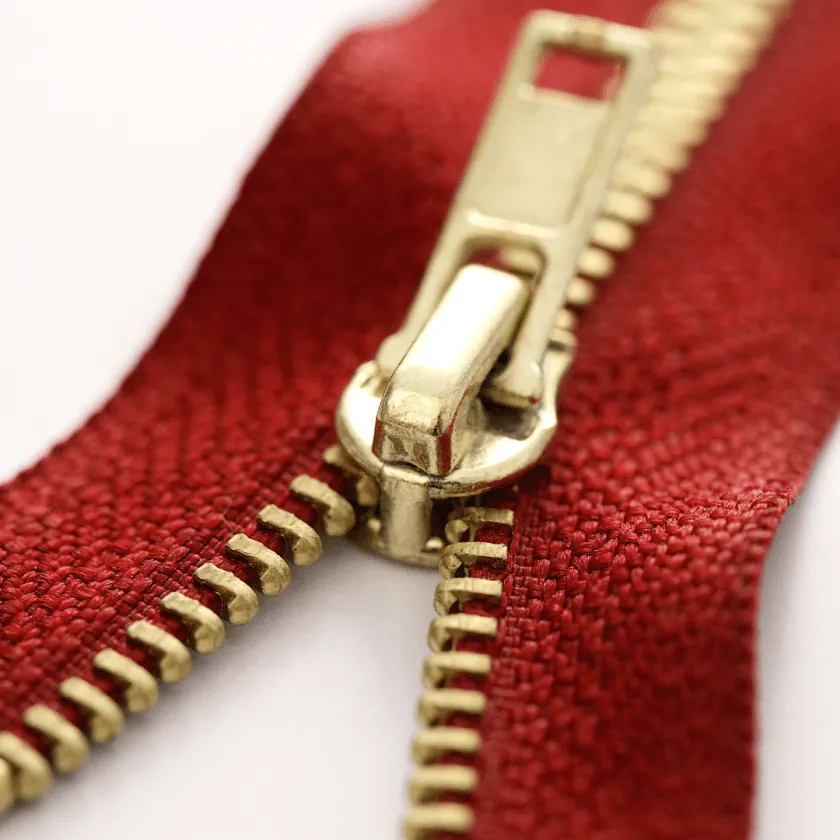
Probably the most sturdy and durable of the bunch, they have teeth made out of metal that are clamped onto the zipper tape, however they can be relatively heavy and are a lot more difficult to shorten.

Often seen on denim jeans due to their resistance to withstand multiple washes, and due to the rough nature of how people wear/treat their jeans. This style is also used for heavy-duty items such as duffle bags, leather products and suitcases.

There is a huge trend towards adding metal teeth zippers to pouches – they add a feeling of luxury.

(Metal teeth zip)

What are continuous zips?

These zips don’t have a beginning or end, you can cut them to the length you need as there’s no pull tab or bottom stop and you can purchase the zipper tape by the metre.

Zip pulls are purchased and added separately giving you more control over the look and design of your project.

These are great if you need a very long zip. Perfect to reduce waste and for those niche projects, you can also customise it to your needs and add zip pulls to either side!

(Continuous zips)

What does a #3 or #5 Zip look like?

Ever wondered what a size 5 zip actually is?! For the uninitiated, it might seem confusing but the reality is it’s very simple…

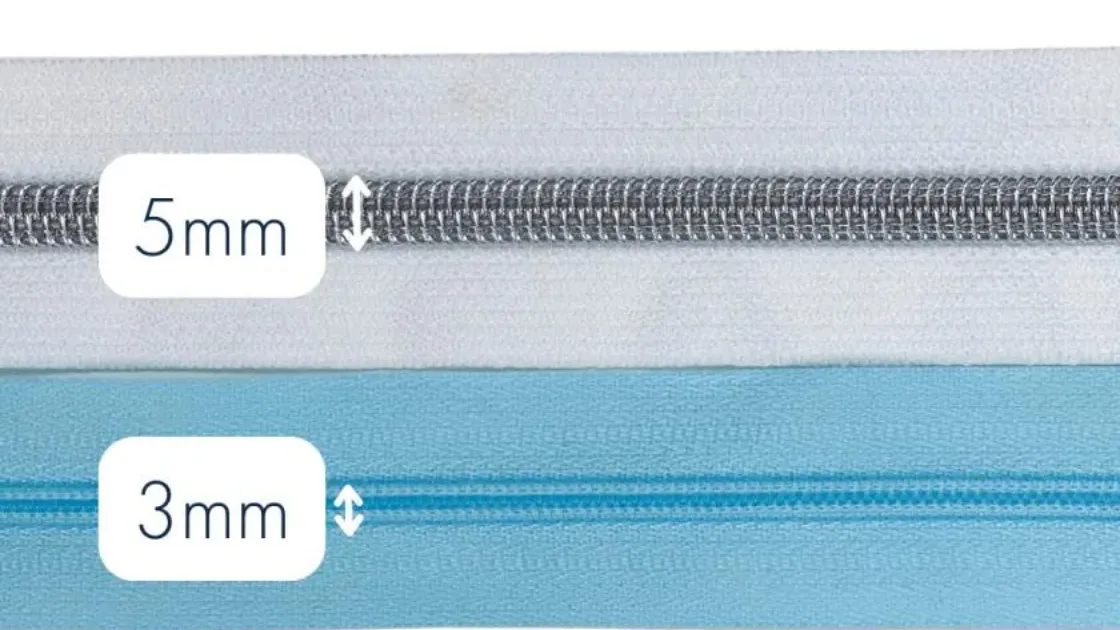
Zip sizes are expressed in numbers (#) and the width of the zip teeth is measured in millimeters. The most common are size #3 and size #5.

I’d be thrilled to hear that you appreciate my work! I’d love it if you bought me a coffee to support my work if it has helped you and offered you value☕️

In most cases the overall size is an approximation of the zipper teeth width in millimeters when the zip is closed.

When sewing your makes, if your project doesn’t include a recommendation for the size of the zipper, you can use the table below:

ZIPPER SIZE CHART

Don’t forget when it comes to measuring the length of your zip, you should start measuring from the top stop and finish measuring when you reach bottom stop, this will give you the most accurate measurement of your zip.

How heavy are zips?

Weight is an important factor to consider as you want to match a suitable weight to the project you’re working on. 

Usually metal zippers will weigh a lot more than moulded plastic ones.

So for example if you’re sewing some children’s clothes with a zip on the front, metal may not be suitable as it would be too heavy and weigh the whole garment down.

Zipper Tools

Grab the tools below to help you with your zip sewing!

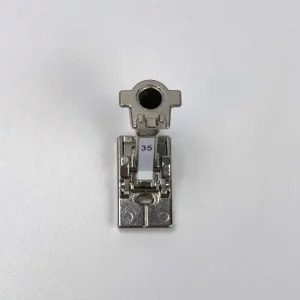
What does a zipper foot look like?

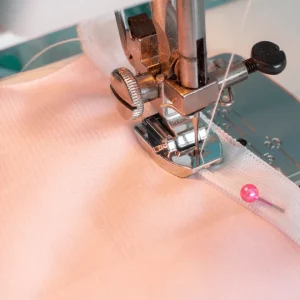
A recommended prerequisite before you start sewing zips is getting yourself a zipper foot. Although some seam-stars agree it’s not a necessity – it does make life a lot easier and you are more likely to get a nice finish.

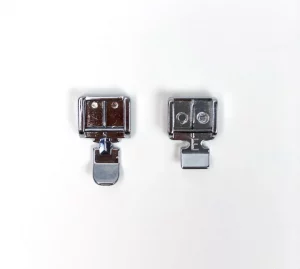
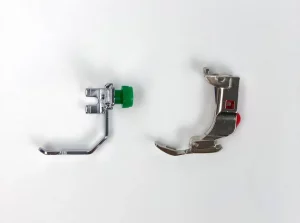
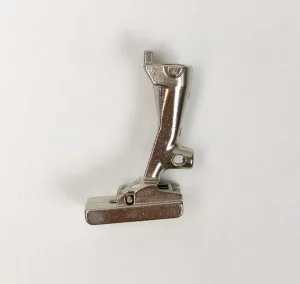
You can get 2 different zipper foots, an invisible zipper foot and a regular zipper foot.

The difference between both is self-explanatory, the invisible zipper foot is to be used when sewing invisible zips, and the regular zipper foot is to be used with all other types.

(Two different types of regular feet)

(Invisible zipper foot)

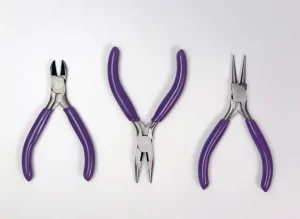
Pliers

Some zippers such as nylon coil and chunky zips can be cut with scissors to shorten, however metal ones need a little more work to shorten & pliers are the perfect tool for this.

All you need to do is snip & pull off some of the metal teeth with pliers.

Clear Tape

An easy tool most of us have in our homes, the same sellotape we use with wrapping paper! I like Scotch Magic Tape as it doesn’t leave a residue on your project.

Use this to stick down the zip whilst sewing for ease to keep it from slipping.

Wonder Tape

Ideal for holding together seams, zips or hems when stitching knit fabric, it’ll also keep the fabric from stretching as you sew.

Even better… this tape disappears after the first wash!

If you prefer watching rather than reading, check out our video version of this guide over on our Youtube

Did this guide help you? If it did I’d appreciate it if you’d leave a comment or a ❤️ on this post to help other people find my work! And if you’d like to hear more from me I’d love it if you would subscribe below… thanks so much!

A Quick Guide To PUL Fabric

A Quick Guide To PUL Fabric

What Is PUL Fabric?

So, what is PUL fabric? Or  polyurethane laminate – apart from being a mouthful!?

Polyurethane laminate can be abbreviated to PUL fabric.

PUL is special… It’s a waterproof AND breathable fabric!

Why is this important?

Well, it means if you make waterproof items of clothing your body heat has a better chance of escaping into the atmosphere!

Heat escapes THROUGH the fabric – so you “glow” less.

It’s pretty brilliant!


Composition of PUL Fabric

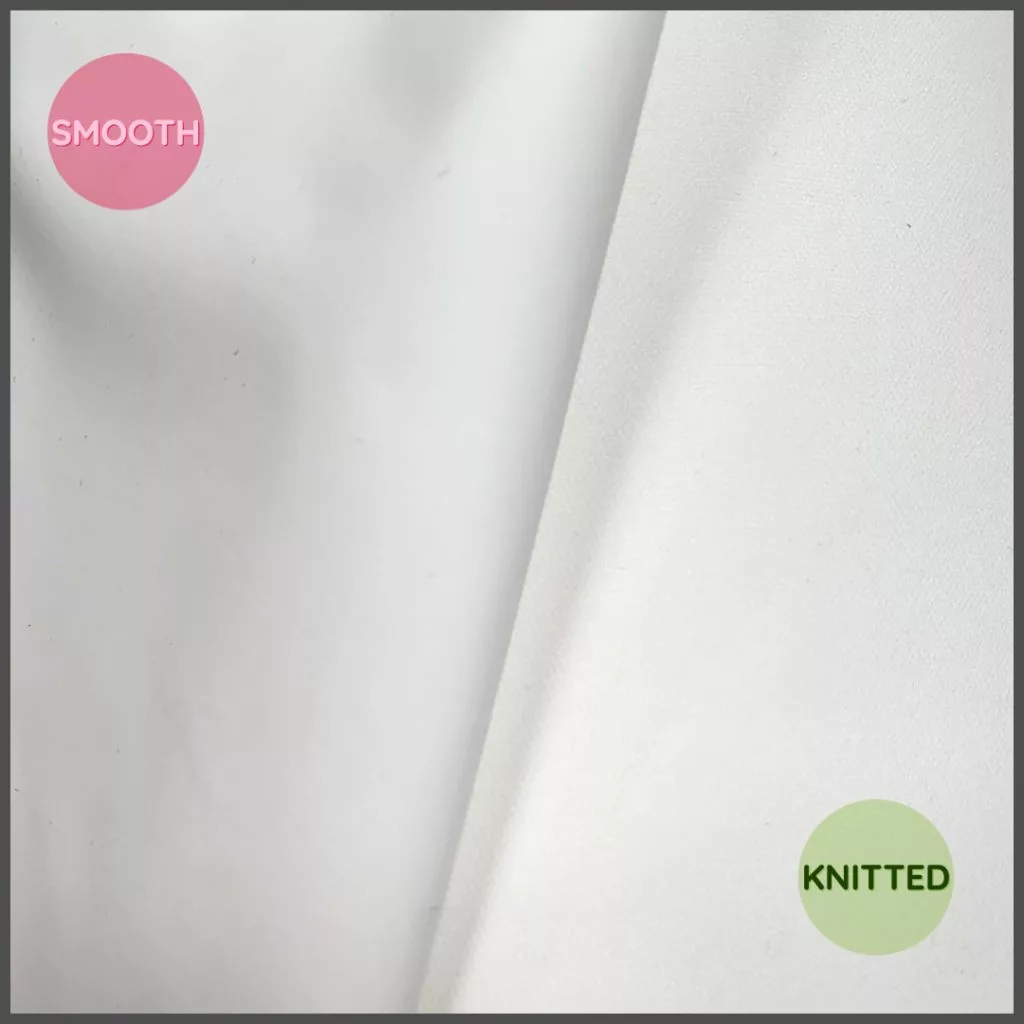
PUL has 2 sides.

One side is a polyester knit, so has a slight stretch which is great for clothing.

The other side has a laminate coating applied.

It’s slippery and shiny – this is the waterproof bit.

  • PUL is soft & flexible
  • It doesn’t really crease
  • It air dries in super quick time
  • It’s safe – there’s no lead, phthalates or BPA

Never miss a tutorial or fabric guide…

Stay up to date with the latest by signing up to our newsletter!

Click to join our mailing list!

What is Sandwich PUL

As well as single layer PUL we also stock sandwich PUL which works in the same way but instead of being composed of 2 layers of fabric there are 3 layers. The layer of laminate is sandwiched in between 2 layers knit fabric. This is especially helpful if you don’t want to have the shiny laminate side against the skin as it’s hidden away between the knit layers. It’s also stronger so if you are applying a kind of fastener such as KAM snaps, extra reinforcement isn’t required around the fastenings.

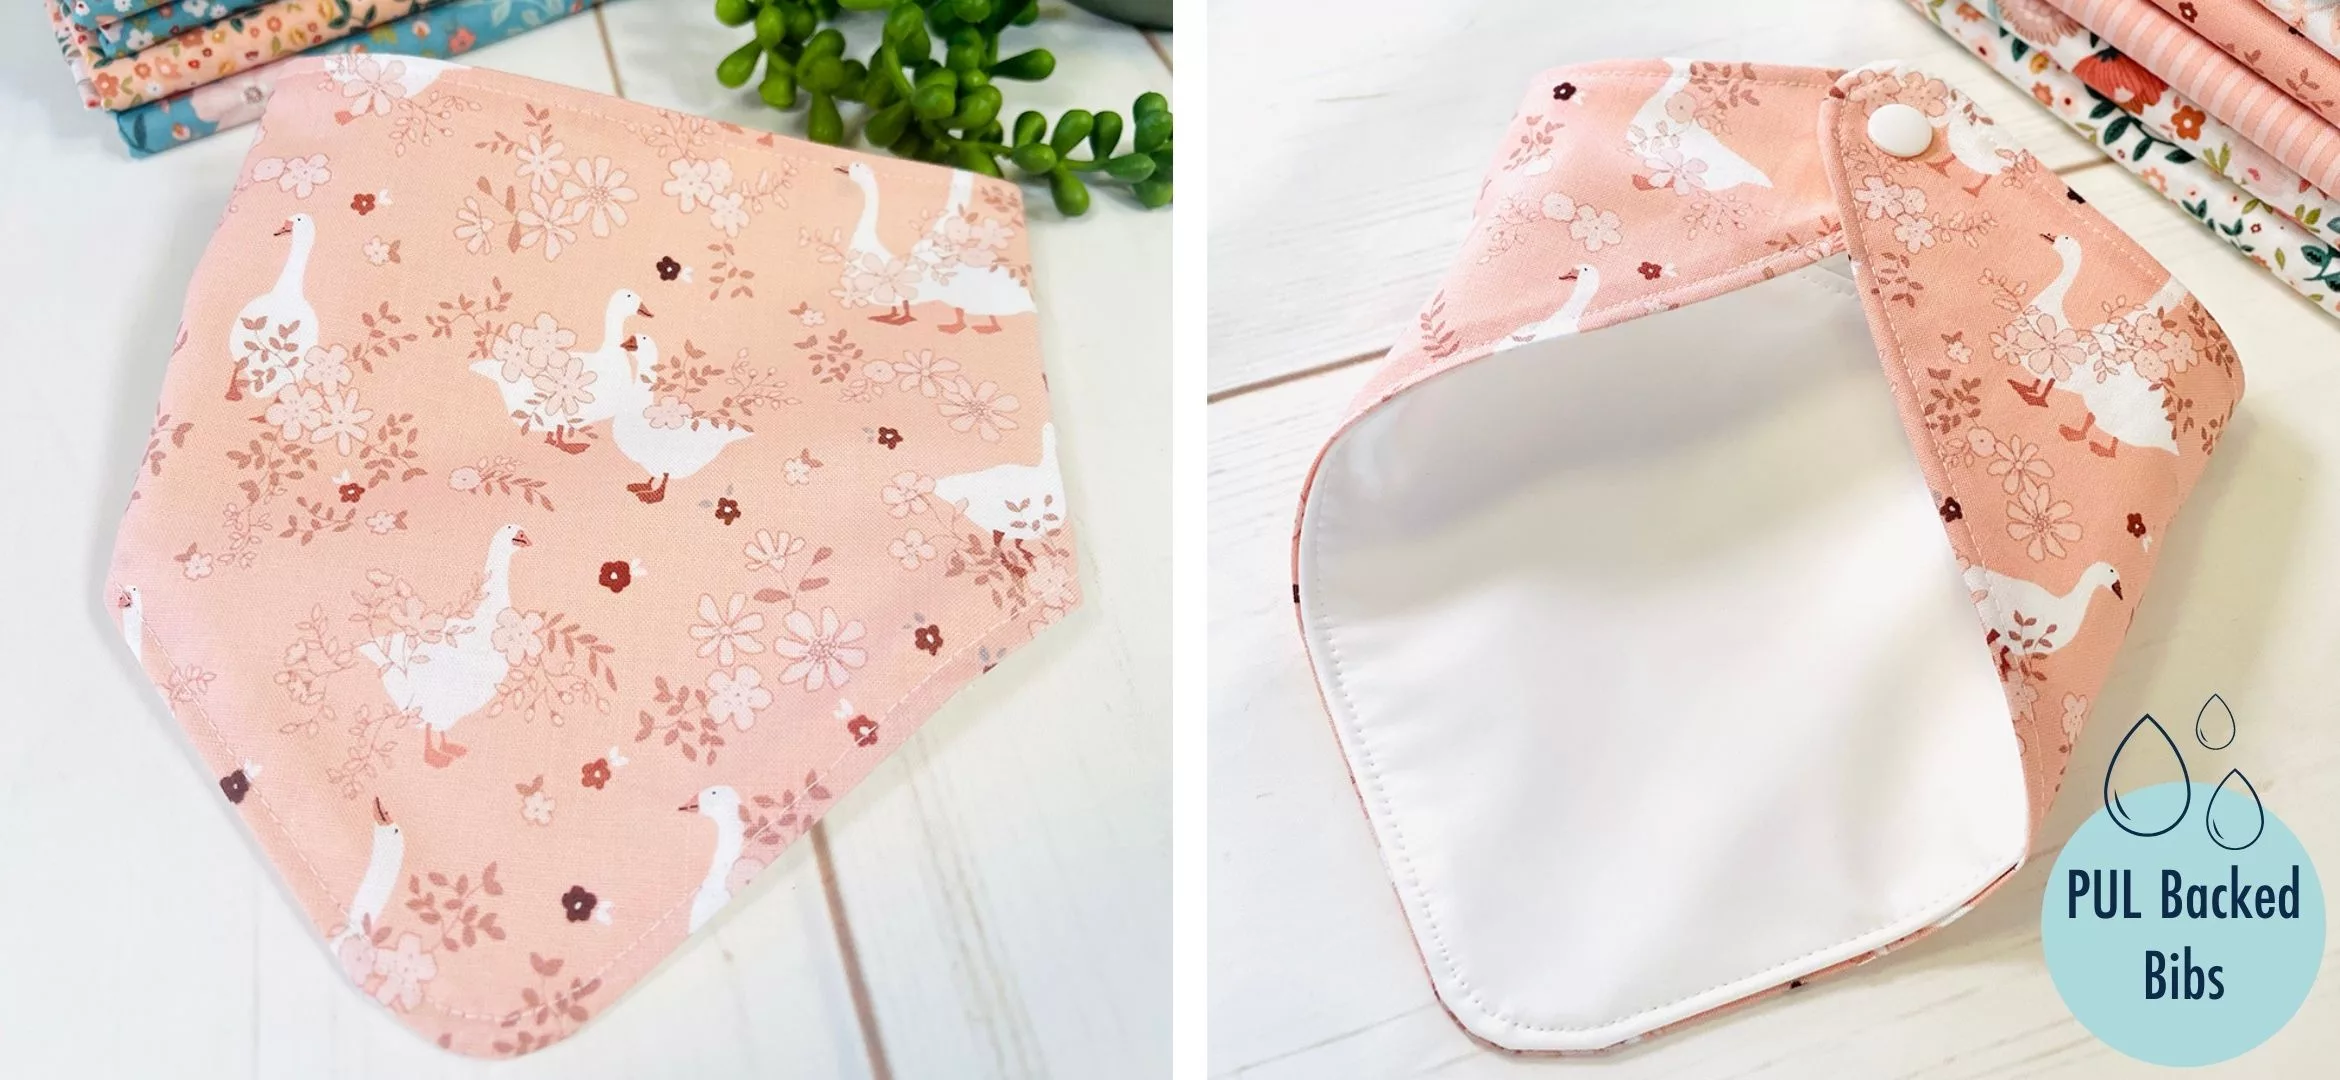
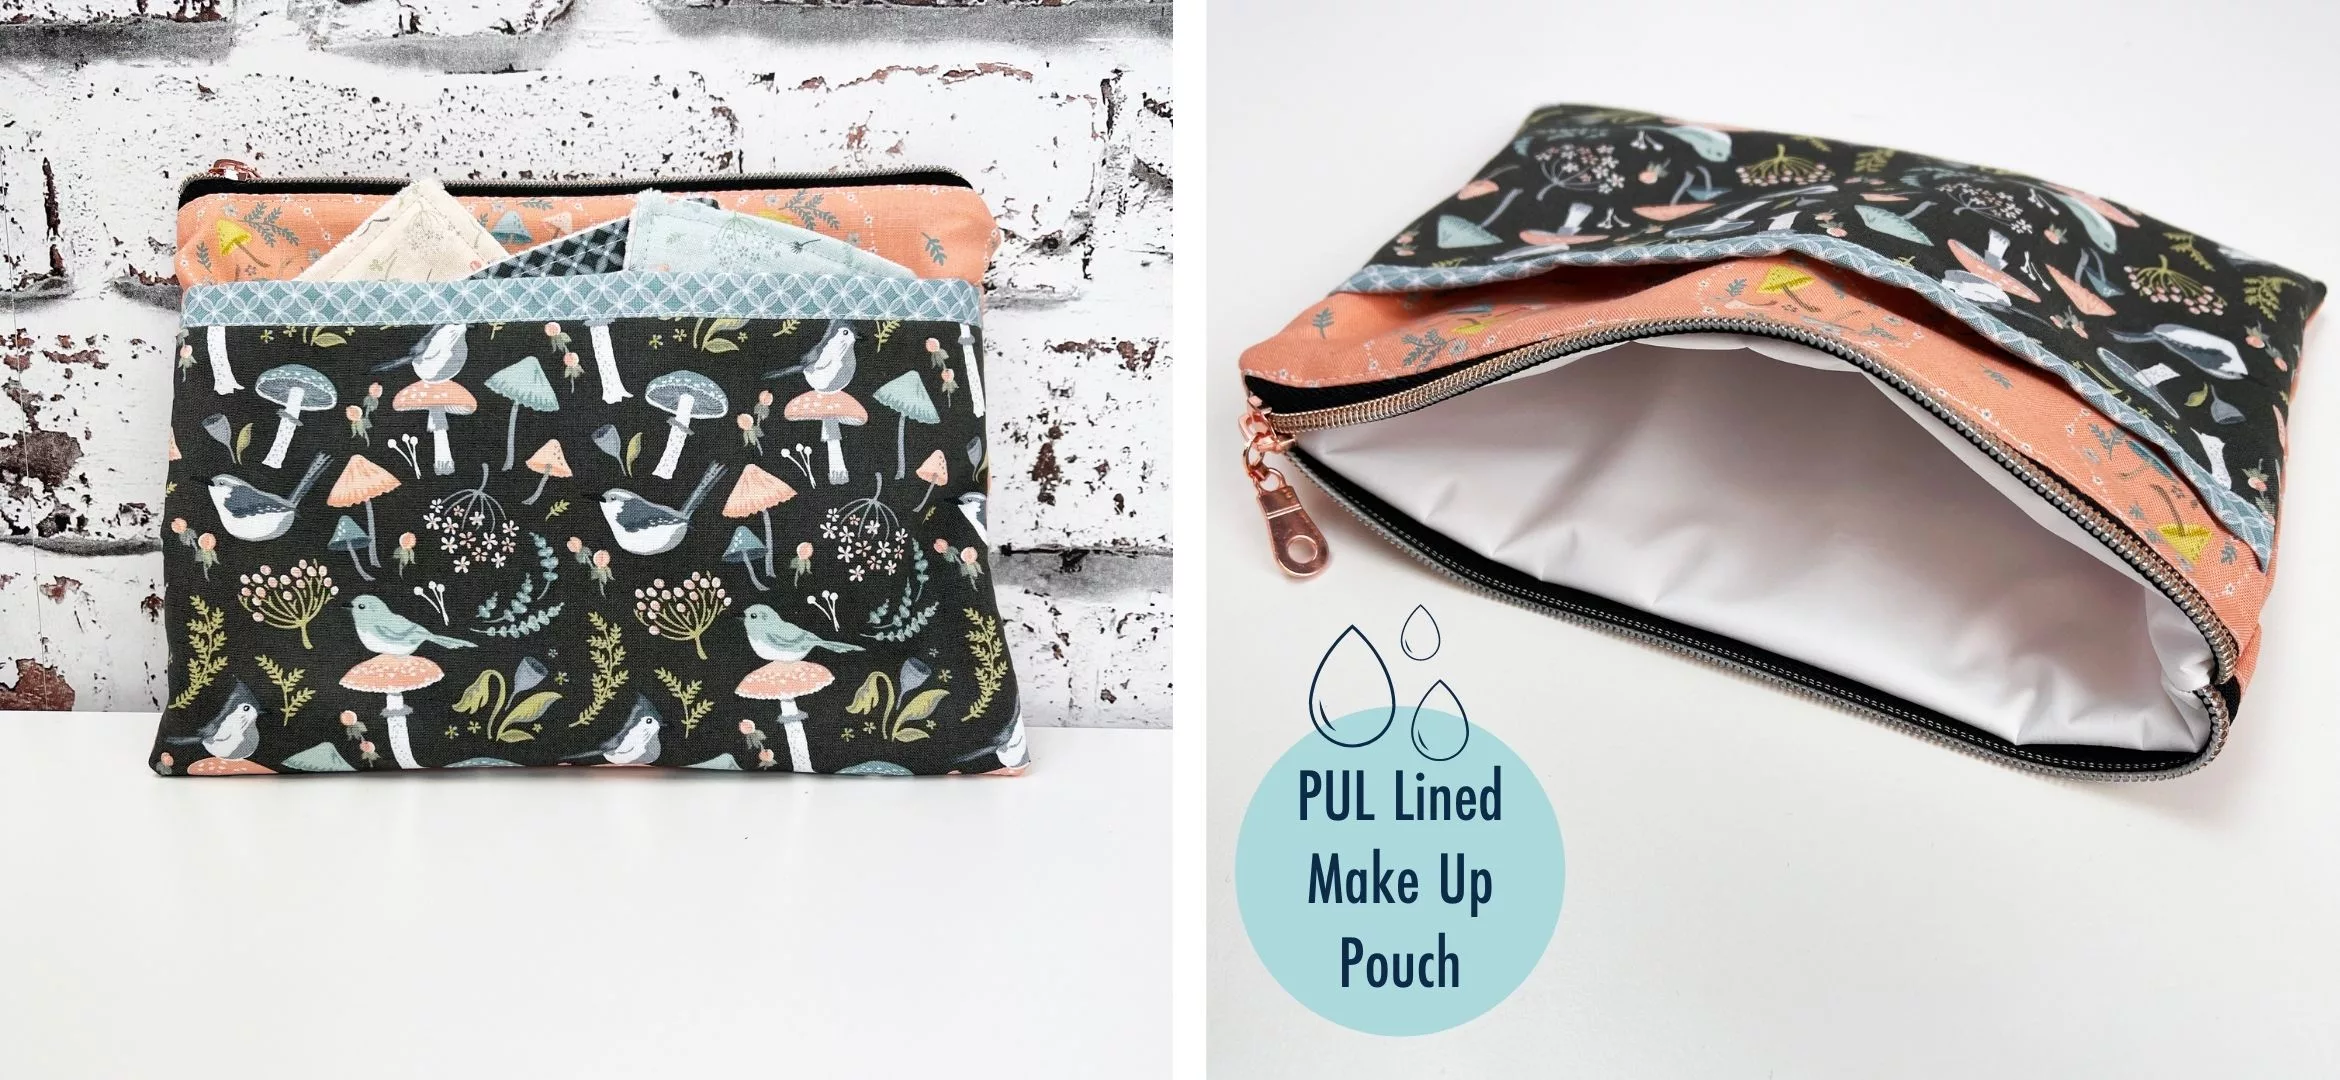
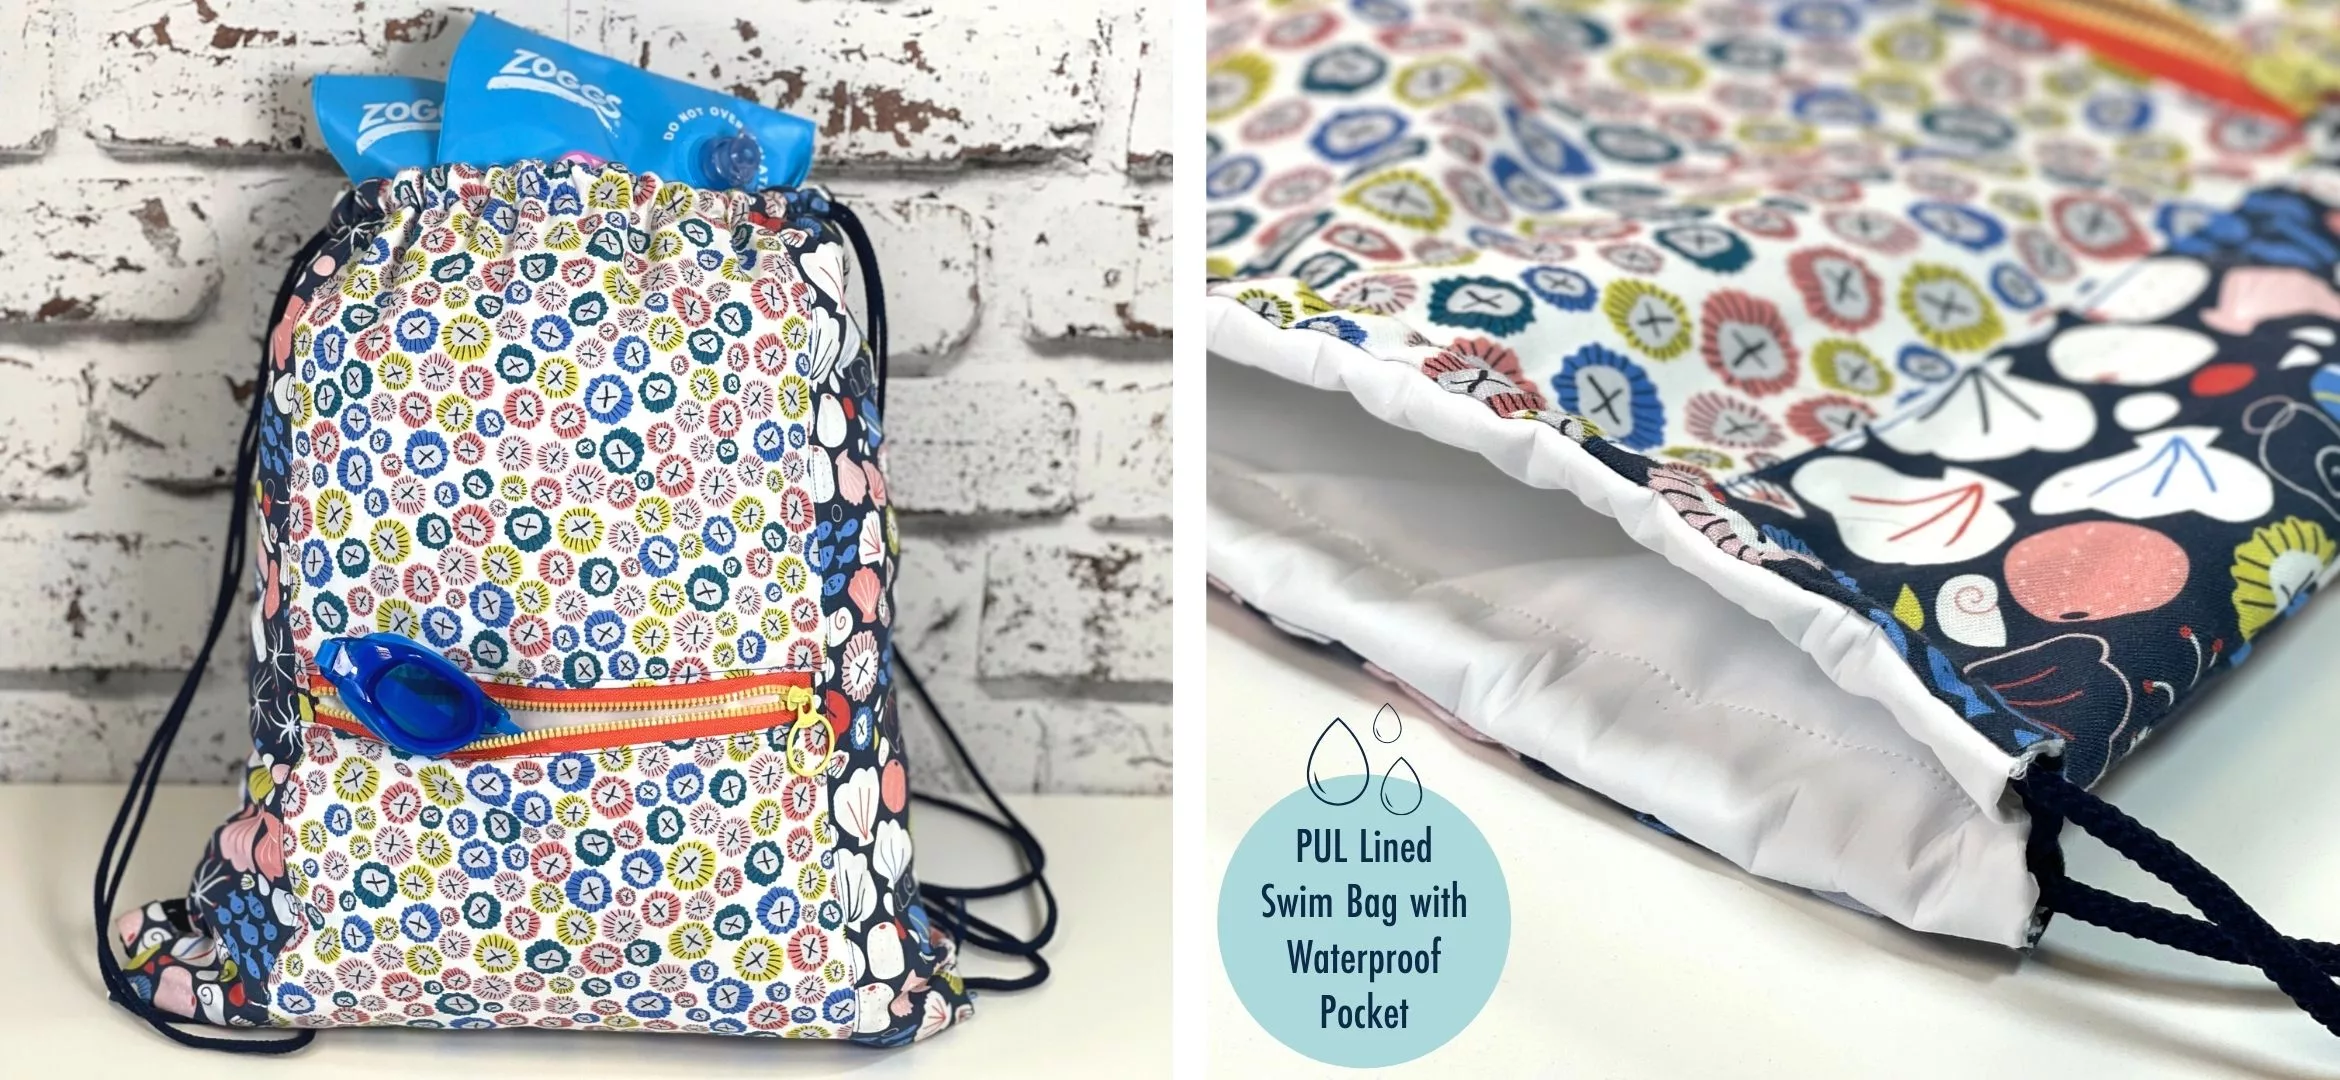
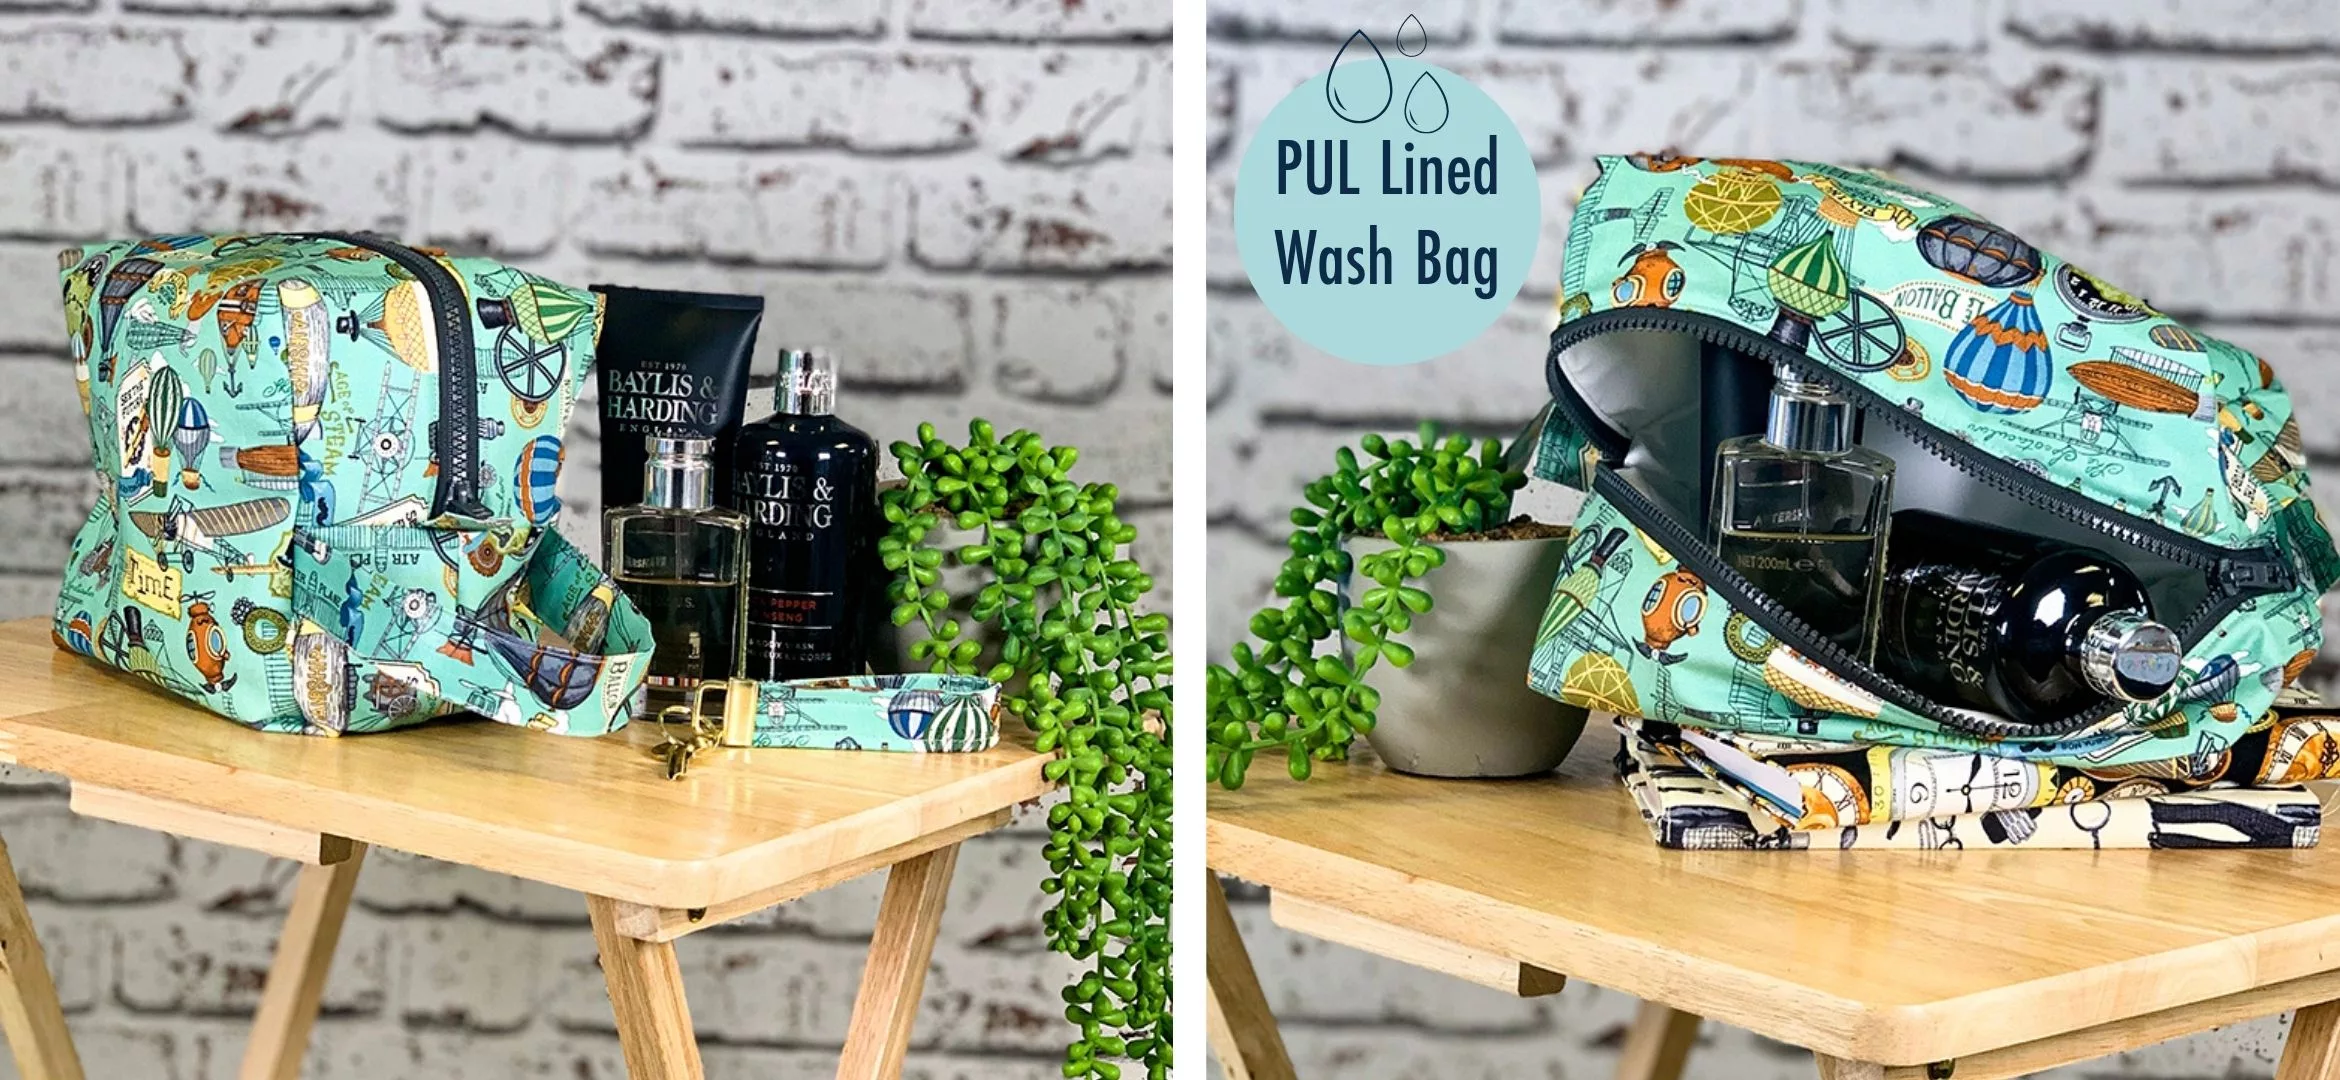
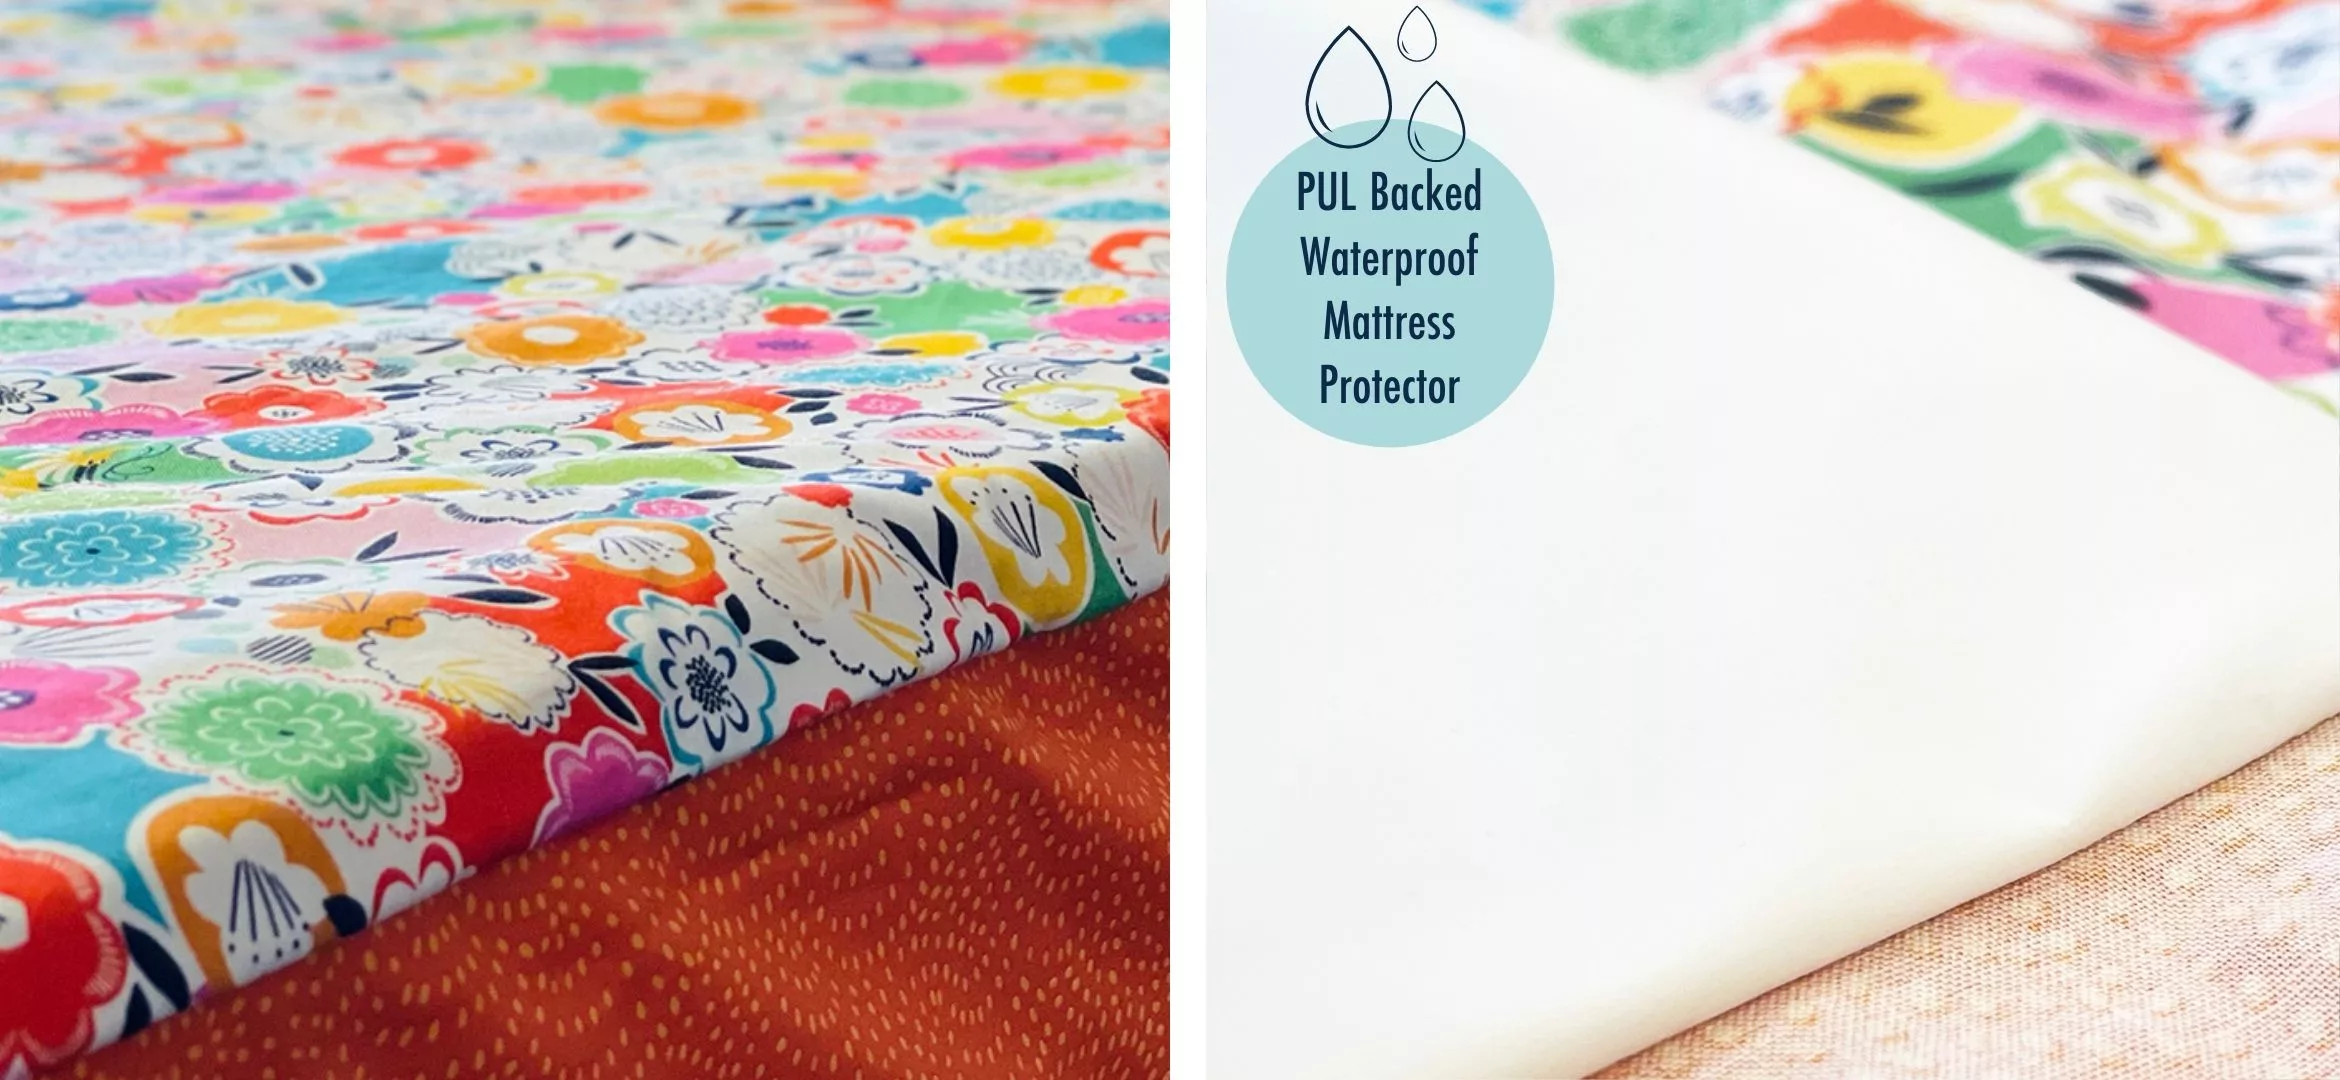
Uses: Cloth nappies and wraps, anoraks, waterproof trousers, wet bags, swim bags, changing mats, changing bags, mattress protectors, pillow protectors, baby bibs, picnic blankets, incontinence products, anywhere you need a waterproof, breathable layer.

Is there a right or wrong side?

We ALWAYS get asked this.

Is there a right side to ensure “waterproof-ness”?

There isn’t really, it’s a personal preference.

The fabric will be waterproof no matter which side you choose, so go with the look that pleases you most!

That said, for aesthetic & comfort reasons I usually use the knit side as the “right” side most often.

It’s more comfy if your project will be close to the skin.

Tips for sewing with PUL fabric

✂️  Needle: Use a stretch needle

✂️  Stitch Length: Use 3mm stitch length

✂️  Machine Foot: A walking foot is helpful. If your machine foot is sticking then you can apply a bit of Scotch Magic Tape to the base of your normal machine foot

✂️  Thread Type: Polyester thread is recommended to match the fabric composition

✂️  Sealing sewing holes: When you sew your needle will leave tiny holes behind in the laminate layer which MAY affect the waterproof effectiveness of your garment.

These holes are easily resealed … either:

✂️ Pop your garment in the tumble dryer on low for 20 minutes

✂️ Or if you’re using our White PUL it’s weldable so just iron it (using a pressing cloth!) and the holes will seal!

❤️  A special note regarding our own brand of white PUL … we get this manufactured ourselves here in the UK & it has some very special properties:

☔ Its waterproof YET breathable

☔ Its medical grade

☔ Its weldable giving you a completely sealed seam (Look! No leaks!)

☔ Its fungistatic which – apart from being a brilliant word – means it inhibits the growth of fungi & bacteria ?

☔ Its double laminated – whaaaat’s that?! It means it lasts longer & is less likely to delaminate over time as it’s washed loads

☔ Its fire retardant

Uses For PUL Fabric

Love the sound of PUL? So where can you use it?! Well… anywhere you need a waterproof layer really…. here’s some handy projects on our blog!

Other ideas include….


  • Waterproof trousers
  • Wet bags
  • Cloth Nappies (We have a guide all about these here)
  • Changing mats
  • Changing bags
  • Picnic blankets
  • Pillow protectors
  • Incontinence products
  • Cloth sanitary protection


Have you sewn with PUL fabric? Have you got any tips to share?

Never miss a tutorial or fabric guide…

Stay up to date with the latest by signing up to our newsletter!

Click to join our mailing list!

Follow Plush Addict on social media and keep an eye out for more tutorials!

Sewing supplies made from recycled & sustainable materials

Sewing supplies made from recycled & sustainable materials

There’s never been a more important time to reduce, recycle and reuse and using recycled products is a great way to support that ethos. In this guide, we are going to highlight some sewing supplies made from recycled & sustainable materials.

Did you know we sell threads, ribbons, interfacings & fabrics that are made from recycled bottles? Or bio-degradable wadding?! Did you know five plastic fizzy drink bottles can supply enough raw materials to make a new T-shirt? Read on for all the info on how you can up the eco-credentials of your stash and choose sewing supplies made from recycled & sustainable materials

Pin & read later:

Sewing supplies made from recycled & sustainable materials
Ribbons made from recycled materials


We are delighted to see that Berisfords are not only now making some of their most popular ranges from recycled plastic bottles, but also the ribbon reels too!

sustainable ribbons

Boring Legal Bit: If you follow any tutorial or guidance found in this post, or on this blog, you agree to be bound by our disclaimer which can be viewed here

The sustainable ribbon that doesn't cost the earth

Recycled polyester is just as good as virgin polyester but takes 59% less energy to make, plus it keeps plastic out of the oceans or landfill. Using recycled polyester also contributes to the reduction of crude oil and natural gas from the earth.

Berisford now manufacture their Grosgrain ribbon & double satin ribbon from recycled plastic bottles!


Sustainable & Recycled Interfacings & Interlinings


Do you use Vlieseline products? Then you’re already doing your bit for the planet! Did you know many Vlieseline interlinings are made from recycled plastic bottles?

recycled plastic bottles process

The bottles are checked with all caps, labels and rubber removed. Then the bottles are washed and crushed into granules before being melted and made into fibres, which is made into the polyester interlining and wadding we all love.

Interfacing and interlinings made from recycled plastic bottles


Vlieseline already offer products made of 100% recycled polyester and/or mixtures thereof. By using already existing materials Vlieseline are reducing the consumption of new raw materials – in particular those that come from non-renewable sources.

Products which are made with recycled plastic bottles are


100 % R-PES         F220 | H310 | R 80 | R 200
80% R-PES          P120 P140 | P250
65% R-PES         M12 | S13
55 % R-PES         249
35 % R-PES         G405 | L 11
15 % R-PES         H180


Biodegradable quilt wadding

The Vlieseline Eco-150 wadding is 100% biodegradable!

The ECO 150 wadding biodegrades when in the ground after 57 days. But there’s no need to panic! It doesn’t start to biodegrade unless it is in the ground as it’s the soil enzymes which trigger the degrading process.

Have a read of The Sewing Directory’s review of this wadding here. Fiona did actually bury it in the ground, and it really does return to the earth

Vlieseline Eco-150 wadding
Sewing Threads made from recycled plastic bottles
Gutermann Creativ Sewing Thread rPET

Gutermann Threads have a fantastic collection of polyester threads that are made from recycled plastic bottles and there are over 160 colours to choose from so you’re bound to find a colour perfectly suited to your project.

They are the same price as regular Sew All threads too – it’s a no-brainer easy switch 🙂

These threads are known as ‘sew-all threads’ and are great for both machine and hand sewing, closing and backstitch seams, fine ornamental stitches and decorative seams.

Gutermann creativ rPET - 100% recycled polyester value pack

The threads can be used for light and heavy to medium-weight fabrics and even clothing fabrics and knitwear. They are made in Germany with their Micro Core Technology, so the same premium quality you’d expect from Gutermann, but super eco-friendly! You can shop for these on our website.

Premium Haberdashery with Plastic Free Packaging

Looking for some premium quality haberdashery? Hemline have introduced a premium rangle of haberdashery called Hemline Gold perfect for any eco-consious Seam Star who doesn’t want to compromise on style! ♻️

Hemline are known for their sleek, modern tools, inspired by the rich heritage of the sewing industry. We are now stocking their Hemline Gold range, which has been manufactured eliminating waste plastic packaging!

You can take a closer look at the range in this video:

Hemline Gold collection

There’s also some gorgeous storage such as premium quality needles & safety pins in glass jars with beautiful brushed gold lids, which can be used for years to come and potentially become an heirloom in the family.


We hope you found this post useful. Feel free to ask us any questions and we’ll always try to help!

Follow us on Instagram:

Fabric Guide – Beautiful Bold Batik Fabrics

Fabric Guide – Beautiful Bold Batik Fabrics

Have you worked with Batik fabrics before? It’s such a beautiful interesting fabric with amazing history, so we thought we would share with you a handy Batik fabric guide all about these incredible fabrics.


Boring Legal Bit: If you follow any tutorial or guidance found in this post, or on this blog, you agree to be bound by our disclaimer which can be viewed here

Recently we have seen a rise in the popularity of Batik fabrics, but they have actually been around for over 2000 years! Batiks have such an interesting history, believed to have originated in Asia and India used for making batik clothing. 

What is Batik Fabric?

Batik is an indonesian technique where areas of the design are blocked out by applying hot wax. Then, a dye is applied on top and the parts covered in wax resist the dye and remain the original colour leaving the pattern drawn in wax. This process can be repeated to create layers of beautiful elaborate design. After the final layer, the wax is removed in hot water and the fabric is ready with the batik pattern resisted.

Contemporary Batik textiles designers use a wide range of techniques to create different textures including etching, spraying, marbling and cracking. They also use wooden stamps, brushes, stencils and different kinds of wax such as soya wax to get different effects. 

Due to the nature of the process, you will find Batik fabrics look very similar and there is no distinct ‘wrong side’ of the fabric, it completely depends on the look you’re going for. This is because the wax sinks into the fabric so it becomes almost double sided.

Some batiks have a bold print but others may have a more subtle look which work great as blender fabrics. As you can imagine, throughout the years they have been very popular in dressmaking.

Batik is great as quilting fabric but also a great choice for applique as they tend to fray less. They have a tight weave and dense thread count, so may feel a bit stiffer than other fabrics. 

Batik Tips

It’s recommended that you pre wash Batik fabrics, to help prevent the dye from running. Hand washing is best, do check before putting it into the washing machine. 

When washed, air drying is recommended, but out of direct sunlight. Don’t wring out the excess water after soaking and if you must use a tumble dryer, do so on a low heat setting.

Use a sharp needle when sewing, as you will find they have a tighter weave than other fabrics.

Where can I buy Batik Fabric?

We sell lots of different colours and designs over on our website Plush Addict, a fabric superstore based in the UK! 

So, what will you be making with your bold Batiks? Will you be making unique bags, gorgeous quilts or a beautiful batik dress to wear? Leave us a comment and let us know!


Never miss a guide or tutorial

Click to join our mailing list!