Our site is getting a makeover! Please bear with us whilst we make improvements

The Corduroy Comeback: More Than Just a Fabric, It’s a Statement!

The Corduroy Comeback: More Than Just a Fabric, It’s a Statement!

Discover the stylish resurgence of corduroy in modern fashion and sewing! Once seen as a nostalgic fabric, corduroy is making a strong comeback, offering both comfort and personality. In this article, we explore the fabric’s rich history, its versatile use in contemporary designs, and tips for sewing with corduroy to create standout pieces that make a statement. Whether you're a seasoned sewist or just starting out, find inspiration to embrace this textured fabric in your next project!

This post will be updated soon, please check back shortly

What is Swedish Tracing Paper and How Do You Use It?

What is Swedish Tracing Paper and How Do You Use It?

Swedish Tracing Paper is a type of dressmaking pattern tracing paper that is fairly translucent, drapeable and best of all – it’s pattern paper that is sewable! This makes it an incredible choice for making muslins or toiles whilst dressmaking.

In this guide we’re going to talk you through the product, as well as offer a tutorial on how to use this amazing dressmaking pattern paper & how using it can save you both time AND fabric!

What is Swedish Tracing Paper?


Unlike conventional pattern drafting paper that can tear or crumple easily, Swedish tracing paper can be used to

  • Trace dressmaking patterns
  • Alter patterns
  • Sew pattern pieces traced on to Swedish Tracing Paper together to make a muslin & get an idea of fit
  • Easily mark pattern alterations on to

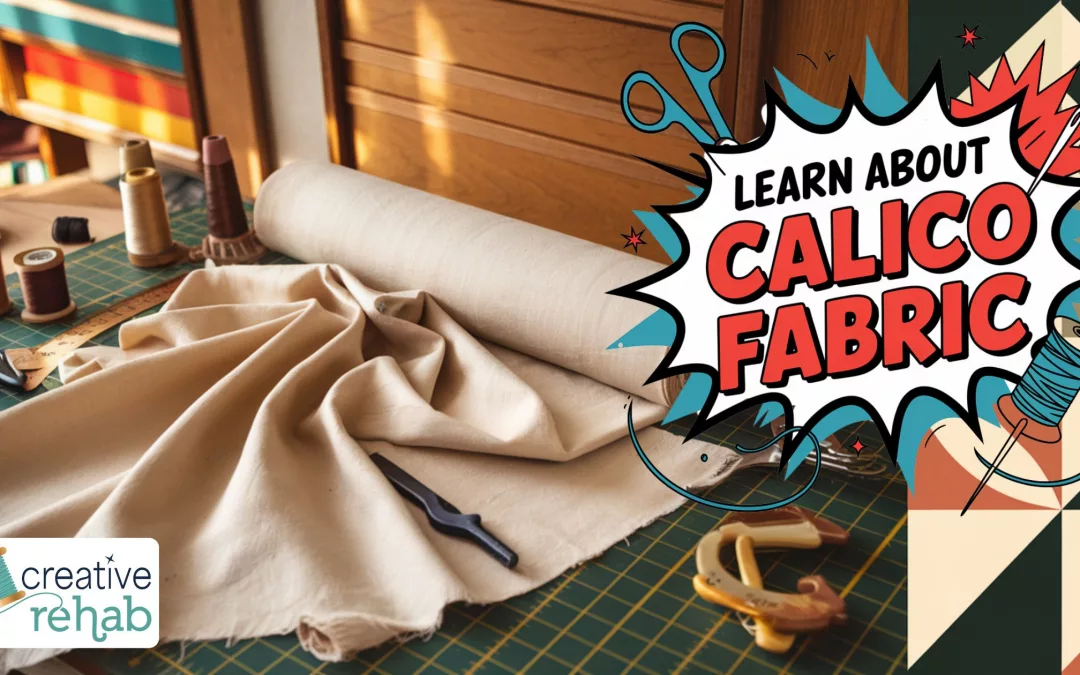
It’s super useful and will save you time and fabric! You could easily skip making a muslin or toile from Calico fabric and use Swedish Tracing Paper instead.

Just a heads up! Some of the links in this post are affiliate links. That means we may earn a small commission - at no extra cost to you - if you make a purchase through them. It’s a little way you can support us and help keep all this awesome content free. Thanks for supporting us! Please read our full disclaimer here 

What is Swedish Tracing Paper made from?

Swedish tracing paper is made from eco-friendly abaca fibres, making it compostable & environmentally friendly. The tightly packed, jumbled fibres make it more tear-resistant than regular pattern paper yet it’s still translucent enough to see through for tracing .

You can sew Swedish tracing paper in the same way you would sew regular ‘muslin’ fabrics using a universal needle and thread.

You can baste your traced pattern pieces together with a long stitch on your sewing machine. Once sewn you can easily mark any fit alterations on your pattern pieces in pencil. After that you can unpick the seams to adjust and retrace the pattern pieces!


Looking to expand your fabric knowledge?

Check out our Fabric Guides for tips on working with all types of fabric

How to use Swedish Tracing Paper to trace a pattern

You Will Need:

Make it even easier with…

1. First, lay the pattern pieces you want to trace on a flat surface.

You may wish to dry iron them first so they lay completely flat for the most accurate trace.

Place your Swedish Tracing Paper on top.

You do not need to use a light box or a window to trace through as Swedish Tracing Paper is translucent enough to see even fairly fine lines through.

2. You can use pattern weights or pins to hold the tracing paper over the pattern pieces as it can have a tendency to curl away slightly.

If you find your tracing paper gets a little crumpled or creased, iron it on a silk or cool setting and a pressing cloth. 

3. To trace off a master copy of any pattern simply trace over your desired sizes, markings & labels on your pattern pieces.

Swedish tracing paper is easy to mark with pencil, pen or even chalk, but pencil is easiest to remark and remove if you make a mistake.

4. Next, cut around the edge of your pattern with paper scissors and mark with your awl all the markings (eg circle markings for bust points) & a pattern notcher for the notches, if you have one.

5. Either use your traced pattern straight away, or sew together using a basting stitch.

Once basted you can then try on your pattern for size!

Mark any adjustments you need to make & alter the pattern piece as required.

Retrace the pattern piece to try again.  

6. You can use the pattern pieces you create from Swedish tracing paper as you would normal paper pattern pieces

Then, simply pin or use pattern weights when cutting out, but they are much more durable in use. For those of us who find the perfect pattern we want to make a time & time again – no more pin marked and destroyed paper pattern pieces!

Want More Sewing Know-How?

Sewing and Handling Tips


  • Needle – Universal machine needles work well for running a simple tacking stitch
  • Thread – A polyester thread works best for creating muslins, as it does not snap easily and is smooth for easy removal.
  • Sewing – Use a long, basting stitch length.

We hope you found this product guide helpful…. Do let us know what you thought in the comments – I’d love to hear from you!

Calico fabric: What exactly is it?

Calico fabric: What exactly is it?

Welcome to your ultimate resource for everything calico! Whether you’re a beginner dabbling with stitches or a seasoned sewist looking to up your fabric game, this guide is here to demystify the humble yet mighty calico fabric. Why settle for confusing or half-baked articles when you can dive into a detailed, entertaining, and absolutely packed guide? Let’s get you sewing smarter, not harder.

What You’ll Discover:

  • The history of calico fabric (it’s more exciting than it sounds, promise).
  • Why sewists swear by calico for beginners and pros alike.
  • Surprising uses for calico – hint: it’s not just for mock-ups.
  • How to choose the right calico fabric for your projects.
  • Practical tips for working with calico (no more frayed edges or wasted fabric!).

Just a heads up! Some of the links in this post are affiliate links. That means we may earn a small commission - at no extra cost to you - if you make a purchase through them. It’s a little way you can support us and help keep all this awesome content free. Thanks for supporting us! Please read our full disclaimer here 

What Is Calico Fabric, and Why Should You Care?

Calico fabric is the unsung hero of the sewing world. Made from unbleached and often undyed cotton, it’s sturdy, versatile, and eco-friendly. Think of it as the dependable friend who’s always there when you need them—no frills, no drama, just pure reliability.

Historically, calico originated in Calicut (modern-day Kozhikode) in India around the 11th century. Traders were so captivated by its durability and charm that they couldn’t stop exporting it to Europe. Fast forward to today, and calico is a staple in sewing rooms worldwide. It’s your go-to fabric for testing patterns, crafting, and even creating stunning finished products. Talk about a glow-up!

The Benefits of Calico Fabric

1: Versatility That’s Hard to Beat

Calico is like the Swiss Army knife of fabrics. Need a fabric for quilting? Check. Looking for a material for practice runs? Double-check. Want something for eco-conscious bags? Triple-check. Its natural texture makes it adaptable for countless projects, from practical to decorative.

2: Affordable Yet Durable

For those of us watching our wallets (and who isn’t?), calico is a budget-friendly choice. But don’t mistake “cheap” for “flimsy”—this fabric can take a beating, whether it’s heavy-duty sewing or everyday use.

3: Eco-Friendly and Sustainable

In a world grappling with environmental concerns, calico stands tall. Its production process is relatively low-impact, especially if you opt for organic options. Plus, its biodegradable nature means you’re leaving less of a footprint. Saving the planet and creating beautiful things? Win-win.

Calico Fabric: Types and Their Best Uses

Not all calico is created equal. Let’s break down the types so you know exactly what you’re working with.

Standard Calico

  • Texture: Crisp and a little coarse.
  • Best For: Pattern testing, tote bags, and lining material.
  • Example Use: A beginner trying their hand at a simple dress pattern can test fit and form without worrying about ruining expensive fabric.

Soft Calico

  • Texture: Slightly smoother, with a finer weave.
  • Best For: Clothing and home décor items.
  • Analogy Opportunity: Think of soft calico as the “business casual” of fabrics—just dressy enough for special occasions but still comfy for everyday use.

Fire Retardant Calico

  • Texture: Treated with chemicals to resist flames.
  • Best For: Theatre backdrops, stage props, and upholstery.
  • Case Study: In 2015, a community theatre production used fire-retardant calico for all their set designs, saving money and meeting safety standards without compromising aesthetics.

Looking to expand your fabric knowledge?

Check out our Fabric Guides for tips on working with all types of fabric

How to Work with Calico Fabric

Pre-Washing: A Step You Can’t Skip

Calico tends to shrink after its first wash. Toss it in with a mild detergent and let it air dry before you start sewing. Trust me, future you will thank you for avoiding that heart-sinking “why-doesn’t-this-fit” moment.

Cutting and Sewing

  • Use sharp scissors or a rotary cutter to avoid fraying.
  • Set your sewing machine to a medium stitch length for best results.
  • Press seams with an iron to keep everything crisp and professional-looking.

Finishing Touches

Consider using pinking shears or a zig-zag stitch to prevent the edges from fraying. Alternatively, serging the edges works wonders if you’ve got the equipment.

Creative Uses for Calico

1: Mock-Ups (Toiles)

If you’re testing a pattern, calico is your best friend. Its stiffness helps highlight any design flaws, so you can make adjustments before cutting into your pricier fabric.

2: Home Décor

From pillow covers to curtains, calico neutral tone makes it a blank canvas for your creativity. Paint it, dye it, stamp it—go wild!

3: Arts and Crafts

Want to get the kids involved? Calico is perfect for painting projects, custom bags, and more. Plus, it’s sturdy enough to handle enthusiastic little hands.

4: Eco-Friendly Bags

Say goodbye to single-use plastics and hello to chic calico totes. A quick sew and you’ve got yourself a reusable bag that’s both stylish and sustainable.

How to Choose the Right Calico for Your Project

When shopping for calico, consider:

  • Weight: Lightweight calico is great for crafting, while heavyweight calico works better for upholstery.
  • Finish: Unbleached calico has a rustic charm, while bleached calico offers a cleaner, more polished look.
  • Purpose: Match the fabric’s properties to your project needs (e.g., fire retardant for safety-critical applications).

    Want More Sewing Know-How?

    A Few Fun Facts About Calico

    • Did you know the first ever printed calico in England dates back to 1630? In the 1630s, the East India Company began importing intricately hand-painted and block-printed cotton textiles from India to England. These vibrant fabrics were revolutionary, introducing Europeans to colourful, lightweight cotton textiles previously unknown in Western markets.
    • In the 18th century, calico became so popular in France that a temporary ban was placed on its importation. Apparently, fabric addiction was real even back then.
    • Mahatma Gandhi promoted spinning calico fabric as a symbol of self-reliance during India’s independence movement. So, every time you sew with calico, you’re participating in a piece of history.

    Sewing Bot 2

    Common Calico Problems and How to Solve Them

    Fraying

    Solution: Use pinking shears or overlock stitches for clean edges.

    Stiffness

    Solution: Wash it with a fabric softener or give it a vinegar soak.

    Staining

    Solution: Stick to mild detergents and avoid bleach, which can damage the fibres.

    Sewing Bot 2

    Calico fabric is a dream come true for sewists of all skill levels. Whether you’re testing patterns, sewing eco-friendly bags, or creating one-of-a-kind décor, calico offers versatility, durability, and sustainability. By choosing this fabric, you’re not just sewing—you’re making a statement about creativity, resourcefulness, and a love for the craft.

    Your Calico Fabric Questions Answered

    Calico fabric is a versatile and eco-friendly choice for many sewing projects. Whether you’re a beginner or a seasoned sewist, understanding its properties can enhance your crafting experience. Dive into our FAQs to learn more about this remarkable fabric.

    What is calico fabric made of?
    Calico is crafted from unbleached, undyed cotton, offering a natural and straightforward textile option.
    Can I dye calico fabric?
    Yes, calico’s neutral base is ideal for dyeing, allowing you to create vibrant, personalized colors.
    Is calico suitable for clothing?
    Absolutely! It’s perfect for lightweight garments like summer dresses and aprons, providing comfort and breathability.
    Can beginners sew with calico?

    Definitely! It’s affordable, easy to work with, and forgiving of mistakes.

    Does calico shrink when washed?

    Yes, pre-washing is a must to avoid size issues later.

    .

    How do I prevent calico from fraying?
    To stop fraying, use pinking shears, a zig-zag stitch, or a serger for clean, durable edges.
    Where can I buy calico fabric?
    You can find calico at most fabric stores, as well as a wide selection from online retailers.
    Is calico eco-friendly?
    Yes, especially when you choose organic options. Calico is biodegradable and produced sustainably, making it an eco-conscious choice.
    What’s the difference between calico and muslin?

    Calico is heavier and coarser than muslin, which is finer and softer.

    Can calico be used for quilting?

    Yes! It’s a popular choice for quilt backings and test blocks.

    So there you have it—everything you need to know about the humble yet mighty calico fabric. Whether you’re crafting a reusable bag, testing a pattern, or sewing your next masterpiece, calico has your back. Affordable, versatile, and environmentally friendly, it’s the unsung hero of the sewing world. Now it’s time to take what you’ve learned and put it into practice. Grab some calico, fire up your sewing machine, and let your creativity take centre stage. Happy sewing!

    The Ultimate Beginner’s Guide to Sewing with Flannel

    The Ultimate Beginner’s Guide to Sewing with Flannel

    The Ultimate Beginner’s Guide to Sewing with Flannel

    Ever tried sewing with flannel and thought, “This fabric has a mind of its own!”? You’re not alone. Sewing with flannel can feel a bit like taming a wild horse – soft and beautiful but occasionally stubborn. Whether you’re here to tackle your first flannel project or to figure out why your last one went haywire, this guide will teach you everything you need to know about working with this cosy, versatile fabric.

    Unlike most articles out there that give you the basics and then leave you scratching your head, this guide dives deep into the details. By the end, you’ll feel like a flannel whisperer. You’ll not only know how to handle flannel but also how to conquer its quirks and make it work for you like a dream.

    Here’s what you’ll discover:

    • Why flannel is secretly the MVP of the fabric world.
    • The top mistakes beginners make (and how to dodge them).
    • Ninja-level tips for sewing flannel like a pro.
    • How to keep your flannel projects from fraying into oblivion.
    • Game-changing hacks for cutting, sewing, and finishing flannel seams.

    Just a heads up! Some of the links in this post are affiliate links. That means we may earn a small commission - at no extra cost to you - if you make a purchase through them. It’s a little way you can support us and help keep all this awesome content free. Thanks for supporting us! Please read our full disclaimer here 

    Why Flannel is a Great Fabric for Beginners

    Flannel has been around for centuries, warming hearts (and bodies) since the 17th century in Wales. It’s the fabric equivalent of a warm hug—soft, comforting, and oh-so-versatile. Want to sew cosy pyjamas? Flannel’s got you covered. Crafting a rustic quilt? It’s perfect for that, too. And let’s not forget flannel shirts, the unofficial uniform of relaxed autumn vibes.

    But flannel isn’t just about aesthetics and comfort. It’s also surprisingly forgiving for beginners. Unlike slippery silks or stretchy knits that seem determined to sabotage you, flannel’s stable weave stays put, making it easier to cut and sew. Think of it as your sewing BFF – patient and understanding, even when you’re fumbling with the basics.

    How is Flannel made?

    Traditionally, flannel was made from fibres such as carded wool or worsted yarns, but modern flannel can be made from literally any fibre, most popularly; Cotton, Wool and Synthetic fibres like Polyester.

    Cotton is commonly used as it has similar properties to Wool, but does not insulate heat as well, perfect for more casual wear.

    The loosely spun yarns the flannel is made from usually provide most of the softness, but it can be woven with a twill or a plain weave, and is then often napped/ brushed to give an extra textured but even softer surface. Spaces between the fibres in the flannel trap air, making it warm and breathable.

    The Top Challenges of Sewing with Flannel (and How to Fix Them)

    Let’s not sugarcoat it: flannel has its quirks. But don’t worry, every challenge has a solution, and I’ll walk you through them step by step.

    Fraying Like Crazy?

    Flannel loves to fray – like, aggressively. This happens because it’s a loosely woven fabric. While that softness is what makes it so comfy, it’s also why your seams might start unraveling faster than a bad relationship.
    How to Fix It:

    • Use pinking shears or a serger to finish the raw edges.
    • If you’re old school, zig-zag stitches can also do the trick.
    • Try using Fray Check (a liquid sealant) on your edges for extra security.

    It’s Bulky, Isn’t It?

    Flannel can get as thick as grandma’s winter quilt, especially when you’re sewing multiple layers.
    How to Fix It:

    • Trim seam allowances down to 1/4 inch.
    • Use a walking foot on your sewing machine to handle those bulkier seams without breaking a sweat.

    The Dreaded Pilling

    You know those tiny fabric balls that pop up after a few washes? That’s pilling, and flannel is notorious for it.
    How to Fix It:

    • Pre-wash your fabric before sewing. This removes excess lint and pre-shrinks the fabric.
    • Invest in higher-quality flannel—it pills less.

    Tips For Preparing and Cutting Flannel

    Flannel is a wonderfully soft and versatile fabric, but its loose weave means it can stretch during sewing and shrink significantly after washing. To avoid surprises, a little preparation goes a long way in ensuring your flannel project turns out just as you envisioned.

    Pre-Wash to Avoid Shrinkage

    Think of pre-washing flannel as a first date – you want to know what you’re getting into. Flannel tends to shrink, so always wash it before cutting. Use warm water and tumble dry to get any surprises out of the way.

    Choose the Right Needle and Thread

    Flannel’s thicker weave requires a ballpoint or universal needle (size 80/12 or 90/14). Pair it with a strong all-purpose thread to ensure durability. Weak thread on flannel is like trying to hold up a brick wall with dental floss—it’s not going to end well.

    Cut Smart, Not Hard

    Lay your flannel on a flat surface and use a rotary cutter for precision. Cutting with scissors can cause the fabric to shift, leading to uneven edges. If your pattern involves plaids or stripes, match them up before cutting to avoid wonky results.

     Sewing Flannel Like a Seam Star Ninja

    Set your stitch length slightly longer (3mm) to accommodate flannel’s thickness. Short stitches can bunch up the fabric, leaving you with a frustrating mess. And remember: sew slowly. Flannel rewards patience.

    Starching for Stability

    If your flannel feels a bit too stretchy or floppy, starching it before cutting can make a world of difference. It helps stabilise the fabric, making it easier to handle and cut accurately.

    Buy a Little Extra

    Flannel is prone to shrinkage, so it’s wise to purchase slightly more fabric than your pattern requires. Add several centimetres or inches to your order, especially if you’ll be pattern matching or working with plaids. A little extra fabric now can save a lot of frustration later.

    Cutting Tips

    Flannel can be slippery and stretchy, making precise cutting a challenge. A rotary cutter paired with a self-healing mat is the easiest and most accurate way to cut flannel. If you prefer scissors, make sure they are sharp and take your time to ensure clean, even cuts.

    Allow for Fraying

    Flannel frays easily due to its loose weave, so plan for slightly larger seam allowances than usual. Cutting your pattern pieces a bit bigger than recommended can provide a buffer against fraying. For best results, use a seam allowance of at least 1cm (3/8”) instead of the standard 0.5cm (1/4”).

    Cut With Right Sides Together

    To help achieve a more accurate cut, fold your fabric right sides together before cutting. The nap will help hold the fabric in place and line up lengthwise whilst cutting, meaning you have matching and neater cut pieces.

    “Press” rather than “iron” 

    What does this mean?! Try and avoid ironing with a sweeping motion over your flannel, as the back and forth movement over the fabric combined with the heat/steam will stretch the fabric even further. Instead press by holding the iron in place and lifting, before moving to a different area.


    Avoid using the steam setting.

    Looking to expand your fabric knowledge?

    Check out our Fabric Guides for tips on working with all types of fabric

    Understanding the Nap on Flannel

    Ah, the nap – flannel’s little personality quirk that can either make or break your project. If you’re new to sewing, the word “nap” might make you think of a cosy afternoon snooze (and honestly, that’s not too far off). In fabric terms, the nap refers to the direction of the fibres on the surface of the fabric. It’s what gives flannel that soft, brushed texture we all love. Think of it like petting a cat: when you stroke with the nap, it’s smooth; against it, not so much.

    Why the Nap Matters

    The nap on flannel affects the way light hits the fabric, which can make the colour and texture look different depending on its direction. This is particularly important if you’re sewing multiple pieces together, like for a quilt, garment, or any project requiring pattern pieces. If the nap is inconsistent across sections, you might end up with a finished product that looks mismatched, even if everything is technically sewn perfectly.

    How to Identify the Nap

    Here’s a quick trick to figure out the nap on flannel:

    1. Run your hand across the fabric in both directions. One way will feel smoother than the other. That’s the nap direction.
    2. Hold the fabric up to the light. You’ll notice a subtle difference in sheen or colour depending on the direction of the nap.

    Sewing Tips for Working with the Nap

    • Cut All Pieces in the Same Direction: When laying out your pattern pieces, make sure they’re all oriented with the nap running in the same direction. This keeps your project looking cohesive.
    • Mark the Nap on Your Pattern: Use a fabric marker or chalk to lightly indicate the nap direction on the wrong side of each piece. A simple arrow will do.
    • Double-Check Before Cutting: It’s easy to overlook this step when you’re excited to dive in, but taking the extra minute to confirm the nap alignment can save you hours of frustration later.
    • Press with the Nap: When pressing your seams, always follow the nap direction. Pressing against it can flatten the fibres and change the texture.

    A Common Mistake: Ignoring the Nap

    Let’s say you’re making a cosy flannel shirt. If you don’t pay attention to the nap, one sleeve might look slightly darker or feel rougher than the other. Not ideal, right? This is especially noticeable in solid flannels or subtle plaids, where the difference can seem minimal at first but glaring in the final product.

    Paying attention to the nap might seem like a small detail, but it’s one of those subtle things that takes your sewing from “homemade” to “handcrafted.” When you respect the nap, flannel rewards you with a polished, professional-looking finish. It’s just another way this fabric asks for a little care in exchange for a lot of comfort!

    The Psychology of Flannel: Why We Love It

    Flannel has an emotional pull. Studies show that tactile experiences (like soft fabrics) can trigger feelings of nostalgia and comfort. This is why a flannel quilt can feel like more than just a blanket—it’s a memory stitched into fabric.

    Flannel Project Ideas to Spark Your Creativity

    Types of Flannel Fabric

    There are many different types of flannel, including: 

    • Wool flannel
    • Cotton flannel
    • Synthetic/Blended flannel
    • Ceylon flannel (50/50 blend of Cotton and Wool)
    • Baby flannel (napped both sides, often made of Cotton or Wool)
    • Nappy/Diaper flannel (napped both sides to increase absorption)
    • Vegetable flannel (made from cellulose)
    • Flannelette (coarser and woven slightly differently than regular flannel) 

    How is Flannel Fabric Made?

    Flannel is made by first spinning your base fibre – whether that be cotton, wool or synthetic fibres, into a loose yarn.

    It is then woven using a plain or twill weave, into a piece of flannel. The flannel may then be napped or carded using a random, non-directional method, to produce an even softer textile and to conceal the weave of the fabric. This can be done on one, or both sides.

    It may then also be finished with a ‘treatment’. This could be to prevent it from producing toxic or excessive flames, particularly useful for textiles that will be used around the home. We stock a variety of different Cotton flannels, perfect for many different projects, and in a mix of fun licensed prints and solid colours.

    Explore our Sewing Tutorials for step-by-step guidance on beginner and advanced projects.

    What can I make with Flannel Fabric?

    Not sure what to make? Here’s some inspiration:


    • Quilts: Start with a simple patchwork design to showcase flannel’s colours and patterns.
    • Pyjamas: The ultimate cosy sewing project.
    • Tote Bags: Flannel-lined bags are perfect for autumn outings.
    • Home Décor: Think flannel throw pillows or table runners.
    • Rag Quilts: Create a cosy and textured rag quilt that showcases flannel’s soft, frayed edges, perfect for snuggling on chilly nights.
    • Loungewear: Sew comfortable and breathable flannel loungewear that’s perfect for lounging at home or even running casual errands.
    • Shirts: Craft classic flannel shirts with a timeless plaid pattern that combines rugged style with ultimate comfort.
    • Blankets: Make a warm, oversized flannel blanket to wrap yourself in during movie nights or chilly outdoor adventures.
    • Use Instead of Batting When Quilting: Replace traditional batting with flannel for a lighter yet warm quilt that drapes beautifully.
    • For Underlining Jackets: Add a layer of flannel underlining in jackets to provide structure, insulation, and a touch of softness.
    • Bedding: Stitch flannel bedding sets that feel like a warm hug, keeping you cosy and snug during colder months.
    • Cloth Nappies: Create eco-friendly, reusable cloth nappies with flannel’s absorbent and soft texture, gentle on a baby’s skin.
    • Baby Clothes: Sew adorable and soft flannel baby clothes that are as practical as they are cuddly for little ones.
    • Scarves: Design a stylish flannel scarf that adds warmth and personality to your winter wardrobe.
    • Hats: Craft snug and chic flannel hats to keep heads warm while making a fashion statement.
    • Burp Cloths: Whip up flannel burp cloths that are absorbent, washable, and gentle on baby’s delicate skin.
    • Pillows: Sew decorative or functional flannel pillows to add a cosy touch to your living space or bedroom.

    Common Mistakes Beginners Make With Flannel Fabric


    Using the Wrong Side of the Fabric

    Flannel has a “right” and “wrong” side. The right side is softer and more vibrant. Always check before cutting.

    Ignoring Plaid Alignment

    If you’re working with plaid flannel, align your patterns carefully. Misaligned plaids can ruin the aesthetic.

    Common Questions About Sewing with Flannel

    Should I pre-wash flannel before sewing?

    Yes, pre-washing flannel is essential as it tends to shrink significantly after the first wash. This step helps prevent your final project from becoming misshapen.

    What stitch length is ideal for sewing flannel?

    A longer stitch length, around 3mm, is recommended for flannel to accommodate its thickness and prevent puckering.

    Can regular scissors be used to cut flannel fabric?

    While regular scissors can be used, a rotary cutter is preferred for more precise and clean cuts, especially given flannel’s tendency to fray.

    Why does flannel fabric fray easily?

    Flannel is a loosely woven fabric, which makes it prone to fraying. Using a serger or a zig-zag stitch can help finish the edges neatly.

    How can I avoid puckering seams when sewing flannel?

    To prevent puckering, use a walking foot and adjust your stitch length. This helps manage the fabric’s movement and tension during sewing.

    Is flannel suitable for beginners?

    Absolutely! With a bit of patience, flannel is very beginner-friendly.

    What’s the best way to care for flannel projects?

    Wash on a gentle cycle and avoid over-drying to prevent pilling.

    How do I sew flannel with other fabrics?

    Match the fabric weights and use a walking foot for even stitching.

    Can flannel be used for quilts?
    1. Definitely! Flannel quilts are warm and perfect for colder months.

    Is flannel the same as wynciette?

    Almost! The two fabric types are similar, but flannel tends to be a slightly heavier weight fabric. 

    Sewing with flannel isn’t just a skill; it’s an experience. From the first cut to the final stitch, you’re working with a fabric that’s as comforting as it is challenging. With this guide, you’re armed with everything you need to tackle your flannel projects head-on. Remember, every stitch you sew is a step closer to mastering this art.

    Please leave us a comment and share your experience working with flannel fabric!

    A Fabric Guide To: Viscose

    A Fabric Guide To: Viscose

    The Ultimate Guide to Sewing with Viscose/Rayon Fabric

    Imagine finding the perfect piece of viscose fabric, its soft drape flowing like liquid silk through your fingers. You’re envisioning a stunning dress or a breezy blouse. But as you start sewing, you find yourself wrestling with fraying edges, slippery cuts, and puckered seams. Sound familiar? Don’t worry—this guide is here to help.

    We’re delving into the art of sewing rayon – yes, that finicky but irresistibly beautiful fabric. By the end, you’ll have the confidence to master it, turning it from a sewing challenge into your creative ally.

    Why This Guide Will Be Your Go-To Resource

    • Understand what makes viscose both special and challenging.
    • Learn pro tips for cutting, handling, and sewing rayon fabric.
    • Discover solutions to common issues like fraying and puckering.
    • Get inspired by project ideas that will rekindle your love for viscose.
    • Learn how pre-washing your fabric can save you time and frustration.

    Just a heads up! Some of the links in this post are affiliate links. That means we may earn a small commission - at no extra cost to you - if you make a purchase through them. It’s a little way you can support us and help keep all this awesome content free. Thanks for supporting us! Please read our full disclaimer here 

    What is Viscose/Rayon Fabric?

    Viscose, often called rayon, is a semi-synthetic fabric made from wood pulp. Consider it the bridge between natural and man-made textiles. Developed in the 1800s to replicate the luxury of silk without the high cost, viscose offers a soft, breathable texture that’s ideal for warm weather.

    However, viscose can be tricky to handle. Its slippery surface and tendency to fray can make sewing a challenge. But with the right techniques, you can tame it with ease.

    Viscose is available in both woven and knit forms. Woven viscose, like challis, is ideal for flowy dresses and blouses, while viscose jersey is stretchy, making it perfect for comfortable tops or loungewear. Understanding the type of viscose you’re working with is essential for success.

    Why Sewists Adore (and Fear) Viscose

    Viscose is like the charming but high-maintenance friend in your life. Its soft drape makes it ideal for breezy summer dresses, while its breathable nature keeps you cool in the heat. It’s also seen as a more sustainable option compared to cotton or polyester.

    But it’s not all smooth sailing. It shifts under scissors, frays the moment you cut it, and can shrink significantly if not pre-washed. Like any worthwhile relationship, sewing with viscose requires effort—but the results are worth it.

    Preparing to Sew with Viscose/Rayon

    Choosing the Right Fabric

    Viscose fabrics vary widely. Blends such as cotton-viscose add structure, while viscose-linen combinations are breathable with added texture. Test the drape by holding the fabric against your body or draping it over a chair. A beautiful flow is a good sign.

    Pre-Washing the Fabric

    Viscose is notorious for shrinking, so pre-washing is essential. Use cold water and a gentle detergent, then air dry the fabric flat to avoid stretching. Avoid wringing it out, as this can distort its shape. Pre-washing ensures your finished garment fits as intended.

    Cutting the Fabric

    Cutting viscose can be tricky due to its slippery nature. A rotary cutter on a self-healing mat ensures clean edges. For added stability, tape tissue paper to your cutting surface and pin the fabric on top. This technique prevents shifting while you cut.

    Marking and Pinning

    Use traditional pins  and mark with tailor’s chalk to avoid marking the fabric. For especially delicate projects, you might consider a temporary fabric spray adhesive to keep layers secure while you work.

    Looking to expand your fabric knowledge?

    Check out our Fabric Guides for tips on working with all types of fabric

    Essential Tools and Materials for Sewing Viscose

    • Needles: A universal needle works for woven viscose, while a ballpoint needle is best for knits. Ensure needles are sharp to avoid snagging.
    • Thread: Opt for cotton thread to minimise shedding and seam breakage.
    • Rotary Cutter: Achieve precise cuts with minimal fraying.
    • Walking Foot: This attachment helps feed slippery fabrics evenly through the sewing machine.
    • Stay Tape: Use this to stabilise seams and prevent stretching or puckering.

    Sewing Techniques for Viscose/Rayon

    Setting Up Your Sewing Machine

    Start with a fresh needle—Microtex or sharp for woven viscose, and ballpoint for knits. Adjust thread tension and test stitch length on scraps. For lightweight viscose, aim for 1.5–2 mm stitches; for heavier fabrics, try 2.5 mm.

    Sewing Seams

    French seams are ideal for viscose, encasing raw edges to prevent fraying. For long side seams, consider a lightning stitch or a narrow zigzag for slight stretch and durability.

    Managing Fraying Edges

    Fraying can be mitigated with an overlocker. If unavailable, pinking shears or bias binding are excellent alternatives for clean finishes.

    Hemming Viscose

    Hemming viscose can be tricky as it stretches easily. Use stay tape or hem tape to stabilise the edge. Rolled hems suit lightweight fabrics, while narrow hems work well for medium-weight pieces.

    Troubleshooting Common Problems

    • Puckering Seams: Lower thread tension and use a sharp needle. Test your settings on scraps.
    • Fraying Edges: Reinforce with overlocking or seam sealant.
    • Fabric Shifting: Use a walking foot or place tissue paper under the fabric.
    • Stretching Issues: Stabilise fabric with stay tape or use a lightning stitch
    • Shrinking Issues: Always pre-wash to account for shrinkage.

    Inspiration: What to Sew with Viscose/Rayon

    Project Ideas

    • Flowing summer dresses
    • Light, breezy blouses and skirts
    • Comfortable lounge pants
    • Lingerie, sleepwear, or linings
    • Lightweight jackets and wraps

    Pattern Recommendations

    Opt for patterns designed for drapey fabrics. Wrap dresses and A-line skirts are great for beginners, while advanced sewists might enjoy fitted blouses or wide-leg trousers.

    Explore our Sewing Tutorials for step-by-step guidance on beginner and advanced projects.

    Caring for Viscose Garments

    • Washing: Hand wash or use a gentle cycle with cold water.
    • Drying: Air dry flat or hang to retain shape.
    • Ironing: Use a cool iron with a pressing cloth to avoid shine.
    • Storage: Fold flat or hang on padded hangers to prevent creasing.

    Congratulations—you’re now armed with all the tips, tricks, and techniques to tackle viscose head-on. This guide has walked you through the essentials, from fabric prep to troubleshooting, giving you the confidence to create stunning garments. Whether you’re a beginner or a seasoned sewist, mastering viscose opens up a world of creative possibilities. Imagine the gorgeous flowy dresses, chic blouses, and even elegant eveningwear you can create with this versatile fabric.

    Keep in mind that every sewing project is an opportunity to learn, improve, and express your creativity. Don’t let the quirks of viscose deter you—embrace the challenge, enjoy the process, and celebrate your progress along the way.

    We hope this guide has been both educational and inspiring. Now it’s your turn: grab that dreamy piece of viscose you’ve been eyeing, apply these tips, and let your sewing machine sing. And remember, we’re here to help. If you hit a snag or just want to share your success, leave a comment or tag us with your creations. Let’s sew something extraordinary together!

    Common Questions About Sewing Viscose

    What is the best needle for sewing viscose?

    For woven viscose, a universal needle is ideal, while a ballpoint needle is recommended for knits to prevent fabric damage.

    How do I stop viscose from fraying?

    To prevent fraying, consider using overlocking, pinking shears, or applying bias binding to the edges.

    Can I sew viscose without a serger?

    Yes, you can achieve neat finishes with a zig-zag stitch or by employing French seams.

    Does viscose shrink when washed?

    Viscose tends to shrink, so it’s advisable to pre-wash your fabric to avoid unexpected size changes.

    What tension should I use for sewing viscose?

    Lower the tension slightly and test on fabric scraps to ensure smooth stitching without puckering.

    Is viscose stretchy?

    Woven viscose is not stretchy, but knit viscose (jersey) has elasticity.

    Can I machine wash viscose garments?

    Yes, but use a gentle cycle and cold water.

    Why does my viscose fabric look shiny after ironing?

    The iron was too hot. Use a pressing cloth and a lower heat setting.

    What projects work best with viscose?

    Dresses, skirts, blouses, and even lightweight jackets.

    Can beginners sew with viscose?

    Yes! With the right preparation and tools, beginners can handle viscose projects.

    13 Tips For Sewing With Bamboo Towelling Fabric

    13 Tips For Sewing With Bamboo Towelling Fabric

    Bamboo is one of the most sustainable sources on the planet, but did you know that it can be used to produce a soft, strong and eco-friendly textile that is perfect for keeping cosy, mopping up spills and a variety of re-usable projects?!

    Non? Well!  In this guide we’ll be talking aaalllll about bamboo towelling fabric, sharing how this super-fabric is made and giving you 13 sewing tips for handling this fluffy little fella of a fabric…

    (more…)