
Free Pattern For A Hot Water Bottle Cover

What is Swedish Tracing Paper and How Do You Use It?
Swedish Tracing Paper is a type of dressmaking pattern tracing paper that is fairly translucent, drapeable and best of all – it’s pattern paper that is sewable! This makes it an incredible choice for making muslins or toiles whilst dressmaking.
In this guide we’re going to talk you through the product, as well as offer a tutorial on how to use this amazing dressmaking pattern paper & how using it can save you both time AND fabric!
What is Swedish Tracing Paper?
Unlike conventional pattern drafting paper that can tear or crumple easily, Swedish tracing paper can be used to
- Trace dressmaking patterns
- Alter patterns
- Sew pattern pieces traced on to Swedish Tracing Paper together to make a muslin & get an idea of fit
- Easily mark pattern alterations on to
It’s super useful and will save you time and fabric! You could easily skip making a muslin or toile from Calico fabric and use Swedish Tracing Paper instead.
Just a heads up! Some of the links in this post are affiliate links. That means we may earn a small commission - at no extra cost to you - if you make a purchase through them. It’s a little way you can support us and help keep all this awesome content free. Thanks for supporting us! Please read our full disclaimer here
What is Swedish Tracing Paper made from?
Swedish tracing paper is made from eco-friendly abaca fibres, making it compostable & environmentally friendly. The tightly packed, jumbled fibres make it more tear-resistant than regular pattern paper yet it’s still translucent enough to see through for tracing .
You can sew Swedish tracing paper in the same way you would sew regular ‘muslin’ fabrics using a universal needle and thread.
You can baste your traced pattern pieces together with a long stitch on your sewing machine. Once sewn you can easily mark any fit alterations on your pattern pieces in pencil. After that you can unpick the seams to adjust and retrace the pattern pieces!
Looking to expand your fabric knowledge?
Check out our Fabric Guides for tips on working with all types of fabric
How to use Swedish Tracing Paper to trace a pattern
You Will Need:
- The pattern you want to trace
- Scissors
- Swedish Tracing Paper
- Mechanical pencil
- Tape Measure
- Ruler
- French curve
- Sticky Tape
- An eraser
Make it even easier with…
1. First, lay the pattern pieces you want to trace on a flat surface.
You may wish to dry iron them first so they lay completely flat for the most accurate trace.
Place your Swedish Tracing Paper on top.
You do not need to use a light box or a window to trace through as Swedish Tracing Paper is translucent enough to see even fairly fine lines through.


2. You can use pattern weights or pins to hold the tracing paper over the pattern pieces as it can have a tendency to curl away slightly.
If you find your tracing paper gets a little crumpled or creased, iron it on a silk or cool setting and a pressing cloth.
3. To trace off a master copy of any pattern simply trace over your desired sizes, markings & labels on your pattern pieces.
Swedish tracing paper is easy to mark with pencil, pen or even chalk, but pencil is easiest to remark and remove if you make a mistake.


4. Next, cut around the edge of your pattern with paper scissors and mark with your awl all the markings (eg circle markings for bust points) & a pattern notcher for the notches, if you have one.
5. Either use your traced pattern straight away, or sew together using a basting stitch.
Once basted you can then try on your pattern for size!
Mark any adjustments you need to make & alter the pattern piece as required.
Retrace the pattern piece to try again.


6. You can use the pattern pieces you create from Swedish tracing paper as you would normal paper pattern pieces
Then, simply pin or use pattern weights when cutting out, but they are much more durable in use. For those of us who find the perfect pattern we want to make a time & time again – no more pin marked and destroyed paper pattern pieces!
Want More Sewing Know-How?
Sewing and Handling Tips
- Needle – Universal machine needles work well for running a simple tacking stitch
- Thread – A polyester thread works best for creating muslins, as it does not snap easily and is smooth for easy removal.
- Sewing – Use a long, basting stitch length.
We hope you found this product guide helpful…. Do let us know what you thought in the comments – I’d love to hear from you!
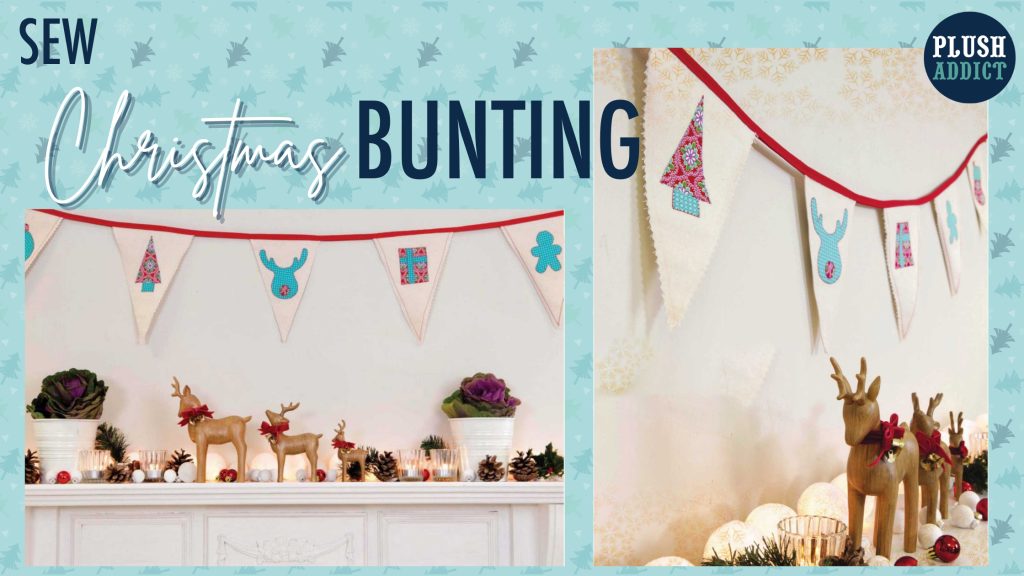
Sew Your Own Appliquéd Christmas Bunting Tutorial

What are Continuous Zips? A Product Guide

Ever wondered what a continuous zip is?
Does adding a zip pull to zip tape seem daunting?
We’re here to help!
Here at Plush Addict we offer a huuuuge selection of zips for sewing to help your projects achieve the look you dreamt of!

Boring Legal Bit: If you follow any tutorial or guidance found in this post, or on this blog, you agree to be bound by our disclaimer which can be viewed here
With zipper tape choices ranging from rainbow to block colour… flat to flowery zip pulls, we’re sure to have something for your next project.
Read on for more info about what a continuous zip is, and why you might want to use one instead of a regular zip
Then… see our tutorial on how to add zip pulls to continuous zip tape… We’ve provided you with a photo tutorial, as well as a video demo at the end…

What is a continuous zip?
Continuous zips differ from others in that the zipper tape is sold by the metre, without zip pulls. This means you are able cut your zip to ANY size you like. It also means you can add TWO zipper pulls, cos… ya know… you have to love that look.

What are the benefits of a continuous zip?
Waste less: As you just use the amount of zip tape you need there is an environmental benefit to continuous zipper tape; with a little planning waste can be kept to a minimum and a length, with enough pulls ordered, can become multiple zips.
Any length: Cutting zip tape to size means you can have REALLY long zips!
Multiple zip pulls: It also means you can add TWO zipper pulls to your tape, giving you a funky zip just like this one
Greater personalisation – you can mix and match the zip tape and zip pulls to your heart’s desire
Looking for info on other zip types? Then check out our Zip Types Guide Post
Photo Tutorial: How To Attach Zipper Pulls to Zipper Tape

You will need:
We used:
Important notes
- Some zip tape comes with a pull/ slider, check the item description for details.
- When ordering zip pulls check they correspond with the tape size/ brand being purchased.
Method
1. Cut the tape to the required length. Use domestic scissors to cut through the teeth.

2. Pull the bottom 10cm of the zipper teeth apart.

3. With the back of the zip pull and back of the tape facing upwards thread 1 end of the tape into the zipper from the top. To make this easier angle the teeth into the pull from the side.

4. Repeat step 4. on the other side. Both sets of teeth want to sit toward the top of the clasp.
4. Repeat step 4. on the other side. Both sets of teeth want to sit toward the top of the clasp.

5. Keeping the 2 sides of teeth level with each other, hold the zip pull between one finger/ thumb then draw the 2 sides of the tape down through the pull with the other hand. The zip pull should then begin to move up the tape.
Alternatively, you may find it easier to place the zipper pull between the prongs of a fork (check out the video below!)
draw the 2 sides of the tape down through the pull
Never miss a guide or tutorial
Click to join our mailing list!
6. Slide the pull toward the top of the tape (without coming off the other end) then pull it back down to check the zip works.


7. If 2 zip pulls are required, repeat steps 1. To 5. from the other end of the tape.
And you’re done!

Handy Hint
If you find yourself struggling using this method try using a fork to hold the zip pull for you: tuck the bar of the zip between the central teeth (not the clasp where the teeth need to go).
…And if your fork won’t stay still; hold it steady with a blob of blue-tack.
Video Tutorial: How To Attach Zipper Pulls to Zipper Tape
Check out our video on how to attach zipper pulls to continuous zipper tape
Want to learn how to sew a zip in?
Find our tutorial on the blog where you can learn how to sew a cushion with piping and a zip or why not try making this reading cushion?

We hope you found this tutorial useful!
Let us know how you get along in the comments below 🙂
Never miss a guide or tutorial
Click to join our mailing list!
Follow Plush Addict on social media and keep an eye out for more tutorials!
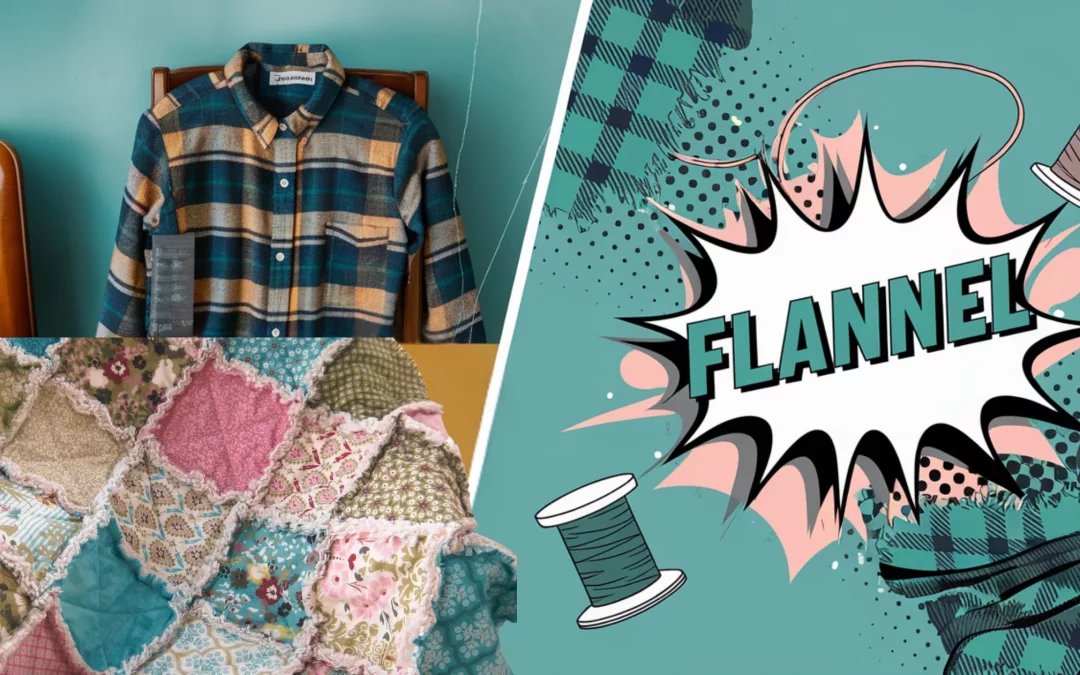
The Ultimate Beginner’s Guide to Sewing with Flannel
The Ultimate Beginner’s Guide to Sewing with Flannel
Ever tried sewing with flannel and thought, “This fabric has a mind of its own!”? You’re not alone. Sewing with flannel can feel a bit like taming a wild horse – soft and beautiful but occasionally stubborn. Whether you’re here to tackle your first flannel project or to figure out why your last one went haywire, this guide will teach you everything you need to know about working with this cosy, versatile fabric.
Unlike most articles out there that give you the basics and then leave you scratching your head, this guide dives deep into the details. By the end, you’ll feel like a flannel whisperer. You’ll not only know how to handle flannel but also how to conquer its quirks and make it work for you like a dream.
Here’s what you’ll discover:
- Why flannel is secretly the MVP of the fabric world.
- The top mistakes beginners make (and how to dodge them).
- Ninja-level tips for sewing flannel like a pro.
- How to keep your flannel projects from fraying into oblivion.
- Game-changing hacks for cutting, sewing, and finishing flannel seams.
Just a heads up! Some of the links in this post are affiliate links. That means we may earn a small commission - at no extra cost to you - if you make a purchase through them. It’s a little way you can support us and help keep all this awesome content free. Thanks for supporting us! Please read our full disclaimer here
Why Flannel is a Great Fabric for Beginners
Flannel has been around for centuries, warming hearts (and bodies) since the 17th century in Wales. It’s the fabric equivalent of a warm hug—soft, comforting, and oh-so-versatile. Want to sew cosy pyjamas? Flannel’s got you covered. Crafting a rustic quilt? It’s perfect for that, too. And let’s not forget flannel shirts, the unofficial uniform of relaxed autumn vibes.
But flannel isn’t just about aesthetics and comfort. It’s also surprisingly forgiving for beginners. Unlike slippery silks or stretchy knits that seem determined to sabotage you, flannel’s stable weave stays put, making it easier to cut and sew. Think of it as your sewing BFF – patient and understanding, even when you’re fumbling with the basics.

How is Flannel made?
Traditionally, flannel was made from fibres such as carded wool or worsted yarns, but modern flannel can be made from literally any fibre, most popularly; Cotton, Wool and Synthetic fibres like Polyester.
Cotton is commonly used as it has similar properties to Wool, but does not insulate heat as well, perfect for more casual wear.
The loosely spun yarns the flannel is made from usually provide most of the softness, but it can be woven with a twill or a plain weave, and is then often napped/ brushed to give an extra textured but even softer surface. Spaces between the fibres in the flannel trap air, making it warm and breathable.
The Top Challenges of Sewing with Flannel (and How to Fix Them)
Let’s not sugarcoat it: flannel has its quirks. But don’t worry, every challenge has a solution, and I’ll walk you through them step by step.
Fraying Like Crazy?
Flannel loves to fray – like, aggressively. This happens because it’s a loosely woven fabric. While that softness is what makes it so comfy, it’s also why your seams might start unraveling faster than a bad relationship.
How to Fix It:
- Use pinking shears or a serger to finish the raw edges.
- If you’re old school, zig-zag stitches can also do the trick.
- Try using Fray Check (a liquid sealant) on your edges for extra security.
It’s Bulky, Isn’t It?
Flannel can get as thick as grandma’s winter quilt, especially when you’re sewing multiple layers.
How to Fix It:
- Trim seam allowances down to 1/4 inch.
- Use a walking foot on your sewing machine to handle those bulkier seams without breaking a sweat.
The Dreaded Pilling
You know those tiny fabric balls that pop up after a few washes? That’s pilling, and flannel is notorious for it.
How to Fix It:
- Pre-wash your fabric before sewing. This removes excess lint and pre-shrinks the fabric.
- Invest in higher-quality flannel—it pills less.


Tips For Preparing and Cutting Flannel
Flannel is a wonderfully soft and versatile fabric, but its loose weave means it can stretch during sewing and shrink significantly after washing. To avoid surprises, a little preparation goes a long way in ensuring your flannel project turns out just as you envisioned.
Pre-Wash to Avoid Shrinkage
Think of pre-washing flannel as a first date – you want to know what you’re getting into. Flannel tends to shrink, so always wash it before cutting. Use warm water and tumble dry to get any surprises out of the way.
Choose the Right Needle and Thread
Flannel’s thicker weave requires a ballpoint or universal needle (size 80/12 or 90/14). Pair it with a strong all-purpose thread to ensure durability. Weak thread on flannel is like trying to hold up a brick wall with dental floss—it’s not going to end well.
Cut Smart, Not Hard
Lay your flannel on a flat surface and use a rotary cutter for precision. Cutting with scissors can cause the fabric to shift, leading to uneven edges. If your pattern involves plaids or stripes, match them up before cutting to avoid wonky results.
Sewing Flannel Like a Seam Star Ninja
Set your stitch length slightly longer (3mm) to accommodate flannel’s thickness. Short stitches can bunch up the fabric, leaving you with a frustrating mess. And remember: sew slowly. Flannel rewards patience.
Starching for Stability
If your flannel feels a bit too stretchy or floppy, starching it before cutting can make a world of difference. It helps stabilise the fabric, making it easier to handle and cut accurately.
Buy a Little Extra
Flannel is prone to shrinkage, so it’s wise to purchase slightly more fabric than your pattern requires. Add several centimetres or inches to your order, especially if you’ll be pattern matching or working with plaids. A little extra fabric now can save a lot of frustration later.
Cutting Tips
Flannel can be slippery and stretchy, making precise cutting a challenge. A rotary cutter paired with a self-healing mat is the easiest and most accurate way to cut flannel. If you prefer scissors, make sure they are sharp and take your time to ensure clean, even cuts.
Allow for Fraying
Flannel frays easily due to its loose weave, so plan for slightly larger seam allowances than usual. Cutting your pattern pieces a bit bigger than recommended can provide a buffer against fraying. For best results, use a seam allowance of at least 1cm (3/8”) instead of the standard 0.5cm (1/4”).
Cut With Right Sides Together
To help achieve a more accurate cut, fold your fabric right sides together before cutting. The nap will help hold the fabric in place and line up lengthwise whilst cutting, meaning you have matching and neater cut pieces.
“Press” rather than “iron”
What does this mean?! Try and avoid ironing with a sweeping motion over your flannel, as the back and forth movement over the fabric combined with the heat/steam will stretch the fabric even further. Instead press by holding the iron in place and lifting, before moving to a different area.
Avoid using the steam setting.
Looking to expand your fabric knowledge?
Check out our Fabric Guides for tips on working with all types of fabric
Understanding the Nap on Flannel
Ah, the nap – flannel’s little personality quirk that can either make or break your project. If you’re new to sewing, the word “nap” might make you think of a cosy afternoon snooze (and honestly, that’s not too far off). In fabric terms, the nap refers to the direction of the fibres on the surface of the fabric. It’s what gives flannel that soft, brushed texture we all love. Think of it like petting a cat: when you stroke with the nap, it’s smooth; against it, not so much.
Why the Nap Matters
The nap on flannel affects the way light hits the fabric, which can make the colour and texture look different depending on its direction. This is particularly important if you’re sewing multiple pieces together, like for a quilt, garment, or any project requiring pattern pieces. If the nap is inconsistent across sections, you might end up with a finished product that looks mismatched, even if everything is technically sewn perfectly.
How to Identify the Nap
Here’s a quick trick to figure out the nap on flannel:
- Run your hand across the fabric in both directions. One way will feel smoother than the other. That’s the nap direction.
- Hold the fabric up to the light. You’ll notice a subtle difference in sheen or colour depending on the direction of the nap.

Sewing Tips for Working with the Nap
- Cut All Pieces in the Same Direction: When laying out your pattern pieces, make sure they’re all oriented with the nap running in the same direction. This keeps your project looking cohesive.
- Mark the Nap on Your Pattern: Use a fabric marker or chalk to lightly indicate the nap direction on the wrong side of each piece. A simple arrow will do.
- Double-Check Before Cutting: It’s easy to overlook this step when you’re excited to dive in, but taking the extra minute to confirm the nap alignment can save you hours of frustration later.
- Press with the Nap: When pressing your seams, always follow the nap direction. Pressing against it can flatten the fibres and change the texture.
A Common Mistake: Ignoring the Nap
Let’s say you’re making a cosy flannel shirt. If you don’t pay attention to the nap, one sleeve might look slightly darker or feel rougher than the other. Not ideal, right? This is especially noticeable in solid flannels or subtle plaids, where the difference can seem minimal at first but glaring in the final product.
Paying attention to the nap might seem like a small detail, but it’s one of those subtle things that takes your sewing from “homemade” to “handcrafted.” When you respect the nap, flannel rewards you with a polished, professional-looking finish. It’s just another way this fabric asks for a little care in exchange for a lot of comfort!
The Psychology of Flannel: Why We Love It
Flannel has an emotional pull. Studies show that tactile experiences (like soft fabrics) can trigger feelings of nostalgia and comfort. This is why a flannel quilt can feel like more than just a blanket—it’s a memory stitched into fabric.
Flannel Project Ideas to Spark Your Creativity
Types of Flannel Fabric
There are many different types of flannel, including:
- Wool flannel
- Cotton flannel
- Synthetic/Blended flannel
- Ceylon flannel (50/50 blend of Cotton and Wool)
- Baby flannel (napped both sides, often made of Cotton or Wool)
- Nappy/Diaper flannel (napped both sides to increase absorption)
- Vegetable flannel (made from cellulose)
- Flannelette (coarser and woven slightly differently than regular flannel)
How is Flannel Fabric Made?
Flannel is made by first spinning your base fibre – whether that be cotton, wool or synthetic fibres, into a loose yarn.
It is then woven using a plain or twill weave, into a piece of flannel. The flannel may then be napped or carded using a random, non-directional method, to produce an even softer textile and to conceal the weave of the fabric. This can be done on one, or both sides.
It may then also be finished with a ‘treatment’. This could be to prevent it from producing toxic or excessive flames, particularly useful for textiles that will be used around the home. We stock a variety of different Cotton flannels, perfect for many different projects, and in a mix of fun licensed prints and solid colours.
Explore our Sewing Tutorials for step-by-step guidance on beginner and advanced projects.

What can I make with Flannel Fabric?
Not sure what to make? Here’s some inspiration:
- Quilts: Start with a simple patchwork design to showcase flannel’s colours and patterns.
- Pyjamas: The ultimate cosy sewing project.
- Tote Bags: Flannel-lined bags are perfect for autumn outings.
- Home Décor: Think flannel throw pillows or table runners.
- Rag Quilts: Create a cosy and textured rag quilt that showcases flannel’s soft, frayed edges, perfect for snuggling on chilly nights.
- Loungewear: Sew comfortable and breathable flannel loungewear that’s perfect for lounging at home or even running casual errands.
- Shirts: Craft classic flannel shirts with a timeless plaid pattern that combines rugged style with ultimate comfort.
- Blankets: Make a warm, oversized flannel blanket to wrap yourself in during movie nights or chilly outdoor adventures.
- Use Instead of Batting When Quilting: Replace traditional batting with flannel for a lighter yet warm quilt that drapes beautifully.
- For Underlining Jackets: Add a layer of flannel underlining in jackets to provide structure, insulation, and a touch of softness.
- Bedding: Stitch flannel bedding sets that feel like a warm hug, keeping you cosy and snug during colder months.
- Cloth Nappies: Create eco-friendly, reusable cloth nappies with flannel’s absorbent and soft texture, gentle on a baby’s skin.
- Baby Clothes: Sew adorable and soft flannel baby clothes that are as practical as they are cuddly for little ones.
- Scarves: Design a stylish flannel scarf that adds warmth and personality to your winter wardrobe.
- Hats: Craft snug and chic flannel hats to keep heads warm while making a fashion statement.
- Burp Cloths: Whip up flannel burp cloths that are absorbent, washable, and gentle on baby’s delicate skin.
- Pillows: Sew decorative or functional flannel pillows to add a cosy touch to your living space or bedroom.
Common Mistakes Beginners Make With Flannel Fabric
Using the Wrong Side of the Fabric
Flannel has a “right” and “wrong” side. The right side is softer and more vibrant. Always check before cutting.
Ignoring Plaid Alignment
If you’re working with plaid flannel, align your patterns carefully. Misaligned plaids can ruin the aesthetic.
Common Questions About Sewing with Flannel
Should I pre-wash flannel before sewing?
Yes, pre-washing flannel is essential as it tends to shrink significantly after the first wash. This step helps prevent your final project from becoming misshapen.
What stitch length is ideal for sewing flannel?
A longer stitch length, around 3mm, is recommended for flannel to accommodate its thickness and prevent puckering.
Can regular scissors be used to cut flannel fabric?
While regular scissors can be used, a rotary cutter is preferred for more precise and clean cuts, especially given flannel’s tendency to fray.
Why does flannel fabric fray easily?
Flannel is a loosely woven fabric, which makes it prone to fraying. Using a serger or a zig-zag stitch can help finish the edges neatly.
How can I avoid puckering seams when sewing flannel?
To prevent puckering, use a walking foot and adjust your stitch length. This helps manage the fabric’s movement and tension during sewing.
Is flannel suitable for beginners?
Absolutely! With a bit of patience, flannel is very beginner-friendly.
What’s the best way to care for flannel projects?
Wash on a gentle cycle and avoid over-drying to prevent pilling.
How do I sew flannel with other fabrics?
Match the fabric weights and use a walking foot for even stitching.
Can flannel be used for quilts?
Definitely! Flannel quilts are warm and perfect for colder months.
Is flannel the same as wynciette?
Almost! The two fabric types are similar, but flannel tends to be a slightly heavier weight fabric.
Sewing with flannel isn’t just a skill; it’s an experience. From the first cut to the final stitch, you’re working with a fabric that’s as comforting as it is challenging. With this guide, you’re armed with everything you need to tackle your flannel projects head-on. Remember, every stitch you sew is a step closer to mastering this art.
Please leave us a comment and share your experience working with flannel fabric!