Our site is getting a makeover! Please bear with us whilst we make improvements

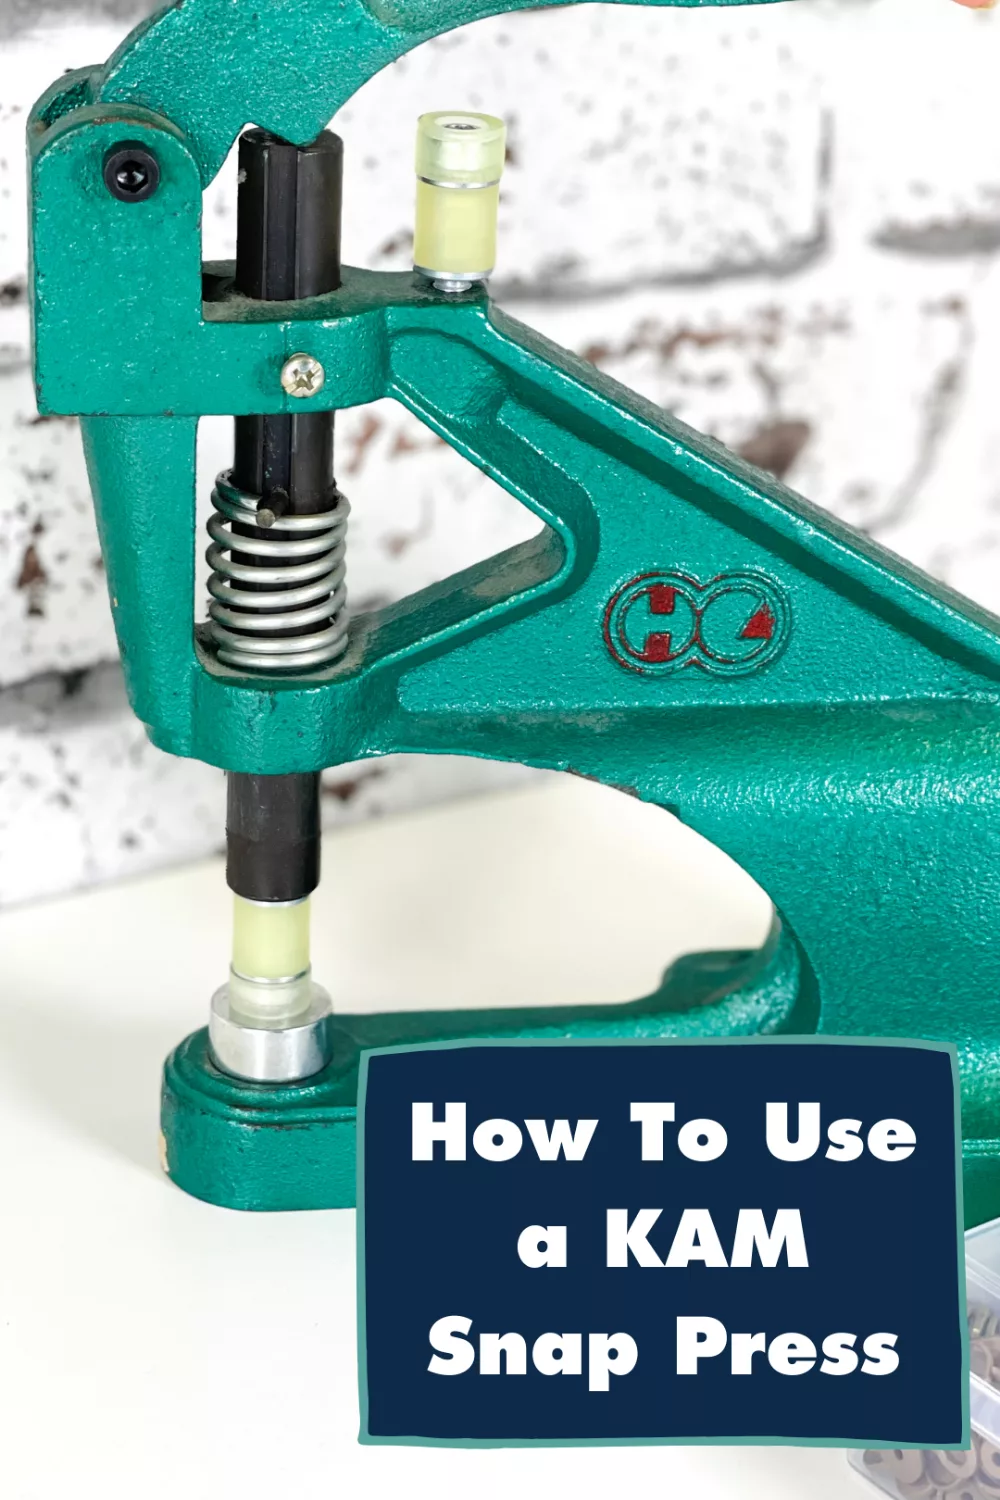
How To Use a KAM Snap Press

How To Use a KAM Snap Press

Are you on the hunt for plastic snap fasteners for your latest project? Maybe you’ve invested in some but are feeling a little lost on how to install them? We hope our latest blog can help with all your KAM snap worries.

First of all, what are KAM snaps? KAM snaps are a strong and durable fastener made from polyacetal resin which is super strong and OEKO-TEX certified.
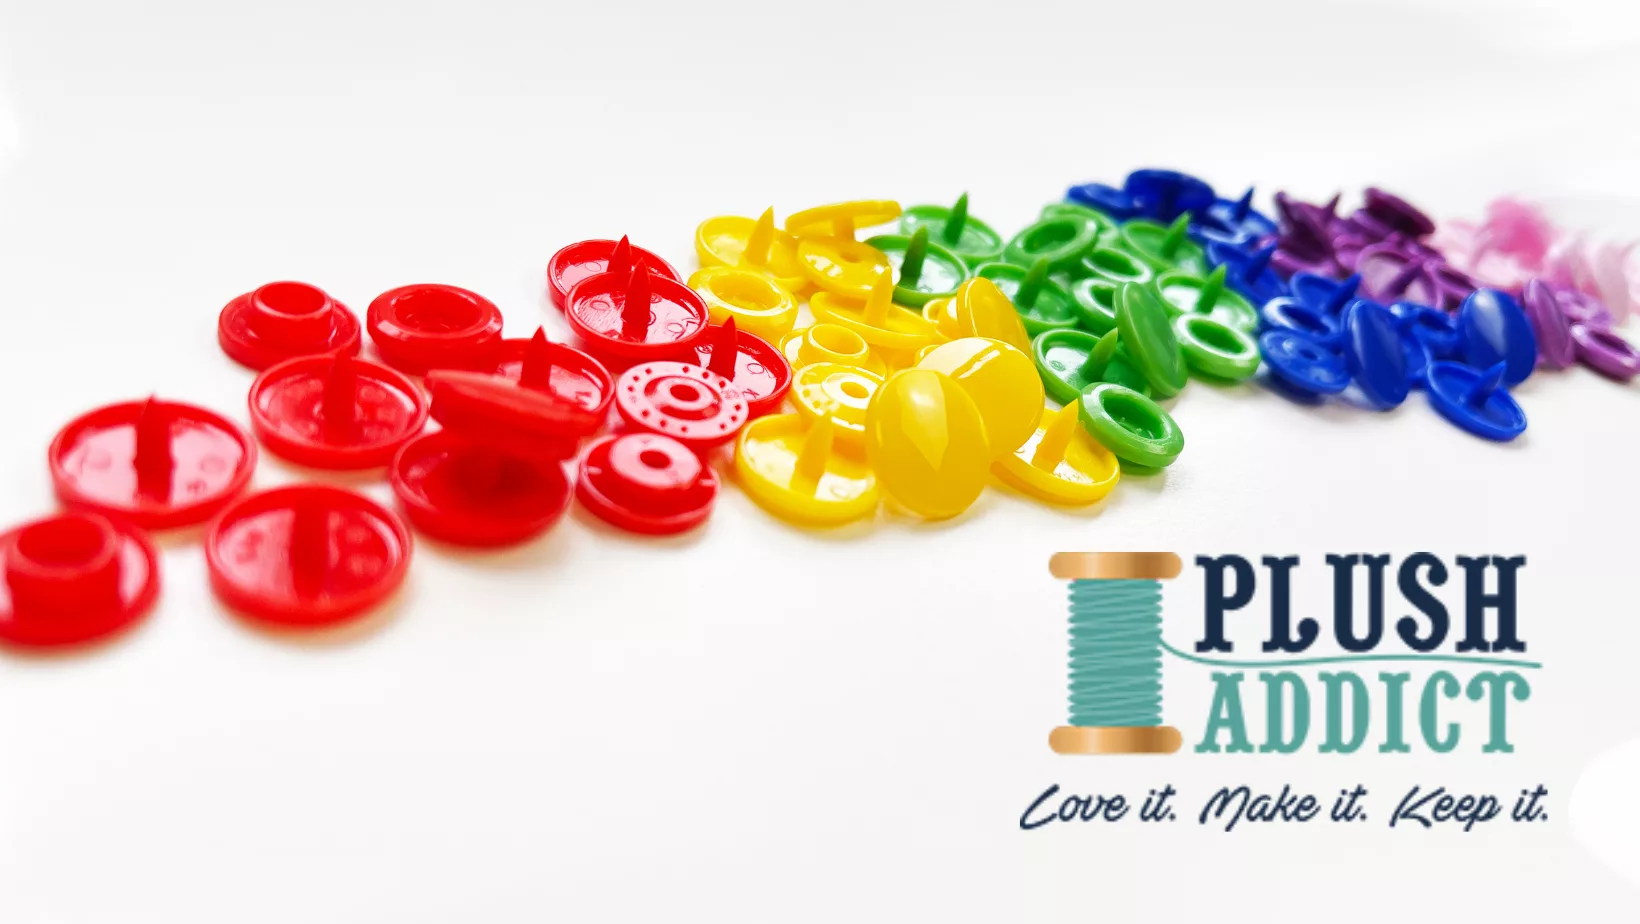
They are super safe snap fasteners for clothing and the perfect alternative to buttons or metal snaps.

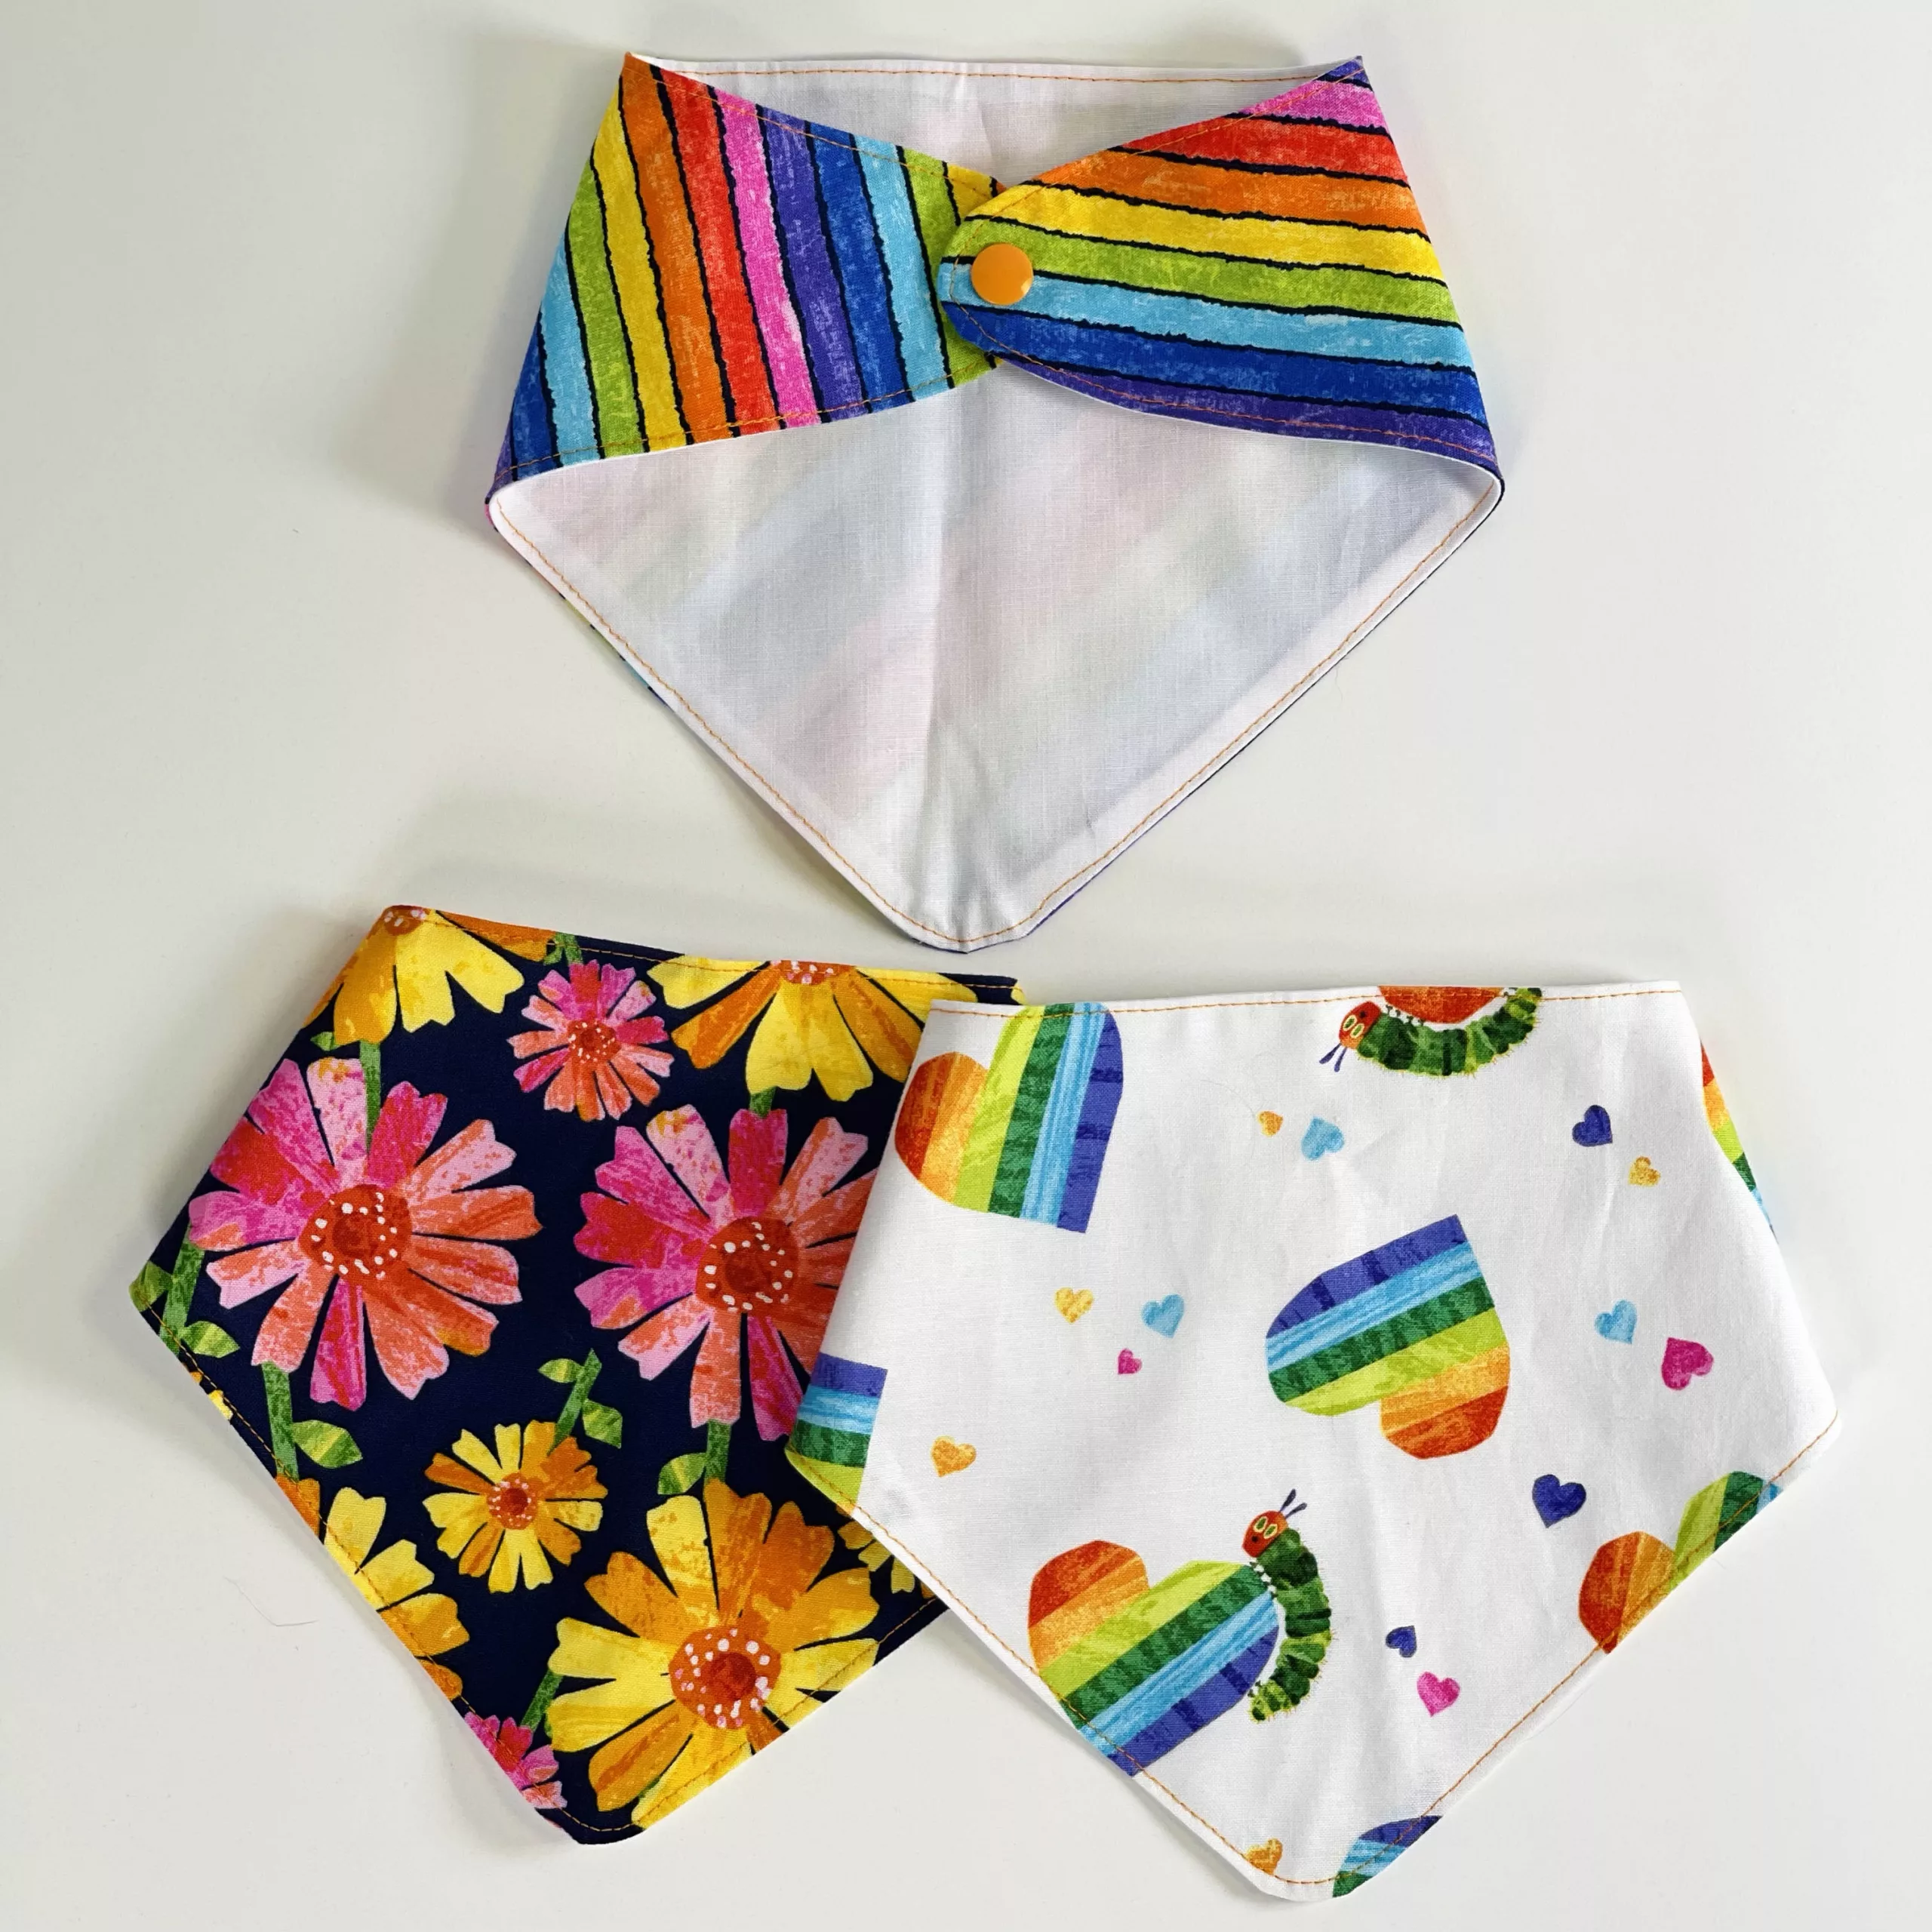
You need either a KAM press or KAM pliers to attach them to all kinds of projects such as clothing, coin purses and more. We have a detailed beginners blog all about KAM here. 
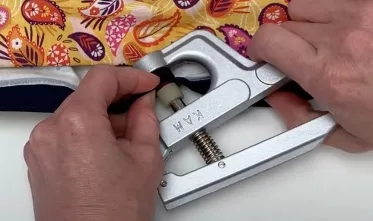
KAM Press or Pliers?

You may have seen on our website we sell 2 types of snap fastener tools. The pliers are compatible with all shapes and sizes of KAM snaps as they come with different die sets, adjusting screw driver and plastic handled awl.

The KAM presses sit on the table top and are compatible with all shapes & sizes of KAM snaps, just ensure you have the correct die head. Our KAM presses are supplied with a free size 20 round die.

KAM Presses super easy to use & make sure your snaps are applied really securely. The pliers are great for light use, however you may prefer a KAM press if you’re looking to apply a lot of snaps.

If you are making to items to sell, especially baby items then we’d definitely recommend applying KAM snaps with a press for enhanced peace of mind that your snaps snaps won’t come off.

If you’re looking for an easy, secure and snug installation, a KAM press is the one to go for. Presses are also especially helpful if you suffer with any dexterity issues such as arthritic hands etc.

Although a press is more of an investment, it’s worth it for the professional finish which is important if you’re making to sell and a press will last you a life time.

Differences between the DK98 and the DK93
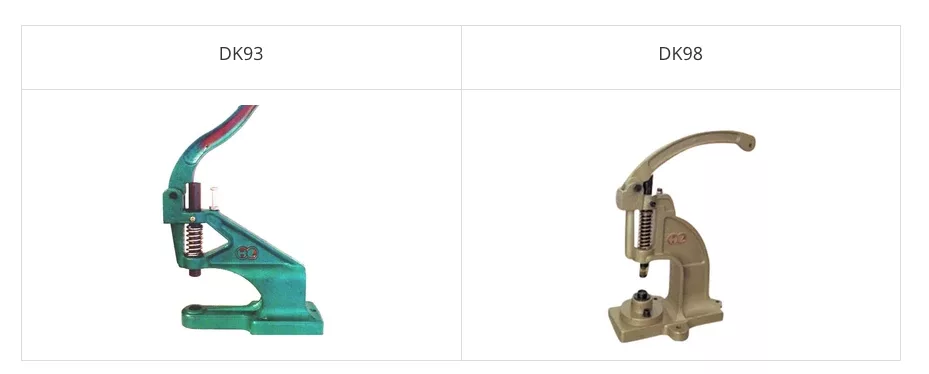
You might have noticed that there are 2 KAM presses to choose from, the DK98 and DK93.

    • The DK93 has a larger gap for the fabric, meaning you can fit over triple the width between the dies compared to the DK98. This is perfect for projects where you need to install a snap quite far from the edge of your fabric, so the DK93 is a lot more versatile for a variety of projects.
    • There are also several die sets available and a die set for the DK93 will never work on the DK98 and vice versa.  However we will supply each KAM press bought with the correct die set to fit size 20 (T5) round dies.  Then you are free to buy additional die sets for your machine to suit your making requirements.
    • The upper die in the DK98 can be slower to change, due to it being held in place by a tiny screw that needs an allen key to undo. Be careful not to lose the screw or the allen key or your press will be out of action! The dies in the DK93 directly screw into the press with ease and no tools needed.
    • The DK93 is also a lot lighter (approximately 4KG lighter) and slightly more compact, making it easier to move on and off your sewing table.
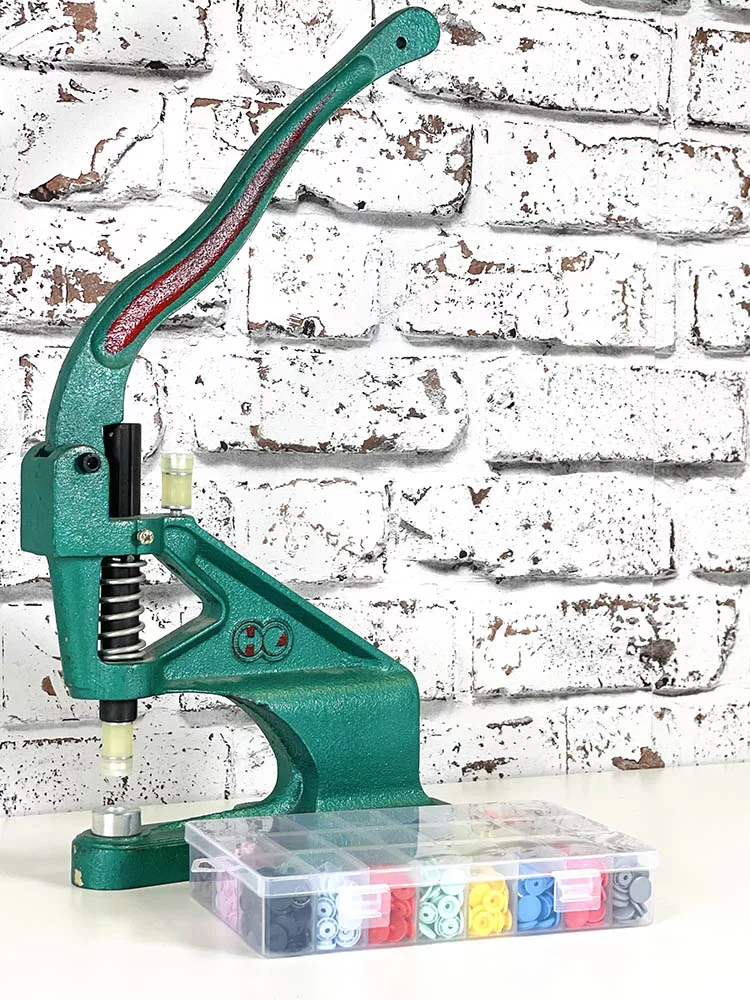
How to put your KAM press together

When you get the KAM press out of the box, you might feel a bit overwhelmed that you have to assemble it. Don’t worry, it’s super easy when you know how…

  1. Choose a smooth, flat surface to work on. Make sure it is low enough so you can extend your arm straight down when pressing the handle down. This will allow you to use your body weight to push down instead of just your arm, for a deeper press and therefore a more professional installation.
  2. Attach the handle with the screw.

Prefer a video tutorial? Check out our YouTube step by step video below:

How to attach KAM snaps

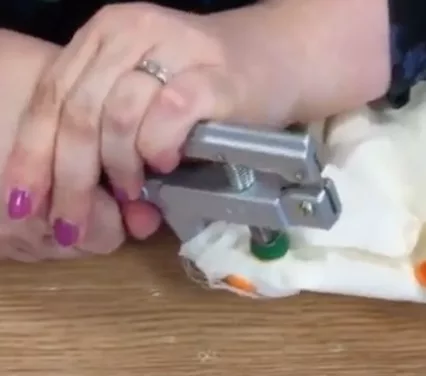
If you’re looking to attach KAM snaps with pliers, we have a handy step by step tutorial here on the blog. Make sure you practice on scrap fabric first before going onto your project!
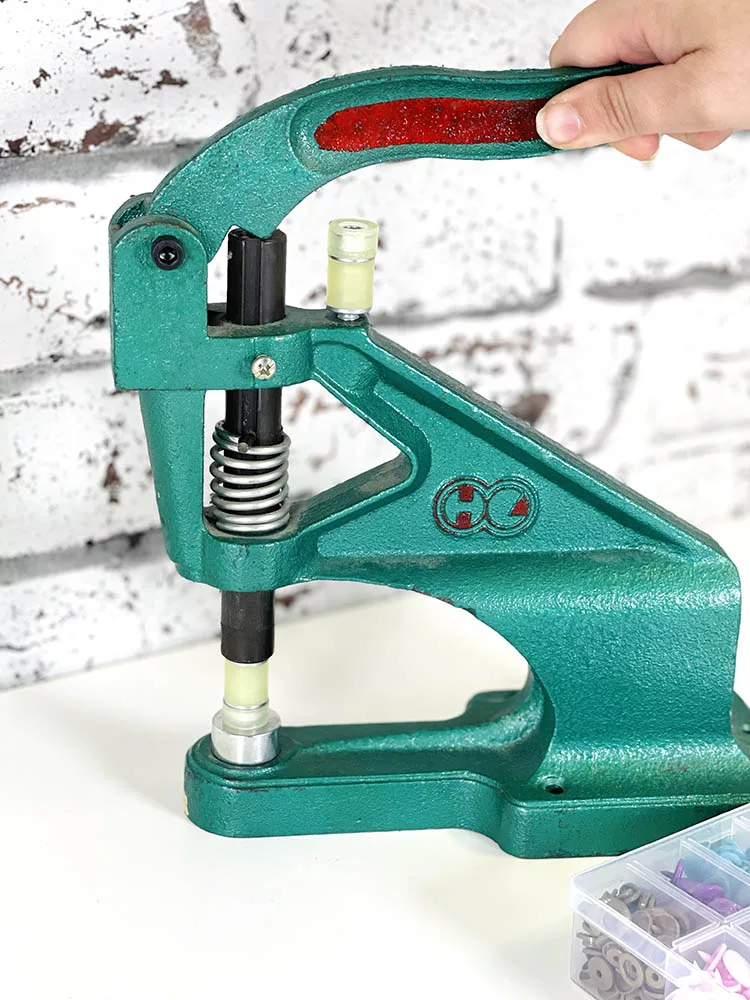
Installing KAM Snaps with a Press

  1. To make sure to apply the right amount of pressure, place your press on a table that is low enough for you to use your shoulder for leverage.
  2. You will need 4 parts of the KAM plastic snap set, 2 caps, a socket and a stud.
  3. Put your cap die into your press and attach your outer die to the top of your press.
  4. Grab your inner snap and press it firmly into the outer die.
  5. Put your plastic cap through your fabric and place it into the cap die with the long prong facing up making sure none of the plastic is outside of the die cup.
  6. Press down, the die should bulge out slightly.
  7. The cap should be flattened and both parts firmly into your fabric.
  8. For the other side, swap out the die at the top of your press for the inner die.
  9. Take your stud and place it into the inner die.
  10. Get another cap and place it into the die cup with the needle facing up once again.
  11. Press down and fix the cap and stud together.

You should have a press stud that snaps together!

Prefer video tutorials? Check out our YouTube tutorial below.

Never miss a guide or tutorial

Click to join our mailing list!

How to remove KAM Snaps

In order to remove KAM snaps, you will need a set of KAM snap removal pliers. It’s really easy to remove both the male and female sides of the snaps. Check out our beginners guide to KAM Snaps for a step by step tutorial.
Pin this for later on Pinterest!

What can I make with KAM snap fastenings?

Now you can attach KAM snap fastenings, we have a ton of project ideas for you!

Check out our UK based sewing superstore for all of our KAM snap fastener supplies! We sell the presspliers and lots of different colour snaps for all of your projects. New to KAM snaps? Check out our snap fastener kit. 

What To Make With Mesh Fabric

What To Make With Mesh Fabric

So, you’ve got some mesh fabric staring at you, daring you to turn it into something fabulous. It’s lightweight, see-through, and just a little bit intimidating. But guess what? That airy, stretchy, and slightly mysterious fabric isn’t as tricky as it seems. It’s like the friend who looks all fancy but is secretly super down-to-earth. Let’s chat about why mesh fabric deserves a prime spot in your sewing stash, and what you can whip up with it.
Why Mesh Fabric Is Worth the Effort

Mesh fabric might seem like the diva of the fabric world, but it’s more like the multitasker who juggles fashion, function, and flair with ease. Need a breathable layer for activewear? Mesh fabric has got your back – literally. Looking to organise your life with lightweight storage solutions? Mesh fabric steps in like a pro. Want a chic overlay for an evening dress? It delivers elegance effortlessly.

Here’s what makes mesh fabric a game-changer:

  • Lightweight and breathable: Ideal for airy garments or storage solutions that won’t weigh you down.
  • Versatile: From tote bags to trendy summer tops, mesh fabric adapts seamlessly to both creative and practical projects.
  • Eco-friendly potential: Turn scraps into reusable produce bags or patchwork panels, reducing waste with style.  
  • Transparency with style: Visibility and sophistication go hand in hand. No more rummaging through opaque bags for your essentials.

Still hesitant? With a few techniques (we’ll cover those soon), you’ll handle mesh fabric like a seasoned sewist.
Common Misconceptions About Sewing with Mesh Fabric

Sewing with mesh fabric isn’t as daunting as it seems. Let’s tackle the myths head-on:
  • “Mesh is too hard for beginners.” Not true. Start with small projects like scrunchies or drawstring bags. It’s like learning to ride a bike – begin with training wheels, and soon you’ll master it.
  • “You need expensive, specialised tools.” All you really need is a basic sewing machine, a ballpoint or stretch needle, and a touch of patience.
  • “Mesh fabric is fragile.” While delicate-looking, mesh fabric is surprisingly durable, especially when supported with stabilisers.

Think of mesh fabric as the underdog in a feel-good movie. Everyone underestimates it, but with some care and effort, it becomes the star of the show.

Looking to expand your fabric knowledge?

Check out our Fabric Guides for tips on working with all types of fabric

Essential Tools and Tips for Sewing with Mesh

Sewing with mesh fabric is a bit like baking a soufflé – delicate, but completely manageable with the right prep. Here’s your go-to toolkit:

Tools You’ll Need

Pro Tips

  • Practice first: Use scrap mesh fabric to test stitches and tension. Think of it as your dress rehearsal.
  • Slow and steady: Speed leads to errors; precision wins every time.
  • Edge control: Finish edges with fold-over elastic or bias tape for a polished look.
  • Layer up: Combine mesh fabric with sturdier fabrics for added structure, especially for pockets.

Fun Fact About Mesh

In 1888, British mill owner Lewis Haslam invented mesh fabric after a serendipitous walk with his aunt. While out in cold weather, he noticed her gloves were full of holes but she remained warm. Intrigued by this observation, Haslam began experimenting with loosely-knit fabrics and founded Aertex, the world’s first mesh fabric production company

Beginner-Friendly Projects to Start With

Jump into mesh fabric sewing with these five beginner-friendly projects:

  • DIY Mesh Tote Bags: Create lightweight, stylish alternatives to plastic bags. Perfect for groceries or books, with the added bonus of visibility.
  • Scrunchies: Fun, easy, and ideal for leftover scraps. Mesh fabric adds a unique texture to your hair accessories.
  • Summer Tops or Overlays: Breezy and chic, these are perfect for layering on sunny days.
  • Laundry Bags: Protect your delicates in the wash. Quick to sew and endlessly useful.
  • Home Décor Projects: Add a modern touch with mesh fabric curtains or table runners.

Pattern and Project Highlights

Level up with these standout mesh fabric patterns. Each project brings something unique to the table:

  • Grab Some Grub Lunch Bag: A versatile lunch bag featuring mesh fabric pockets for ice packs or cutlery. Add a chalk border for fun customisation. Pro tip: Line it with Lamifix for easy cleaning.
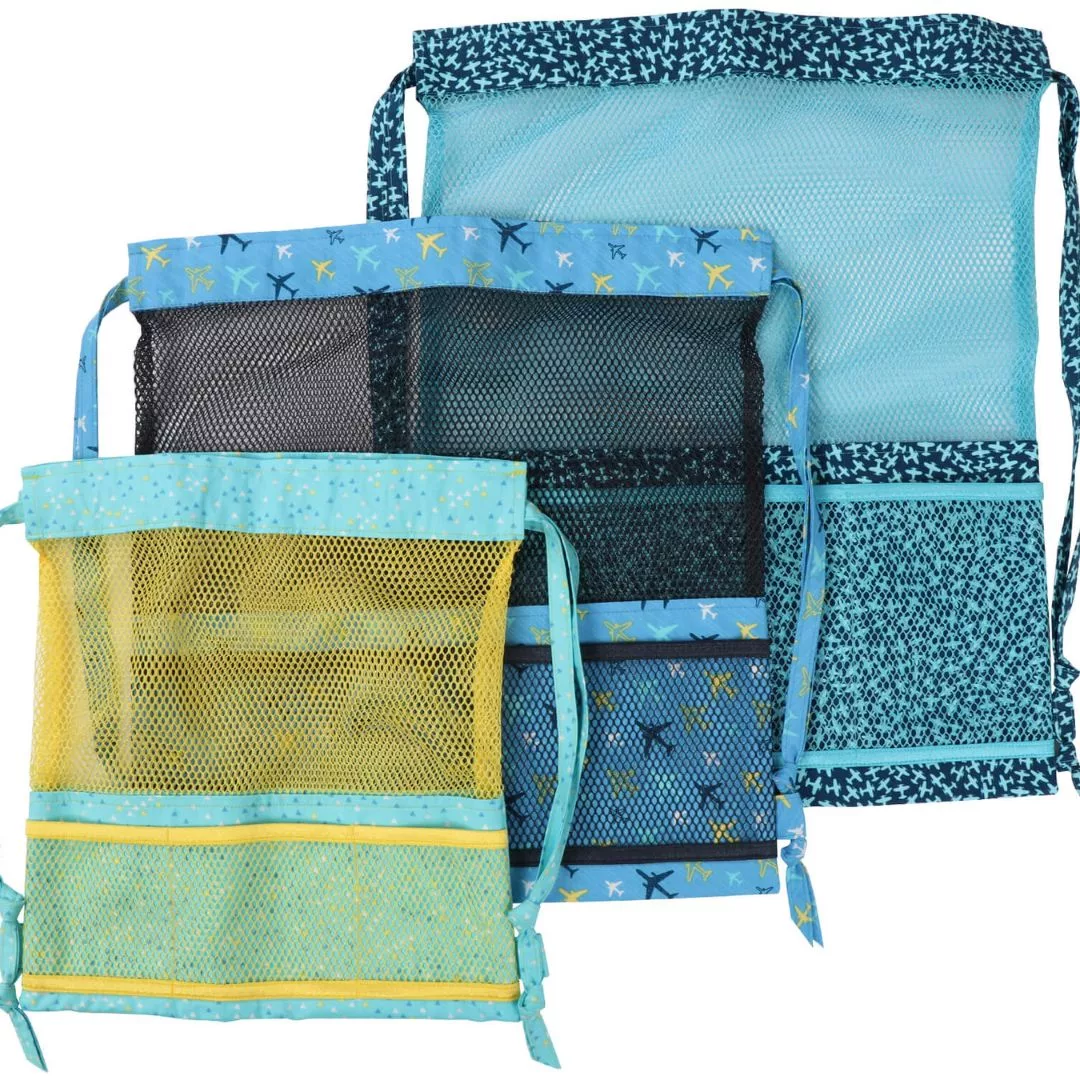
  • Meshing Around Organiser: A drawstring bag ideal for the gym or beach. Its mesh fabric panels provide ventilation and visibility, perfect for damp items.
  • It’s A Cinch Drawstring Bag: A sack-style drawstring bag that’s lightweight and functional for toys, laundry, or sports gear.
  • Close at Hand Supply Bag: Compact and organised, with mesh fabric pockets for visibility. Originally designed for medical supplies, it’s perfect for tools or travel essentials.
  • Hang In There Bedside Pocket Organiser: Never lose your phone or book again. With multiple mesh fabric pockets, it’s a bedside essential.
  • Mad About Mesh Bags: Multipurpose and travel-friendly, these mesh fabric bags make packing and organising a breeze.

Explore our Sewing Tutorials for step-by-step guidance on beginner and advanced projects.

Sustainability and Upcycling Ideas

Mesh fabric shines in sustainability efforts. Here’s how to make the most of your scraps:

  • Upcycled Produce Bags: Lightweight, washable, and a chic replacement for plastic.
  • Patchwork Panels: Combine mesh fabric with other fabrics for textured quilts or garments.
  • Reusable Gift Wrap: Sew mesh fabric into drawstring gift bags for a unique and eco-friendly presentation.

Looking for eco-friendly inspiration?

Explore our Sewing Tutorials for step-by-step guidance on beginner and advanced projects.

Sustainability and Upcycling Ideas

Mesh fabric shines in sustainability efforts. Here’s how to make the most of your scraps:

  • Upcycled Produce Bags: Lightweight, washable, and a chic replacement for plastic.
  • Patchwork Panels: Combine mesh fabric with other fabrics for textured quilts or garments.
  • Reusable Gift Wrap: Sew mesh fabric into drawstring gift bags for a unique and eco-friendly presentation.

Promotional Block: Looking for eco-friendly inspiration? Discover more in our Sustainable Sewing Information section and learn how to sew greener.

Practical Tips

  • Choose durable mesh fabric for long-lasting results.
  • Get creative with scraps to minimise waste.
  • Pair mesh fabric with organic or recycled fabrics to boost sustainability.

Using mesh produce bags help reduce waste, are more durable, and contribute to lowering carbon emissions when used consistently.

Start Your Mesh Journey Today

You’ve got the tools, tips, and inspiration. Now it’s time to create! Whether it’s a chic top or a practical organiser, mesh fabric is your next go-to material.

Mesh fabric is more than a material; it’s an opportunity to innovate and create. From functional bags to stylish overlays, it proves that versatility and beauty can coexist. With the right approach and a touch of courage, there’s nothing you can’t sew with mesh fabric.

So grab your mesh fabric and start stitching. Your next masterpiece is waiting!

Common Questions About Mesh Fabric

What types of mesh fabric are available, and how do I choose the right one for my project?

Choose between sport mesh for activewear, tulle for decorative uses, and power mesh for stretch and support, depending on your project’s needs.

Can mesh fabric be used for structured or supportive projects like bags?

Yes, use stabilisers, interfacing, or layer mesh with sturdier fabrics to add structure and support.

What’s the best way to cut mesh fabric without it fraying or slipping?

Use a rotary cutter on a cutting mat for clean, precise edges and to prevent fabric movement.

How do I sew mesh fabric without it stretching out of shape?

Stabilise the fabric, adjust tension on your sewing machine, and sew slowly with a walking foot.

Can I use mesh fabric for garments? If so, which ones?

Absolutely – mesh works well for overlays, activewear panels, summer tops, and breezy skirts.

What tools or notions do I need for sewing mesh fabric?

Essential tools include a ballpoint needle, polyester thread, walking foot, and temporary spray adhesive.

Are there any tips for finishing the edges of mesh fabric?

Bind edges with bias tape, fold-over elastic, or serge them for a professional, fray-free finish.

Can I combine mesh fabric with other fabrics in one project?

Yes, pairing mesh with fabrics like cotton, denim, or stretch jersey adds texture and functionality to your project.

Can mesh fabric be upcycled or repurposed?

Yes, turn old mesh items into produce bags, organisers, or even decorative accents like window hangings.

What are some common mistakes to avoid when working with mesh fabric?

Avoid using the wrong needle, skipping stabilisers, or sewing at high speed, which can distort the fabric.

15 Tips For Sewing with Mesh Fabric

15 Tips For Sewing with Mesh Fabric

Are you ready to take on a new sewing adventure? Buckle up buttercup! We’re diving headfirst into the sea of! This lightweight, breathable material is making waves in the sewing community, and today, I’ll be your trusty mesh maverick guiding you through the ins and outs of sewing with mesh fabric.

Now, you might be wondering, why mesh fabric? It adds a touch of sporty elegance to garments, creates ethereal overlays, and even works wonders in your bag-making and home decor items. But, and this is a big but, sewing with mesh fabric. can be a bit intimidating, but with a little technical guidance, mesh is actually very easy to sew, and can be applied to many different projects!

In this comprehensive post, I’m going to embark on a sewing journey where we’ll delve into the world of mesh fabric and equip you with all the knowledge and tips you need to confidently work with it. 

We’ll cover everything from understanding mesh fabric and mastering cutting techniques to sewing tips, seam finishes, and edge finishes. Plus, we’ll explore a variety of project ideas to spark your creativity and help you envision the amazing creations you can bring to life with mesh fabric.

Think of me as your sewing sidekick, here to share all the juicy secrets to successful mesh fabric. sewing. We’ll chat about selecting the perfect mesh fabric., prepping and cutting it like a pro, and using the right tools and stitches to ensure your creations turn out top-notch. And hey, I’m not going to leave you hanging when things get a little tricky. We’ll troubleshoot common issues together, so you can conquer any mesh-related challenges that come your way.

So, my fellow sewing superheroes, get ready to flex those creative muscles and let mesh fabric take centre stage in your sewing projects. It’s going to be a fun, wild, and slightly meshy ride. Are you up for the challenge?

What is Mesh Fabric?

Mesh fabric is a lightweight and open-weave textile that is characterized by its distinctive mesh or net-like structure. It is typically made from synthetic fibres like polyester, nylon, or spandex, which give it durability, flexibility, and breathability. The open construction of mesh fabric allows air to flow through, making it ideal for creating garments and accessories that require ventilation or a see-through effect.

Mesh fabric comes in various weights and densities, ranging from fine and delicate to more sturdy and structured. Its unique properties make it suitable for a wide range of applications, offering a combination of functionality and style in sewing projects.

Alrighty, let’s unravel the mystery of this fabric! Picture this: mesh fabric is like the cool kid at the sewing party. It’s lightweight, open-weave goodness that’s all about that meshy, net-like structure. Made from synthetic fibres like polyester, nylon, or spandex, it’s got the durability, flexibility, and breathability you need for your sewing adventures.

Now, here’s the fun part— mesh fabric lets the air flow freely, allowing for some serious ventilation action. That means it’s perfect for creating garments and accessories that need a breath of fresh air or that trendy see-through effect. So, if you’re dreaming of that sporty chic look or an ethereal overlay that’ll make heads turn, mesh fabric is your go-to.

Mesh fabric isn’t just a one-trick pony. Oh no! It’s a versatile superstar that can tackle a wide range of sewing projects. From athletic wear that keeps you cool while you’re breaking a sweat to its superpower in the world of bag-making or sheer overlays that make you feel like a dreamy fashionista, mesh fabric has got your back. 

Tips for Cutting Mesh Fabric

Let’s talk cutting! You’ve got a couple of options here, but we have a top recommendation for precision: reach for a trusty rotary cutter and a self-healing mat. Trust me, it’ll make your life so much easier! 

This method will help you see the holes in the mesh more clearly, making it easier to follow your cutting lines accurately. And remember, slow and steady wins the race. Take your time, breathe, and let your scissors glide smoothly through the mesh.

Keep those selvedges intact if you can. They provide a bit of stability and prevent the mesh from unravelling. If you need to remove them, make sure to finish the raw edges with a zigzag stitch or a serger to keep everything nice and tidy.

But hey, if you’re feeling extra patient or have a particular design in mind, you can grab a pair of scissors. Just remember to take your time and cut single layers at a time as attempting to cut two layers at once can result in a major mix-up, and I’m all about avoiding that frustration. Double layers tend to slip and slide around, making it challenging to get that clean and accurate cut. So, let’s embrace the single-layer approach and achieve those perfect shapes with ease!

15 Tips for Sewing Mesh Fabric

  1. Needle choice: When it comes to sewing mesh fabric, the best needle to use is a ballpoint or stretch needle. These needles have a rounded tip that helps prevent snagging or piercing through the delicate mesh fabric The rounded shape allows the needle to glide smoothly between the holes of the mesh, ensuring clean and undisturbed stitches. So, make sure to stock up on some ballpoint or stretch needles for your  mesh fabric sewing adventures. Your fabric will thank you for it!
  1. Thread Choice: When sewing with mesh fabric, it’s important to choose a thread that matches the fibre composition of the mesh. For most types of mesh, a durable polyester thread is your best bet. Not only will it provide the strength needed to withstand any stretching or stress on your finished item, but it will also ensure your stitches are secure and long-lasting. All-purpose polyester thread is a fantastic choice for sewing mesh fabric. Its versatility and strength make it ideal for various projects, whether you’re creating sportswear, accessories, or decorative pieces. 
  2. Invest in a rotary cutter : For precise, accurate and smooth cuts, use a rotary cutter instead of scissors. Pair it with a self-healing cutting mat to protect your surfaces.
  3. Use pattern weights: When cutting your mesh fabric, opt for pattern weights instead of pins to prevent snags and visible pin marks. The mesh can be slippery, so weights will keep everything in place.
  4. Cut single layers: Avoid cutting double layers of mesh fabric at once, as they tend to shift and slide, resulting in inaccurate cuts. Cut one layer at a time for better control.
  5. Marking Mesh Fabric: Tailor’s chalk or fabric markers: Use tailor’s chalk or fabric markers specifically designed for temporary marking on fabrics. Water-soluble or air-soluble markers: Opt for water-soluble or air-soluble markers that allow you to make visible marks on the mesh fabric. These markers disappear when exposed to water or air, respectively, making them a convenient option for temporary marking. You could also consider making small clips with a pair of scissors, but these can be difficult to locate with all the holes!
  6. Pinning mesh fabric : Pinning mesh fabric can be a bit tricky due to its delicate and open-weave nature. The best pins for mesh are fine pins with sharp points. These pins are less likely to create large holes in the mesh fabric, minimizing any potential damage.

8. Consider alternative methods to pins: If pinning proves to be challenging, consider using alternative methods to hold the fabric together, such as quilting clips, fabric weights, or basting stitches. These options can be gentler on the fabric while still keeping it secure during the sewing process.

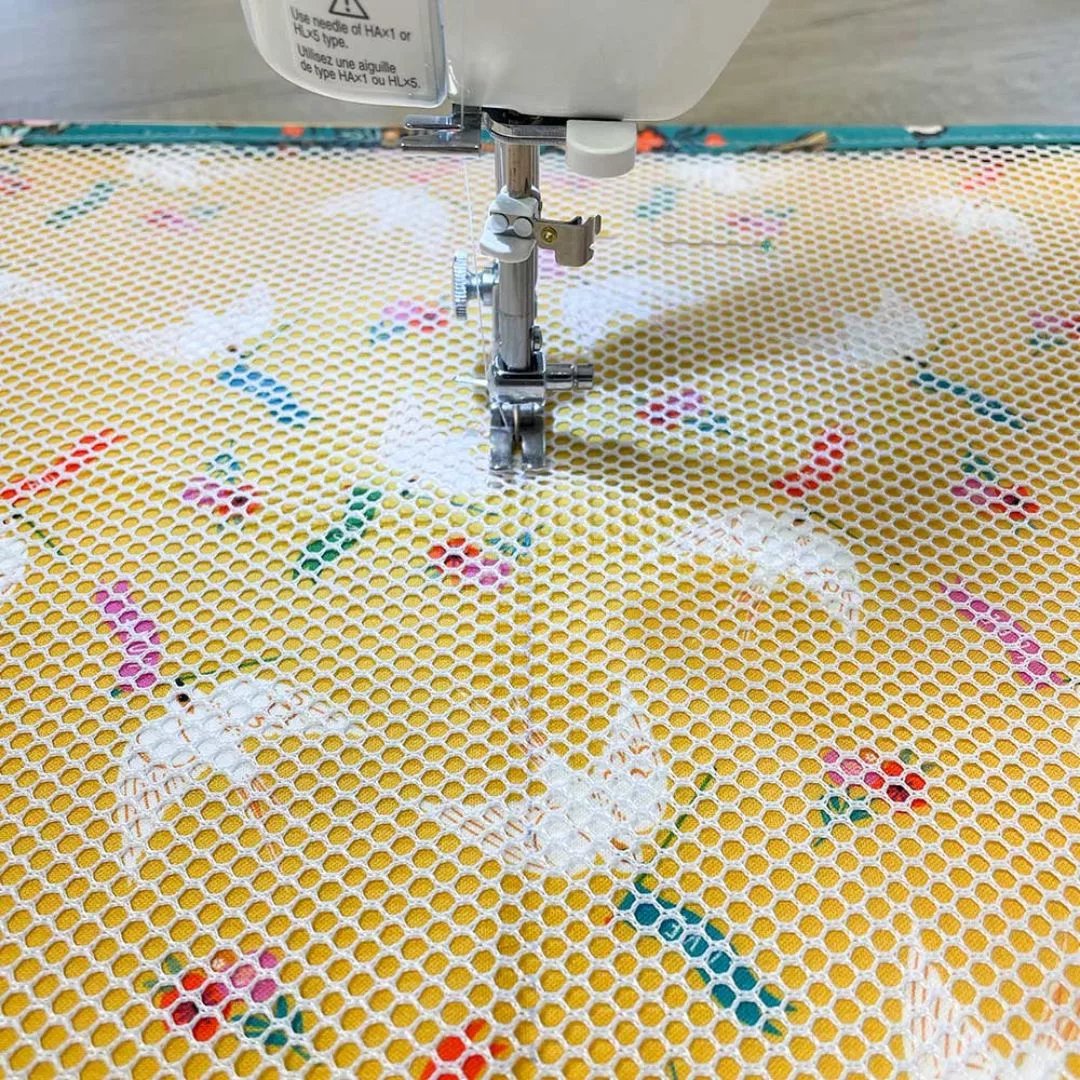
9. Choosing a machine foot to sew with mesh: Consider using a walking foot, which helps guide the mesh smoothly through the machine. To further aid the feeding process, you can place a tear-away stabilizer, tissue paper, or plain paper under the seam. These temporary supports can be easily removed afterwards, ensuring the mesh doesn’t get trapped or stuck on the feed dogs. Alternatively, you can try using a wide straight stitch foot or a roller foot, which can also assist in feeding the mesh fabric evenly.

10. Loosen the pressure:Now, let’s talk about presser foot pressure. If your machine allows it, loosening the presser foot pressure can work wonders when sewing mesh fabric. This adjustment prevents unwanted stretching and distortion, allowing you to maintain the fabric’s shape and integrity. Loosening the pressure will also minimize fabric slippage, especially when dealing with double layers of mesh.

11. Secure edges with tape: If you’re struggling to keep the edges of your mesh fabric aligned while cutting, use masking tape or clear tape to temporarily secure them. This will help maintain accuracy.

12. Sewing Speed:Slow and steady wins the race: Mesh fabric can be delicate and prone to shifting or stretching. To maintain control and precision, it’s generally recommended to sew at a slower speed. This allows you to navigate the fabric smoothly, ensuring accurate stitches without putting unnecessary strain on the mesh and avoid gathers and puckers.

13. Stitch Length:When it comes to stitch length for sewing with mesh fabric, using a shorter straight stitch or a narrow zigzag stitch is recommended to achieve the best results. Opt for a stitch length of around 1.75-2.5mm to ensure secure and balanced stitches. Remember to test your chosen stitch length on a scrap piece of mesh fabric before starting your actual project. This will help you gauge the stitch’s appearance and its compatibility with the fabric’s specific characteristics.

14. Fabric Position: When sewing mesh fabric in combination with other fabrics, it’s essential to pay attention to the position of the mesh layer. To prevent the mesh from slipping or getting trapped, always place the mesh layer on top, closest to the needle. Keeping the mesh layer on the top, it allows the machine’s feed dogs to have better contact with the fabric, ensuring smooth and even feeding. This positioning also helps to minimize the chances of the mesh fabric getting caught or tangled in the machine’s mechanisms. By keeping the mesh layer on top, you’ll have better control over the fabric, minimize potential issues, and achieve beautiful and professional results in your sewing projects.

15. Basting: Instead of traditional basting, you might consider alternative methods to secure the fabric layers temporarily. One option is to use temporary glue or double-sided sticky tape. These adhesive options allow you to secure the mesh fabric to other layers without the need for excessive stitching.

What Seam Finishes Are Best For Mesh Fabric?

When it comes to seam finishes for mesh fabric, it’s important to choose methods that provide both durability and a clean finish without adding bulk. Here are some recommended seam finishes for working with mesh fabric.

Zigzag stitch: Utilize a narrow zigzag stitch along the raw edges of the fabric. This stitch helps to prevent fraying and provides a flexible seam that accommodates the stretchiness of the mesh.

Overlock or serged edge: If you have access to an overlock machine or serger, using it to finish the raw edges of the mesh fabric is an excellent choice. This creates a professional-looking and secure seam that prevents fraying. Treat mesh like you would a very delicate or lightweight fabric when finishing, due to the holes.

French seams: While a bit more time-consuming, French seams work well with lightweight mesh fabrics. They encase the raw edges within the seam, ensuring a neat and clean finish on both the inside and outside of the garment.

Bias tape binding: Another option is to use bias tape to enclose the raw edges of the mesh fabric This technique adds a pop of colour and creates a clean and finished look.

Before deciding on the seam finish, consider the weight and stretchiness of your mesh fabric, as well as the overall look you want to achieve. It’s always a good idea to test different seam finishes on scrap pieces of fabric to ensure you’re happy with the result before applying them to your project.

Remember, when working with mesh fabric, it’s essential to handle it with care and choose seam finishes that maintain the fabric’s integrity while providing a professional and long-lasting outcome.

Edge Finishes for Mesh Fabric

When it comes to edge finishes for mesh fabric, the goal is to prevent fraying and create a clean and professional look. Here are some edge finishes that work well with mesh fabric:

Narrow hem: A narrow hem is a popular choice for mesh fabric It involves folding the raw edge of the fabric twice, typically about 1/4 inch (6mm) or less, and stitching it in place. This creates a clean and polished edge while minimizing bulk.

Bias binding: Using bias binding is a versatile option for finishing mesh fabric edges. Cut bias strips from lightweight fabric or use pre-made bias tape, and then apply it to the raw edge of the mesh fabric Stitch it in place, enclosing the edge and providing a clean finish.

Fold-Over Elastic: Fold-over elastic is a fantastic option for edge finishing with mesh fabric. Not only does it provide a gathered edge, but it also neatly encloses the raw edge at the same time. This makes it an excellent choice for creating expandable pouches and pockets on bags.

Ribbon or trim: Another way to finish the edges of mesh fabric is by using ribbon or decorative trim. This option adds a stylish and unique touch to your project. Choose a ribbon or trim that complements the colour and style of your mesh fabric.

Raw edge: Mesh fabric has a special quality – it won’t fray. This means you can leave the edges raw for a more casual and edgy look. This option works well for projects where you want to embrace the open and airy nature of the mesh fabric.

Decorative edge stitching: Consider using a decorative edge stitch to finish the raw edge of your mesh fabric. This can be done with a decorative stitch on your sewing machine or even with a contrasting thread colour. It adds visual interest while also preventing fraying.

Remember to test the chosen edge finish on a scrap piece of mesh fabric before applying it to your main project. This will allow you to gauge the result and ensure you’re happy with the finished look.

What can I sew with Mesh Fabric?

If you’re just starting out with mesh fabric, don’t worry—there are plenty of beginner-friendly projects to get you comfortable with this versatile material. Here are a few suggestions:

  • Mesh tote bags

  • Mesh pouches

  • Mesh pockets on bags and backpacks

  • Bags with mesh accents

  • Mesh inserts in garments

  • Mesh activewear

  • Mesh pouches and bags for toiletries

  • Beachcombing sacks and pouches

  • Reusable produce sacks and storage bags

  • Laundry bags

  • Washing machine bags for small items (baby socks, etc.)

  • Bath toy storage bags

  • Swimming or beach bags

You have now armed yourself with 15 essential tips for sewing with mesh fabric. From understanding its characteristics to mastering cutting techniques, choosing the right needles and threads, and exploring various seam and edge finishes, you are well-prepared to tackle any mesh fabric project that comes your way.

Did this guide help you? If it did I’d appreciate it if you’d leave a comment or a ❤️ on this post to help other people find my work! And if you’d like to hear more from me I’d love it if you would subscribe below… thanks so much!

Go Super Size with Extra Wide Fabrics!

Go Super Size with Extra Wide Fabrics!

Ever heard the term “wide backs” and wondered what it means? No – it’s not a dressmaking alteration for the broad shouldered!

Some of you beginner seam-stars out there have come across some fabrics on our website which are a huuuuge 106” wide and might think, why on earth would you need a piece of fabric that wide?! Well you’re in luck! In this blog, we’ll be going through why we need extra wide fabrics and inspire you with what they can be used for.

Quilt Backing Fabric

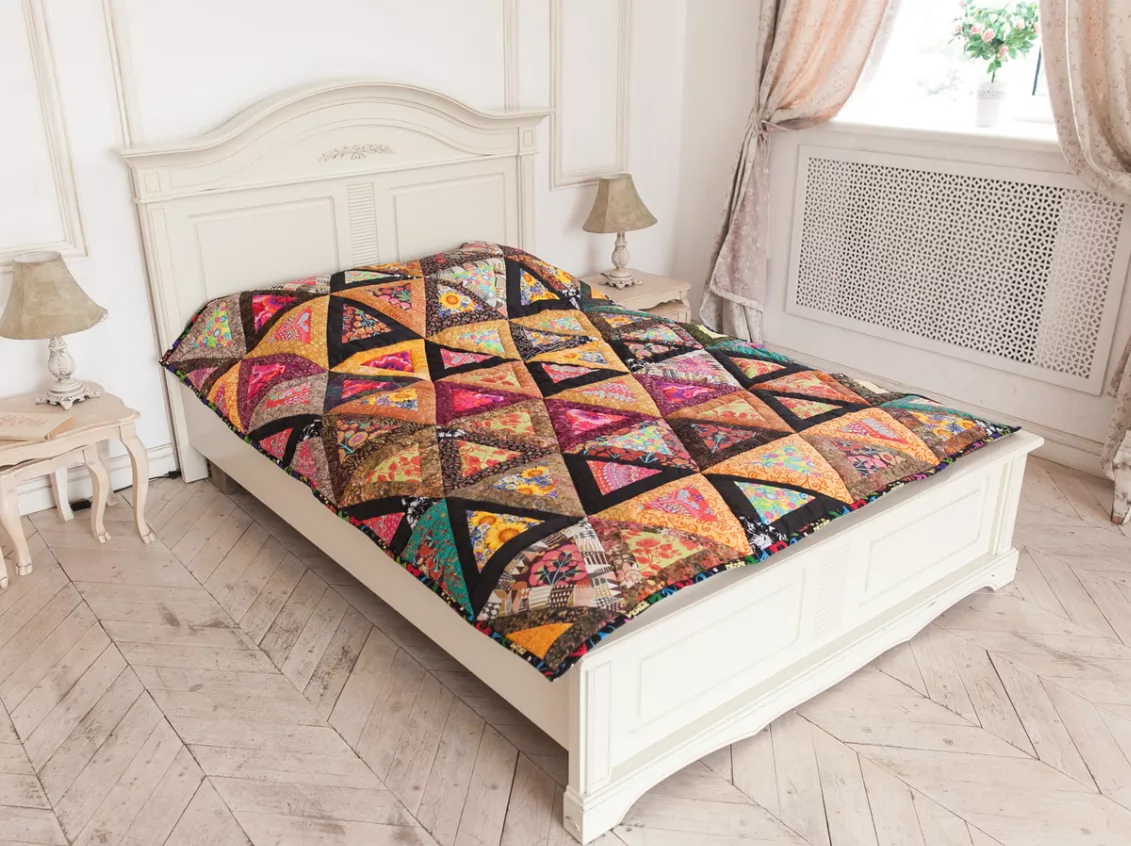
Hey Quilters! What if I told you that you never had to piece the back of a quilt ever again?! You may have started a quilt top and thought, oh no, what will I put on the back? The extra wide fabrics we have to offer on the website are perfect for this. It’ll save you SO much time, seem way less daunting, look really professional and can work out cheaper. Don’t just think about the back either! You can use extra wide fabrics for the front and applique over the top or practice your free motion quilting without hours spent on piecing blocks.

Wide Quilt Backing Fabrics

Pin for later!

Wide Fabrics Curtains And Home Decor

Wide Fabrics for Curtains and Home Decor

Think about those super size projects! Curtains, duvet covers or maybe something you’re upcycling. We have lots of gorgeous designs to choose from to suit any home.

HUGE Fabric Scraps!

Don’t forget when you have finished with your main project, you’ll have some super wide scraps to play with! Why not make some binding for your quilt that matches the back? Maybe you could make a cushion to match? OR start a whole new quilt!

Where can I buy Extra Wide fabric?

We have a huge selection of extra wide fabric to choose from at our sewing superstore, Plush Addict. We’re based in the UK and will ship your order the same day if you order before 3pm, so you can get sewing in no time!

Extra Wide Fabric Guide New Blog

Pin this on Pinterest for later

If you found this blog useful, why not leave us a comment?

A Guide To Bias Binding

A Guide To Bias Binding

Reading Time: 8 Minutes

Bias binding is a seam-stars best friend! 

Have you ever used it before? 

We use it ALL the time in our in-house projects and everyday sewing, it’s used to cover those not so pretty raw edges and gives a project a neat finish.

As well as being available in multiple colours adding a dash of excitement to your project!

Did you know you can use bias binding on a range of different materials and projects?

It’s suitable to use on garments, quilts, cushions and much more and come in various different materials too!

Pin For Later!

Never miss another tutorial or guide…

Stay up to date with the latest by signing up to our newsletter!

Click to join our mailing list!

Types Of Bias Binding

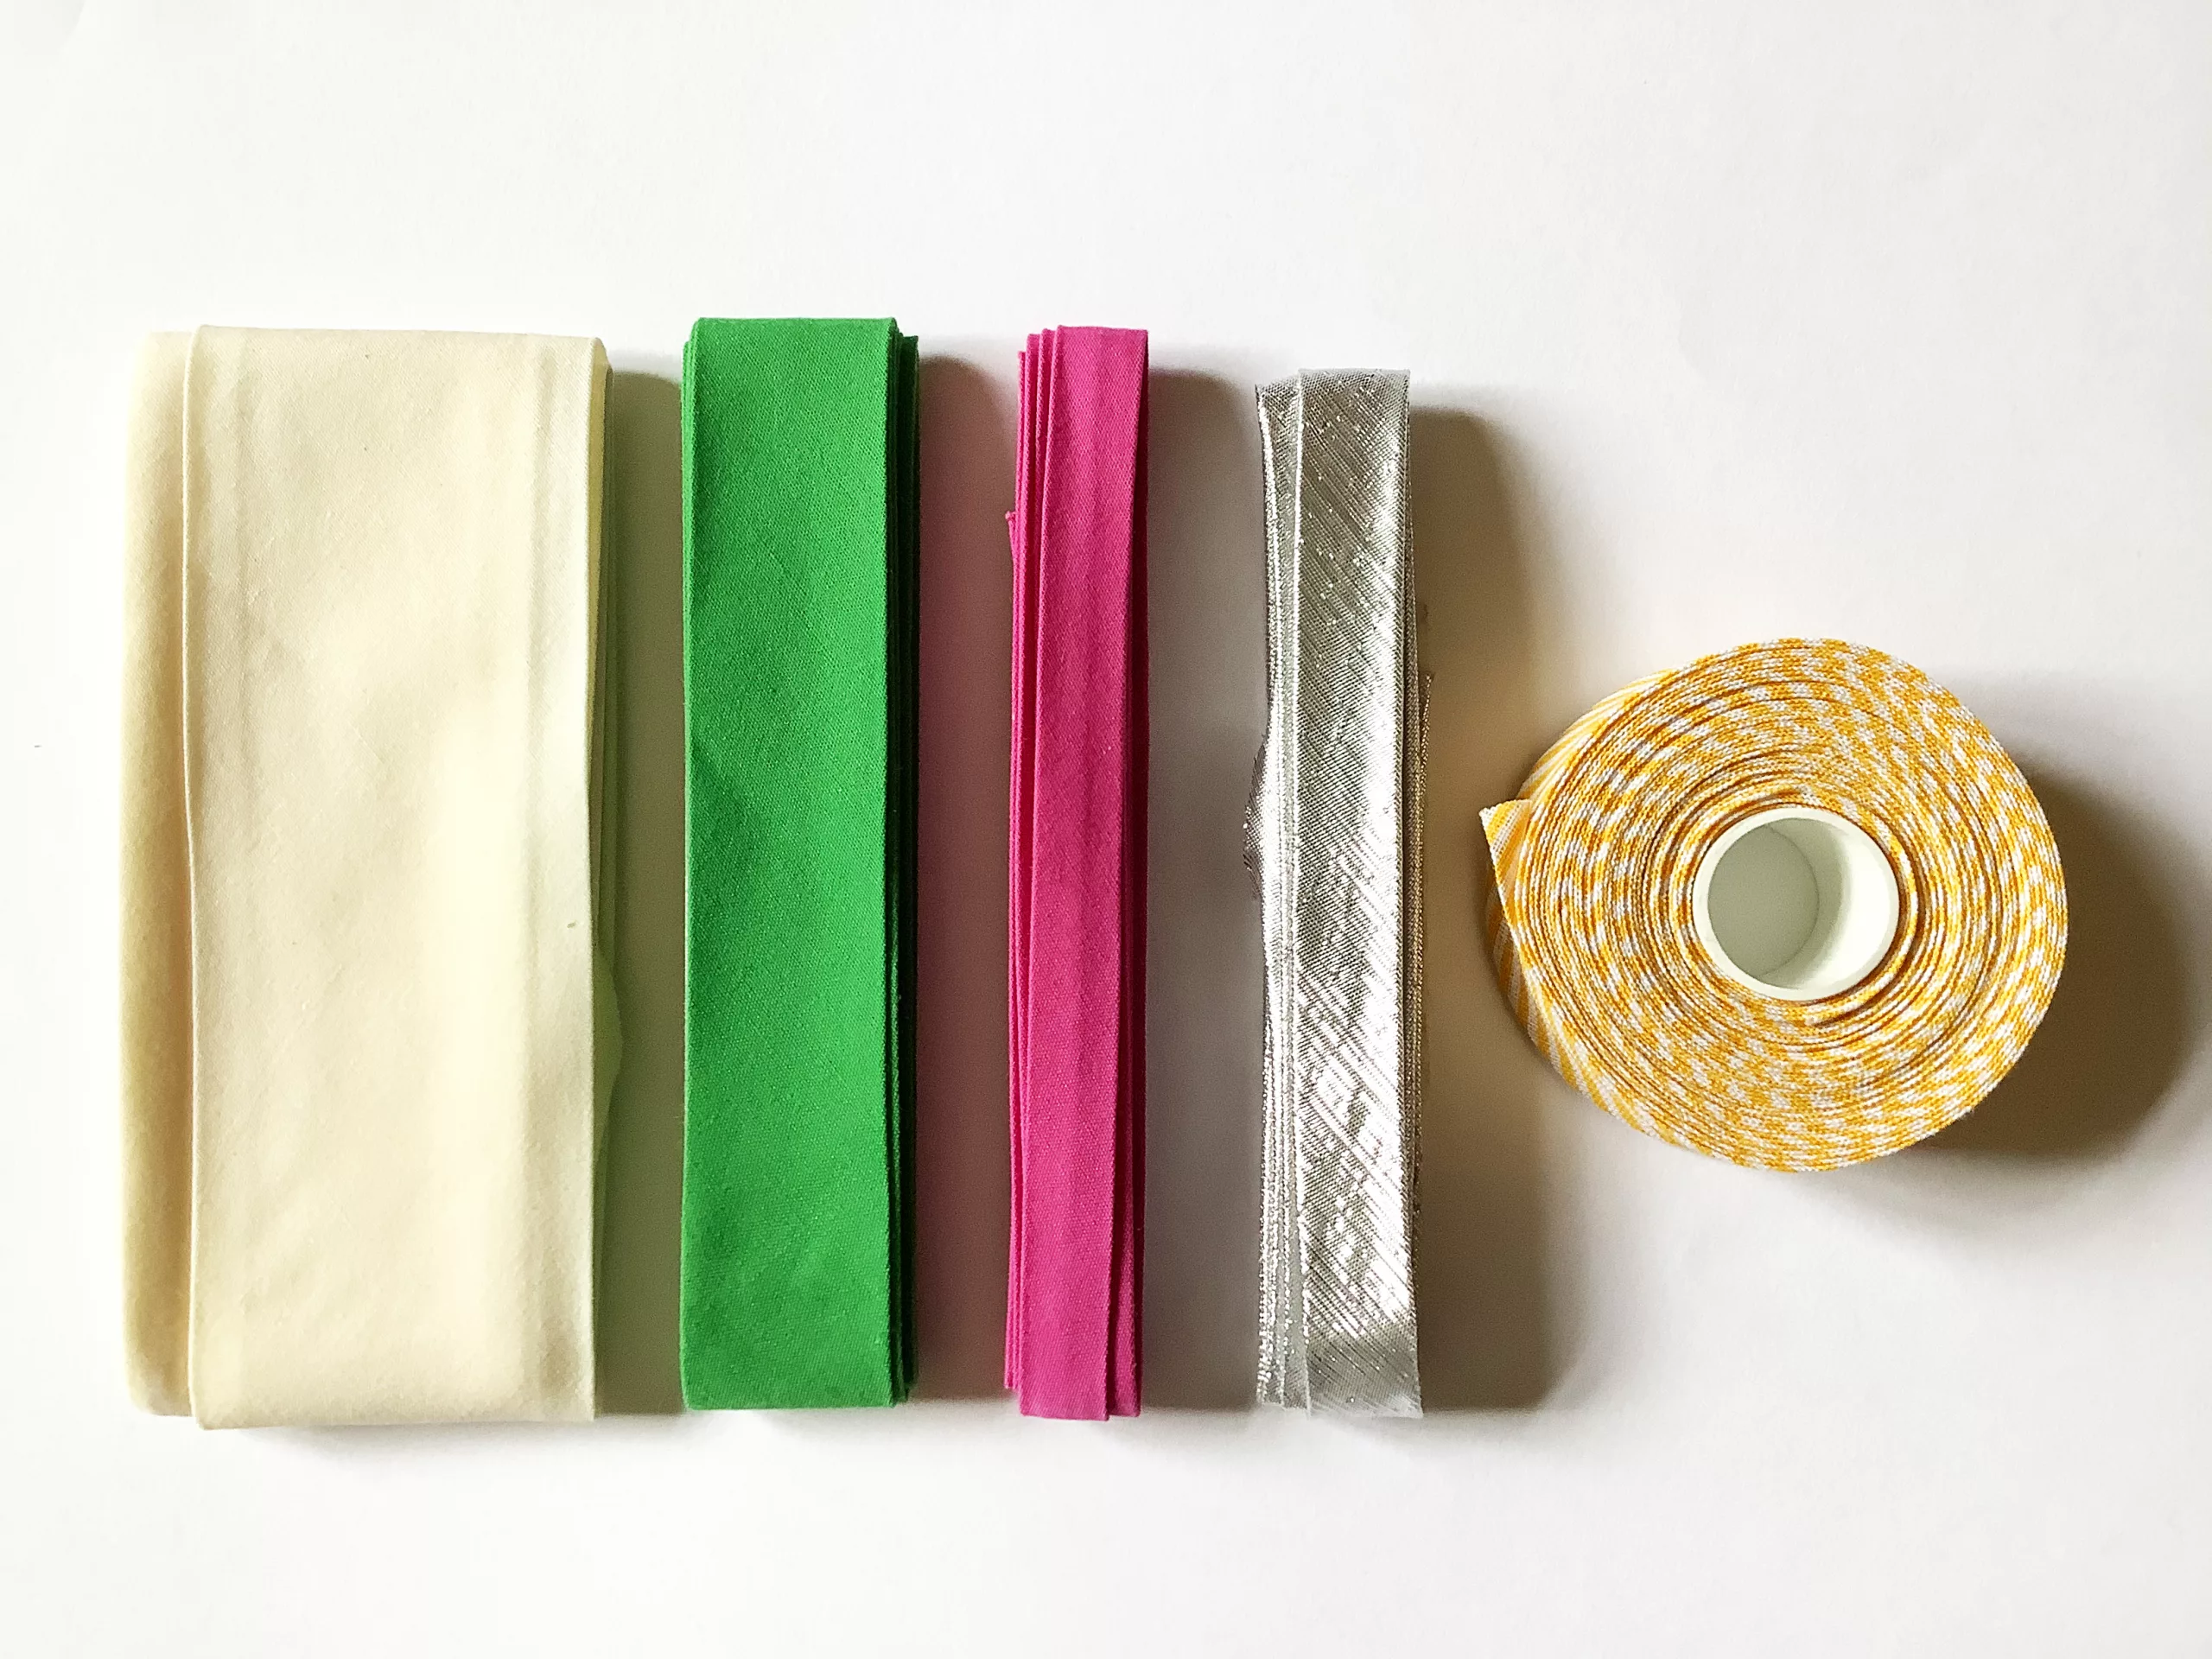
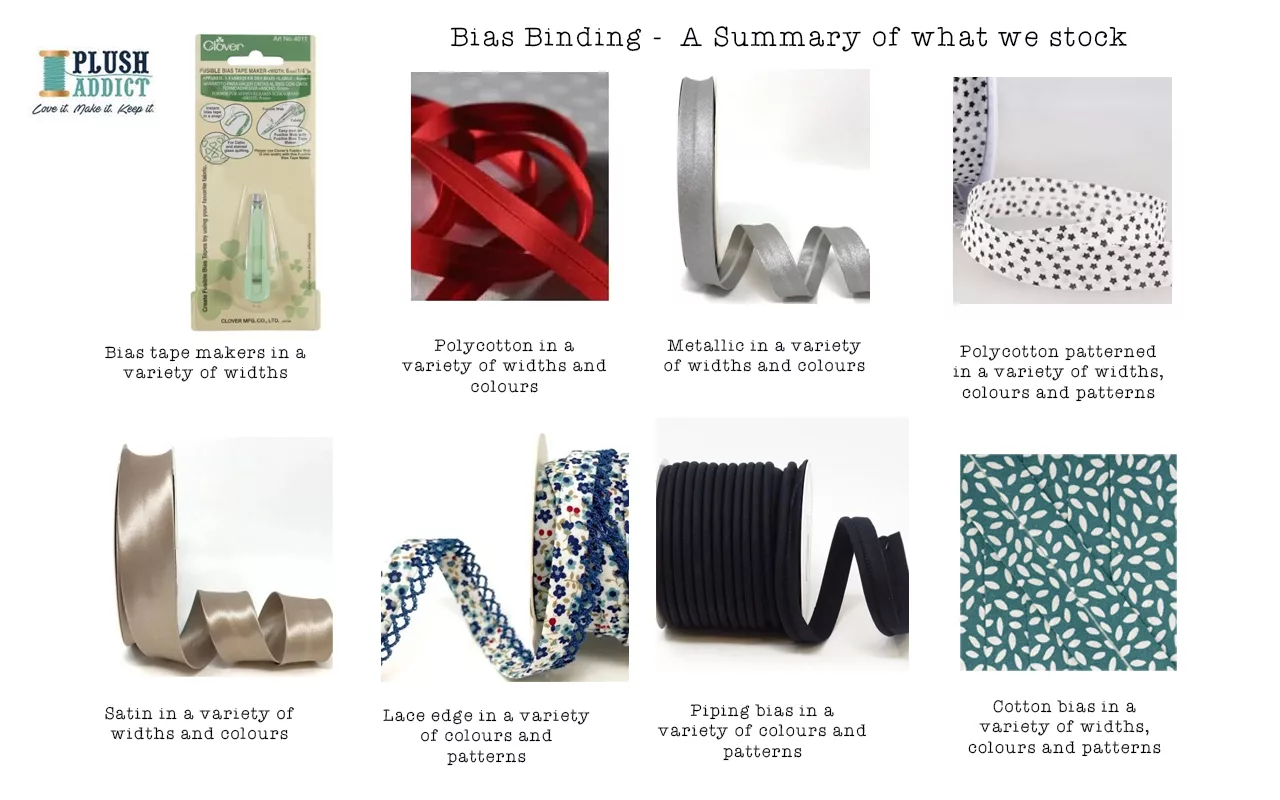
You can find different colours of bias binding ranging from white to blue, to red to pink to black to match any fabric colour! We stock 144 colours of our 20mm bias binding tape!

As well as different colours, bias binding tape also comes in different materials such as cotton, polycotton, metallic, patterned, satin, velvet and leatherette suitable for most types of projects.

And if you’re still on the fence about using this bias tape for your sewing projects this might just sway you… you can get different types of bias binding! There’s plain, piping, stretch, lace edge, iron on and blanket bias binding!

Making your own bias binding is also an alternative to buying it ready made and can often work out much cheaper! We’ll go into detail further on in the guide on how to make your own bias binding.

What’s The Difference Between Single Fold And Double Fold Bias Binding?

We’ll also go over the different types of bias binding. 

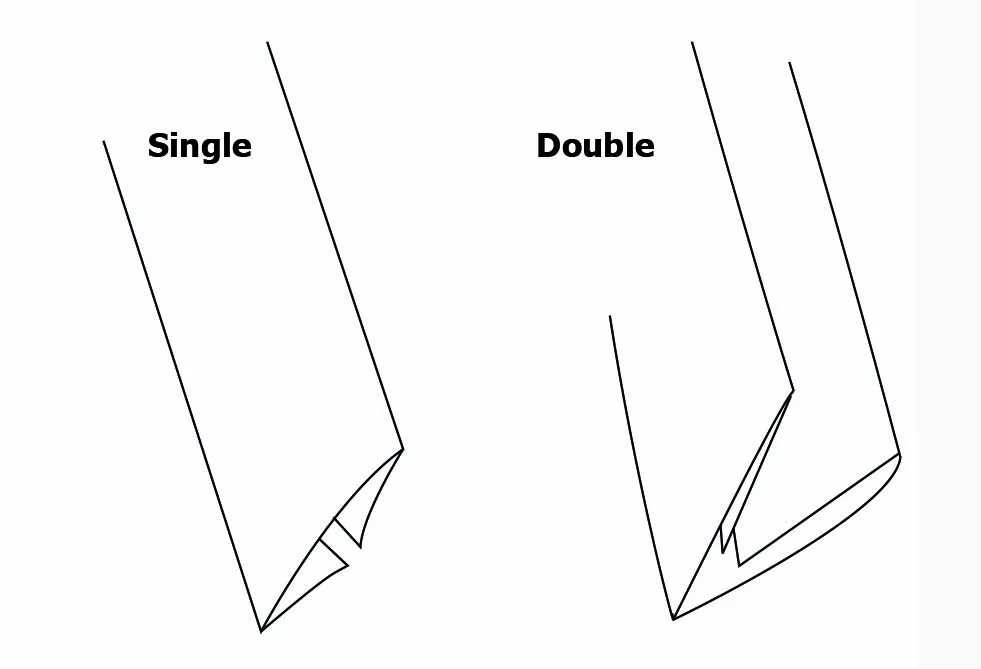
There’s 2 main types, single and double bias tape and you can differentiate both by the way they fold up. 

Single fold tape has both edges folded towards the middle, creating a fold down each side of the bias tape.. 

Whereas double fold is similar to a single fold bias binding, but with an added extra fold in the centre of the bias. 

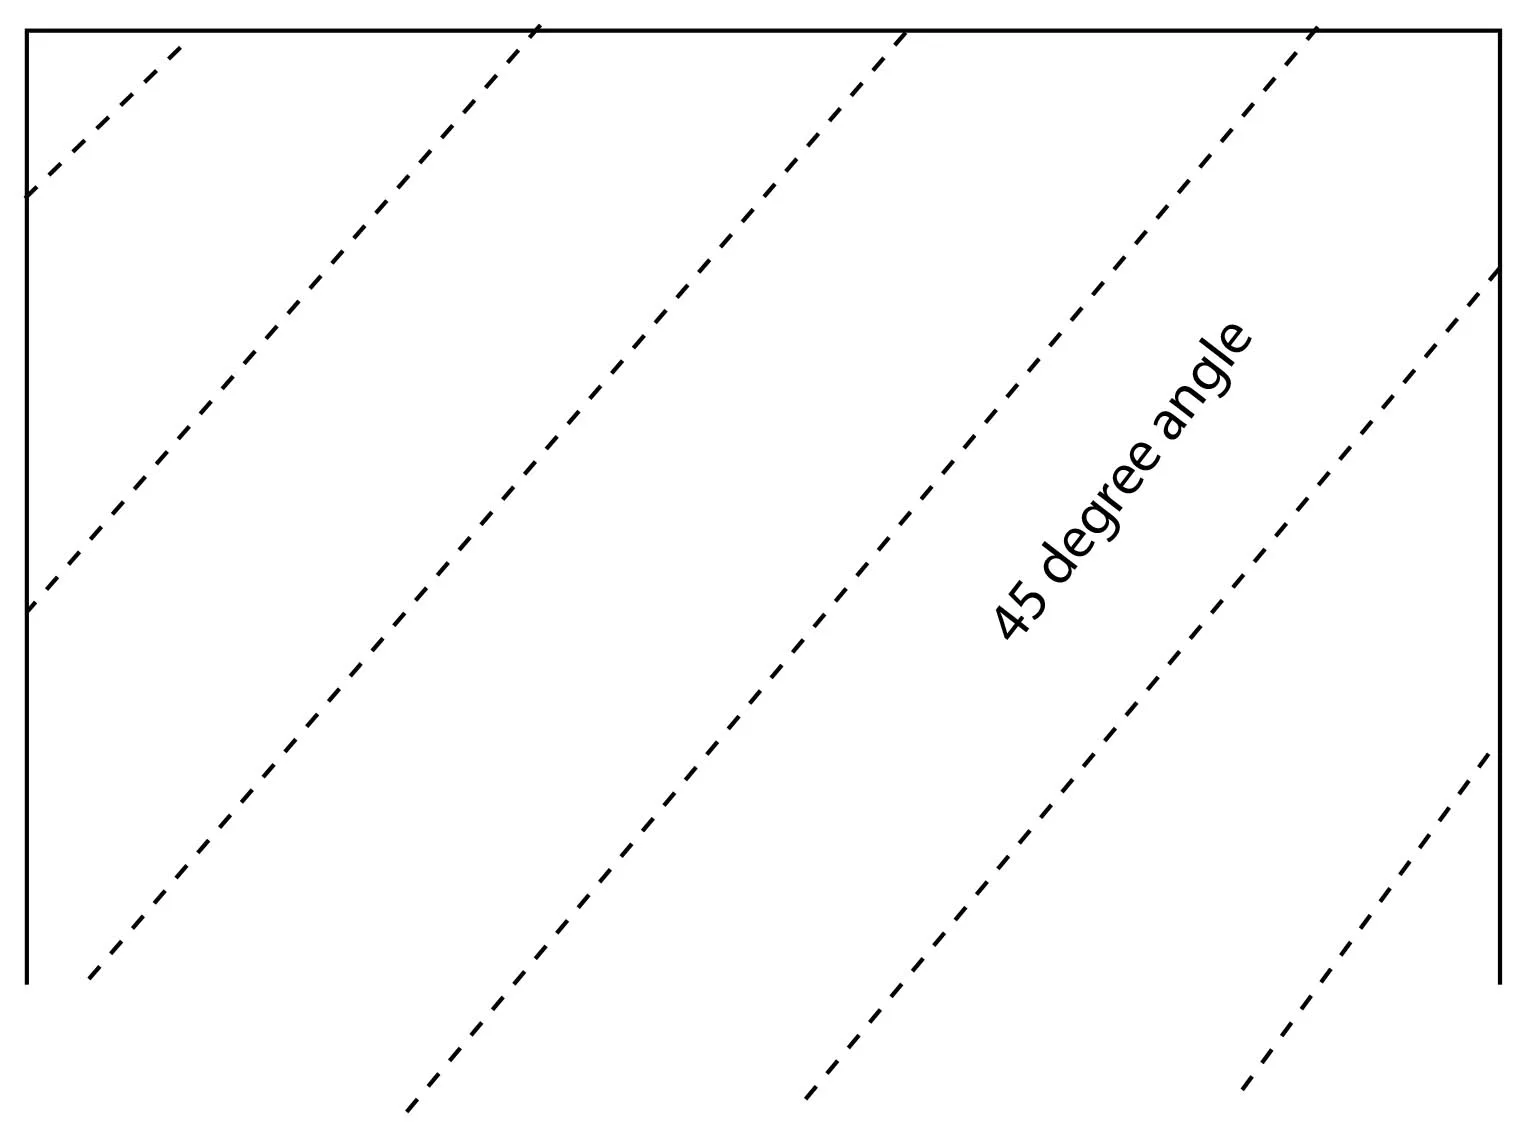
All bias binding is cut at a 45-degree angle to allow for stretch and use on project corners! 

So let’s get into the guide, we’ll go over how to make bias binding, how to attach bias binding, how to sew bias binding corners and more!

How To Make Bias Binding

Knowing how to make bias binding (also known as bias tape) is a life-long skill for any sewist!

The advantages of making handmade bias binding tape are that you can decide on the exact width and pattern that you want, it can also be more cost effective saving you money by using fabrics from your stash.

Plus you can match it perfectly with your project by using the same fabric!

We’d recommend investing in a bias making tool, they’re worth the money and can save so much time. However they come in various different sizes so make sure you choose the correct size for your project.

Want to learn how to make and how to cut your own bias binding tape? Read on!

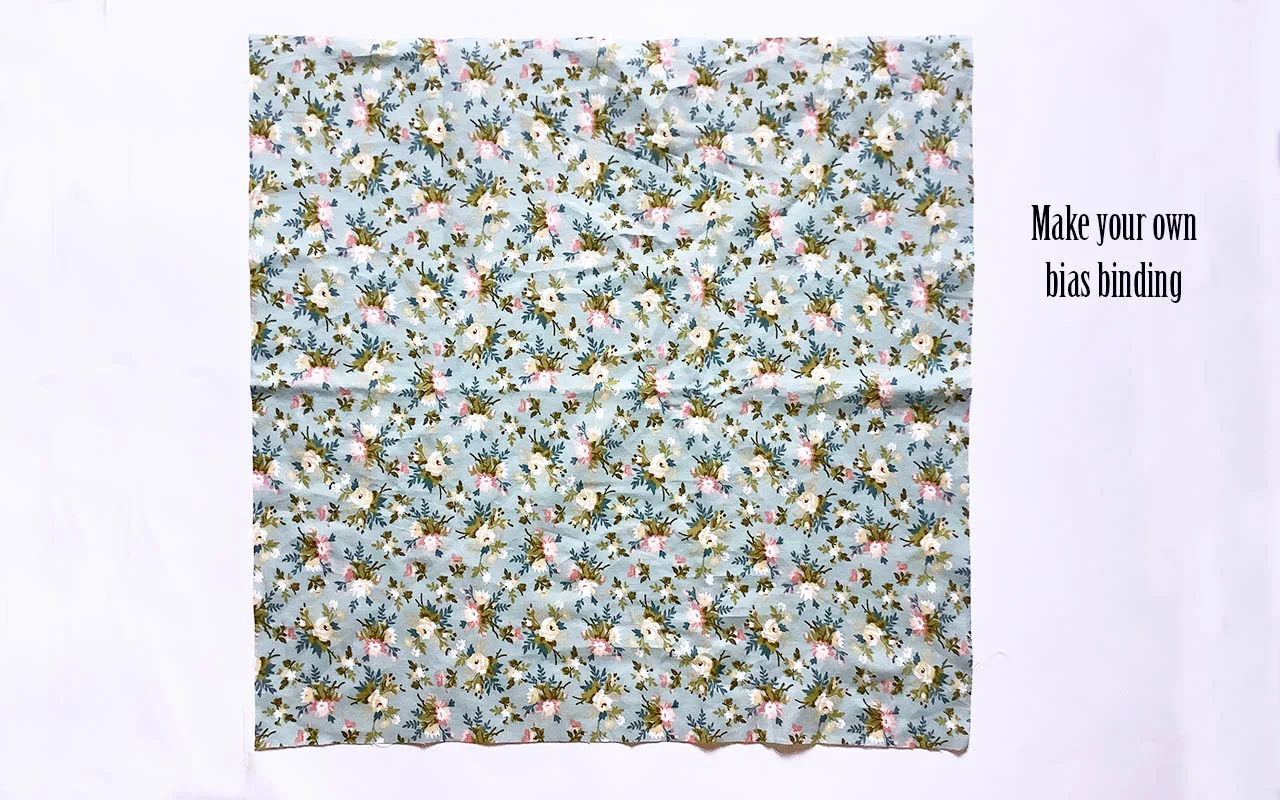
Make Your Own Bias Binding Step-by-Step

Step 1: Take your piece of fabric

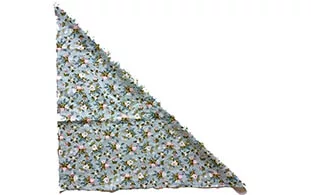
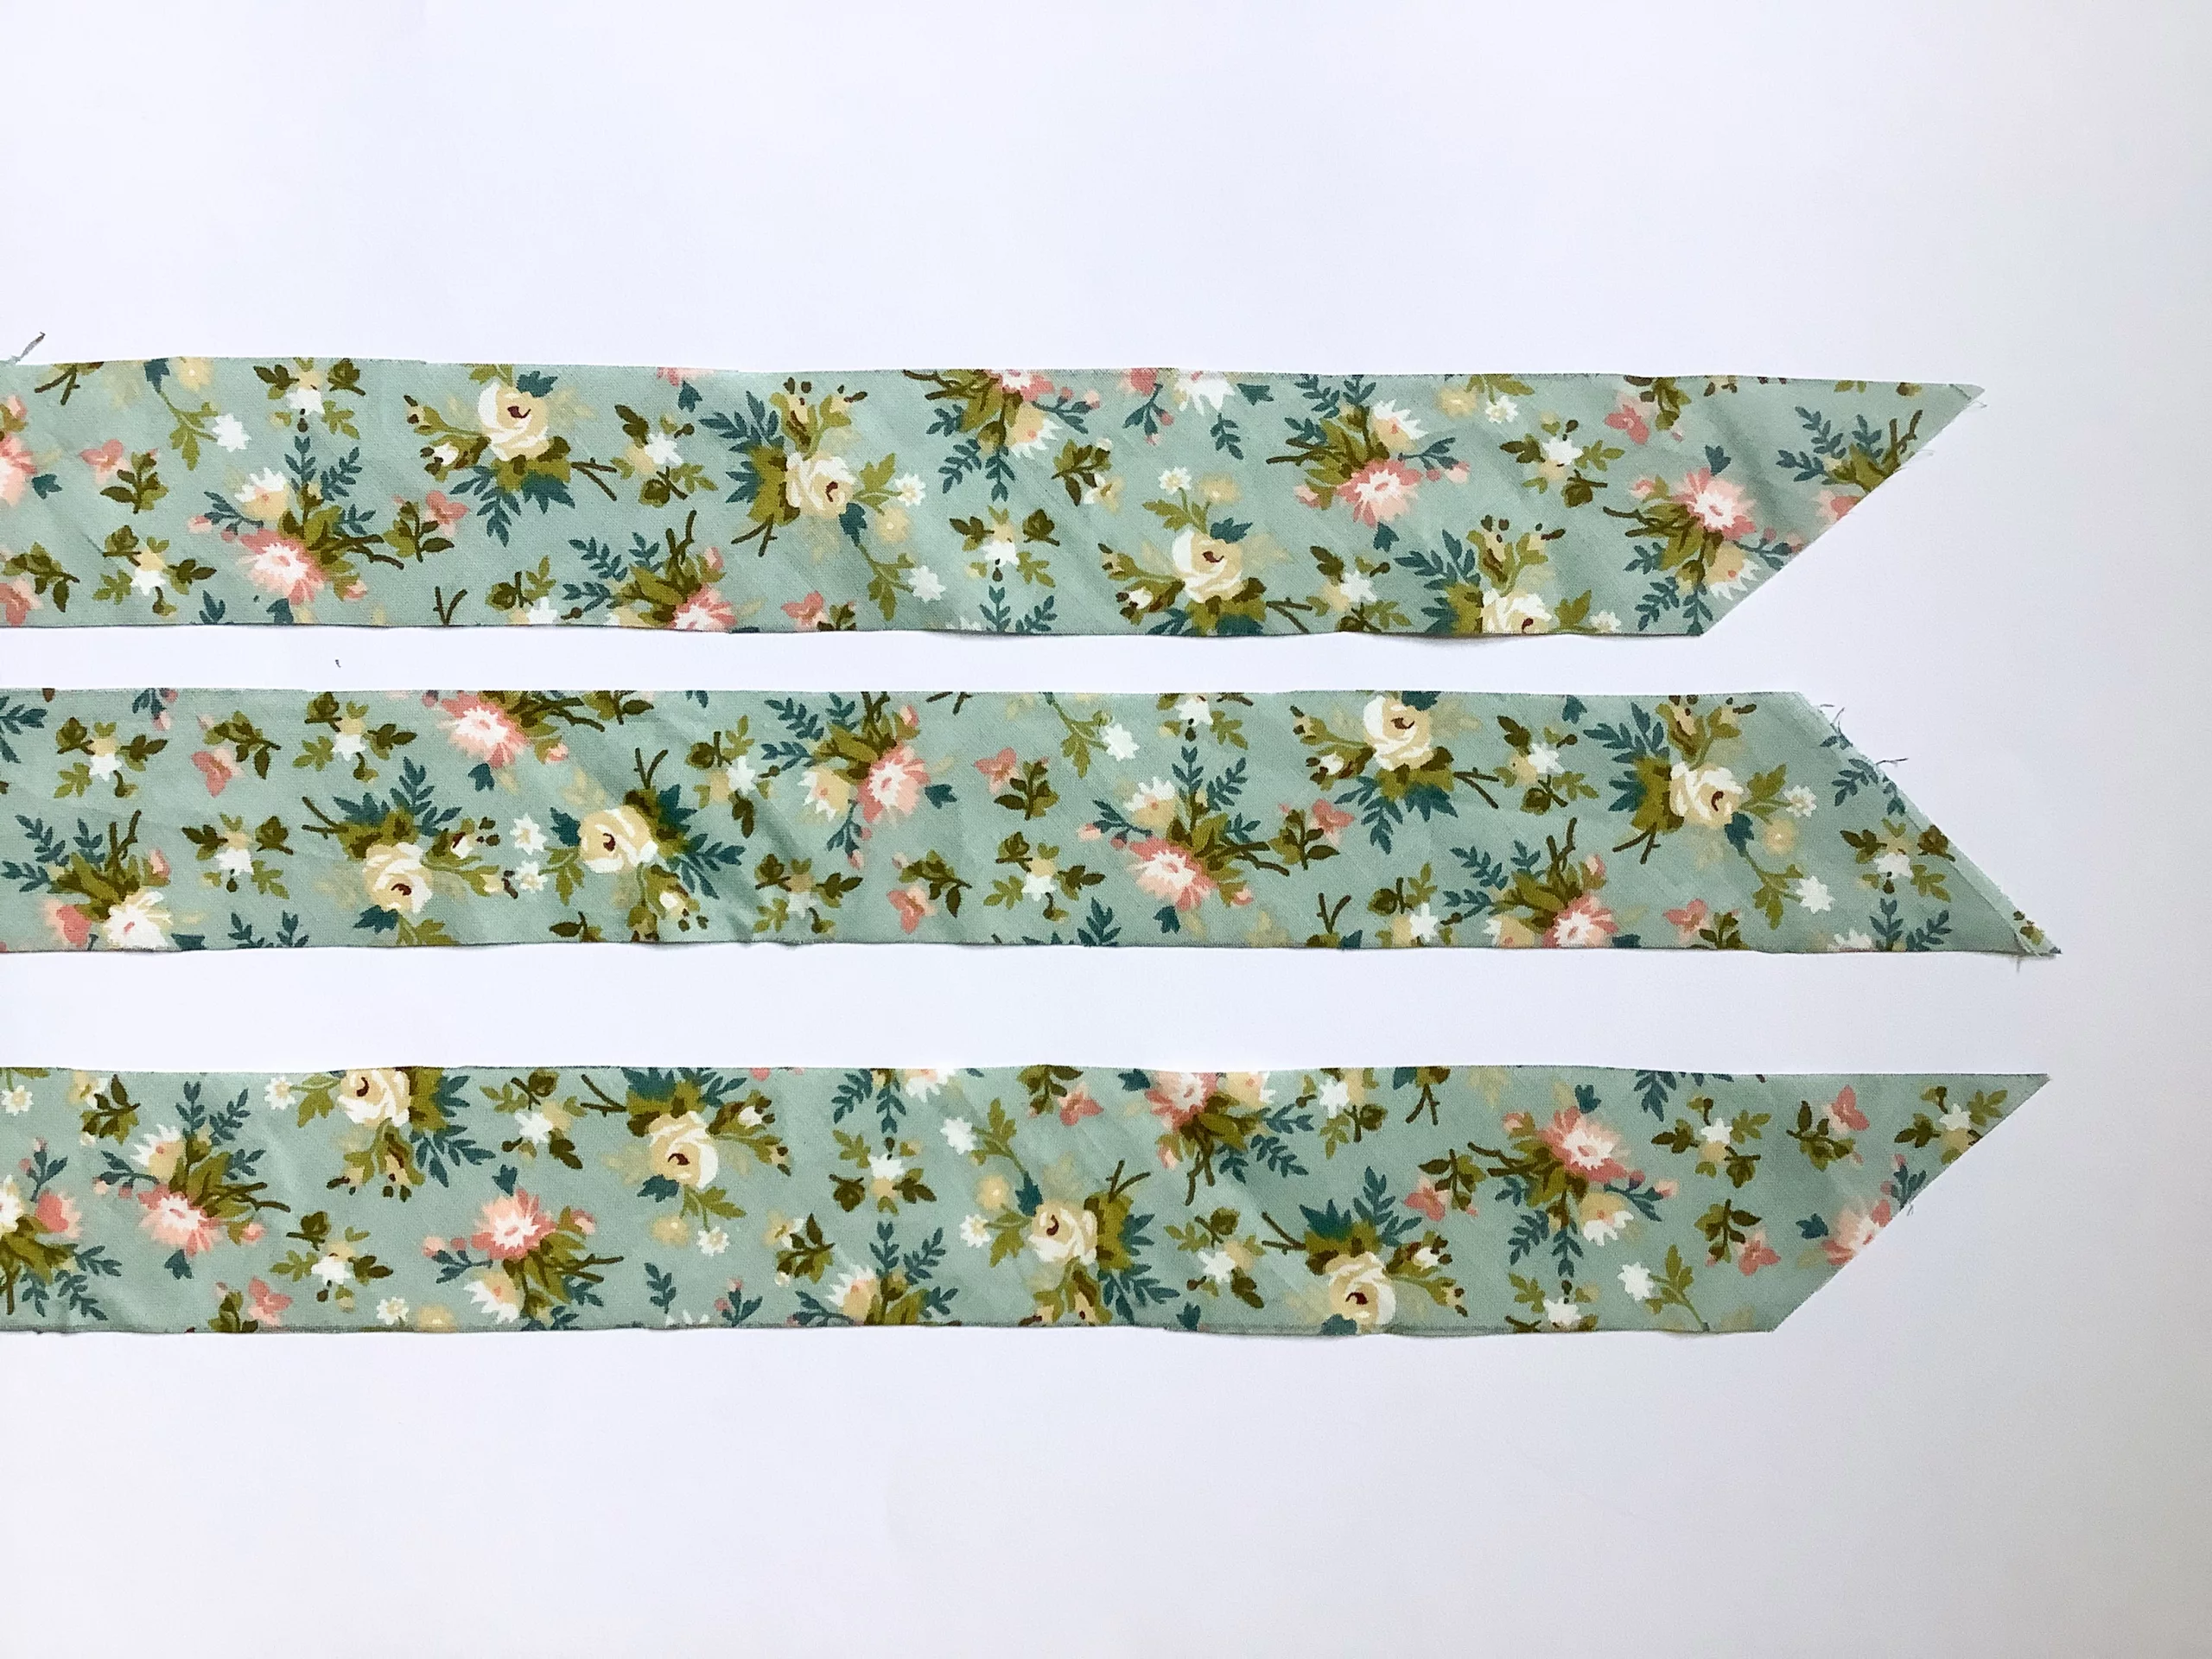
Step 2: Take the top right-hand edge to meet the bottom edge creating a triangle and press.

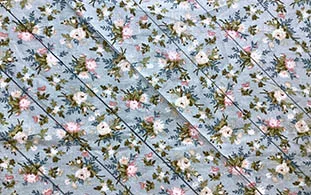
Step 3: Use a ruler and fabric marker to draw strips parallel to the fold. If you are using a bias tool.

Step 4: Cut the strips using fabric scissors or a rotary cutter.

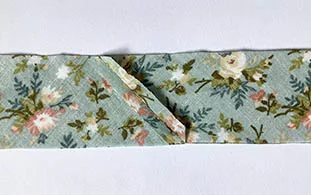
Step 5: Overlap the ends of two strips at a 90-degree angle and pin in place.

Step 6: Stitch together and press back the seams. Trim the seam edges that overhang. Continue to piece all your strips together in this way until you have enough to go around the edge of your project.

Ways To Fold Your Binding

Option 1: Use a bias binding maker

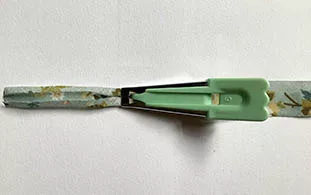
Once you have all your strips joined, feed one end of the strip into the wide end of the maker.

Next, pull the strip out of the narrow end of the bias binding maker.

Move the maker along with the strip, pressing it with a hot iron as you go.

When finished, wind the bias binding tape around some strong card to keep it flat and pressed.

Option 2: If you don’t have a binder maker.

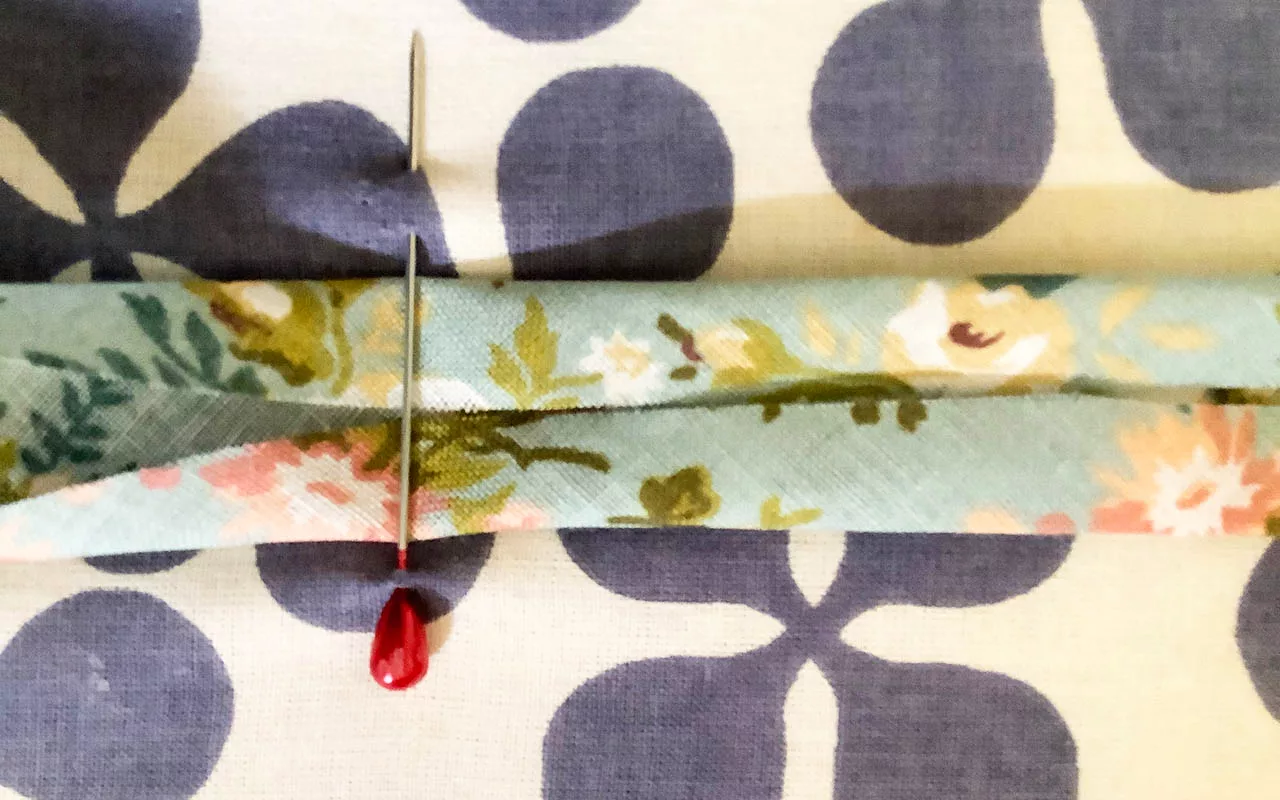
If you don’t have a tool, you can press by hand or use a pin on your ironing board as a guide.

To use the pin method, use a fabric marker to mark two points half the width of your fabric strip.

Insert a pin between these marks.

Pass the strip under the pin pressing with an iron as you go.

Never miss another tutorial or guide…

Stay up to date with the latest by signing up to our newsletter!

Click to join our mailing list!

How To Attach Bias Binding

Curves

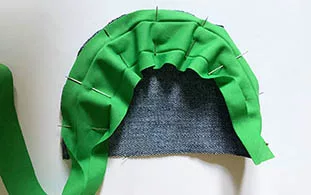
Applying and sewing bias binding around curves may seem daunting at first but it isn’t as difficult as you might think.

Follow our step by step bias binding tutorial to learn how to sew bias binding around curves and how to attach bias binding to a project.

Applying Bias Binding Step-by-Step

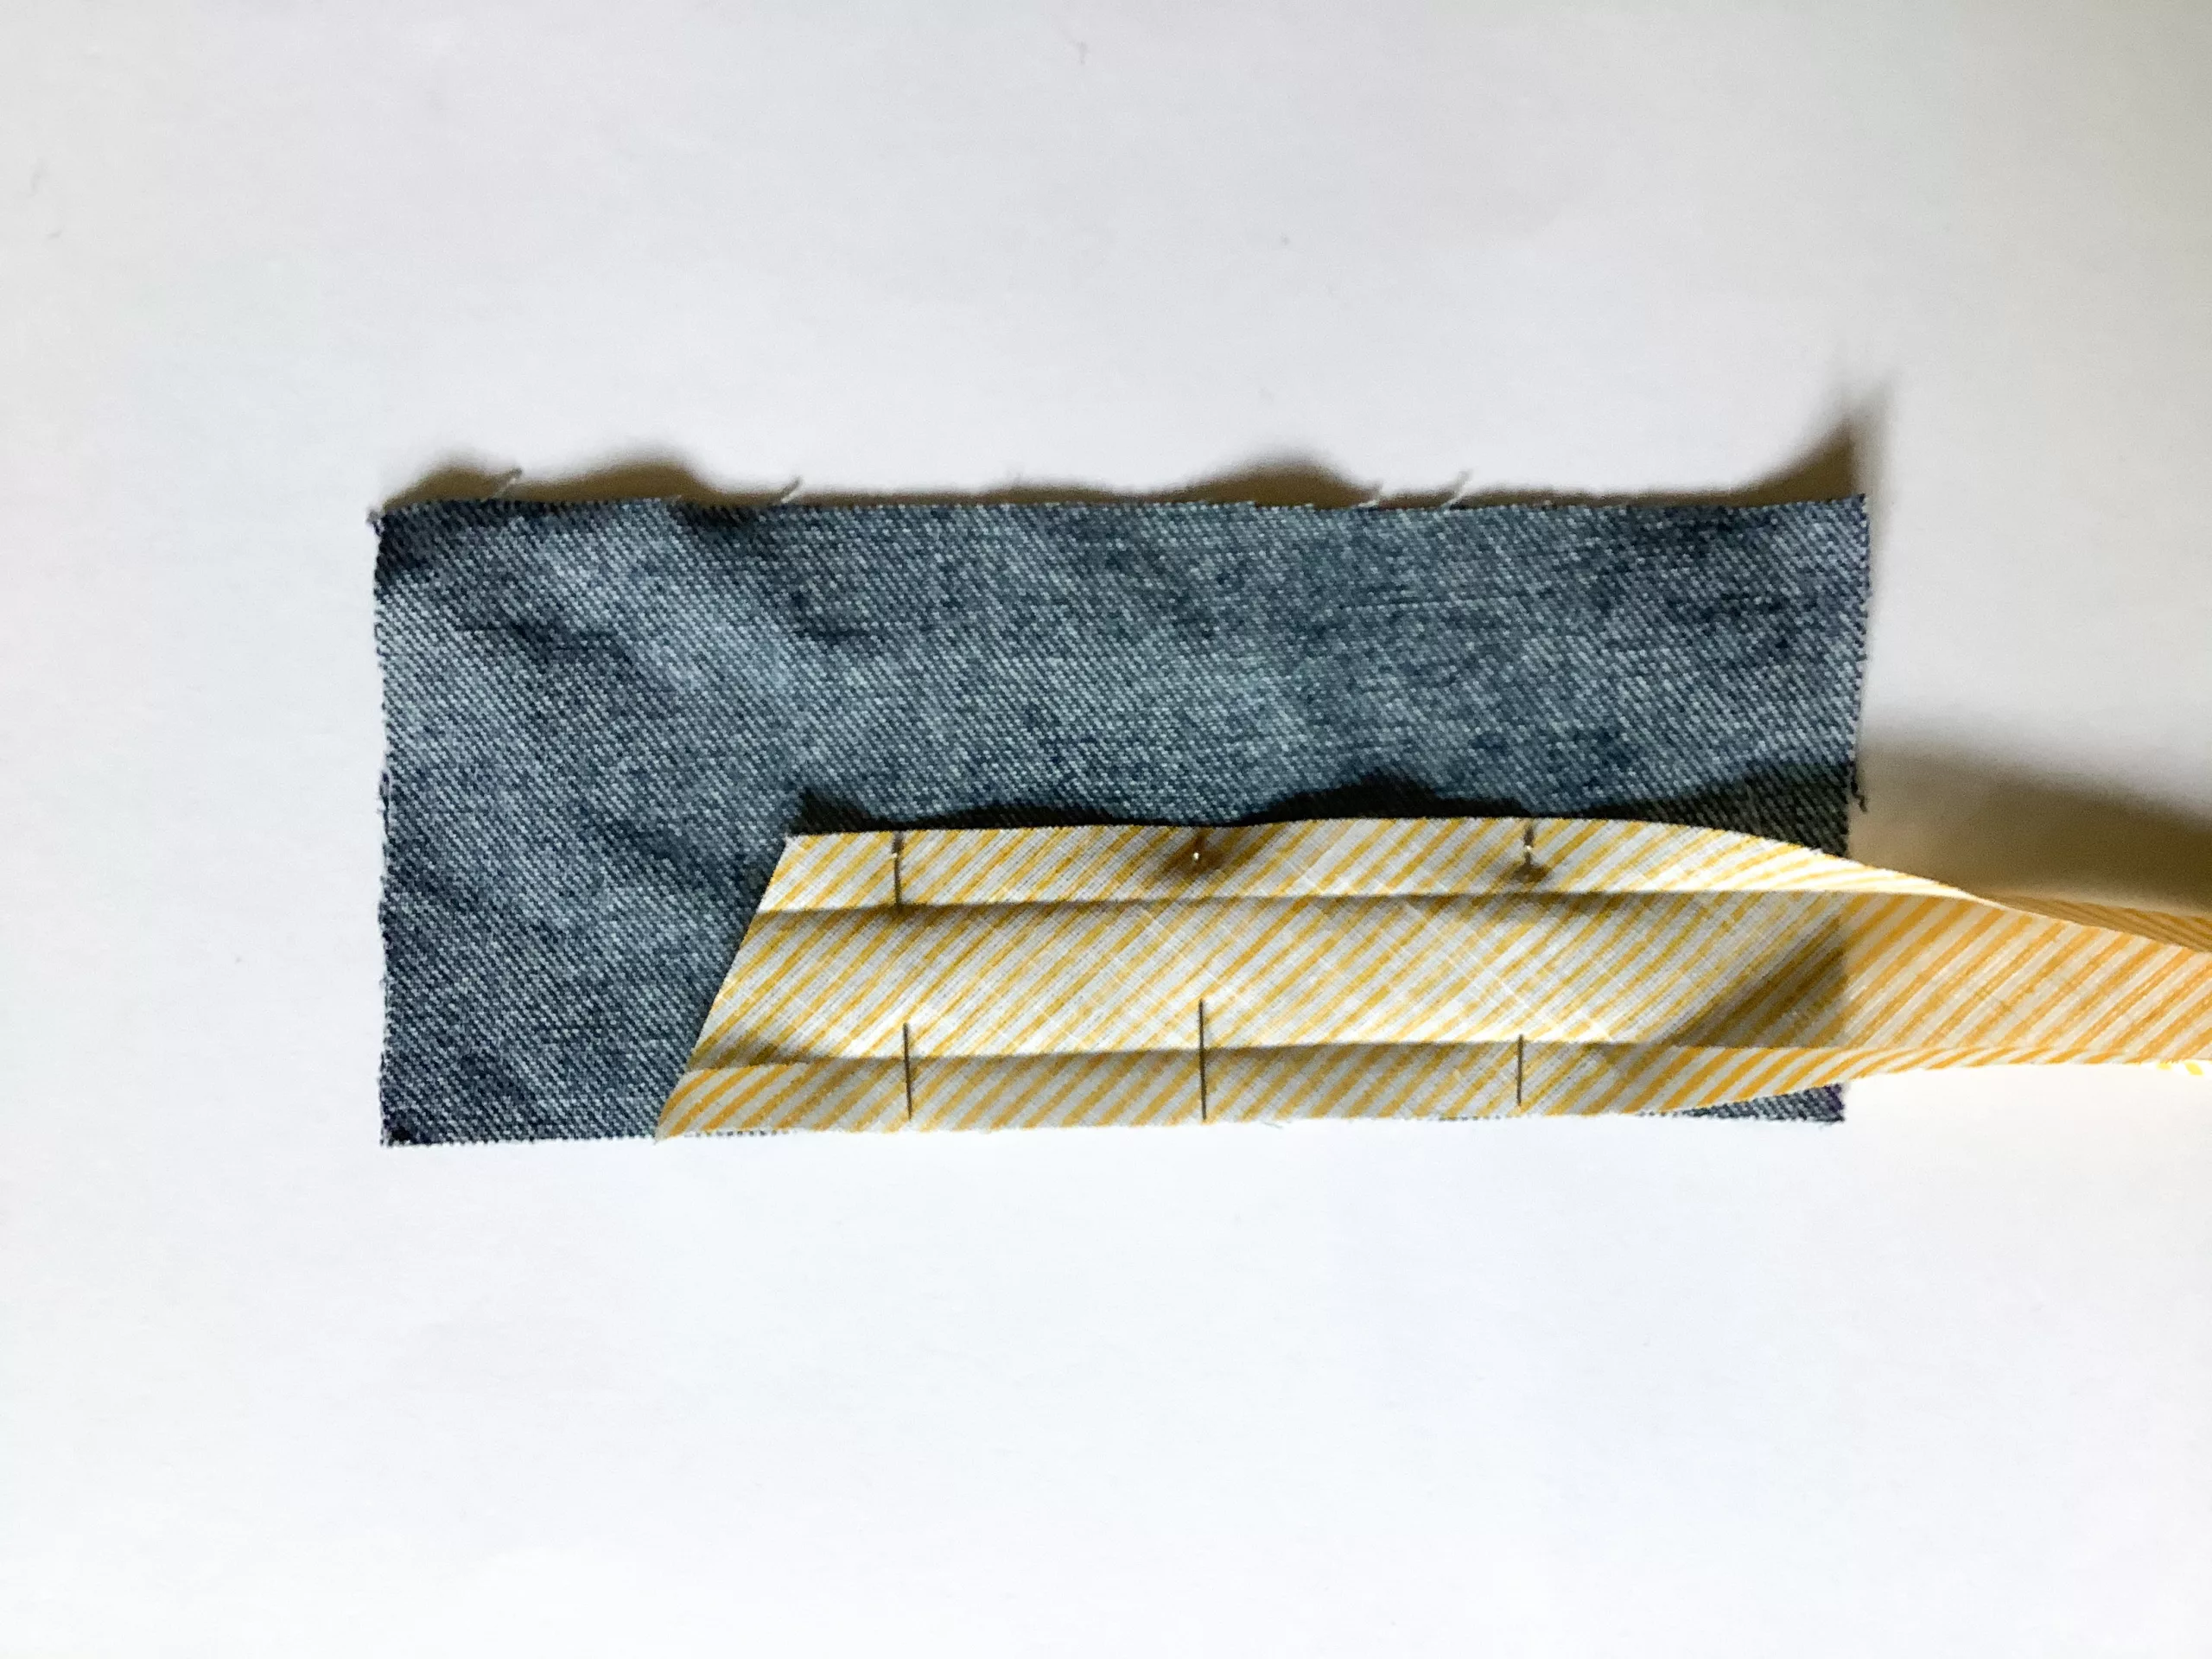
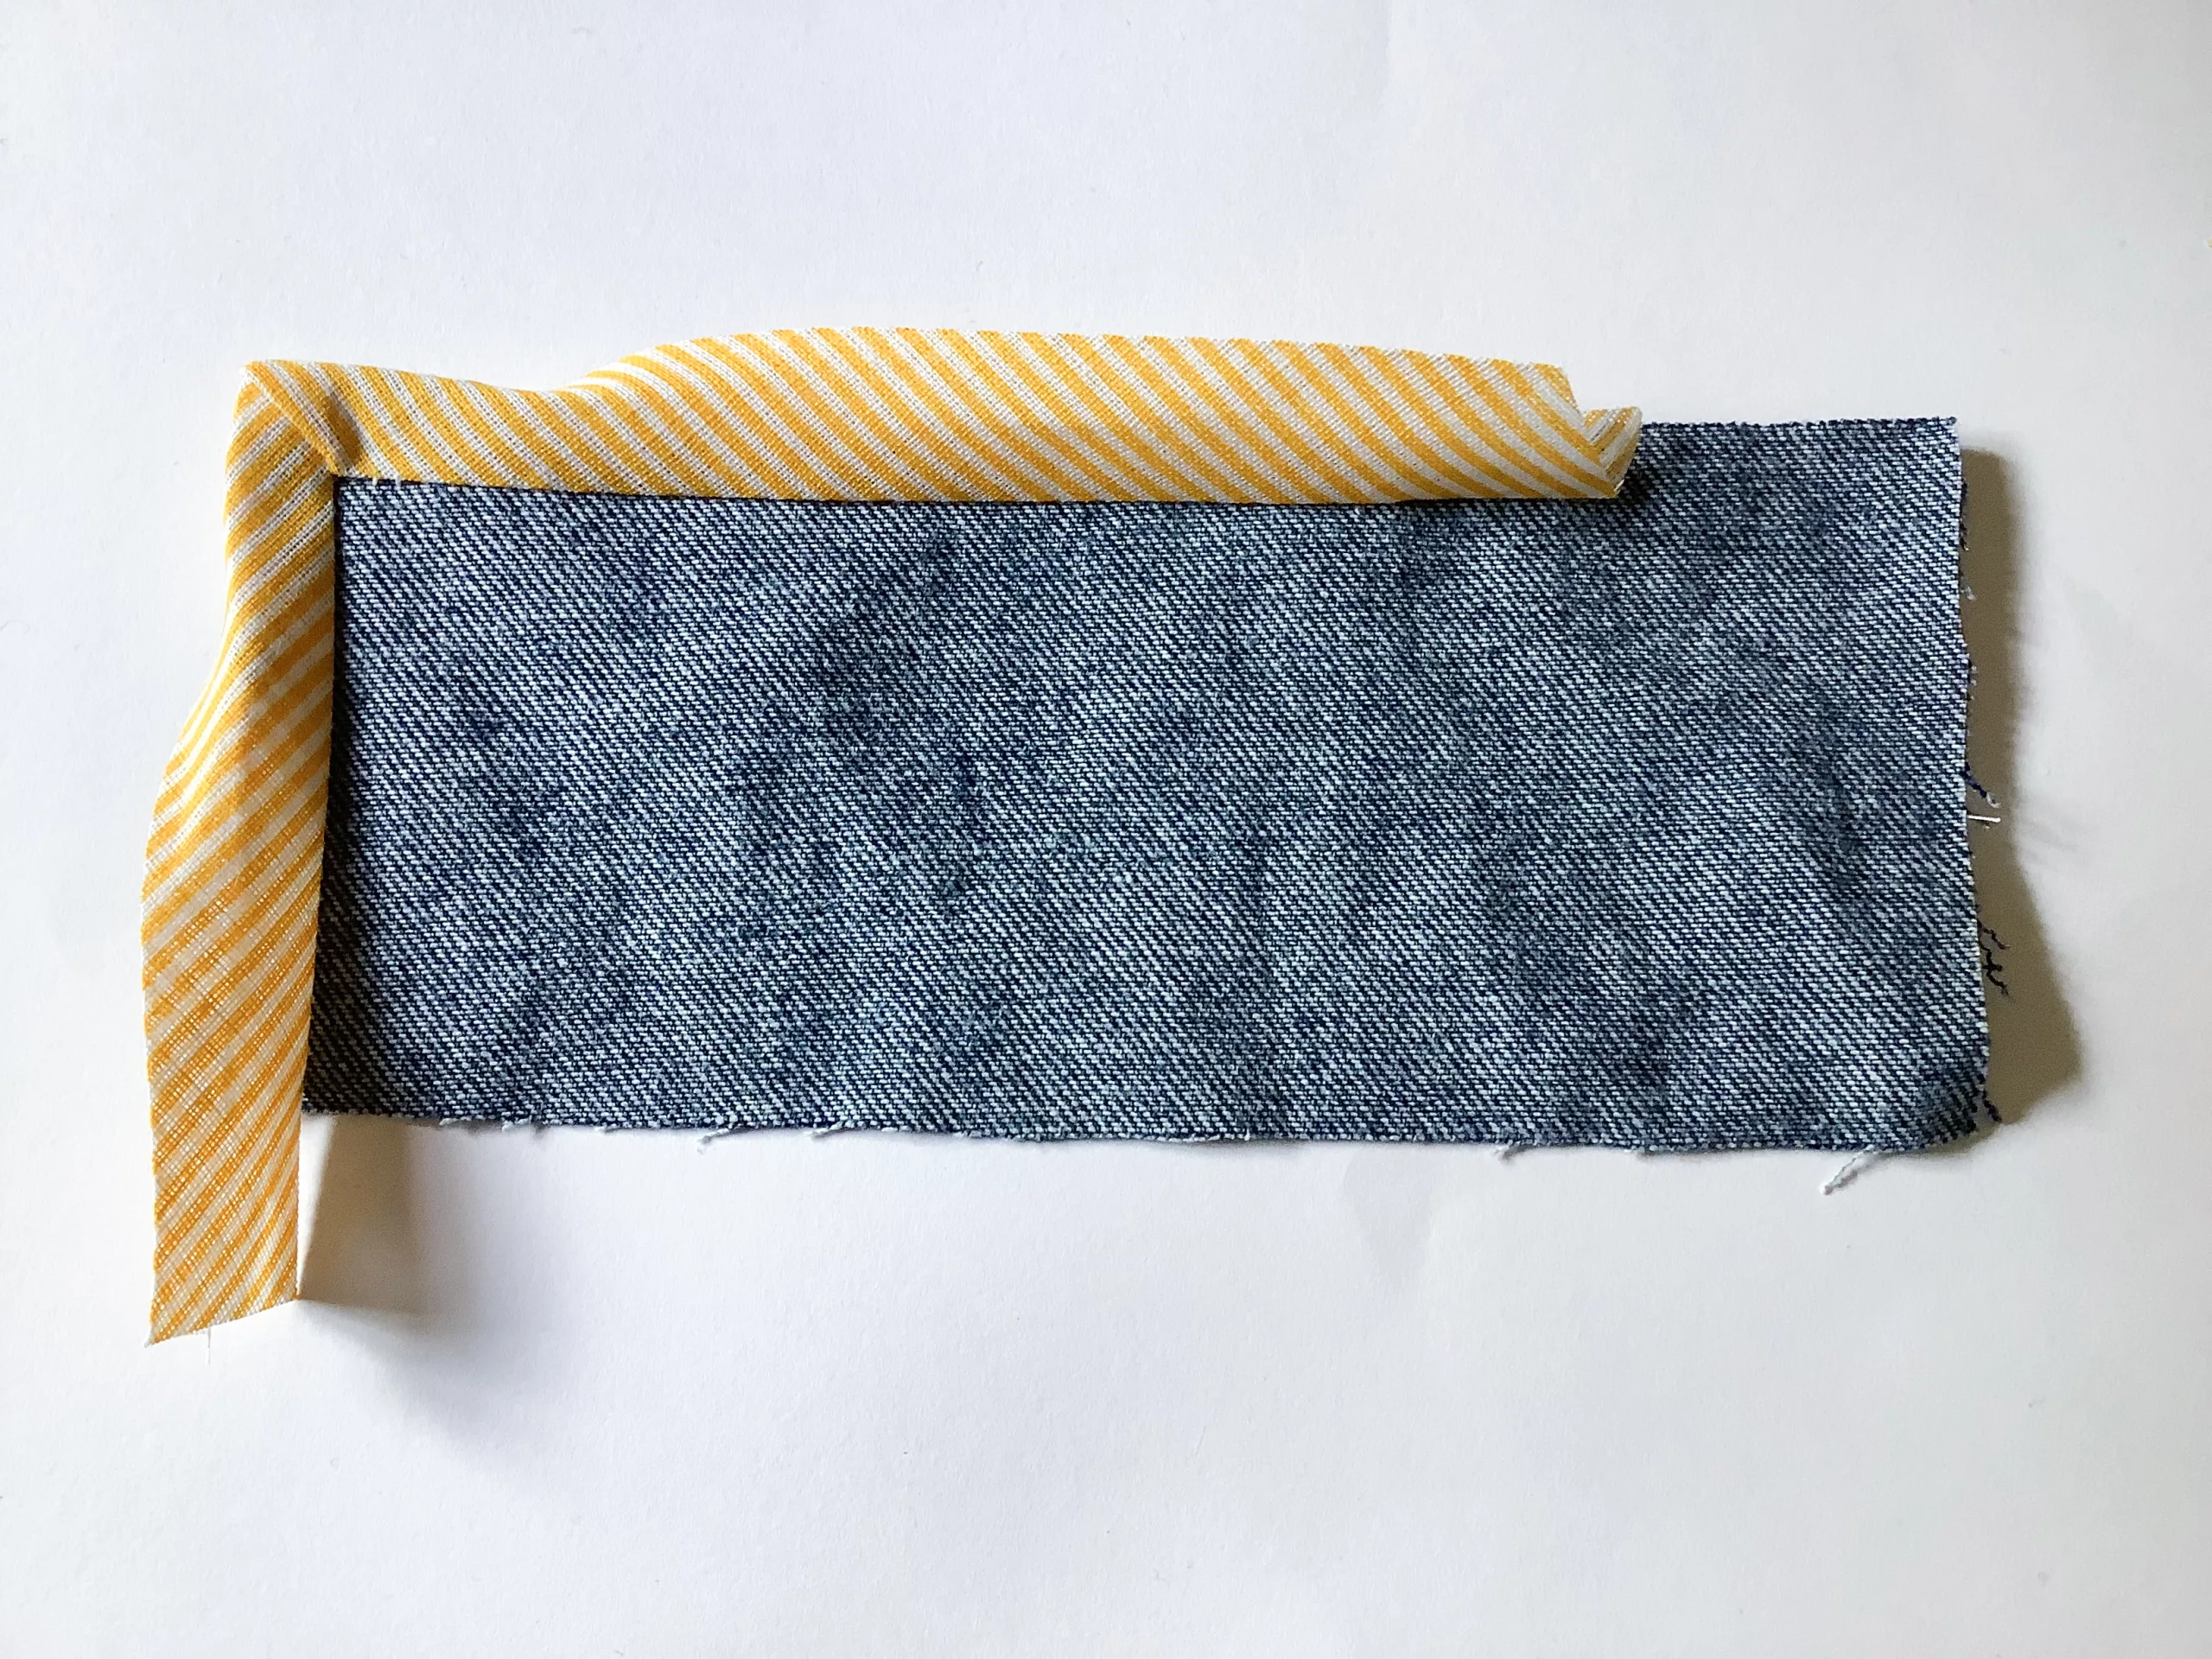
Step 1: Unfold the bias tape and line up the edge with the edge of your fabric.

Make sure your right sides are facing each other and pin in place.

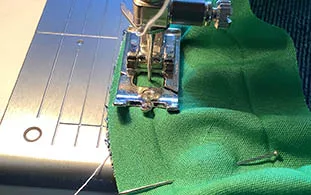
Step 2: You will get some puckering but don’t worry about that. Slowly stitch along the fold line.

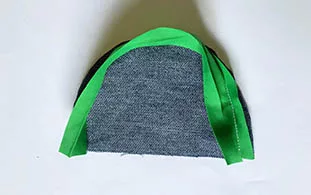
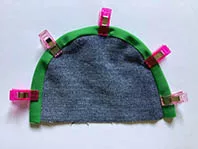
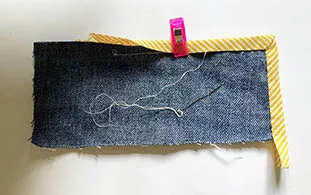
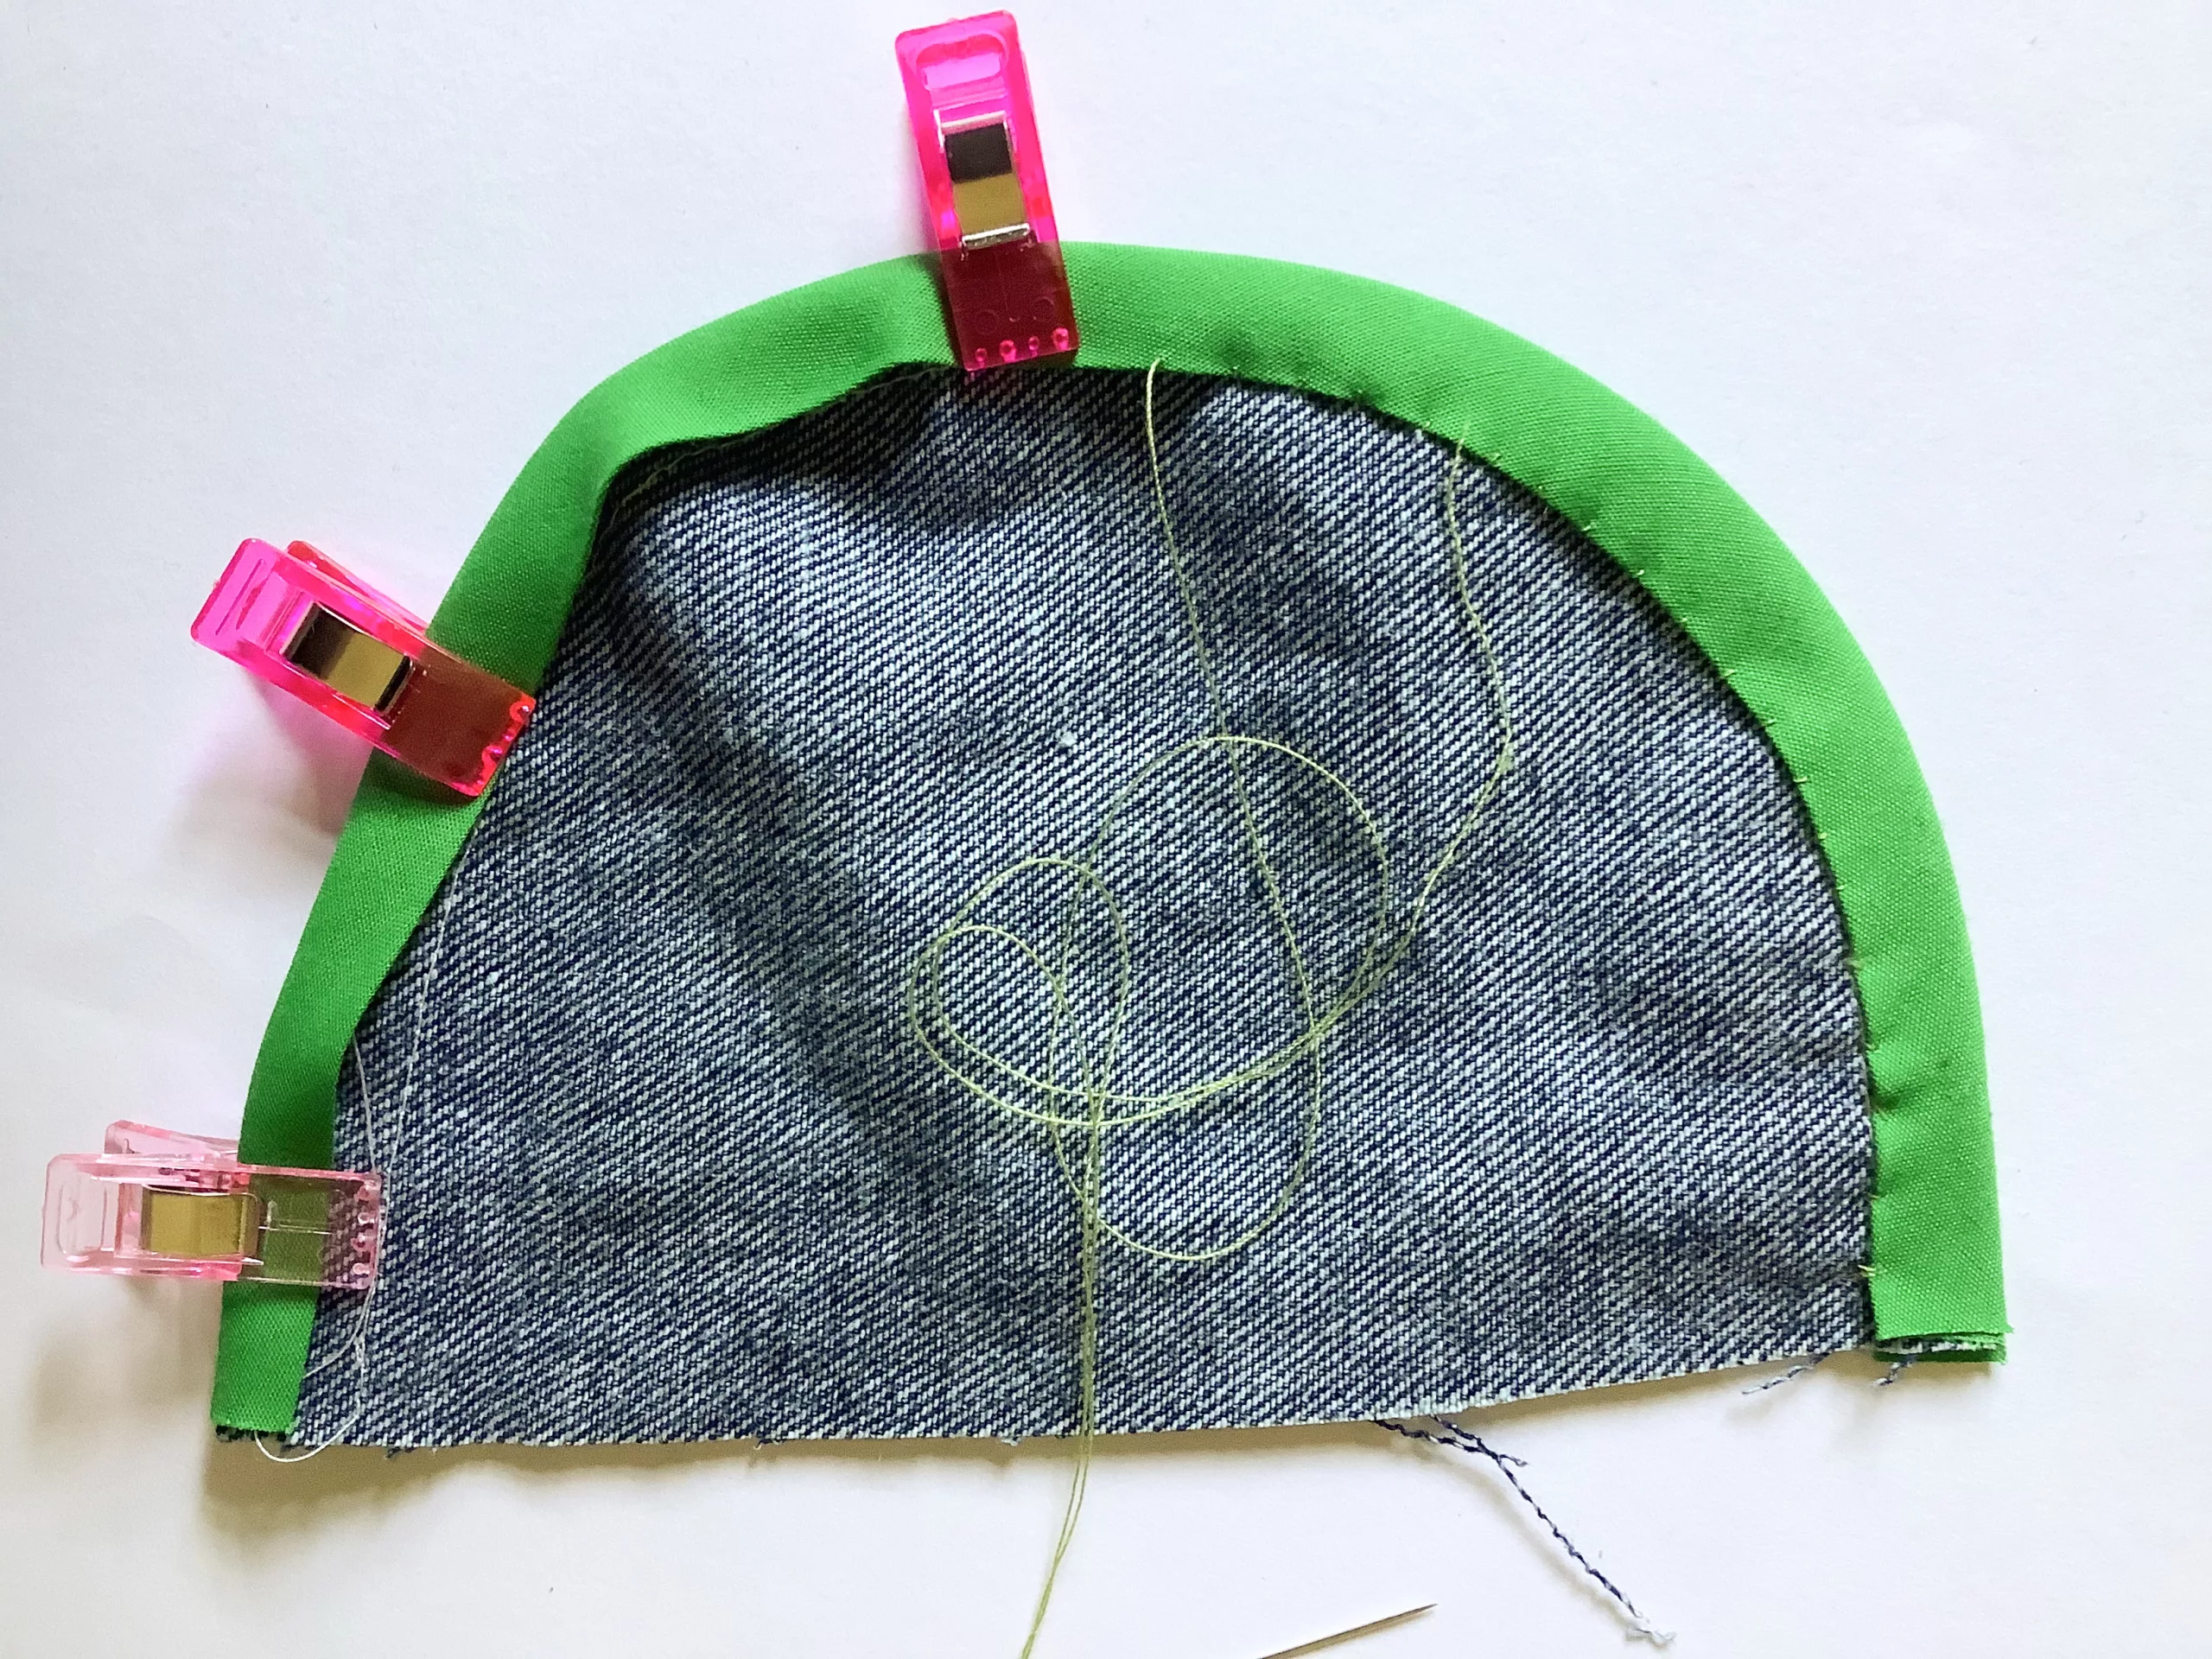
Step 3: Fold the bias tape over to the back.

Step 4: Pin or clip in place. If the binding doesn’t quite sit where you want it, trim the seam allowance slightly.

Step 5: You can topstitch the binding in place, but we recommend hand sewing it so there is no stitch line on the front.

You can also clip the seam allowance if you need to along the curve to remove the bulk.

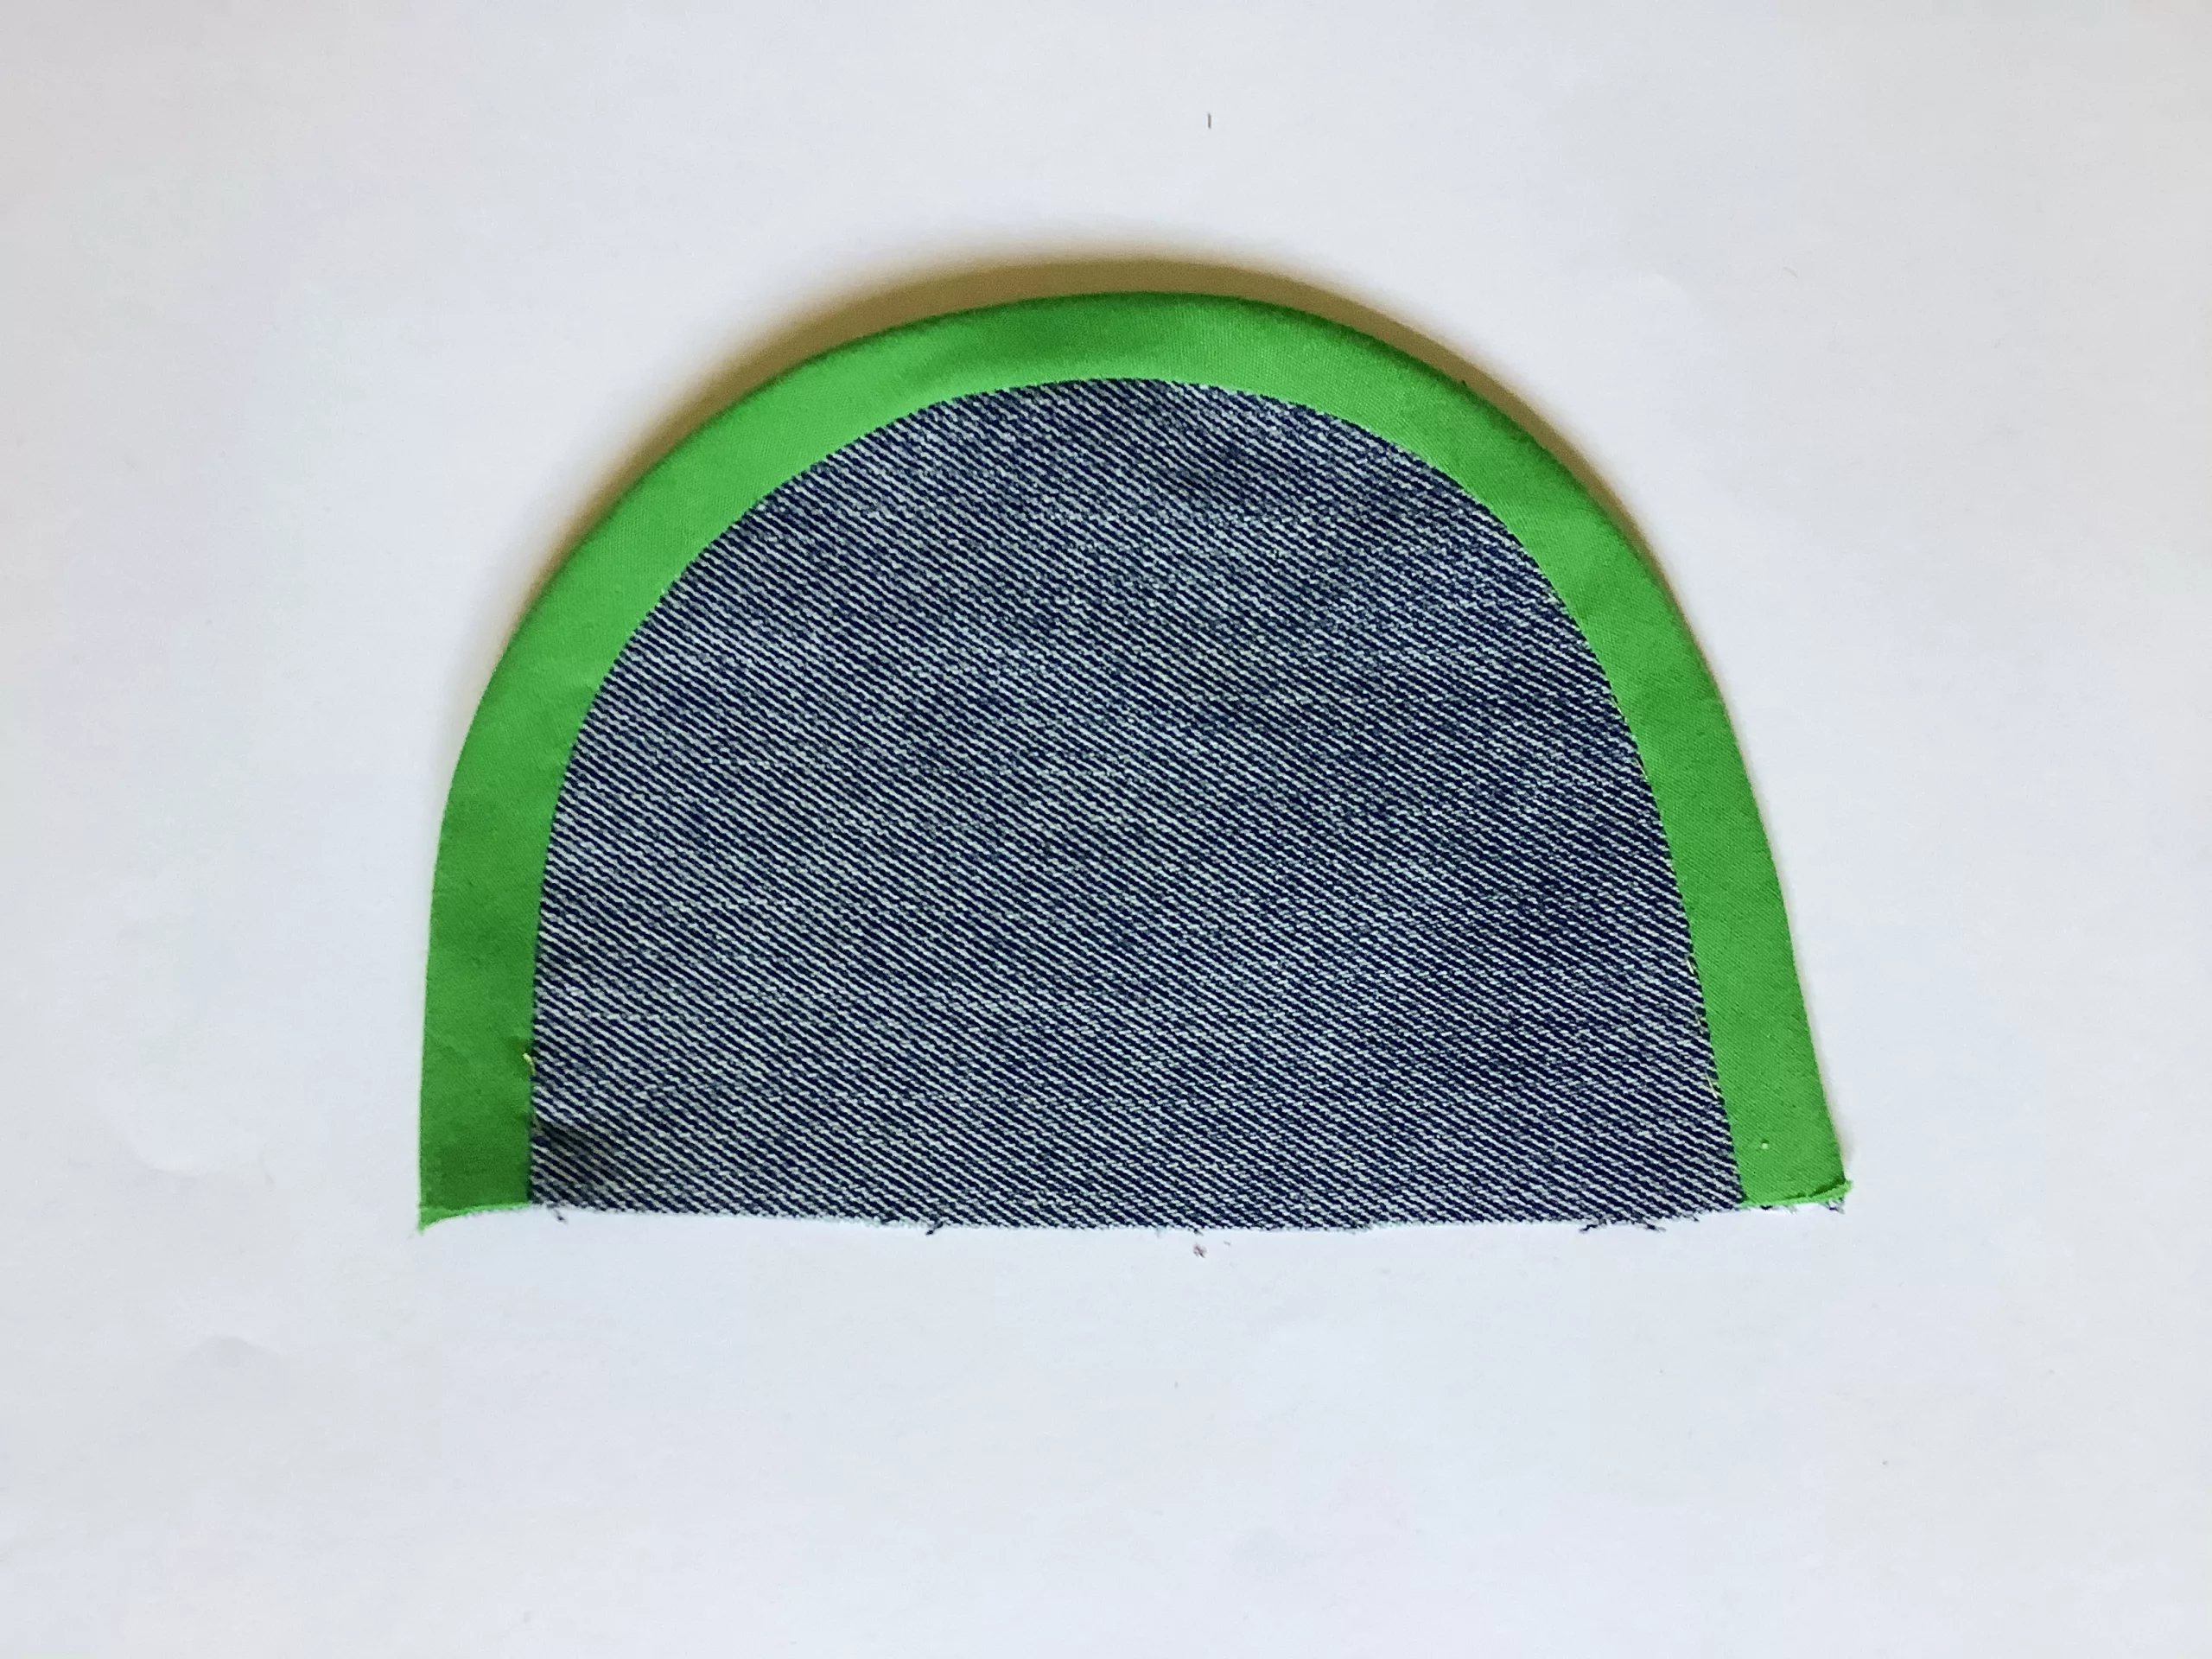
Step 6: Give the binding a good press with the iron.

How To Mitre A Corner with Bias Binding

Although you might find mitred corners hard at first, following the method below takes all the confusion out!

All it takes is just a bit of practice.

Pin For Later!

Mitre A Corner With Bias Binding Step-by-Step

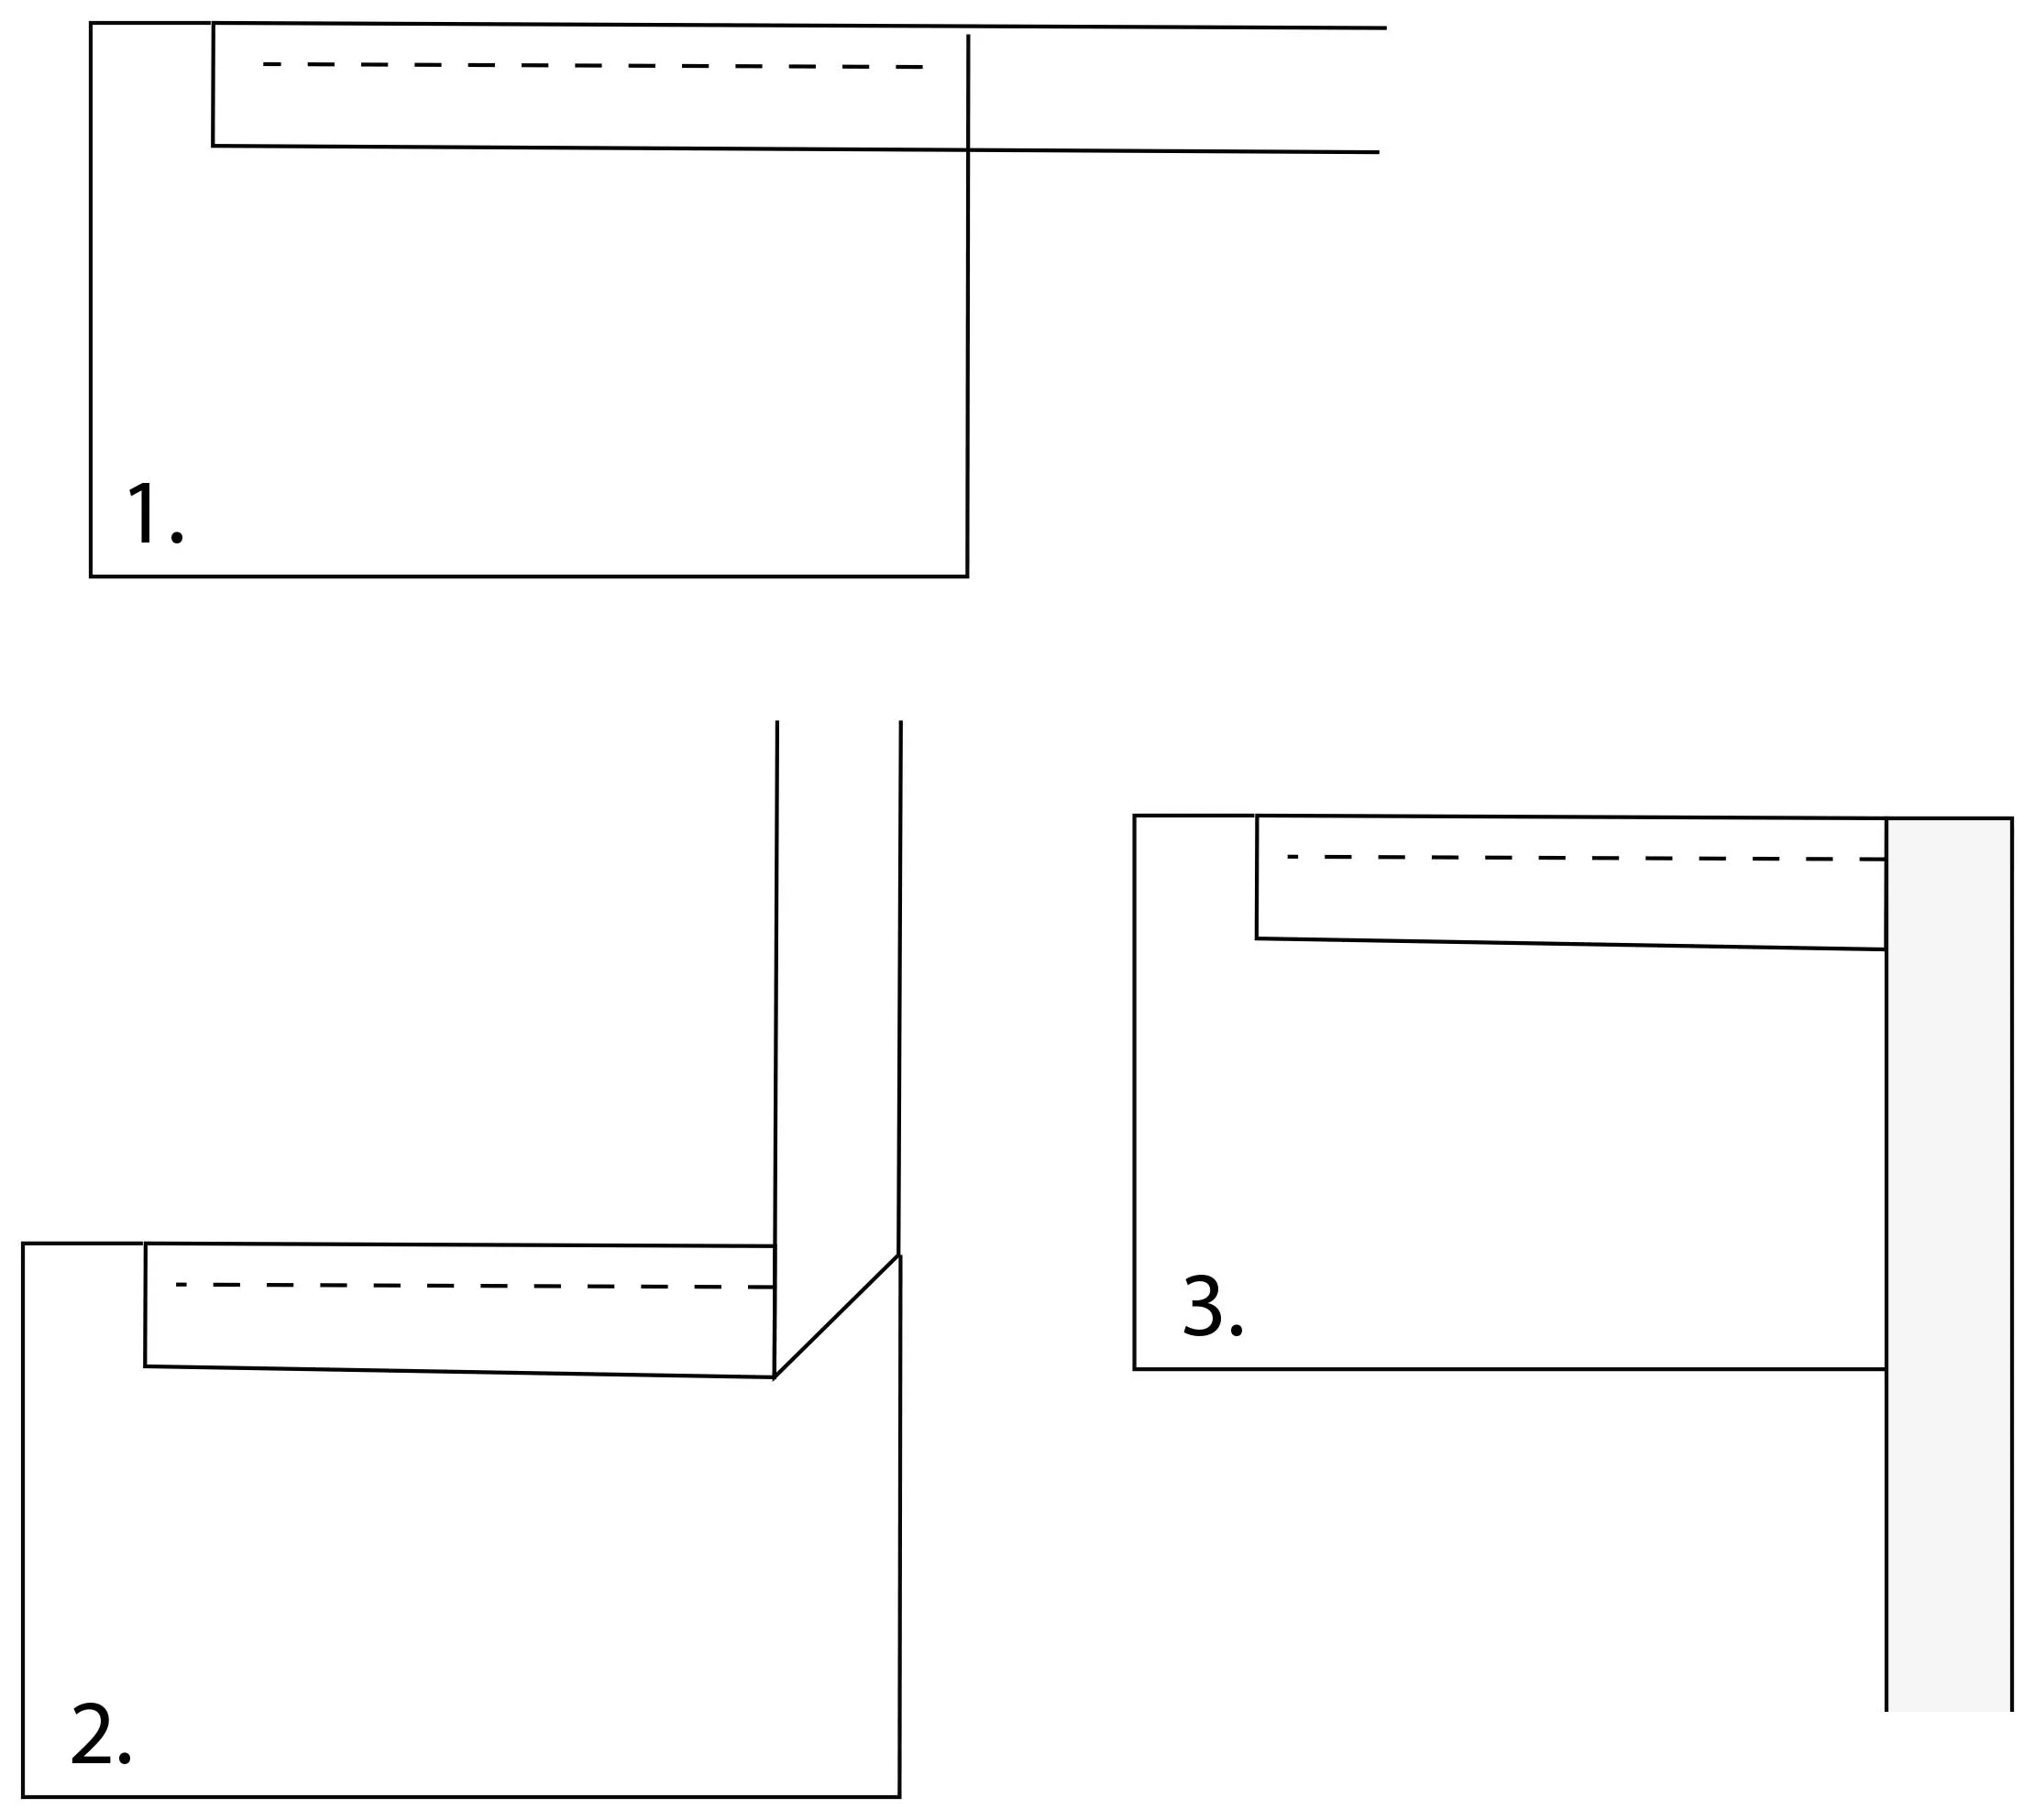
Step 1: Unfold the bias tape and line up the edge with the edge of your fabric.

Make sure your right sides are facing each other and pinned in place.

Step 2: Leave 2 or 3cm before you sew.

This will form an overlap at the end. Stitch along the fold line.

When you get to the end, stop about 6mm before the fabric edge.

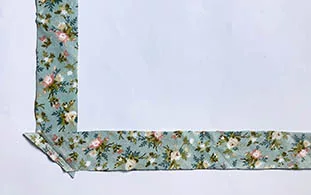
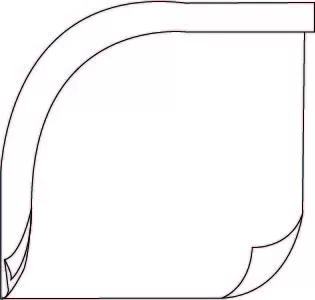
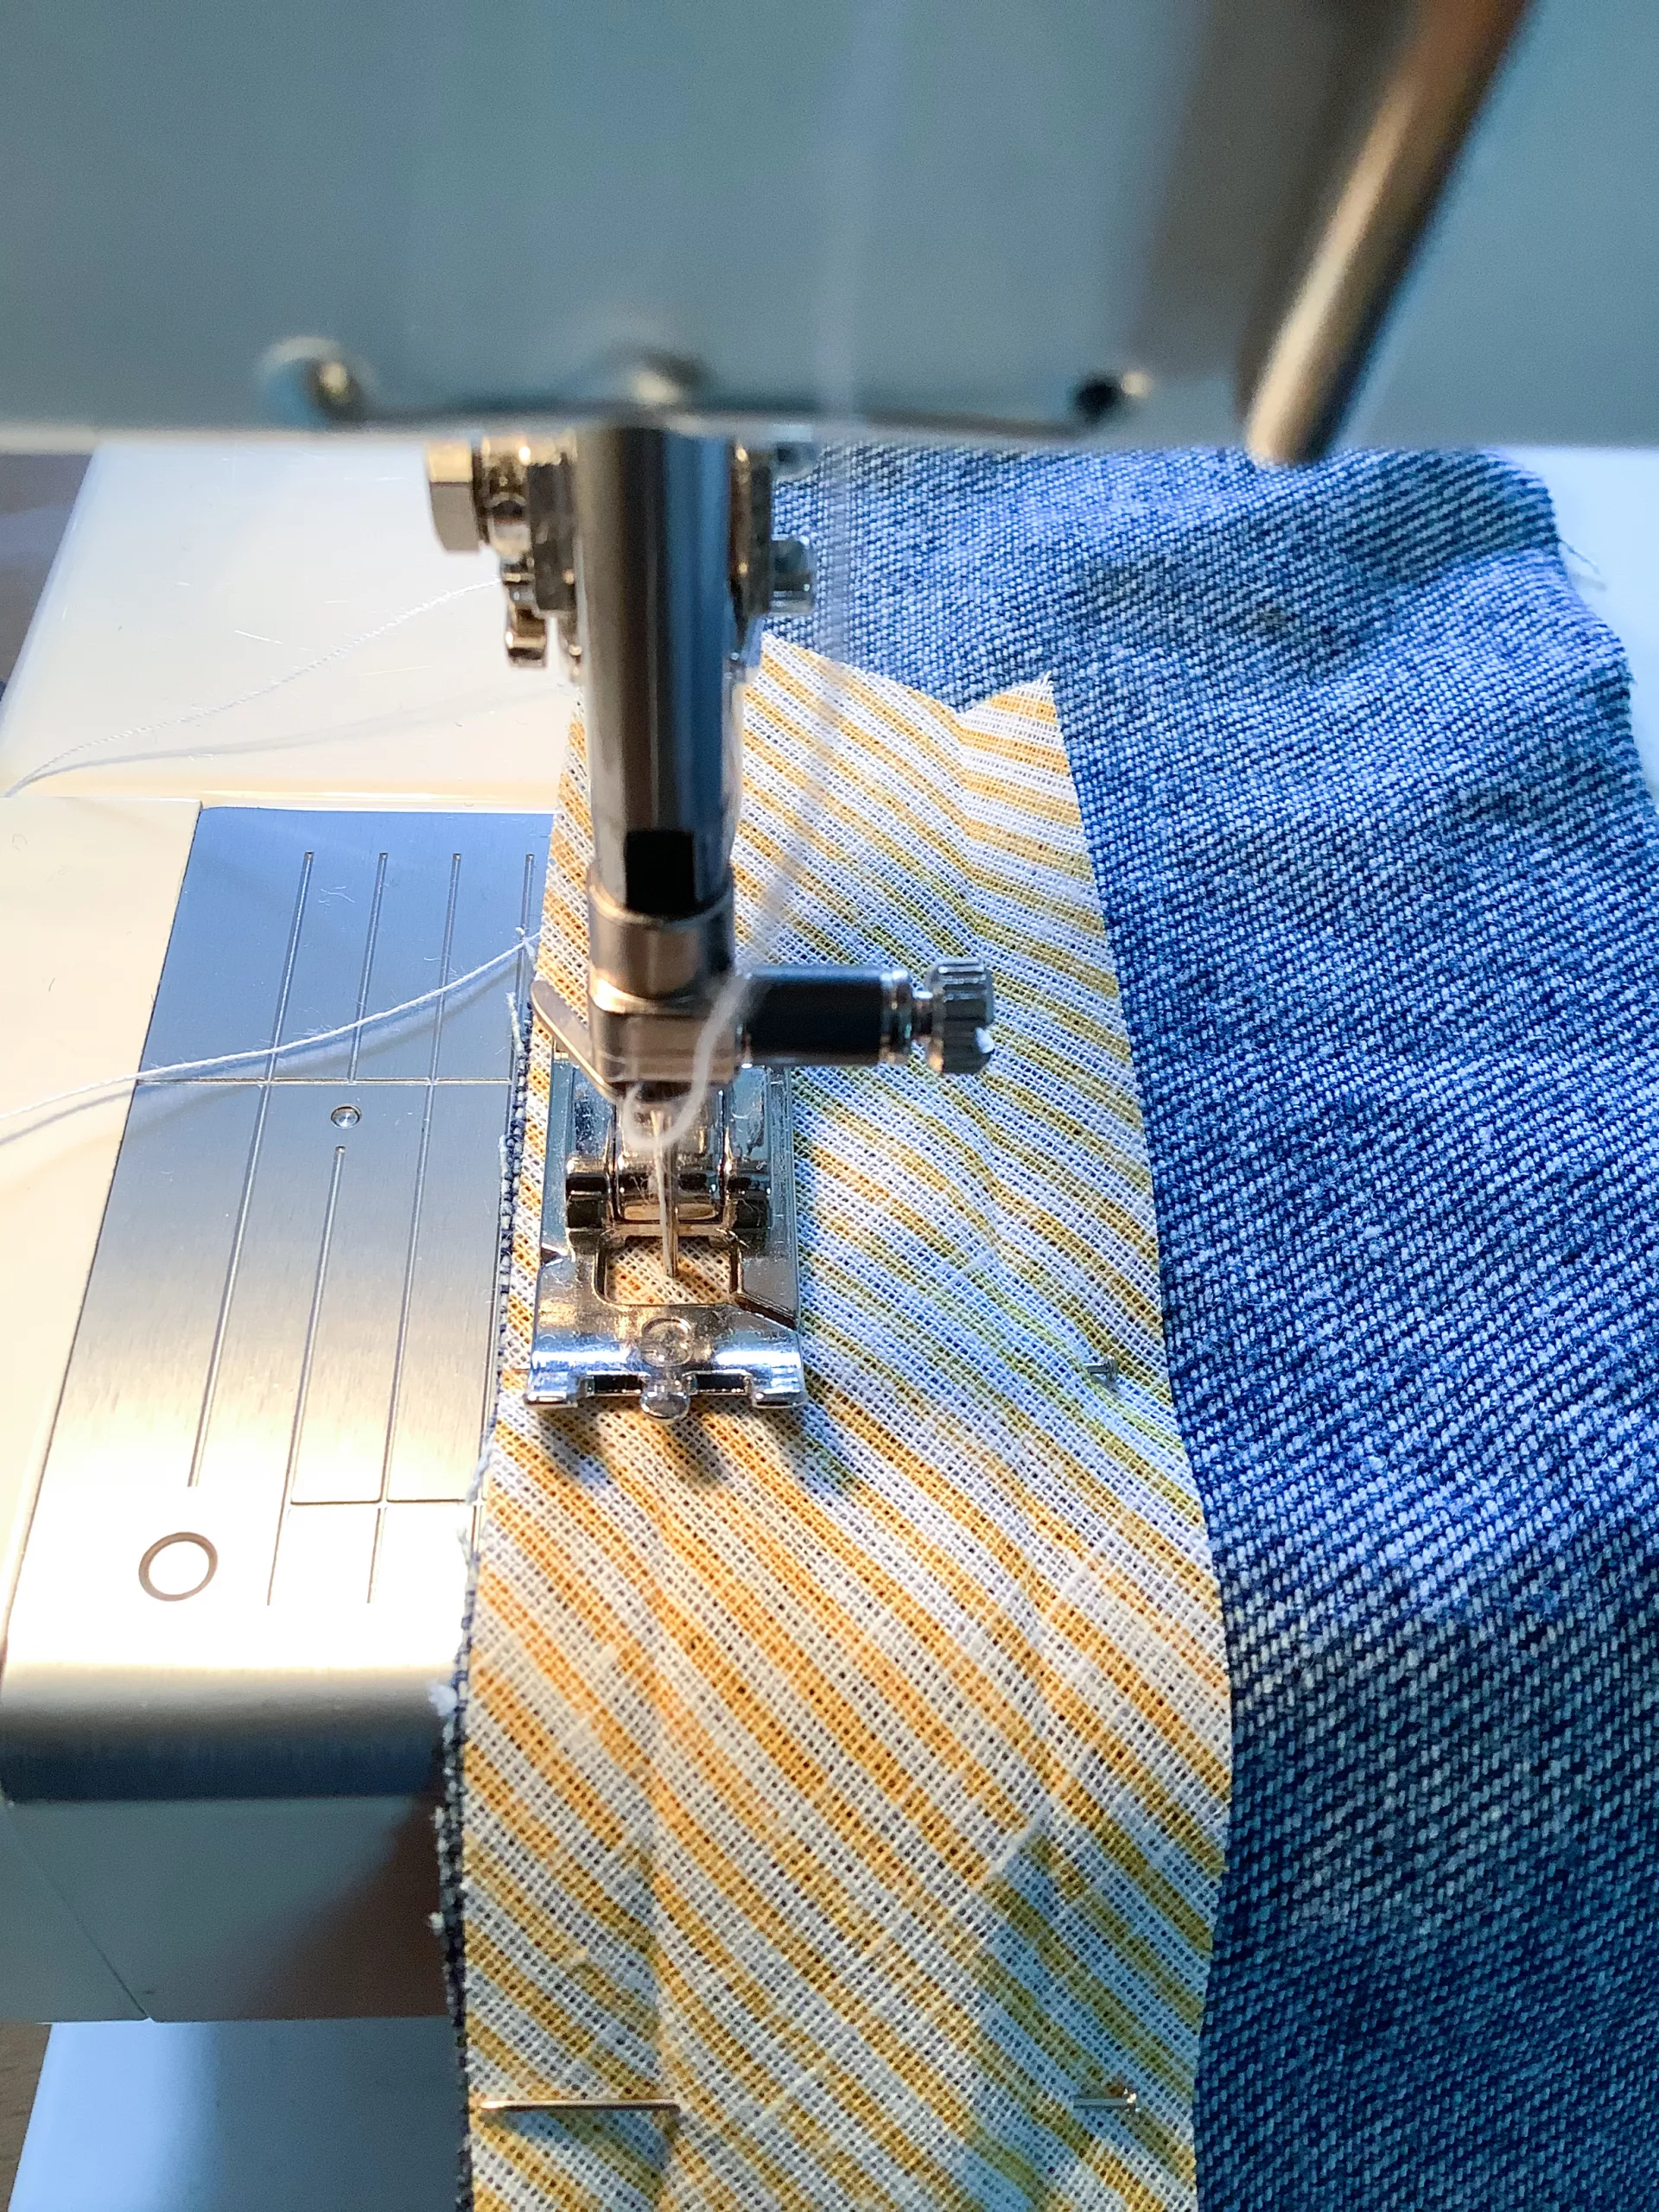
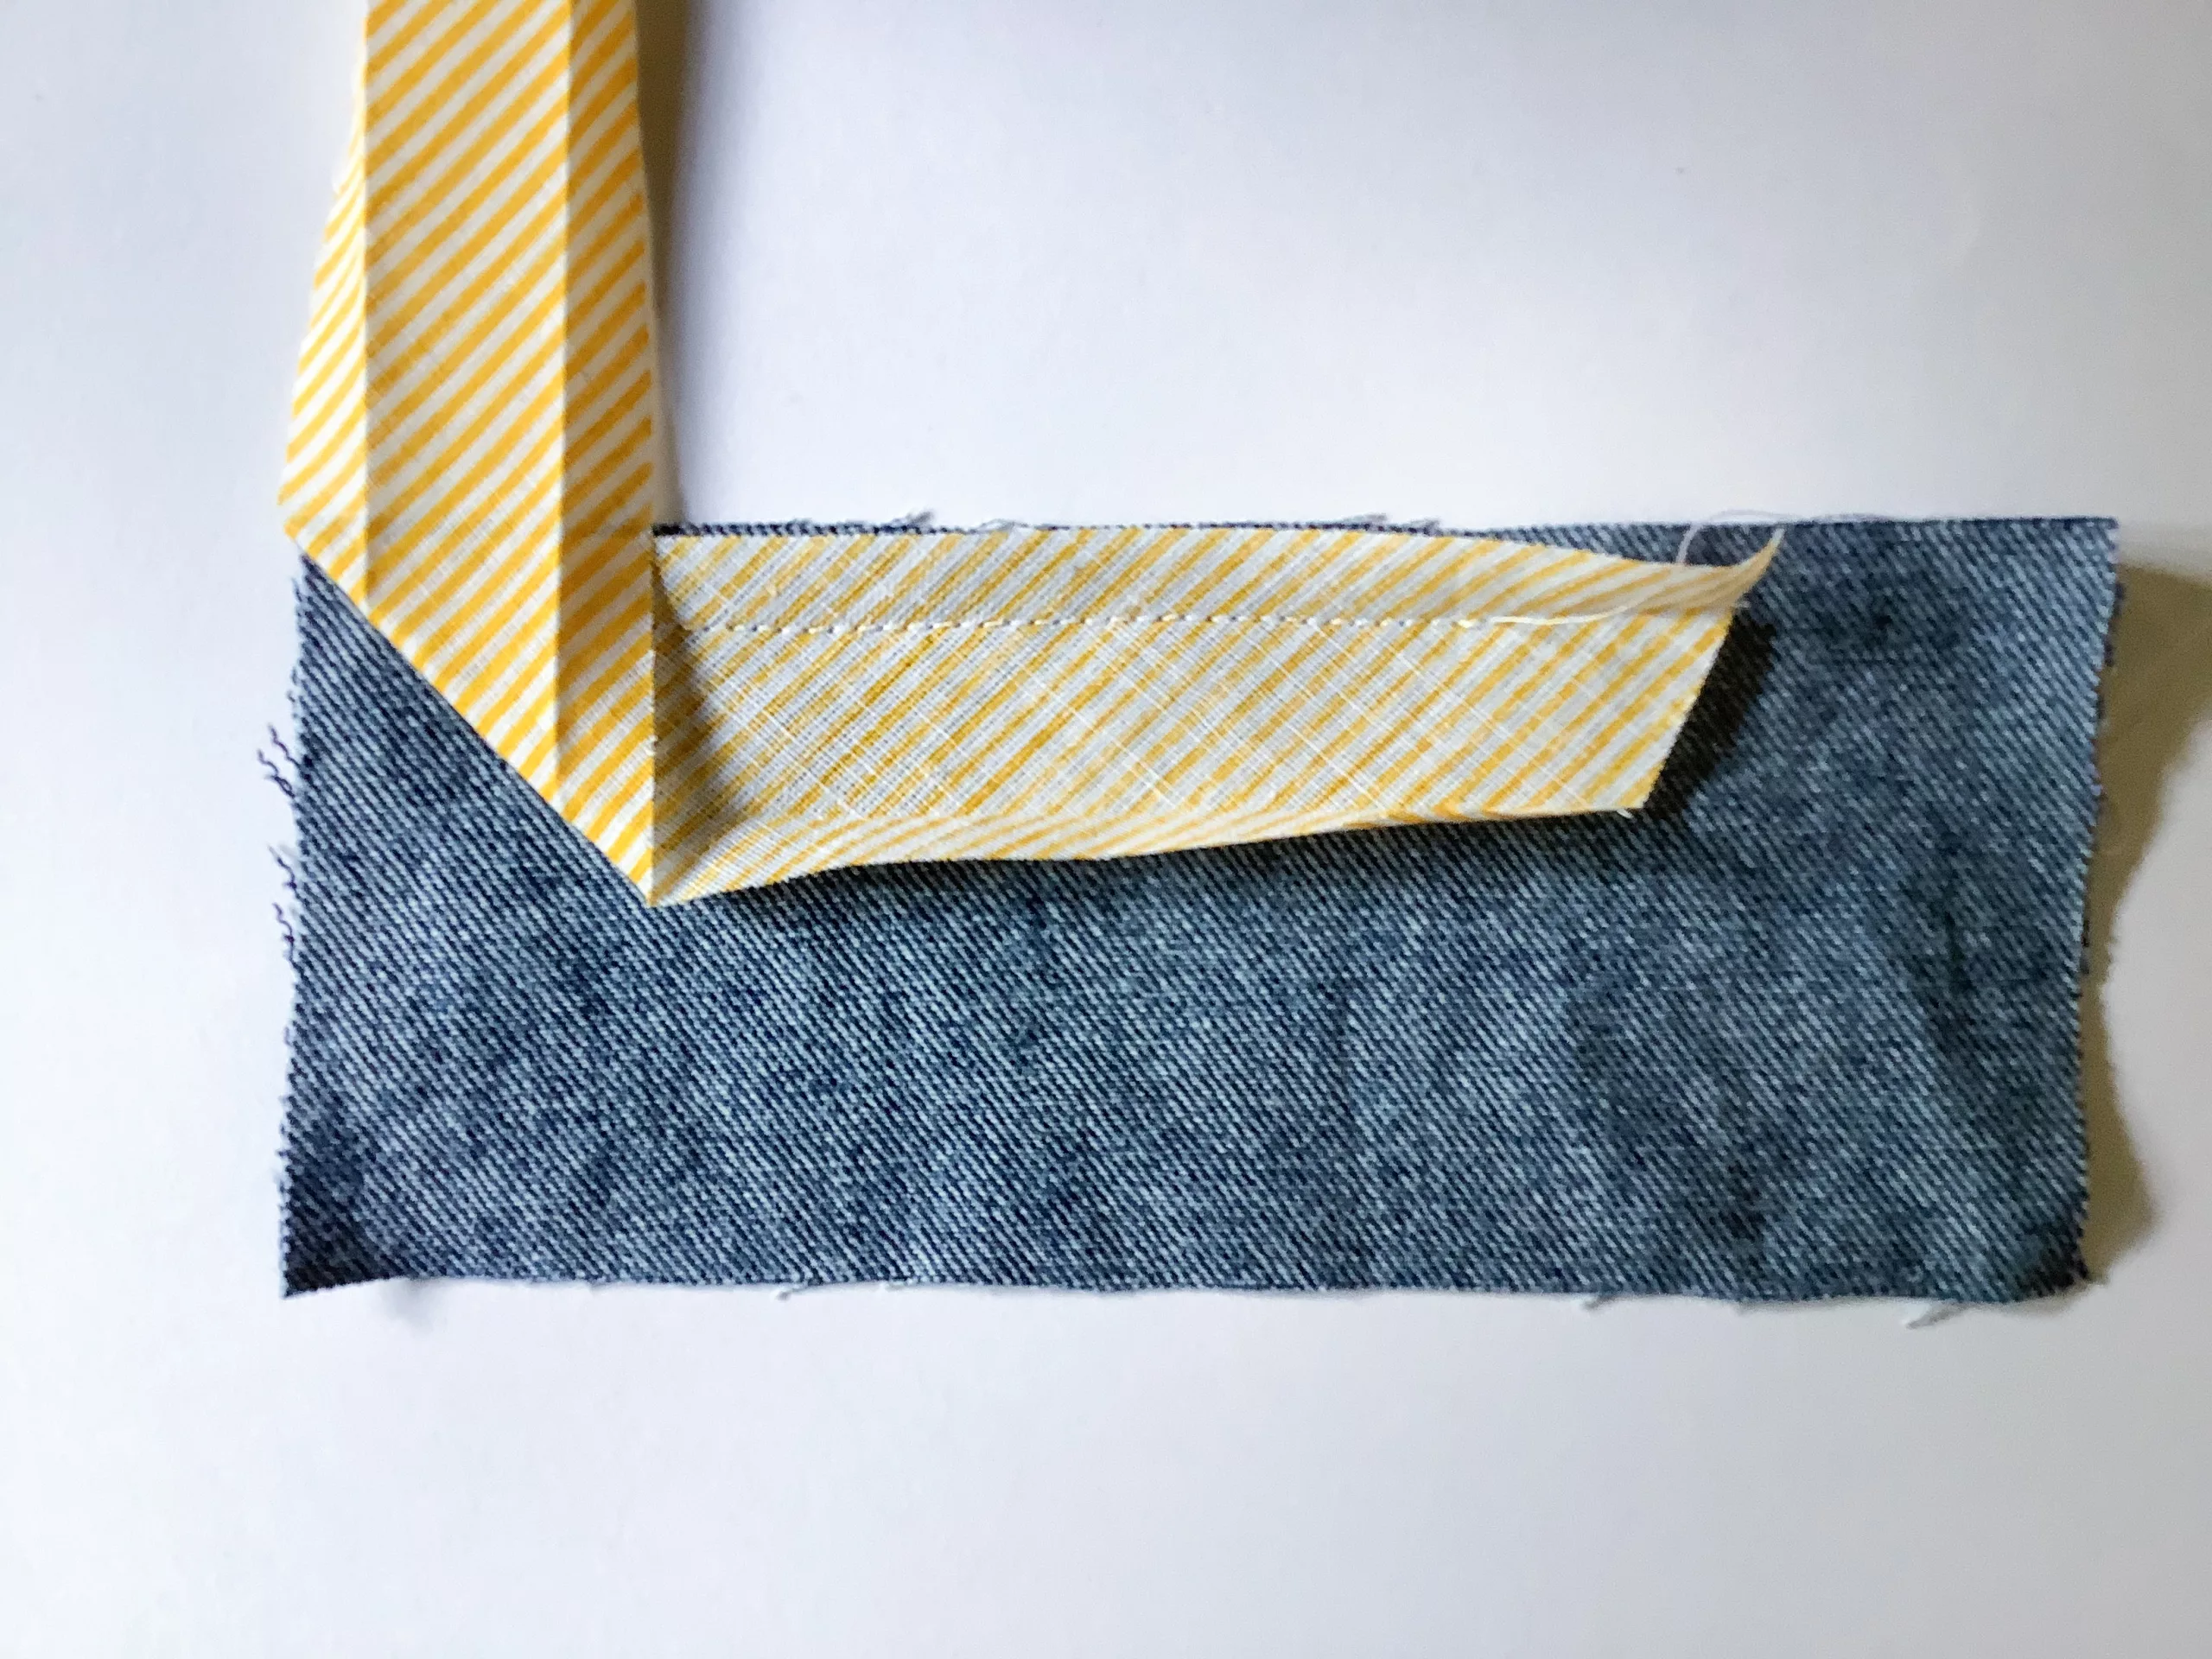
Step 3: Move your needle up and fold the bias tape up at a 90 degree angle and fold back down, this will give you a diagonal 45 degree angle at the corner.

Pin in place.

Step 4: Stitch all the way along the fold line.

Repeat these steps at every corner.

When you get to the end, you can cut your tape but leave enough to overlap.

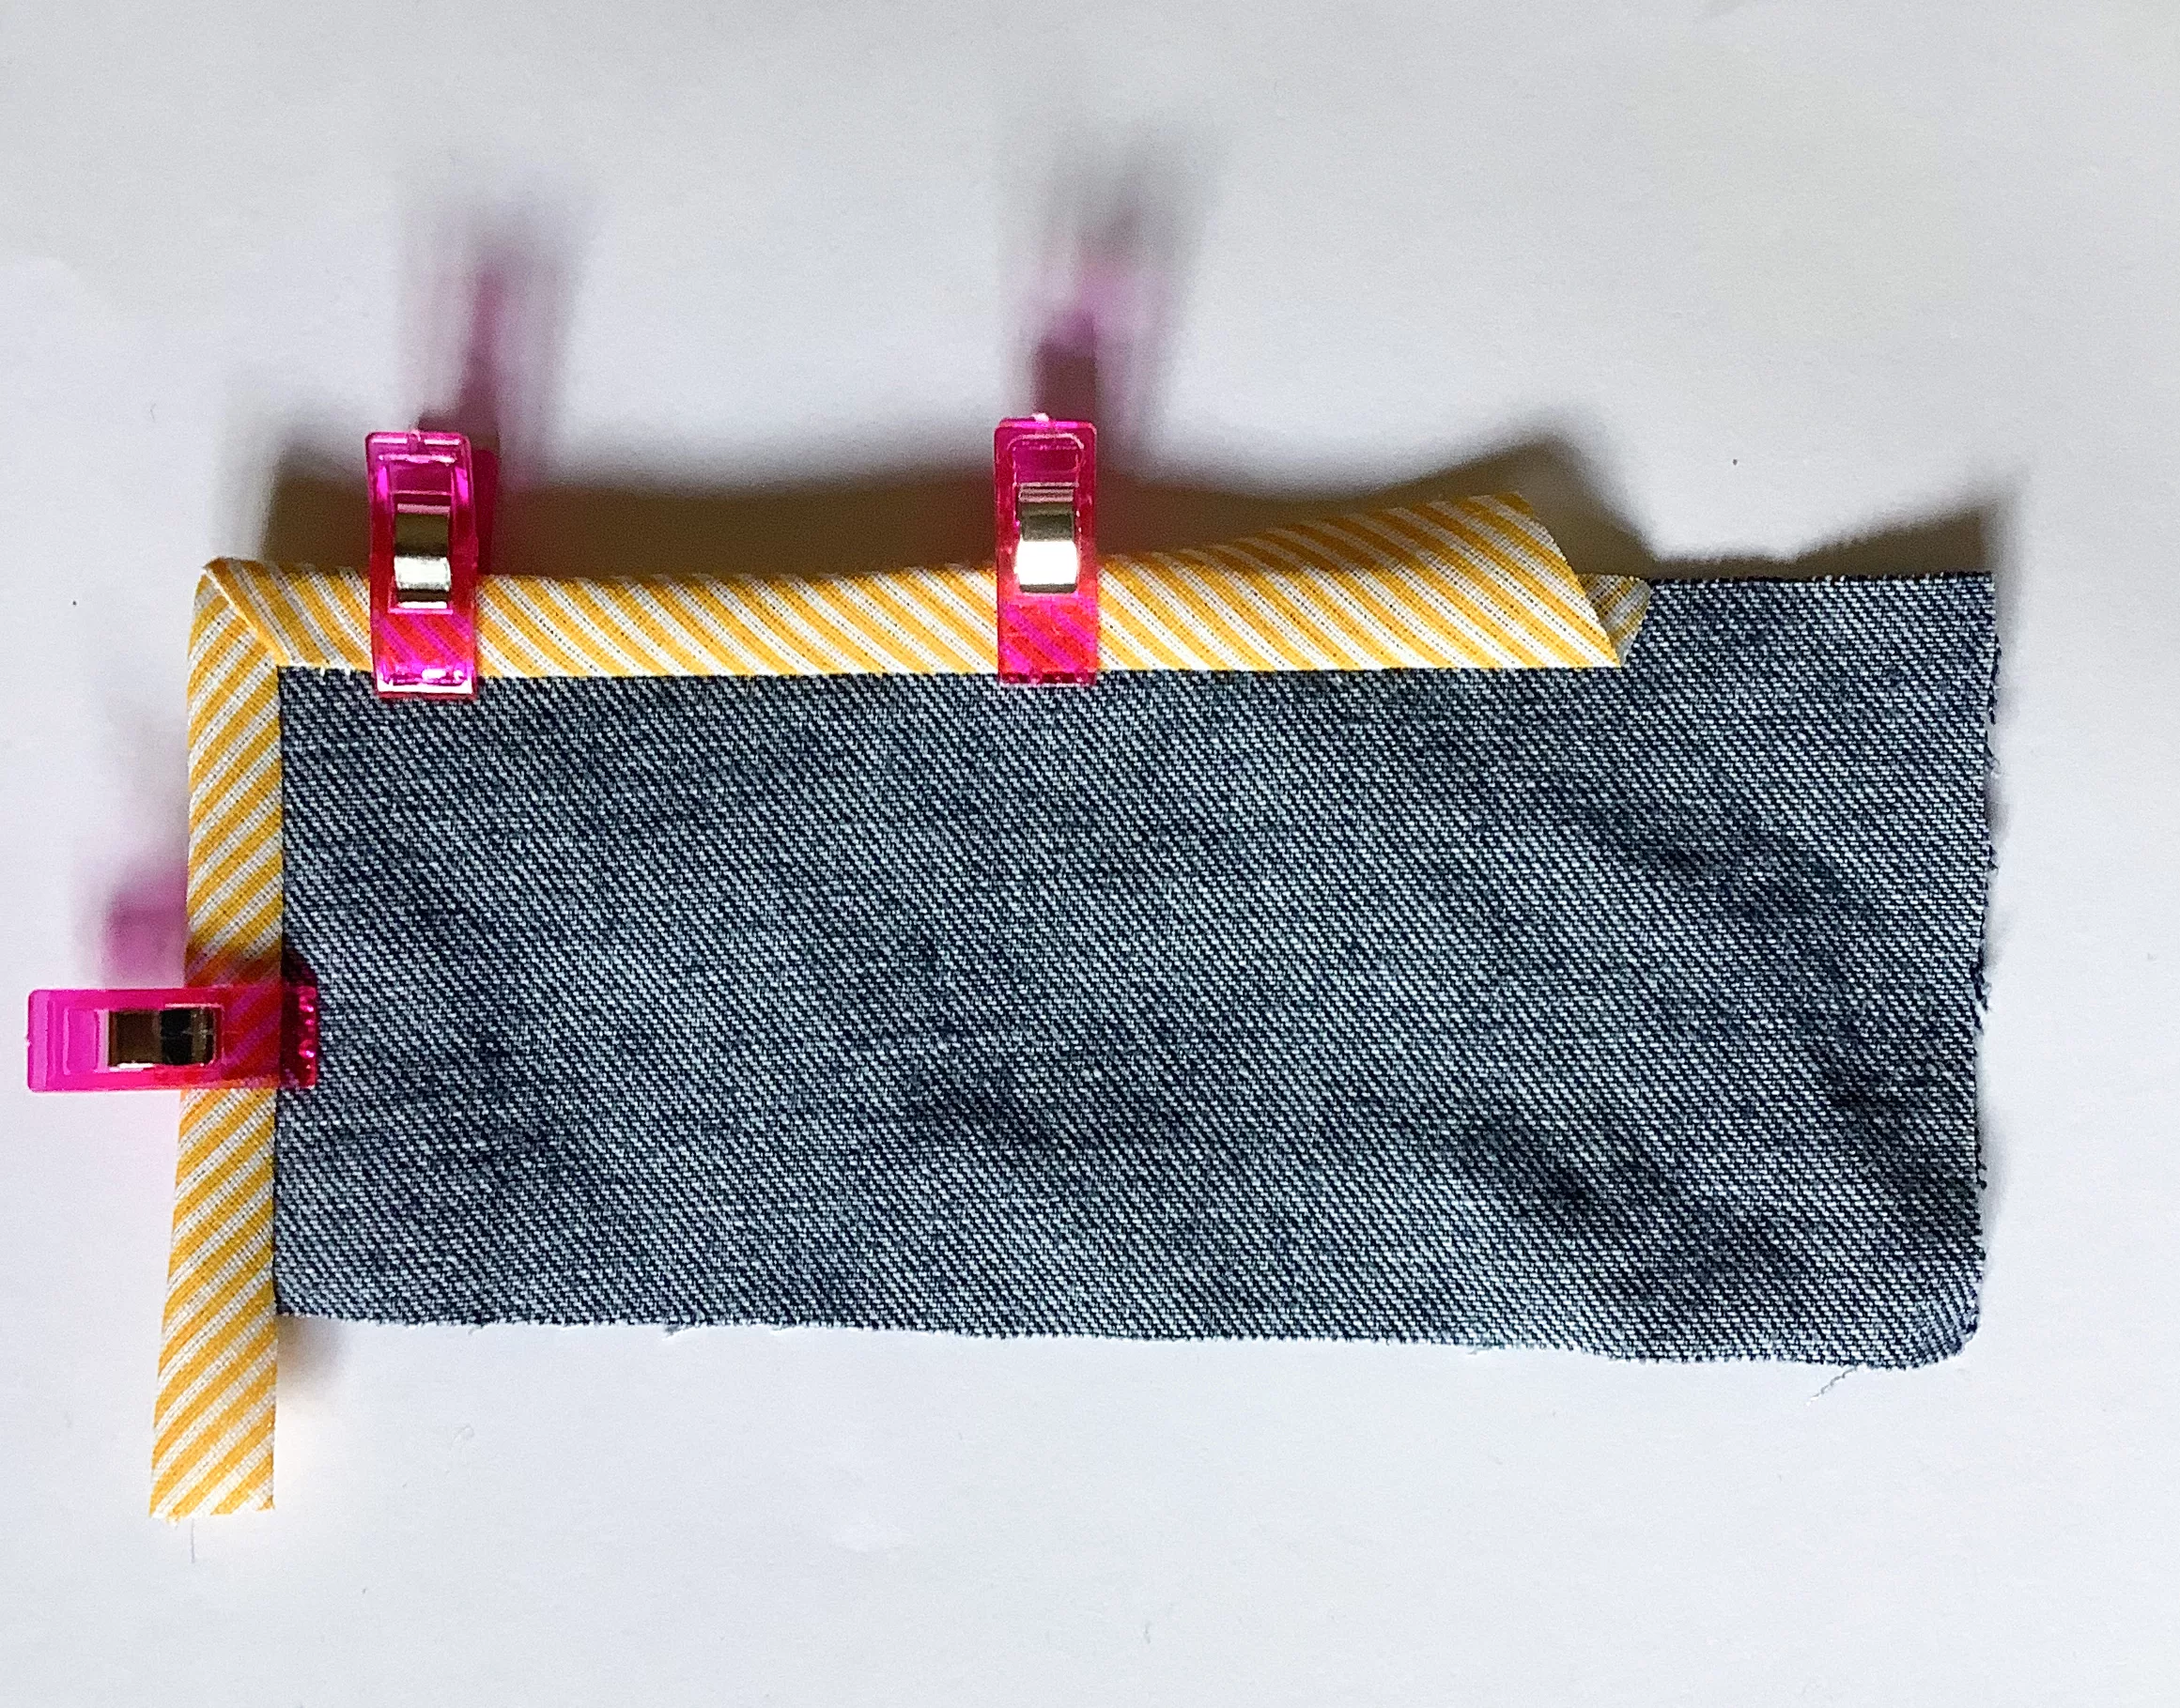
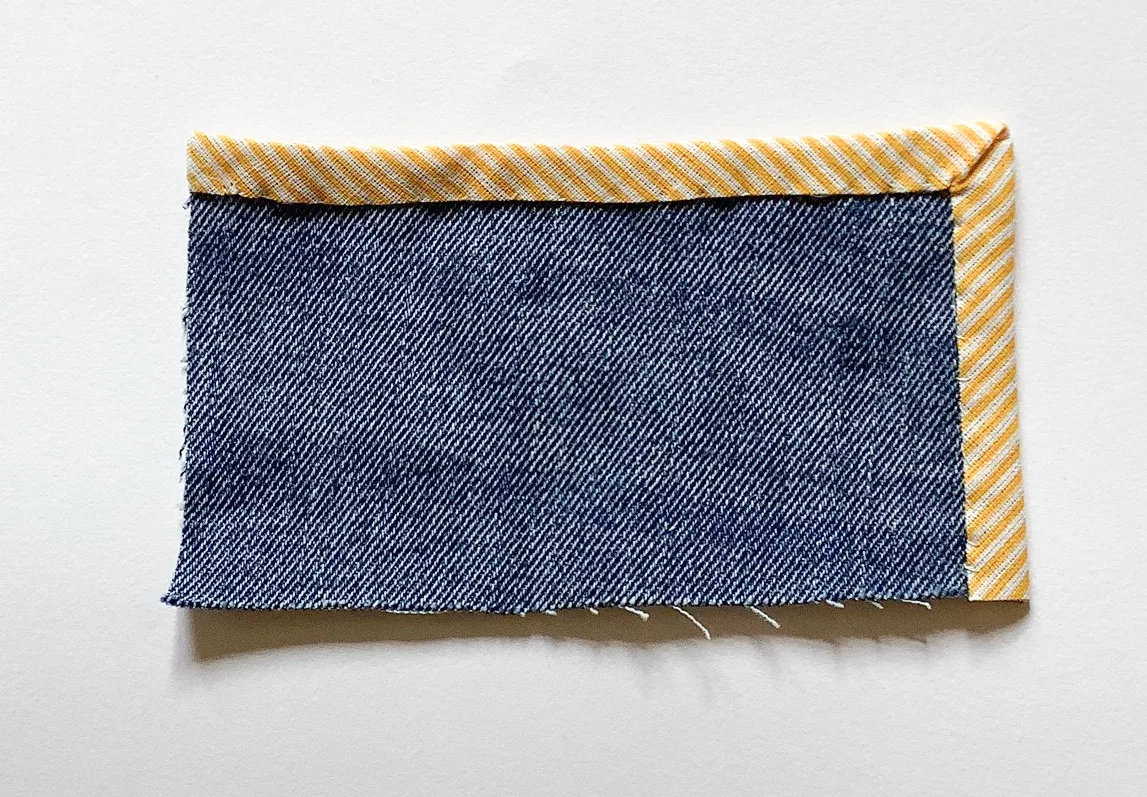
Step 5: Fold the bias tape over to the back.

Pin or clip the binding in place.

Step 6: If the binding doesn’t quite sit where you want it, you can trim it slightly.

When it comes to corners, fold in one side, then the other and if the sides are nice and even, you should get a nice, neat 45-degree corner.

Step 7: You can topstitch the binding in place, but we recommend hand sewing it so there is no stitch line on the front.

You can also clip the seam allowance if you need to along the curve to remove the bulk.

Step 8: Give the binding a good press with the iron.

Never miss another tutorial or guide…

Stay up to date with the latest by signing up to our newsletter!

Click to join our mailing list!

Ready Made Bias Binding

Prefer to buy ready made bias binding?

We’ve got it!

There’s definitely advantages to buying pre-made bias binding vs learning how to make bias binding. It can save you time and also fabric!

Here at Plush Addict, we’re not only a fabric store but we’re also an online haberdashery! We stock a wide variety of bias binding in lots of finishes and sizes.

Our most versatile ready-made bias binding is made from polycotton in 13mm, 20mm, 25mm, 27mm and 50mm. This is the one we would recommend if you have never used ready made bias binding before.

If you’re looking for something bolder, we sell metallic, patterned and decorative bias binding, as well different textures and fabrics such as satin, velvet and leatherette.

We also have several ranges of piping bias to create a different finish, which is great for decorative projects such as cushions and detailing on clothes.

Did you find this guide helpful? Let us know in the comments below and tag us @PlushAddict we’d love to see how you used bias tape in your projects!

Pin For Later!

Follow Plush Addict on social media and keep an eye out for more tutorials!

We hope you found this tutorial useful! Let us know how you get along in the comments below.

10 Tips For Sewing With Chalk Cloth Fabric

10 Tips For Sewing With Chalk Cloth Fabric

In this comprehensive guide to sewing with Chalk Cloth, you will learn 10 tips for sewing with chalk cloth fabric. In addition, you will also learn the benefits of using it for your different projects.

Look at our amazing Chalk Cloth it is so much fun to stitch with.

It works exactly like a traditional chalk board but it is a fabric. You can write on it, draw on it and the great thing is, it’s wipe clean, so that you can use it again and again.


(more…)