


No Overlocker? No Problem! Finishing Seams without an Overlocker or Serger
Do I need an overlocker?
We see this question a lot! Everyone knows that the best way to give your projects a polished & professional finish is to make sure all of your seams are finished neatly – it’s not often we buy items in the shops and they are left with raw seams! As well as being aesthetically pleasing, appropriately finished seams can help your project or garment last longer, stay together better and strengthen the seams, which is ideal if you plan on washing it!
The best way to finish a seam to a professional standard is with an overlocker, however there are plenty of ways to finish seams using a regular sewing machine, or tools you already have too – meaning you can have a clean finish whether you are a beginner or advanced in your sewing, and have not yet made the leap to purchase an overlocker or serger.
So here are just a few techniques on how to finish your seams without an overlocker or serger…

Edges with Pinking Shears
A pinked edge is best used on stable, tightly woven fabrics that don’t fray easily, or on something that won’t be washed or worn a lot, such as a cushion. It works well on a curved edge, or seams on awkward angles that require turning out as it limits the amount of bulk when turned. This is a simple method that requires no sewing, just a pair of pinking shears.
You will need:
- Pinking shears
- Iron
1. Cut close to the edge of the seam with pinking shears – that’s it!

How to Zig Zag raw edges
A zigzag edge is perfect for anything but very lightweight/delicate fabrics, and sheers. It emulates the look of an overlocked edge, but can be done on most domestic sewing machines. If the fabric is too lightweight, the machine will often create an undesirable ‘chewed up’ look. For lighter fabrics, use a smaller stitch length, for heavier fabrics use a longer stitch length. We don’t recommend using this method on anything lighter than a Cotton Poplin.
You will need:
- Sewing machine with zig zag stitch
- Iron
- Use the zig zag stitch on your machine to sew along the edge of the seam allowance, sewing the two sides together.
- Press to one side.

How to sew a Clean Finish Edge Seam
A ‘clean finish’ edge provides a folded over edge along the seam which conceals the raw edge. It works best on light to medium weight fabrics, but not for very lightweight or very heavyweight fabrics.
You will need:
- Sewing machine
- Iron
- With the right sides together, sew the seam as usual and press open.
- For each side of the seam allowance, turn the raw edge under 0.5cm / ¼” or less and press.
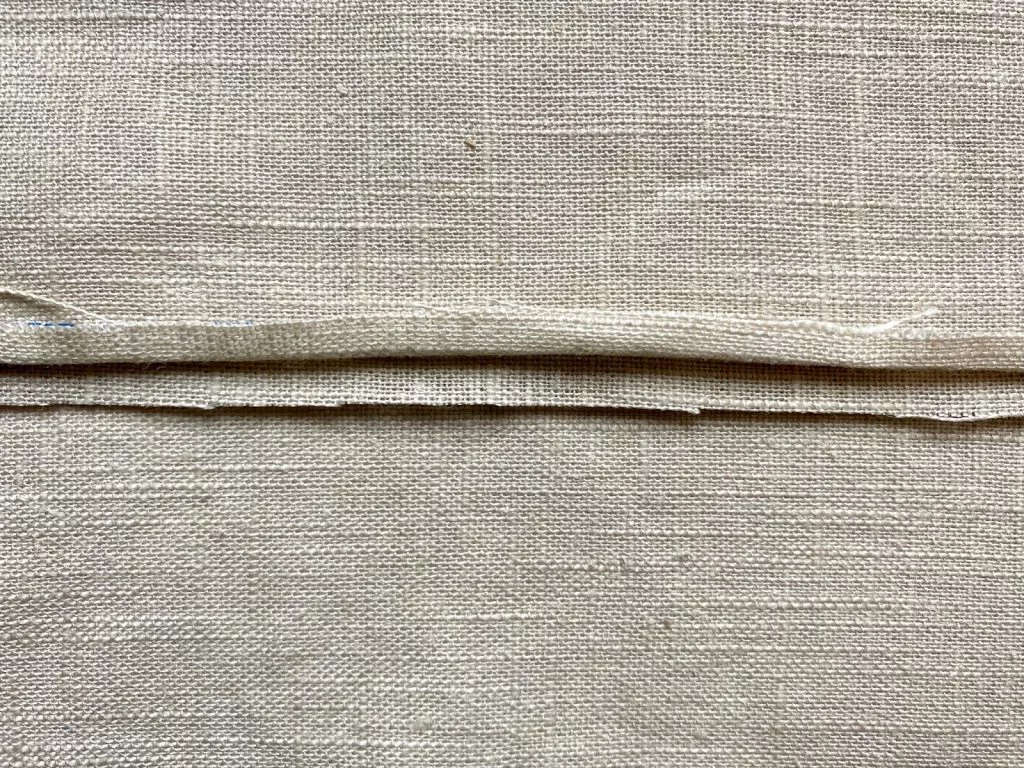
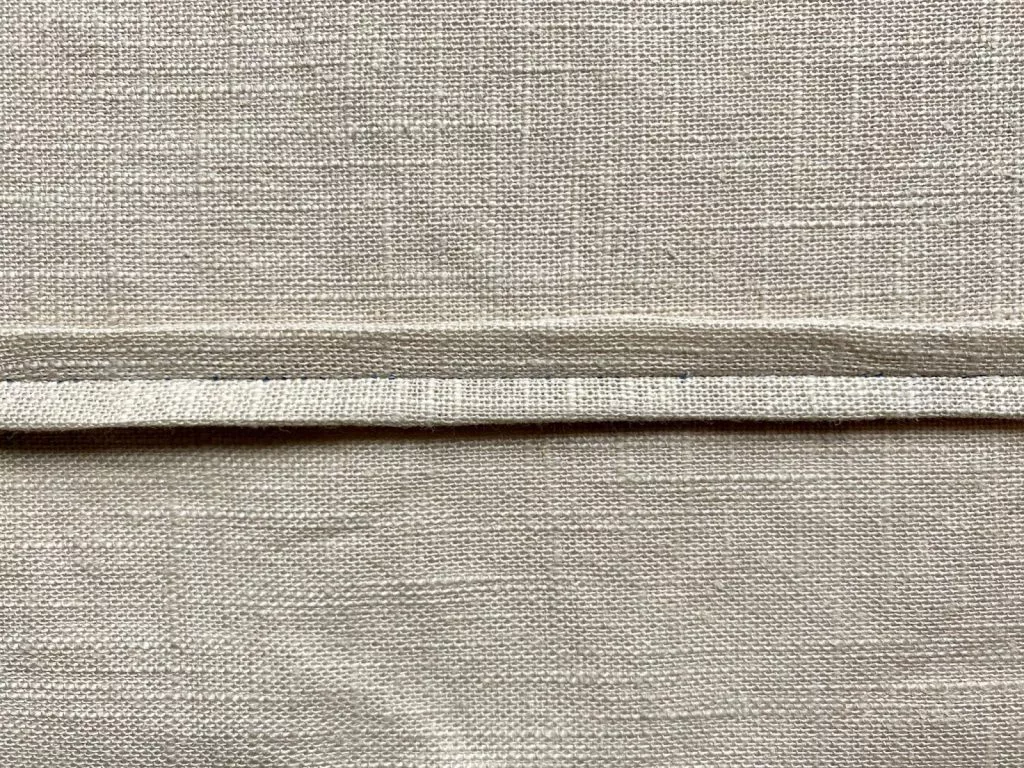
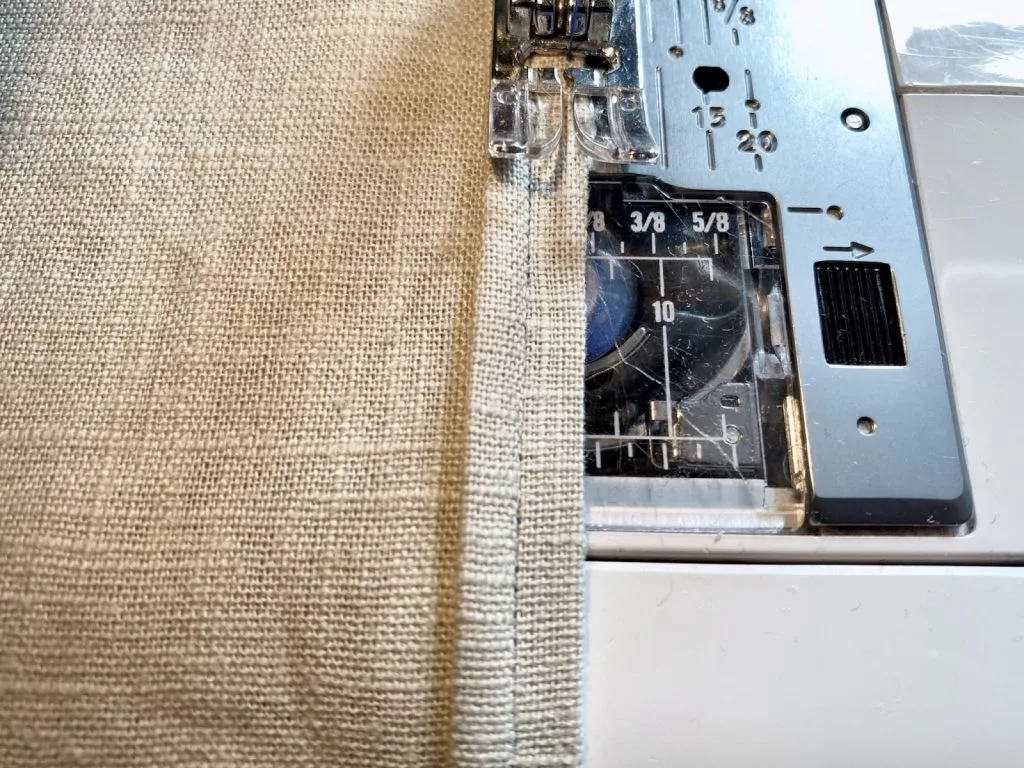
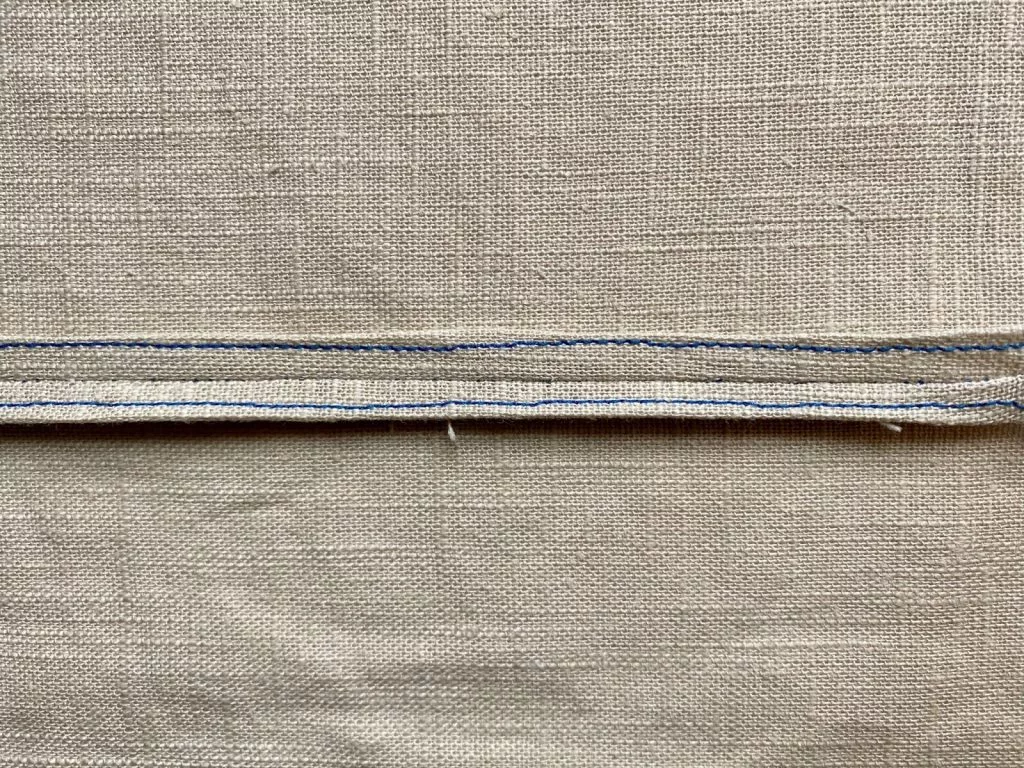
- Sew close to the edge of the seam allowance, do not sew this to the garment itself.
How to French Seam
A French seam is perfect for lightweight and delicate fabrics that fray easily, as it encases the raw edges of the seam, and provides a clean and professional finish. Although the seams would be visible through a sheer fabric, it fully encases them so they look like bound seams.
You will need:
- Sewing machine
- Pinking shears or scissors
- Pins
- The general rule for creating a french seam is to take away 0.5cm / ¼” from the seam allowance that your pattern recommends. For example; if your pattern says to use a standard 1.5cm / ⅝” seam allowance, sew your first seam with a 0.8cm / ⅜” seam allowance, then trim it down to 0.3cm / ⅛”. For this example we are using a standard 1.5cm / ⅝” seam allowance.
- With the wrong sides (WS) of your fabric pieces together, sew 0.8cm / ⅜” from the raw edge.
- Press the seam, then fold your fabric along the seam line, so the right sides (RS) of the fabric are together and the stitching is along the edge of the fold. Press again. You may want to clip/pin the fabric in place.
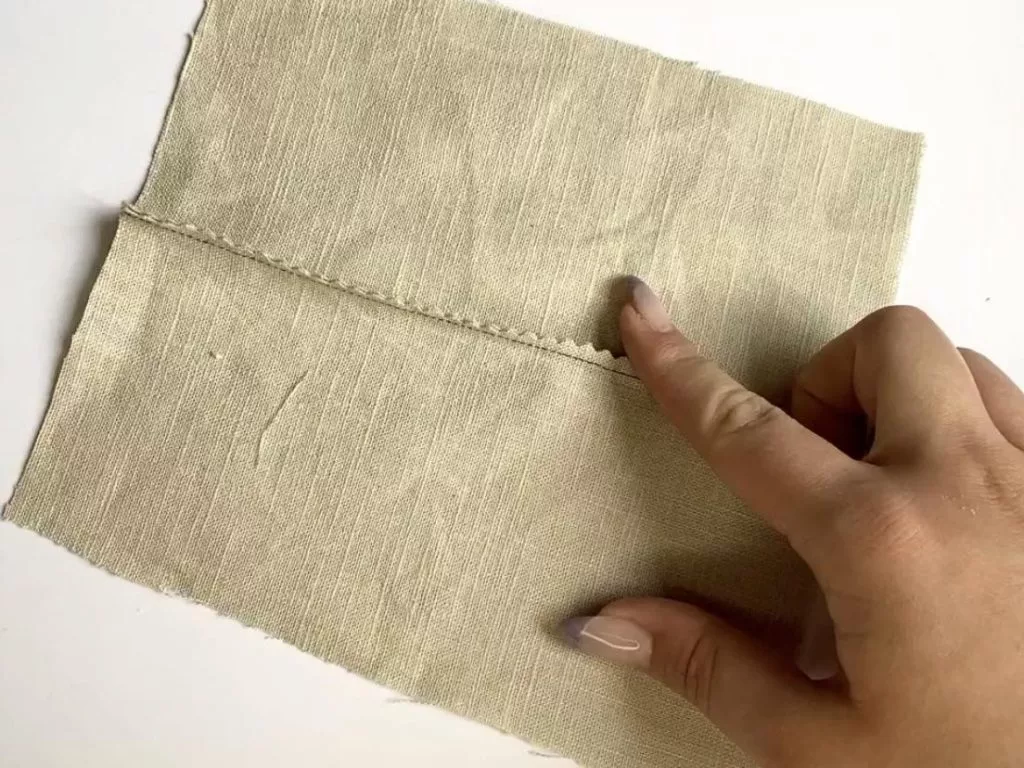
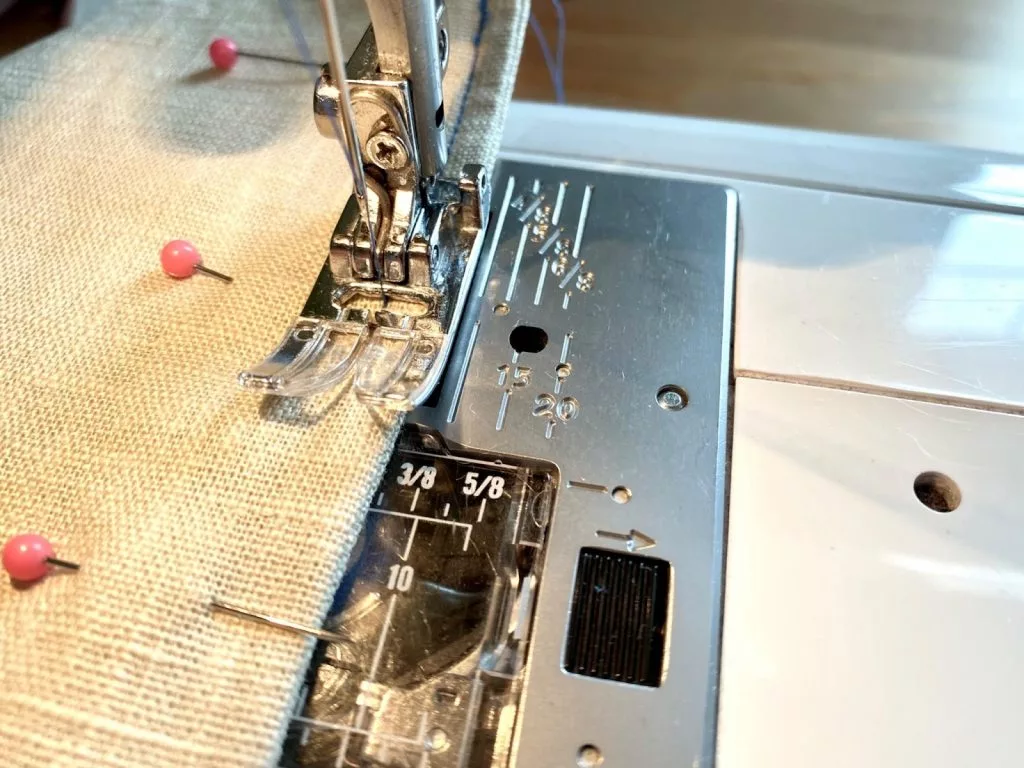
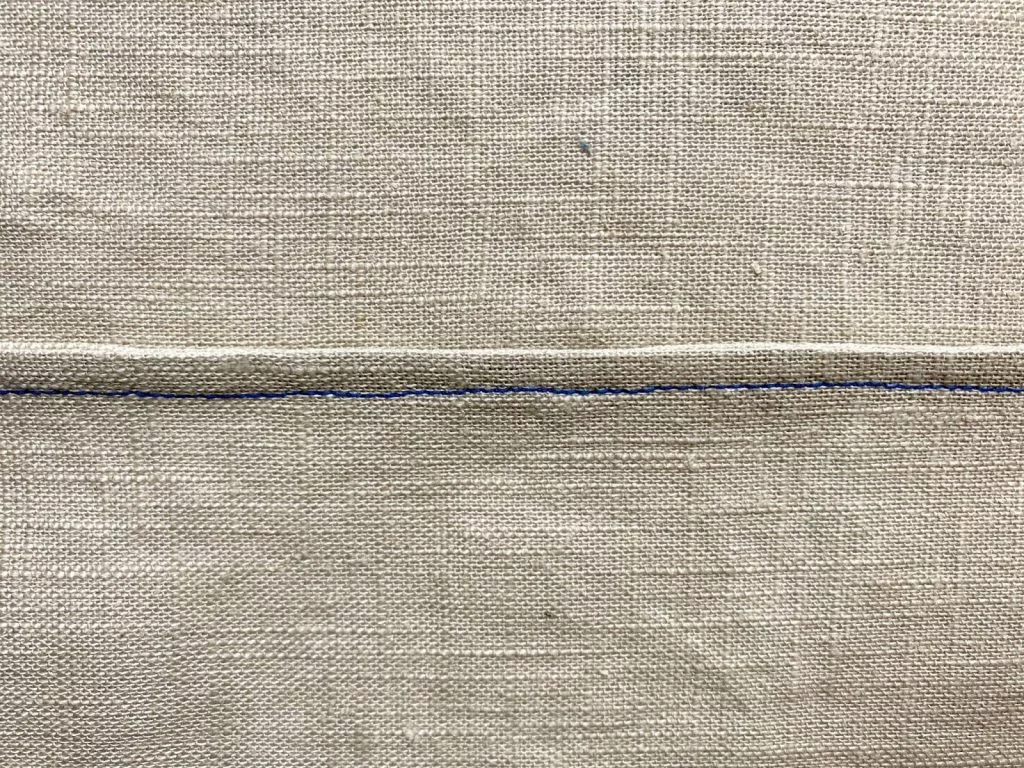
- With the RS of the fabric still together, sew another seam 0.5cm / ¼” in from the folded edge you created. Make sure that the seam completely encloses the other seam, as otherwise the raw edge will poke through and create a messy finish on the right side of the garment.
- Press. Turn your project the right way out and press the seam to one side from the outside.

What is a flat felled seam?
A flat felled seam works best for garments that experience a lot of stress, such as trousers, work clothes and jackets. The process creates a sturdy and durable seam that is much harder to split. This finish is visible from the outside of the garment, and is often done with a contrasting colour thread to create a feature.
You will need:
- Sewing machine
- Pinking shears or scissors
- Iron
- With right sides (RS) together, sew 1.5cm / ⅝” seam from your raw edge.
- Press the seam open, and trim one side of the raw seam edge down to 0.5cm / ¼”

- With the other side of the seam, fold inwards in half, so the raw edge meets the seam. Press.

- Fold this side over the top of the trimmed side, so that it completely covers and conceals the raw edge.

- Stitch close to your folded edge to finish.


How to sew Hong Kong seams
A Hong Kong Seam encases the raw edges of a seam using bias binding. This is best used on lightweight fabrics. We would not recommend using this method on heavy fabrics, or curves and edges, especially those that need turning out as it creates too much bulk. You can use regular ready made bias tape, and this produces no visible stitching when finished. Hong Kong seams are easy to sew, but require you to be precise with your stitching, perfect for taking your sewing skills to the next level.
You will need:
- Sewing machine
- Scissors
- Pins
- Bias binding (Not sure what this is? Check out our guide.)
- Iron
- Make or purchase a length of continuous length of bias tape, 2.5cm – 3cm / 1-1¼” wide (wider tape is easier to sew, as it gives you more room on the wrong side of the seam to sew in place)
- Press your seam open. Cut a length of your prepared bias tape to the same length of the seam you are finishing plus about a 2.5cm or 3cm / an inch or two. Line up the edge of the bias tape with the seam, on the side of the project that will be visible when it is complete. With right sides (RS) together, pin in place.


- Sew the bias to your seam using a 0.5cm / ¼” seam allowance.


- Press the bias away from the seam allowance.
- Wrap the binding around the edge of the seam allowance to the wrong side and press again.
- From the RS of the seam, stitch in the ditch along the bias seam, or along the edge of the bias binding. If you stitch in the ditch the stitches will not show – we have stitched along the edge which is a simpler method.


- Trim away the excess bias if required behind.


How to use Bias Tape to finish seams
A bias-bound seam is a quick way to create a ‘faux’ Hong Kong seam. They use double fold bias tape around the seam to conceal the raw edge. We wouldn’t recommend using this method on very heavyweight fabrics, or using a bias tape that is very different in composition to your project’s main fabric. Shop bought bias tape with a similar composition to the main fabric of your project is easier to sew using this method, as it is made more precisely. If you are making your own bias tape, try to use longer strips of fabric to avoid bulky seams. Using an edge-stitching foot also helps keep your stitch lines neater.
You will need:
- Sewing machine
- Pins
- Bias binding
- Iron
Version 1
- Wrap the bias tape around the seam, pinning/clipping in place.

- If you are using ready-made tape, there will be one edge that is slightly narrower than the other. Make sure the narrow edge goes on the right side (RS) of the seam edge. This will ensure that you catch the bottom layer of the bias tape when sewing them together.
- On the RS of the seam, sew along the length of the tape, about 1/16” from the edge, ensuring that the folded edge of the bias tape is lying close to and hugging the raw edge of the fabric.


Version 2:
- Press your seam open.
- Unfold your double edge bias tape, align the edge with the wrong side (WS) of the seam. Pin/clip into place.
- Sew the bias tape to the seam, along the first folded line of the tape.
- Fold the bias tape over so that the centre crease of the tape is hugging the raw seam edge, pressing into place.
- Sew along the right side (RS) of the seam 0.2cm / 1/16” from the edge.
You can shop for all of the products mentioned in our online Haberdashery, Plush Addict. We are a one stop shop for all things fabric, sewing and haberdashery. Not sure what Haberdashery is? Check out our online guide here.
We hope you found this seam finishing guide helpful, don’t forget to sign up to our newsletter for more tips, tricks and tutorials!

Get Set for Back To School and Sew a Fabric Notebook Cover in 30 minutes!
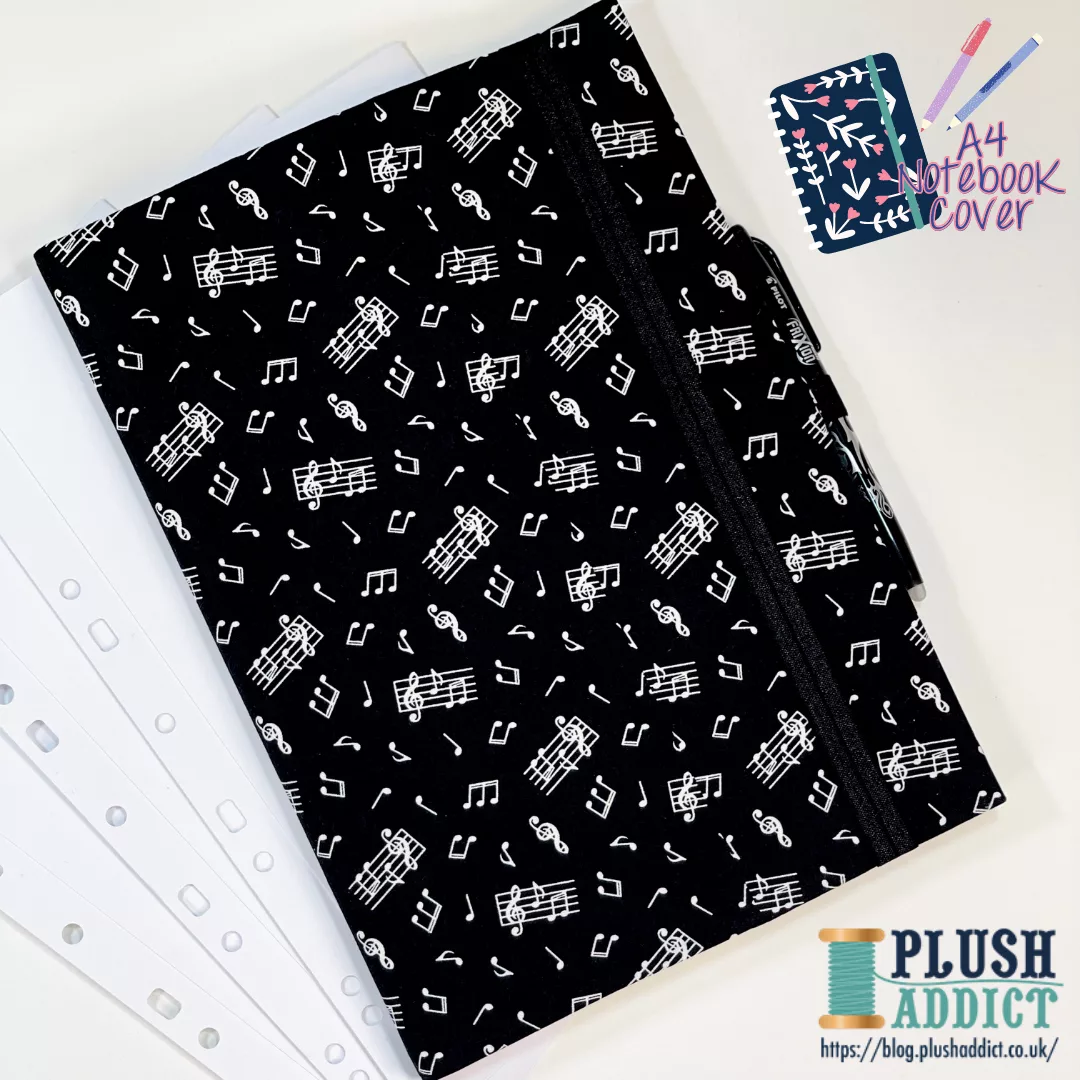
Are you ready to get the kids back to school? Sew a fabric notebook cover in no time. With the first school run of the year just around the corner, we thought this tutorial would be handy to get you and the kids prepared for the lessons to come.
Pin for later!
You may have seen our Father’s Day notebook covers earlier in the year, but this time we have super sized them into A4 ready for all those school books. How impressed will the kids be with a cool fabric notebook to show off in September? Not only will they protect the covers, but they’ll also look super stylish and make a perfect gift, personalised to their taste.
Never miss another tutorial or guide…
Stay up to date with the latest by signing up to our newsletter!
Why not use a fabric that relates to the subject the notebook is for? We have some fabulous music themed fabrics from Nutex and the Venom Black fabric from the Beguiled collection would be perfect for an art journal!
For this project you will need…
1m Fold Over Elastic (We used Black Fold Over Elastic)
Thread (We used Gutermann 38)
To access the tutorial just check out our blog! All you have to change is the size when drafting the pattern.
We can’t wait to see your finished notebooks!

A Guide To Bias Binding
Reading Time: 8 Minutes
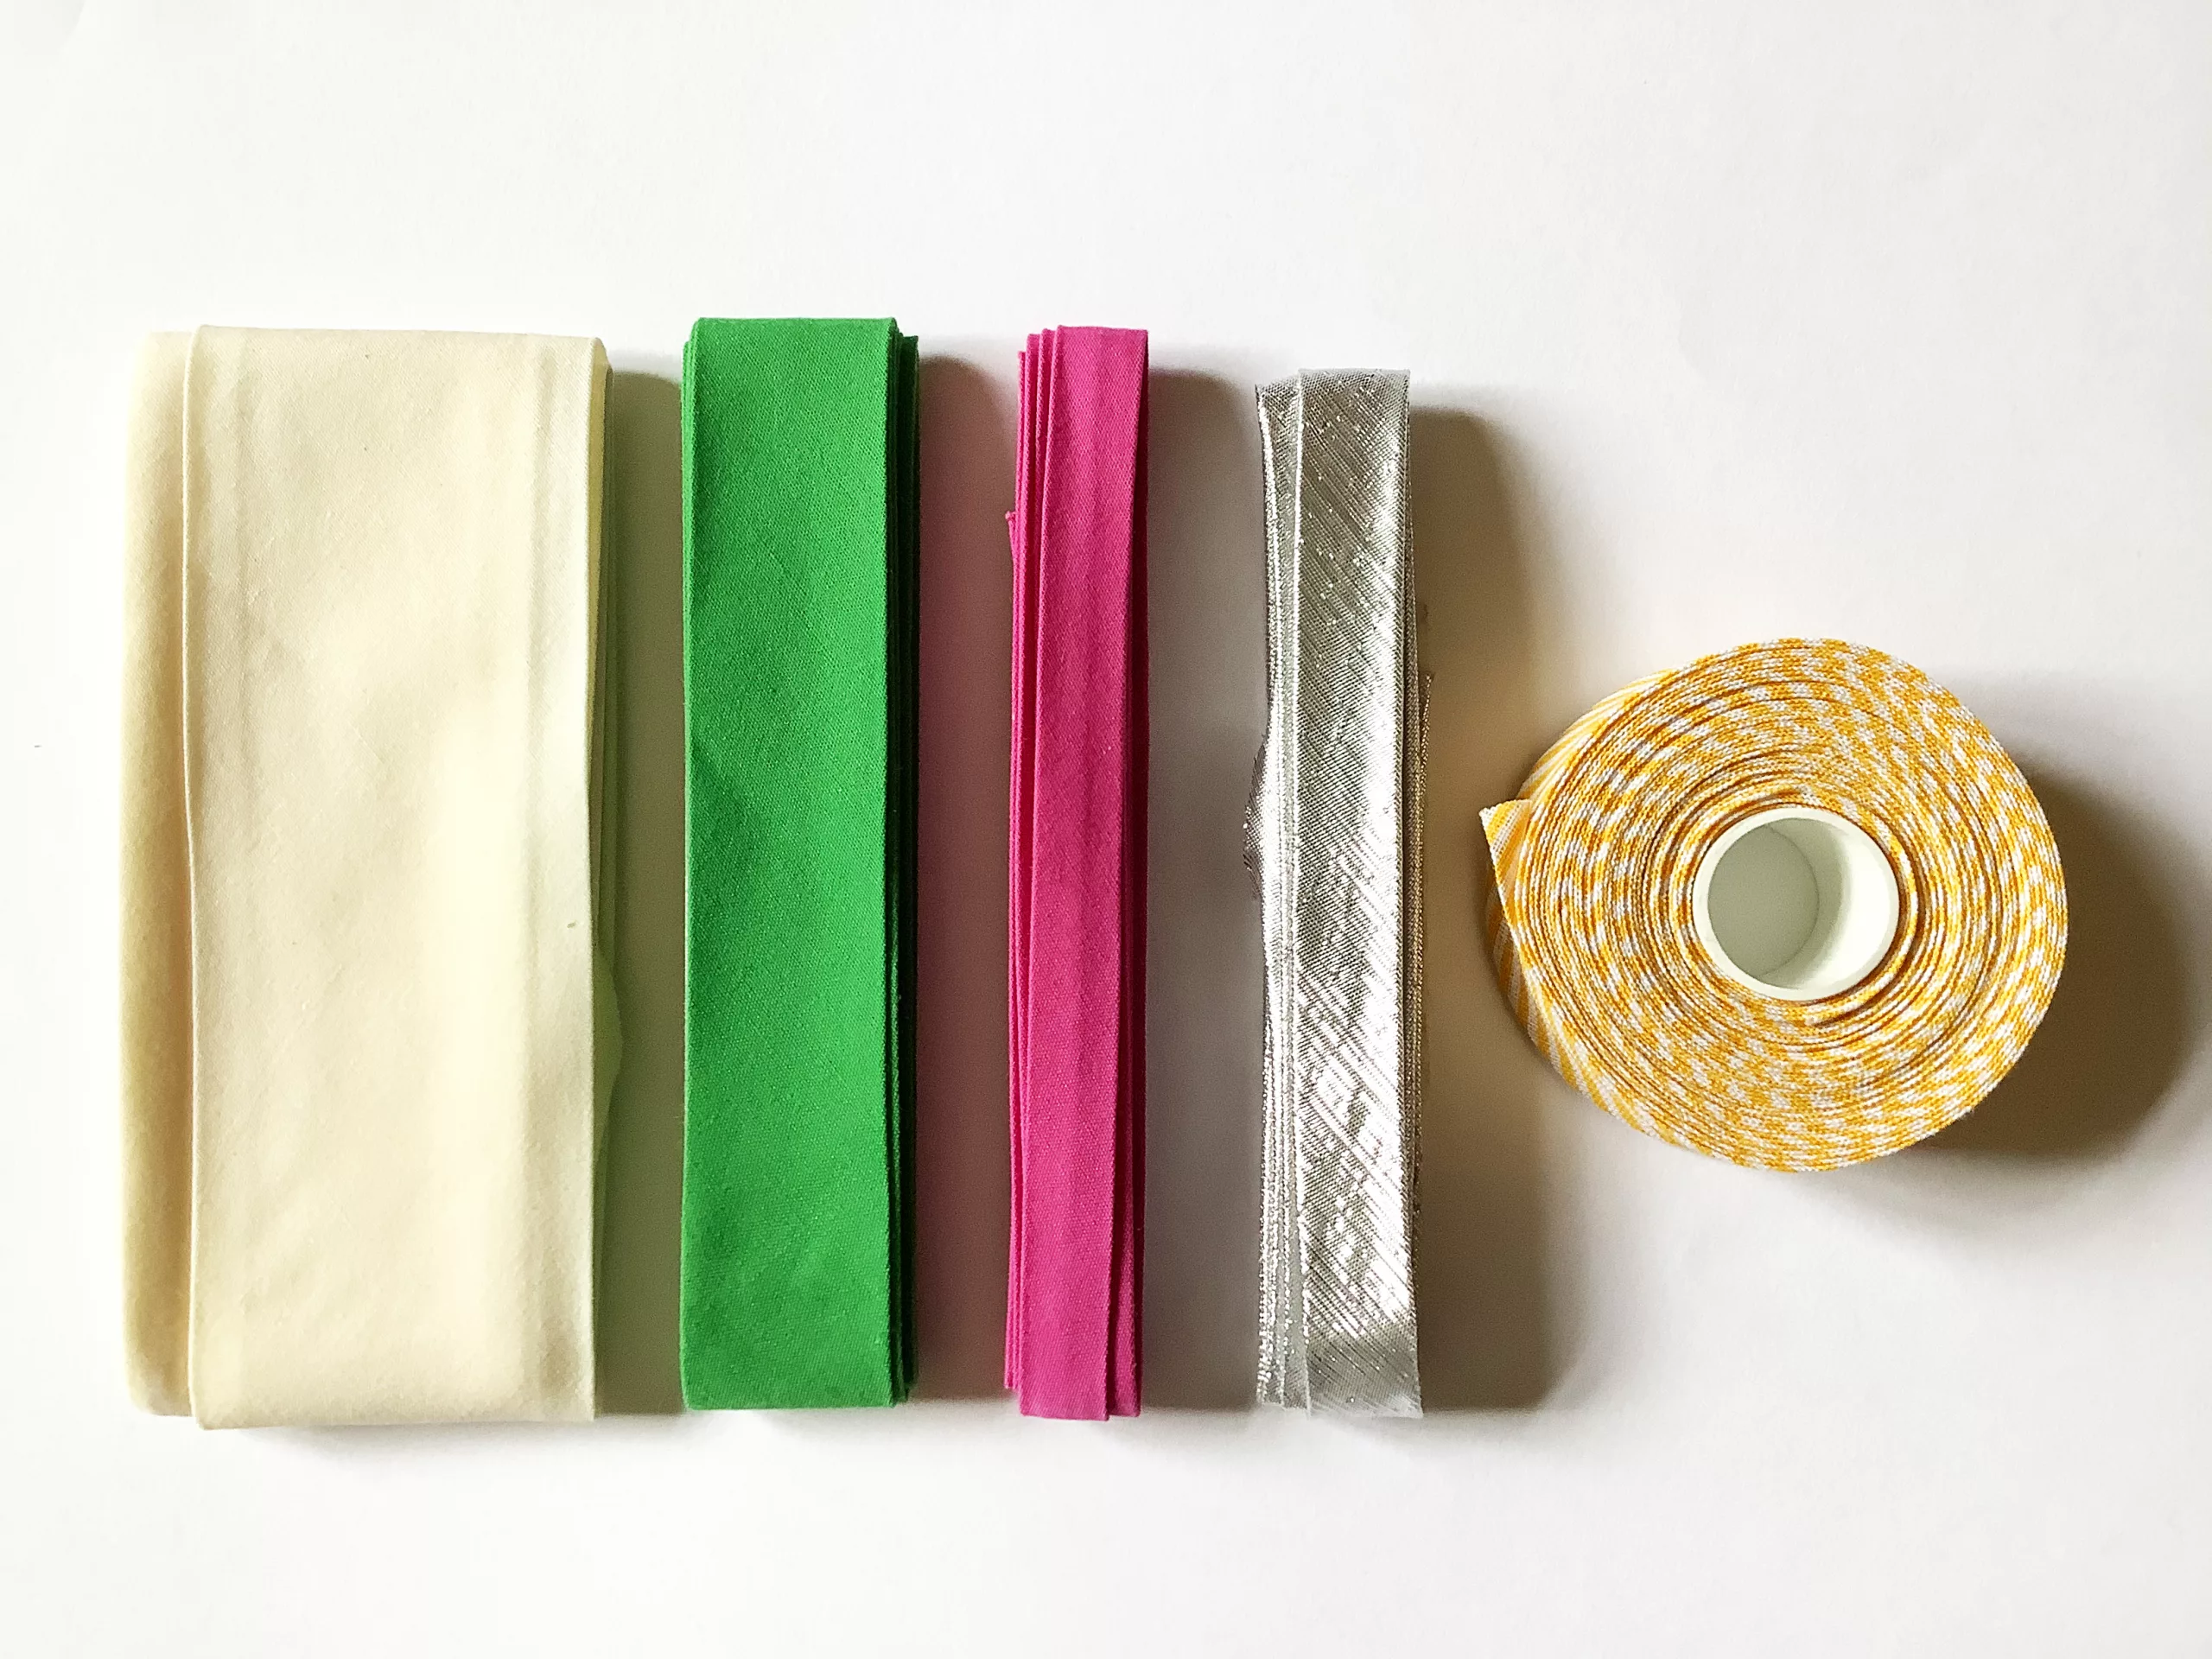
Bias binding is a seam-stars best friend!
Have you ever used it before?
We use it ALL the time in our in-house projects and everyday sewing, it’s used to cover those not so pretty raw edges and gives a project a neat finish.
As well as being available in multiple colours adding a dash of excitement to your project!
Did you know you can use bias binding on a range of different materials and projects?
It’s suitable to use on garments, quilts, cushions and much more and come in various different materials too!
Pin For Later!
Never miss another tutorial or guide…
Stay up to date with the latest by signing up to our newsletter!
Click to join our mailing list!
Types Of Bias Binding
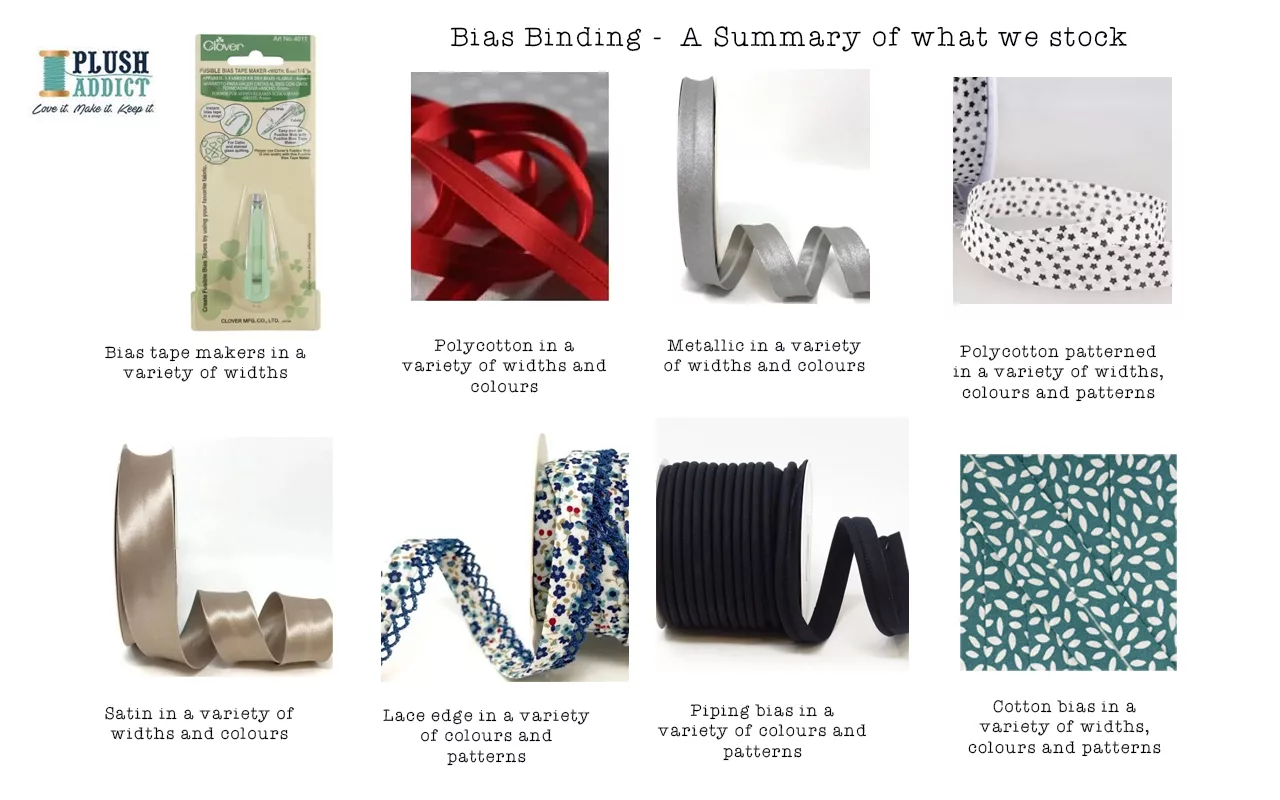
You can find different colours of bias binding ranging from white to blue, to red to pink to black to match any fabric colour! We stock 144 colours of our 20mm bias binding tape!
As well as different colours, bias binding tape also comes in different materials such as cotton, polycotton, metallic, patterned, satin, velvet and leatherette suitable for most types of projects.
And if you’re still on the fence about using this bias tape for your sewing projects this might just sway you… you can get different types of bias binding! There’s plain, piping, stretch, lace edge, iron on and blanket bias binding!
Making your own bias binding is also an alternative to buying it ready made and can often work out much cheaper! We’ll go into detail further on in the guide on how to make your own bias binding.
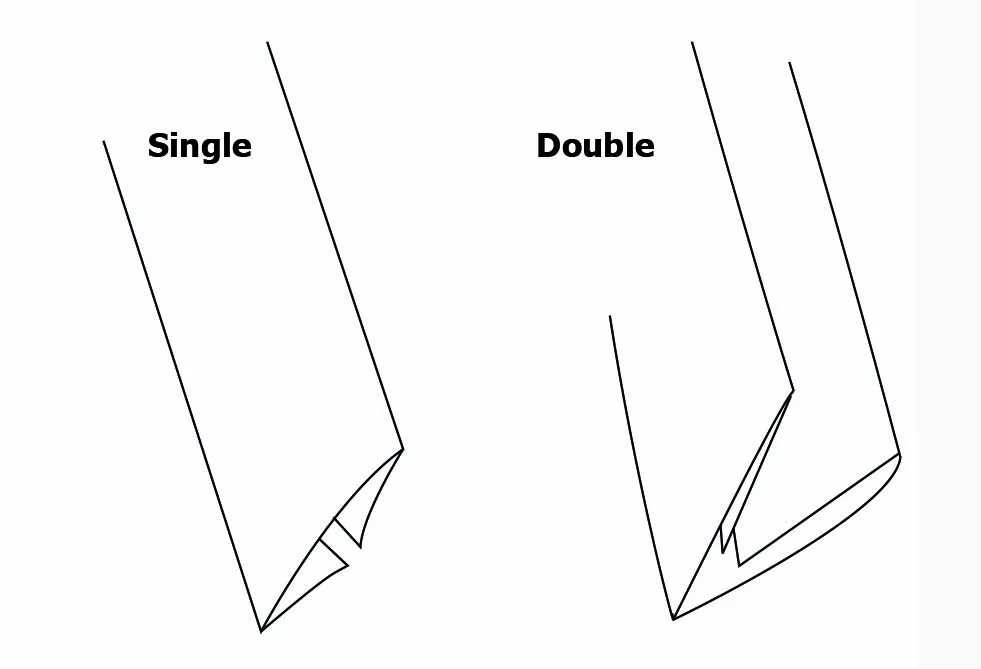
What’s The Difference Between Single Fold And Double Fold Bias Binding?
We’ll also go over the different types of bias binding.
There’s 2 main types, single and double bias tape and you can differentiate both by the way they fold up.
Single fold tape has both edges folded towards the middle, creating a fold down each side of the bias tape..
Whereas double fold is similar to a single fold bias binding, but with an added extra fold in the centre of the bias.
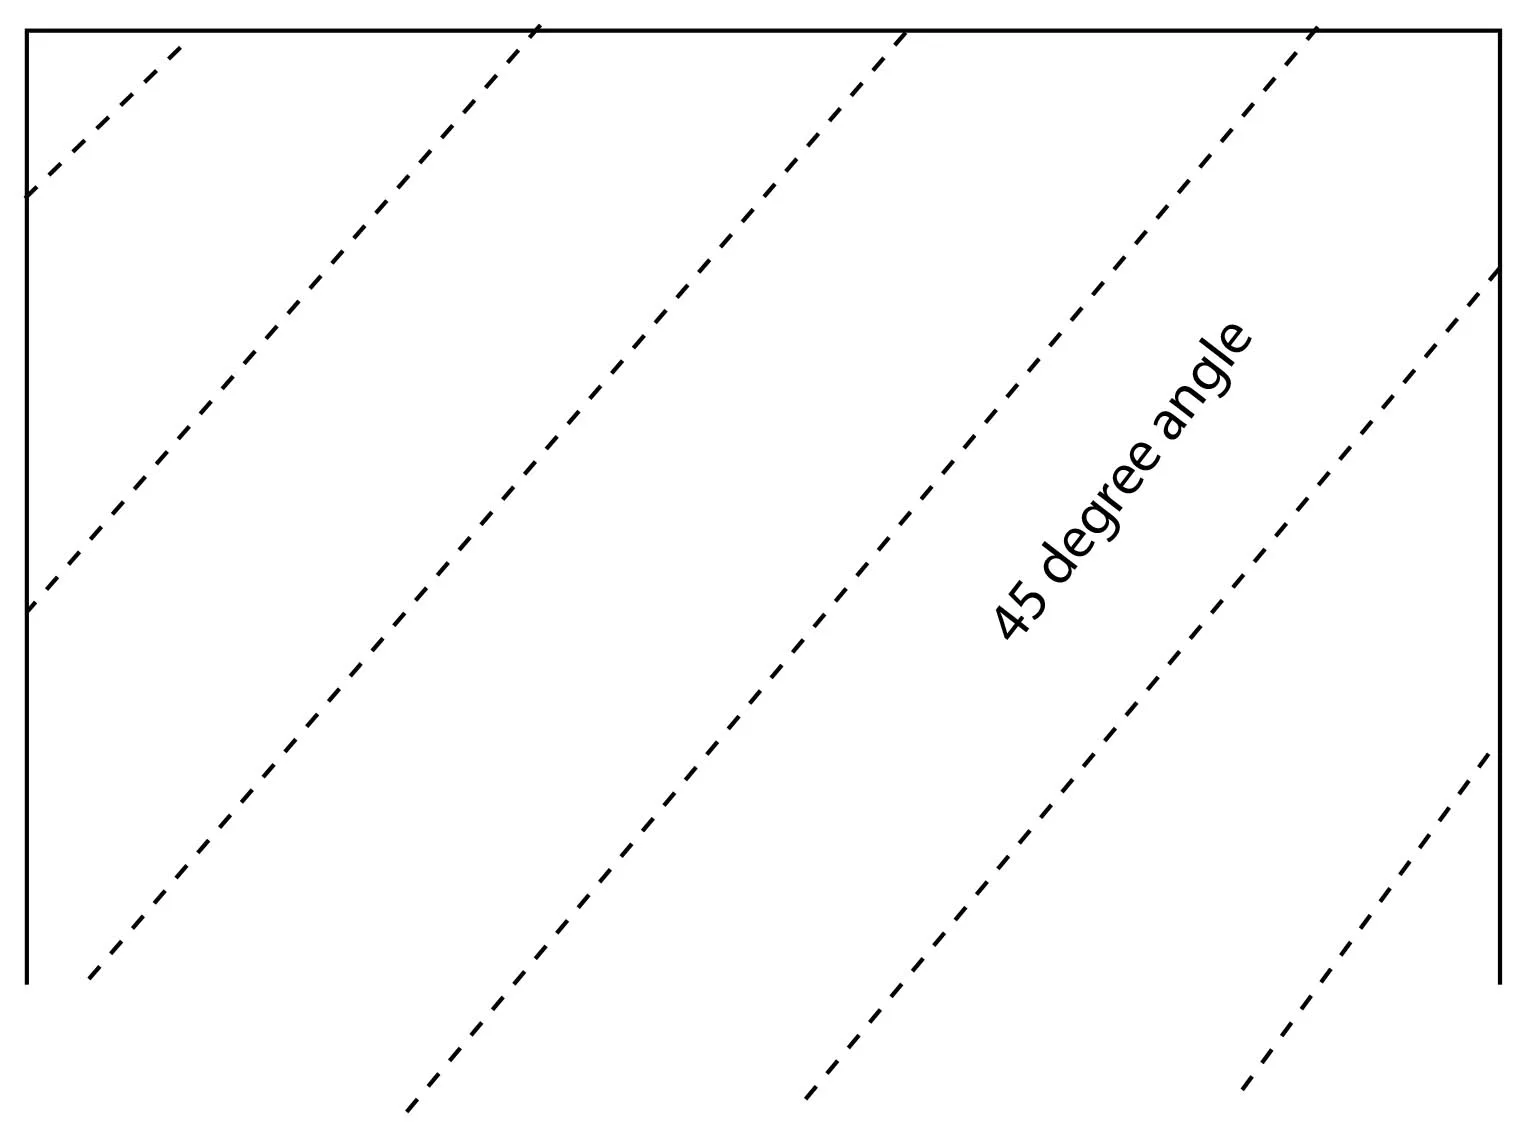
All bias binding is cut at a 45-degree angle to allow for stretch and use on project corners!
So let’s get into the guide, we’ll go over how to make bias binding, how to attach bias binding, how to sew bias binding corners and more!
How To Make Bias Binding
Knowing how to make bias binding (also known as bias tape) is a life-long skill for any sewist!
The advantages of making handmade bias binding tape are that you can decide on the exact width and pattern that you want, it can also be more cost effective saving you money by using fabrics from your stash.
Plus you can match it perfectly with your project by using the same fabric!
We’d recommend investing in a bias making tool, they’re worth the money and can save so much time. However they come in various different sizes so make sure you choose the correct size for your project.
Want to learn how to make and how to cut your own bias binding tape? Read on!
Make Your Own Bias Binding Step-by-Step
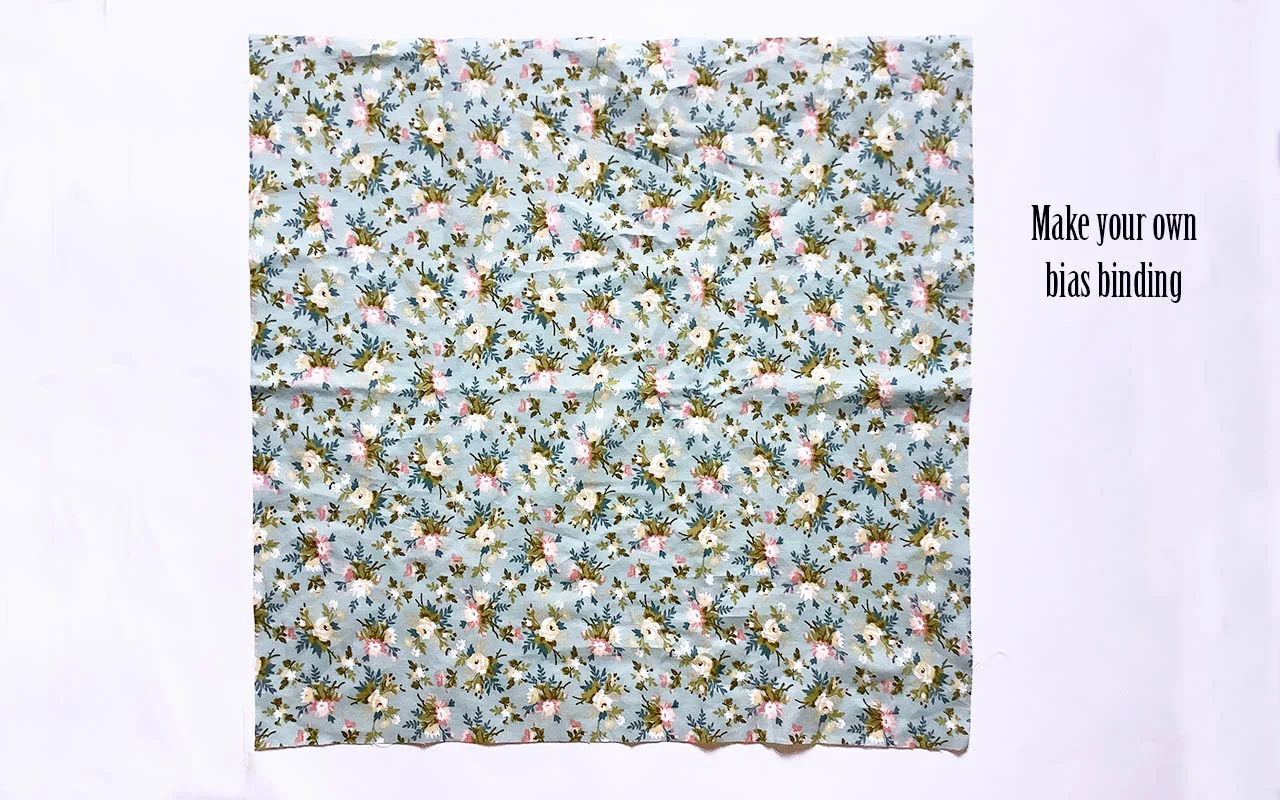
Step 1: Take your piece of fabric
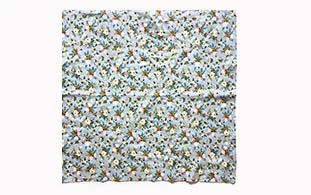
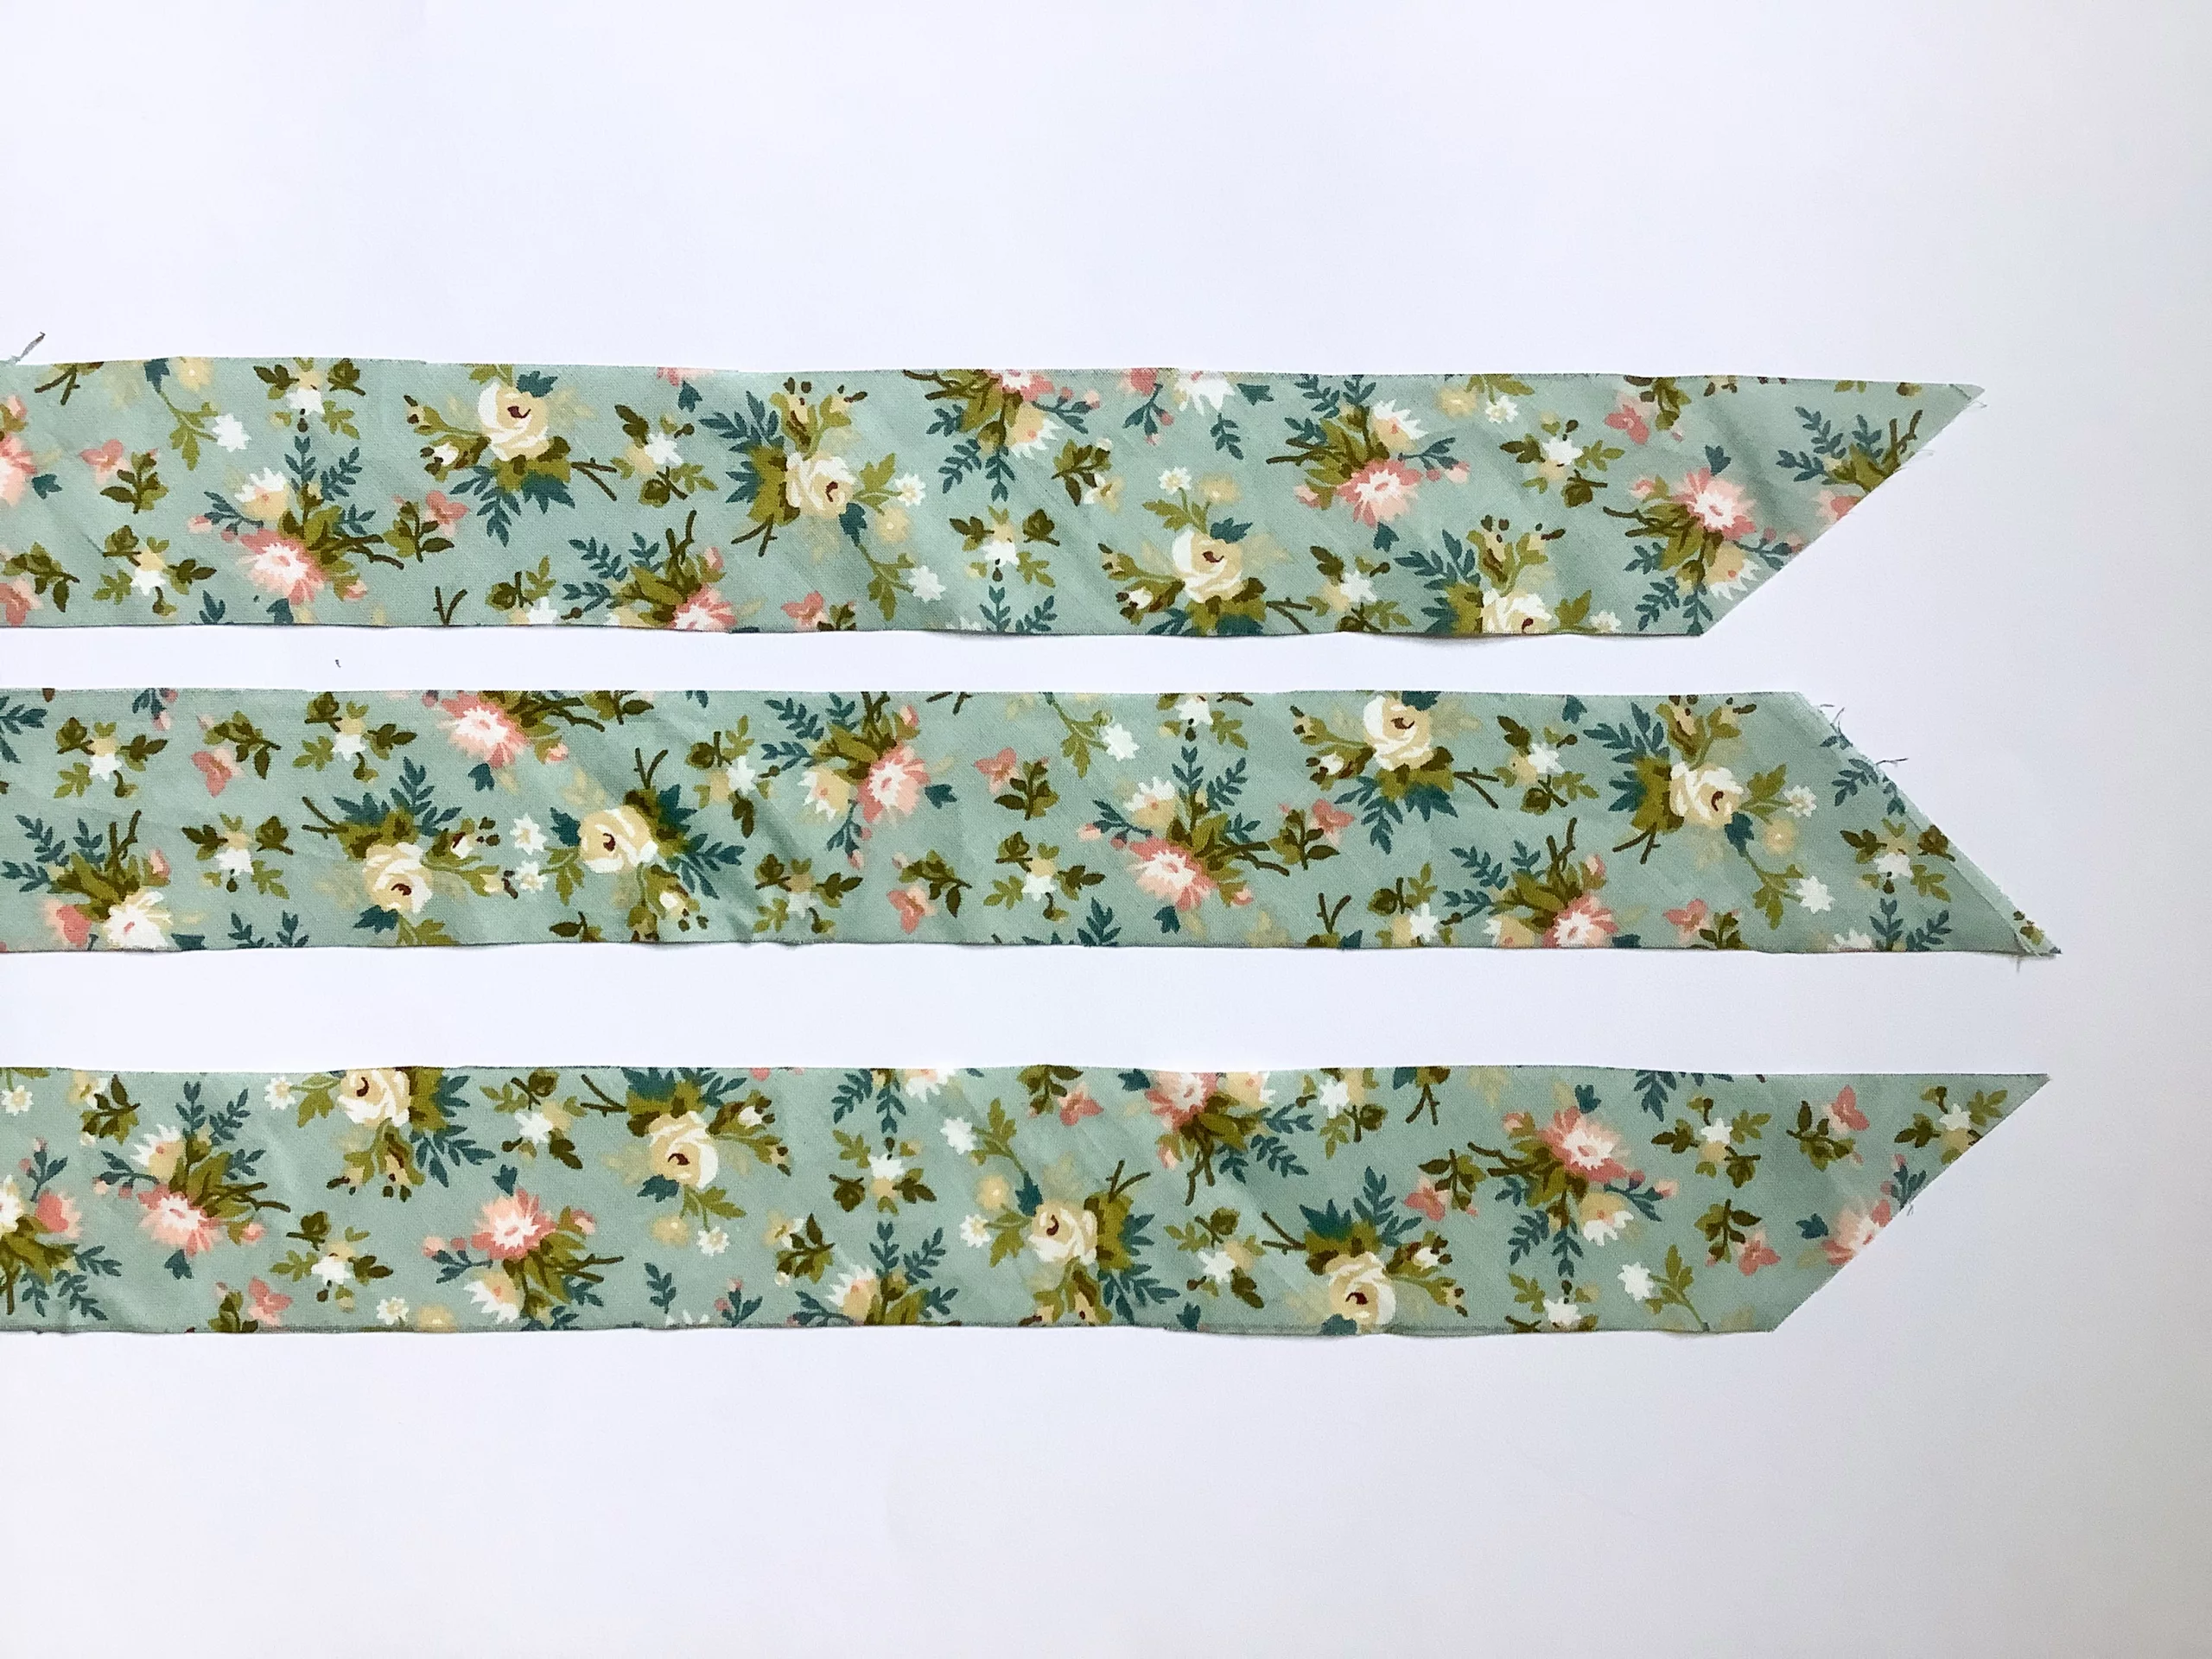
Step 2: Take the top right-hand edge to meet the bottom edge creating a triangle and press.
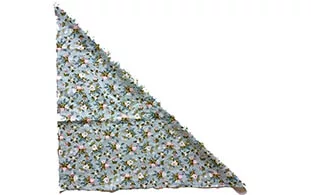
Step 3: Use a ruler and fabric marker to draw strips parallel to the fold. If you are using a bias tool.
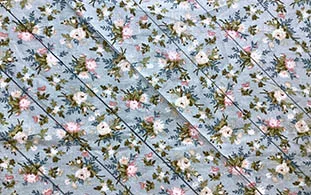
Step 4: Cut the strips using fabric scissors or a rotary cutter.
Step 5: Overlap the ends of two strips at a 90-degree angle and pin in place.
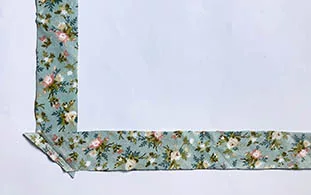
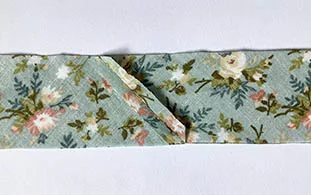
Step 6: Stitch together and press back the seams. Trim the seam edges that overhang. Continue to piece all your strips together in this way until you have enough to go around the edge of your project.
Ways To Fold Your Binding
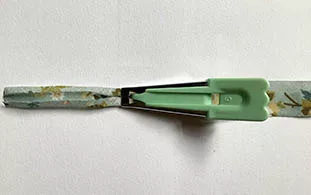
Option 1: Use a bias binding maker
Once you have all your strips joined, feed one end of the strip into the wide end of the maker.
Next, pull the strip out of the narrow end of the bias binding maker.
Move the maker along with the strip, pressing it with a hot iron as you go.
When finished, wind the bias binding tape around some strong card to keep it flat and pressed.
Option 2: If you don’t have a binder maker.
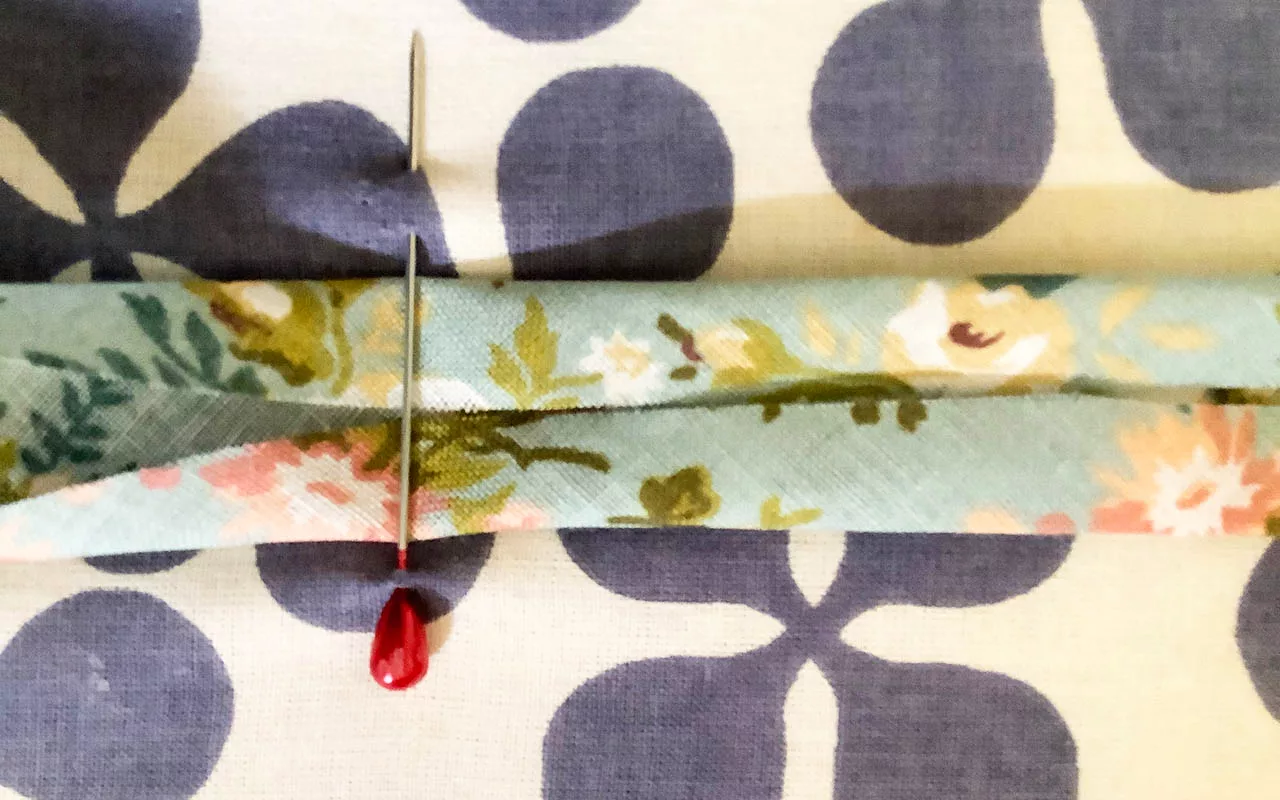
If you don’t have a tool, you can press by hand or use a pin on your ironing board as a guide.
To use the pin method, use a fabric marker to mark two points half the width of your fabric strip.
Insert a pin between these marks.
Pass the strip under the pin pressing with an iron as you go.
Never miss another tutorial or guide…
Stay up to date with the latest by signing up to our newsletter!
Click to join our mailing list!
How To Attach Bias Binding
Curves
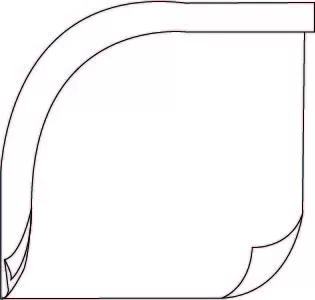
Applying and sewing bias binding around curves may seem daunting at first but it isn’t as difficult as you might think.
Follow our step by step bias binding tutorial to learn how to sew bias binding around curves and how to attach bias binding to a project.
Applying Bias Binding Step-by-Step
Step 1: Unfold the bias tape and line up the edge with the edge of your fabric.
Make sure your right sides are facing each other and pin in place.
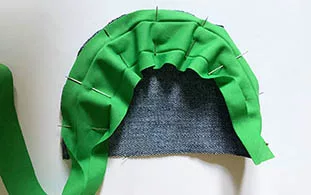
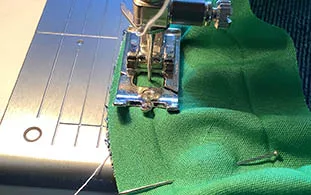
Step 2: You will get some puckering but don’t worry about that. Slowly stitch along the fold line.
Step 3: Fold the bias tape over to the back.
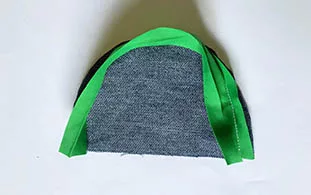
Step 4: Pin or clip in place. If the binding doesn’t quite sit where you want it, trim the seam allowance slightly.
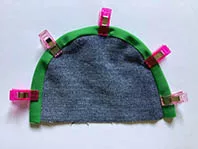
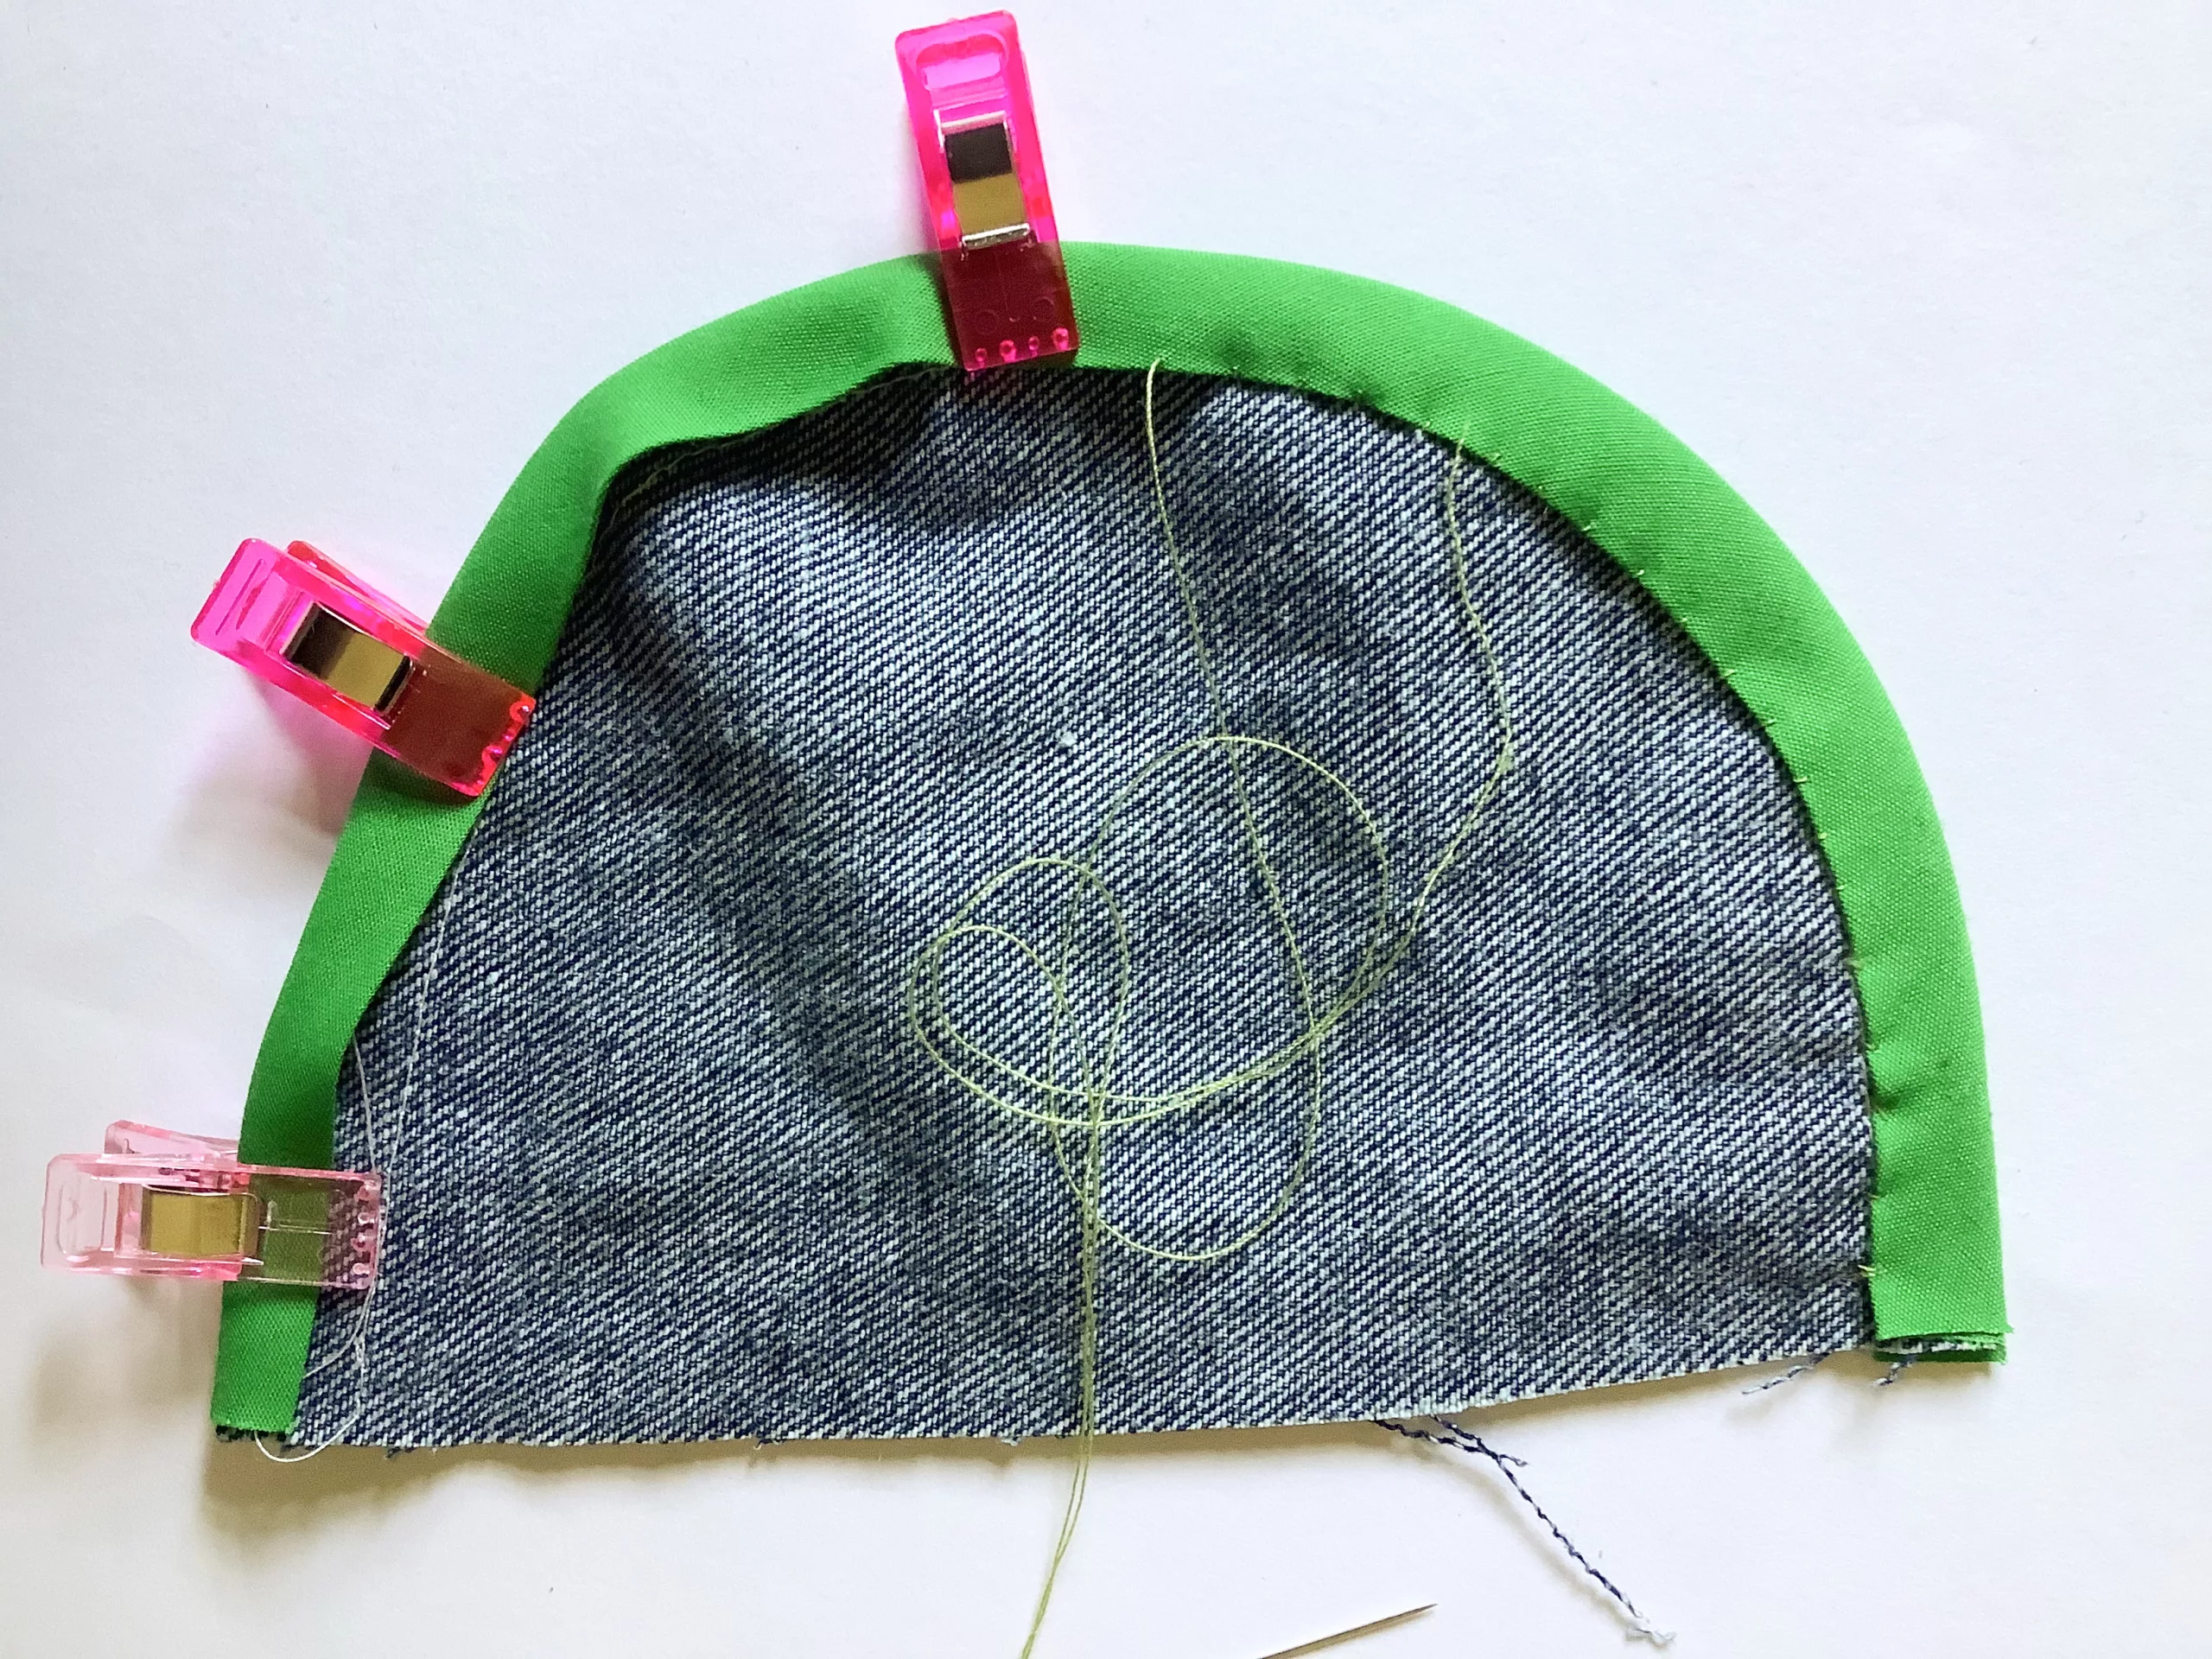
Step 5: You can topstitch the binding in place, but we recommend hand sewing it so there is no stitch line on the front.
You can also clip the seam allowance if you need to along the curve to remove the bulk.
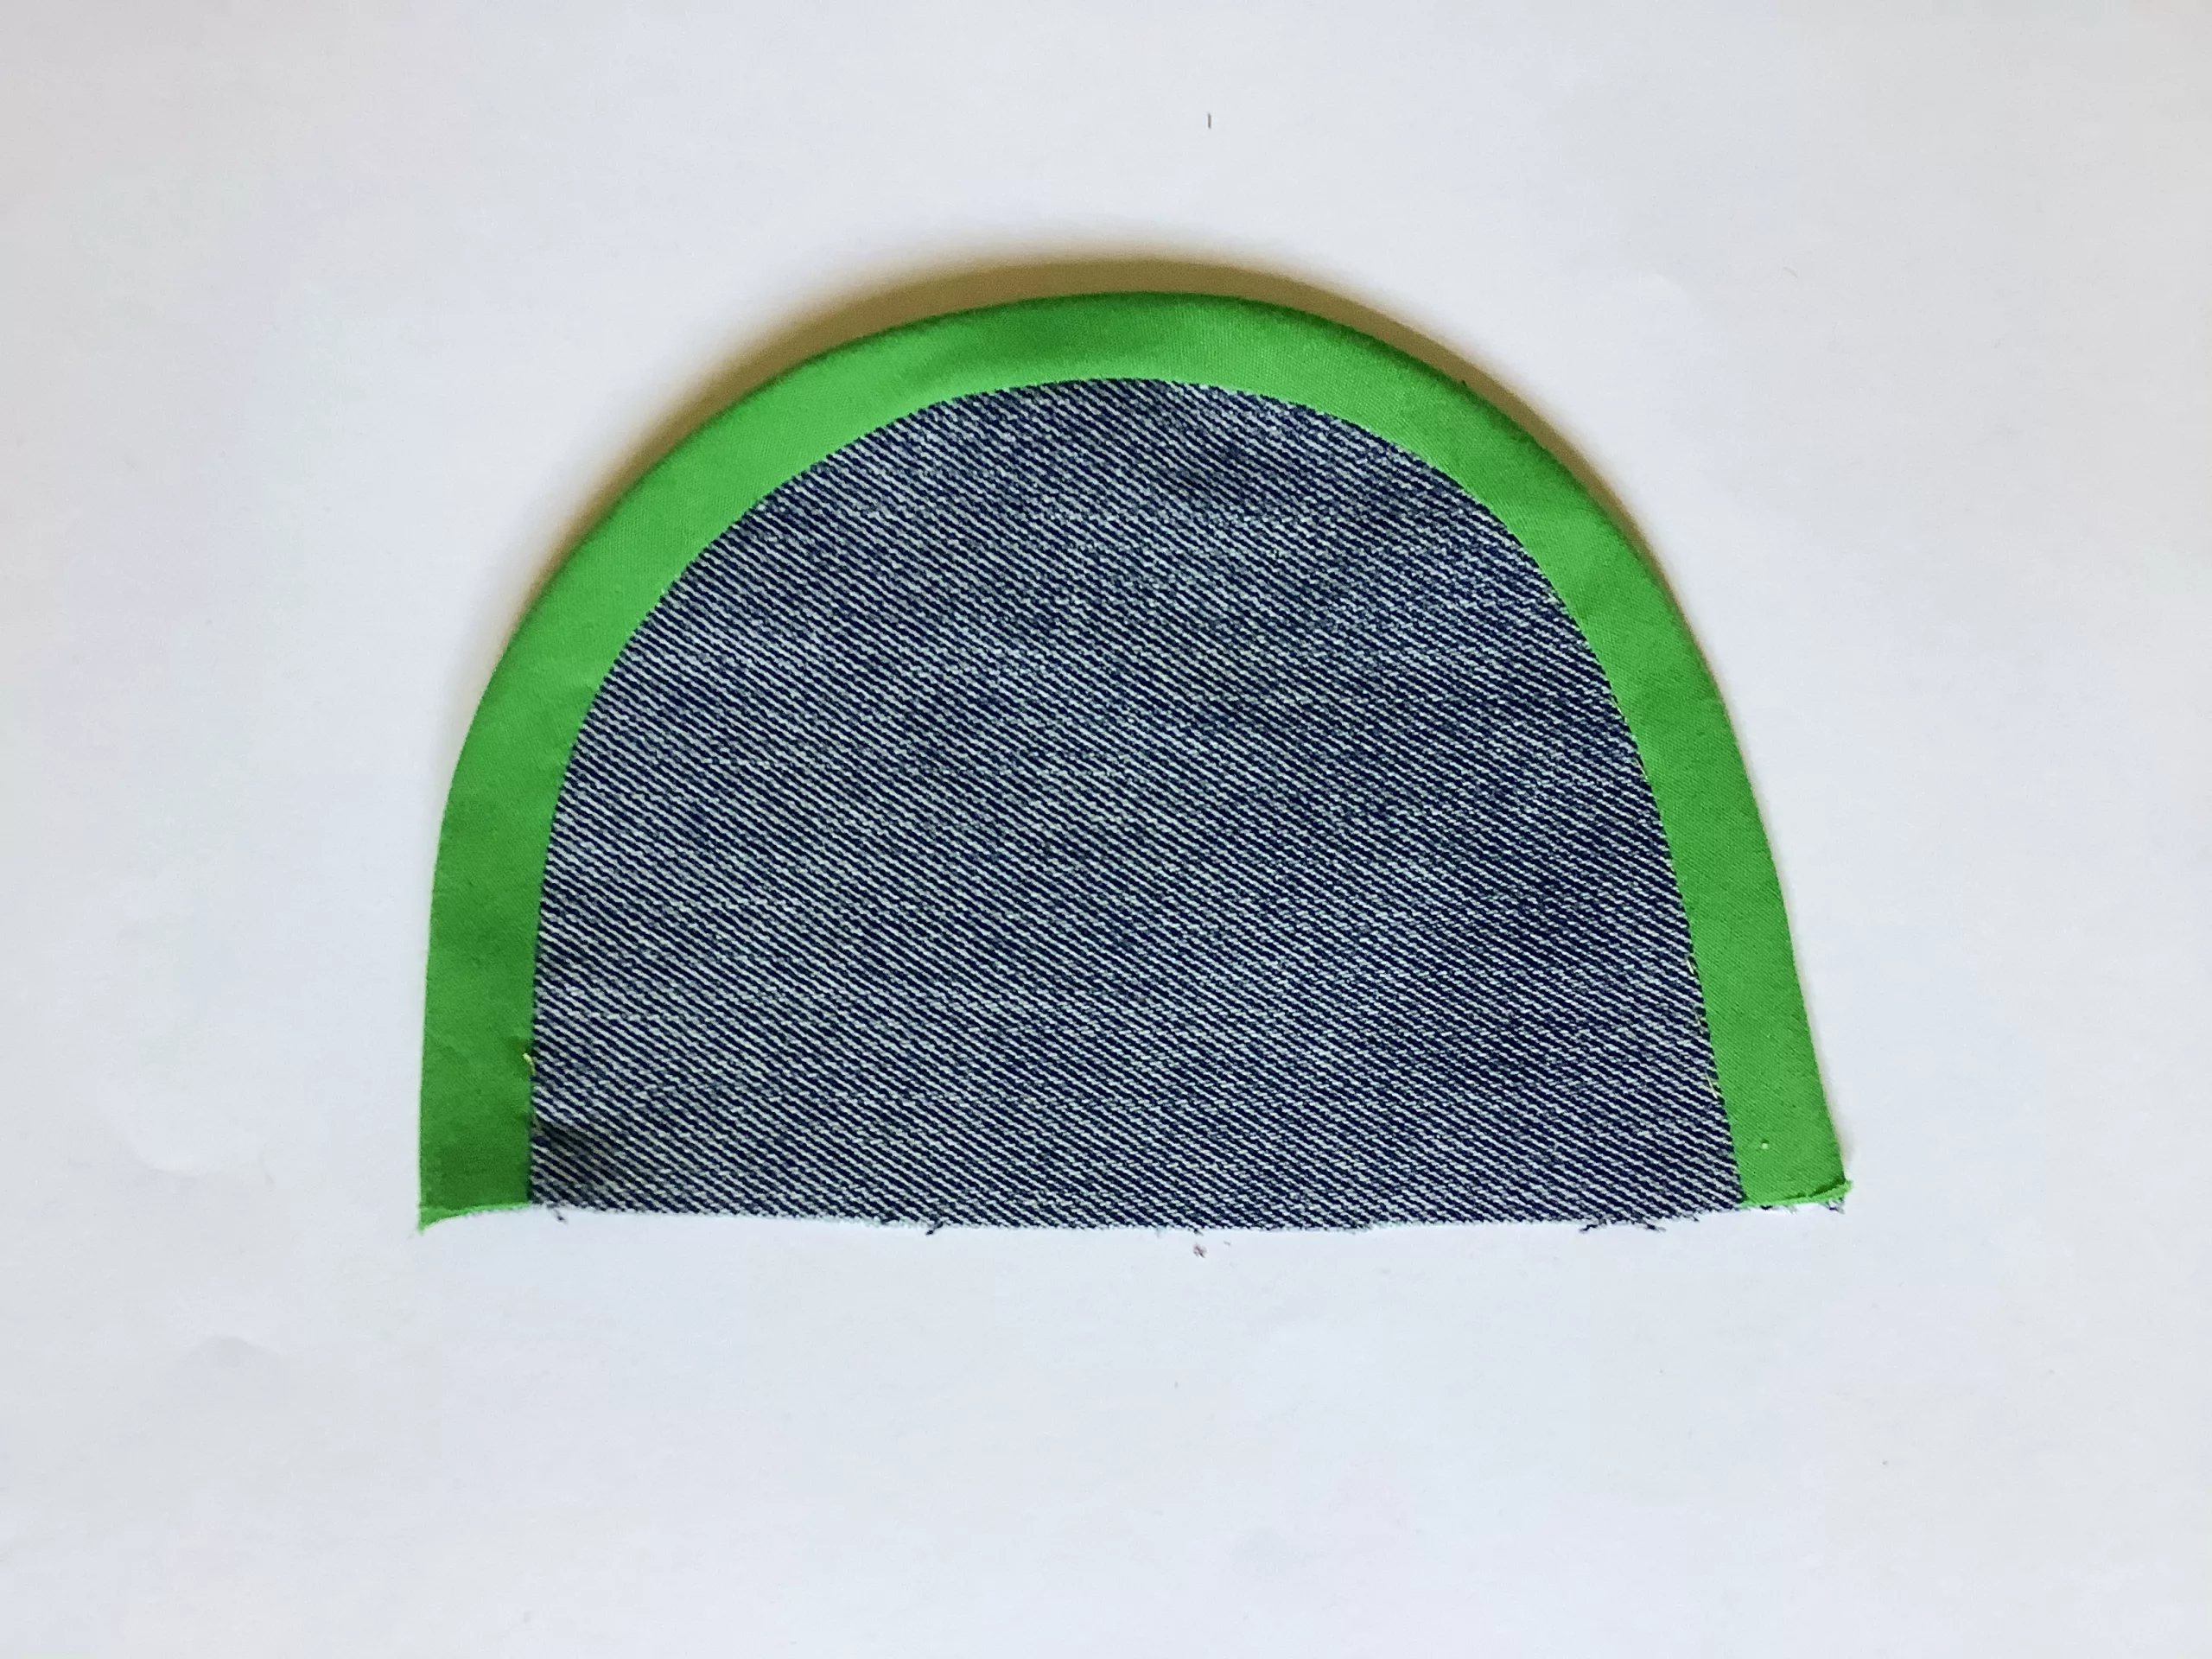
Step 6: Give the binding a good press with the iron.
How To Mitre A Corner with Bias Binding
Although you might find mitred corners hard at first, following the method below takes all the confusion out!
All it takes is just a bit of practice.
Pin For Later!
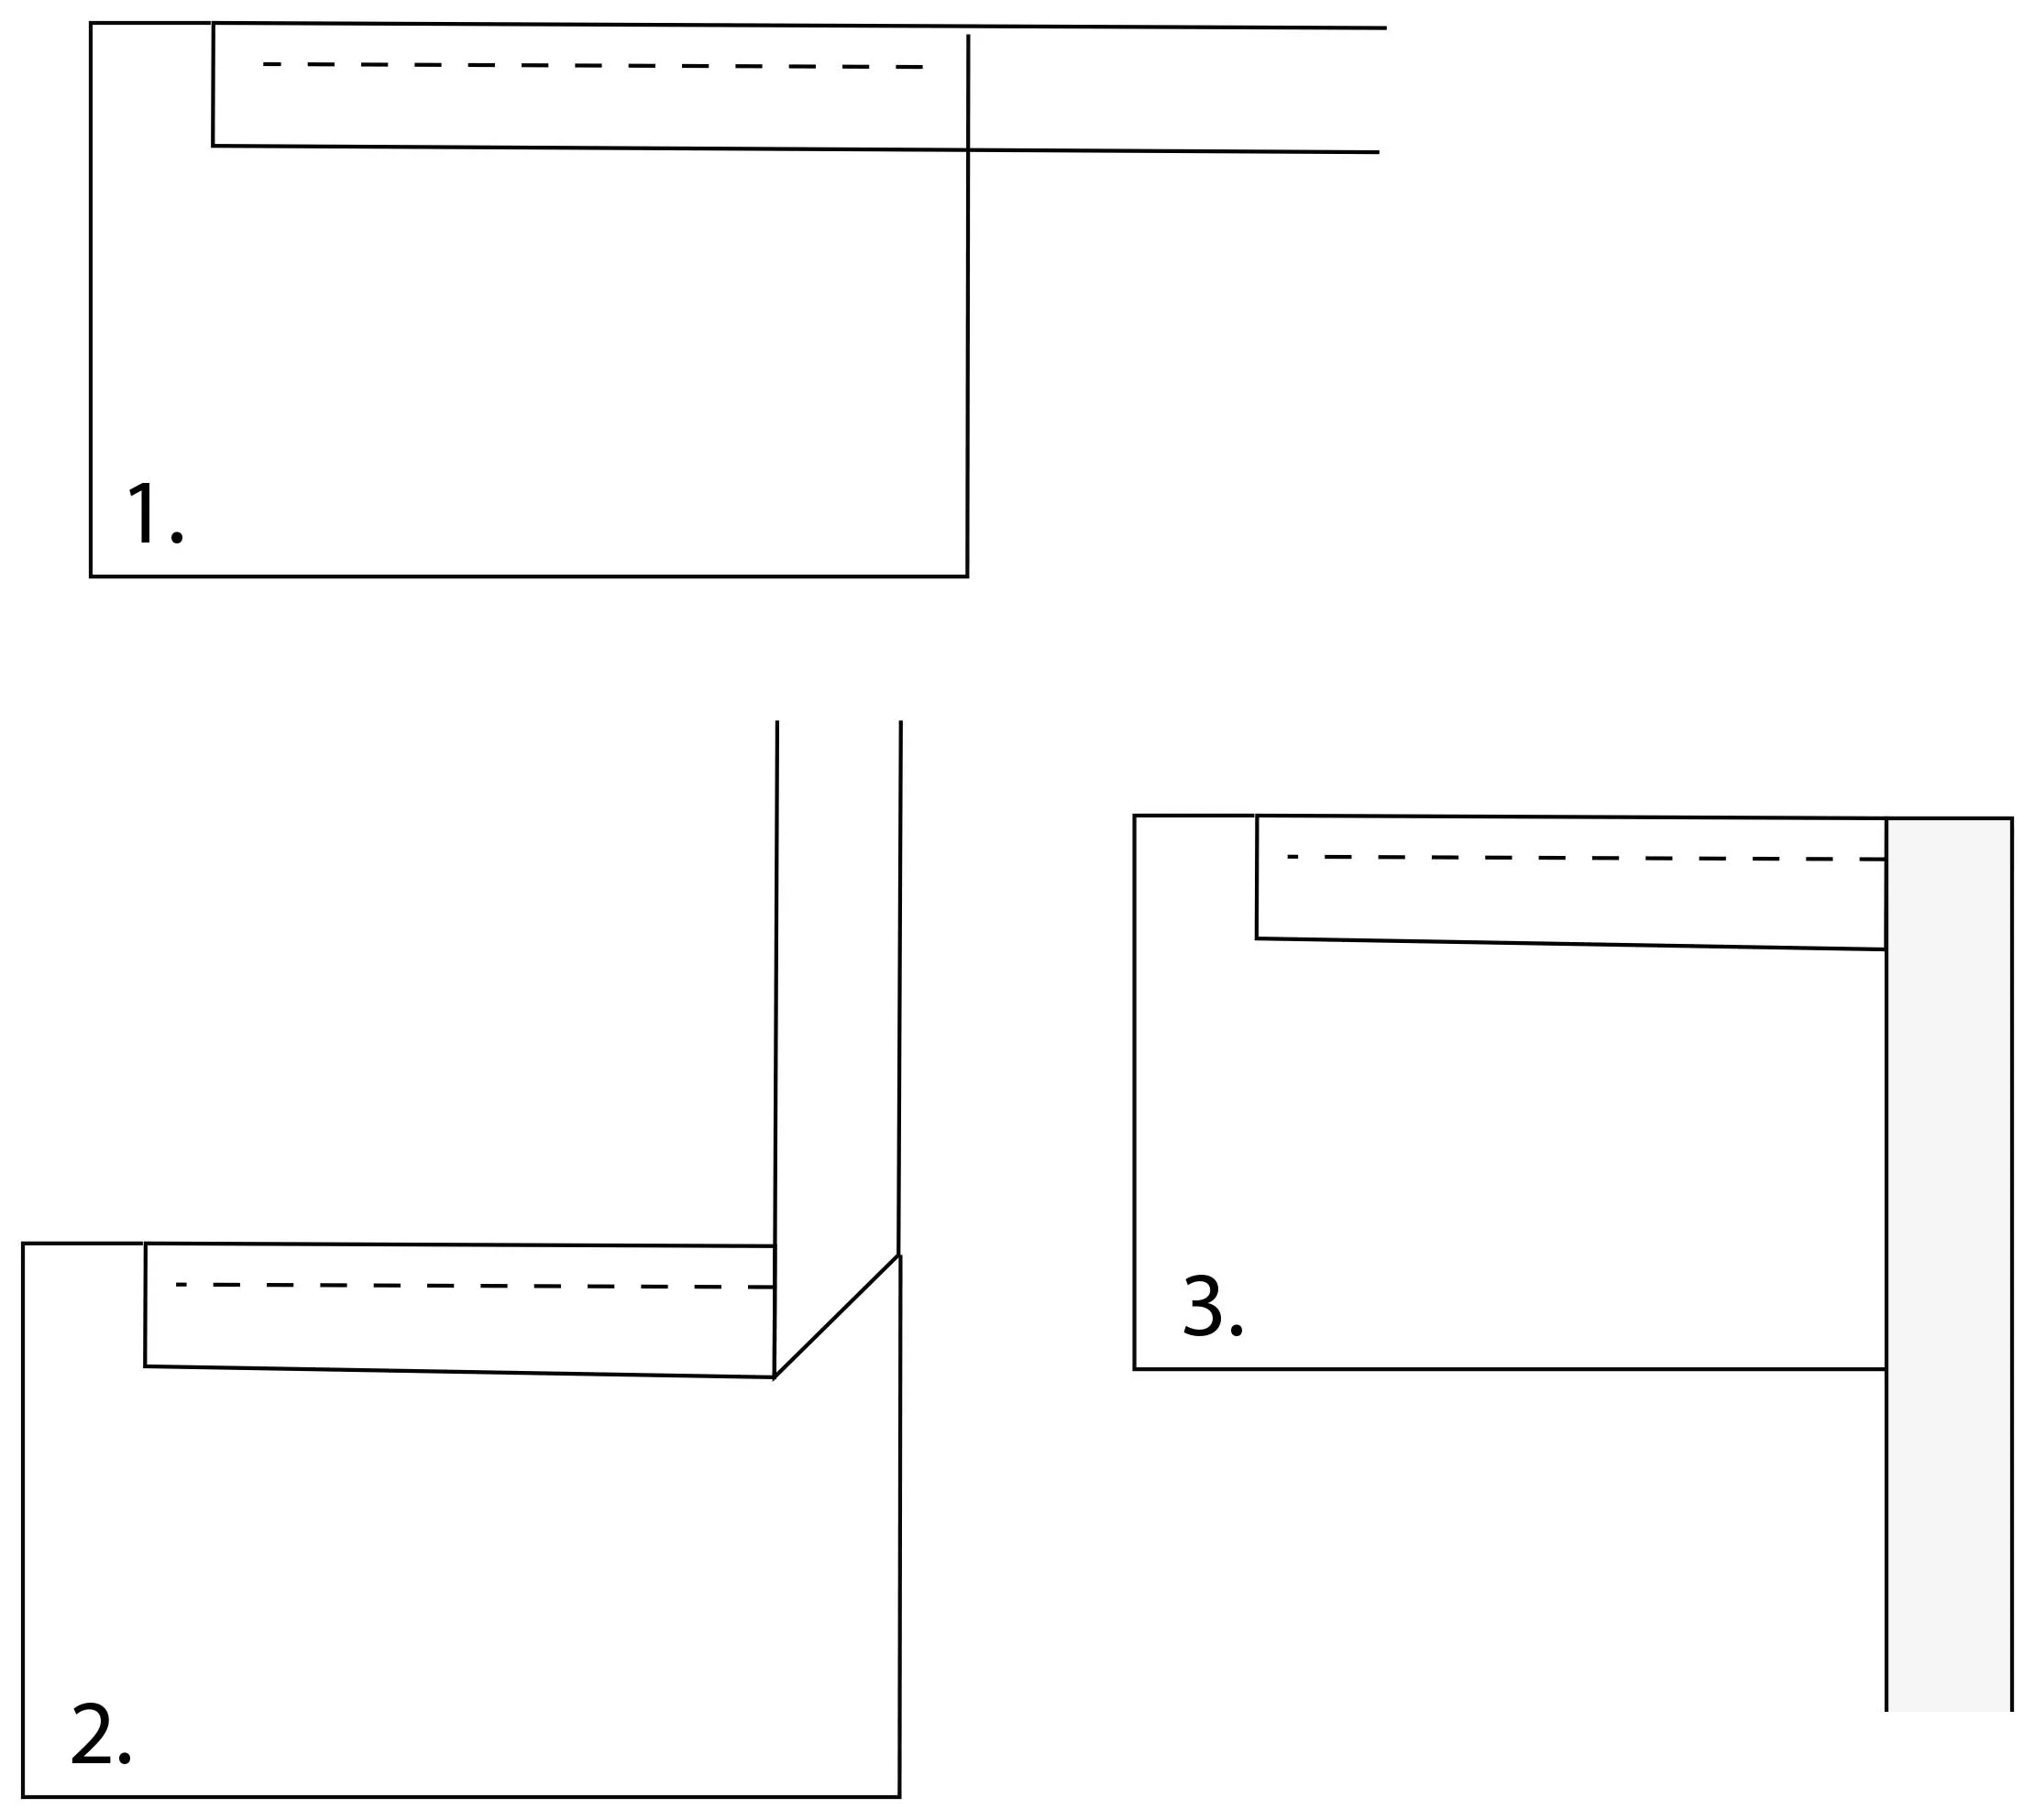
Mitre A Corner With Bias Binding Step-by-Step
Step 1: Unfold the bias tape and line up the edge with the edge of your fabric.
Make sure your right sides are facing each other and pinned in place.
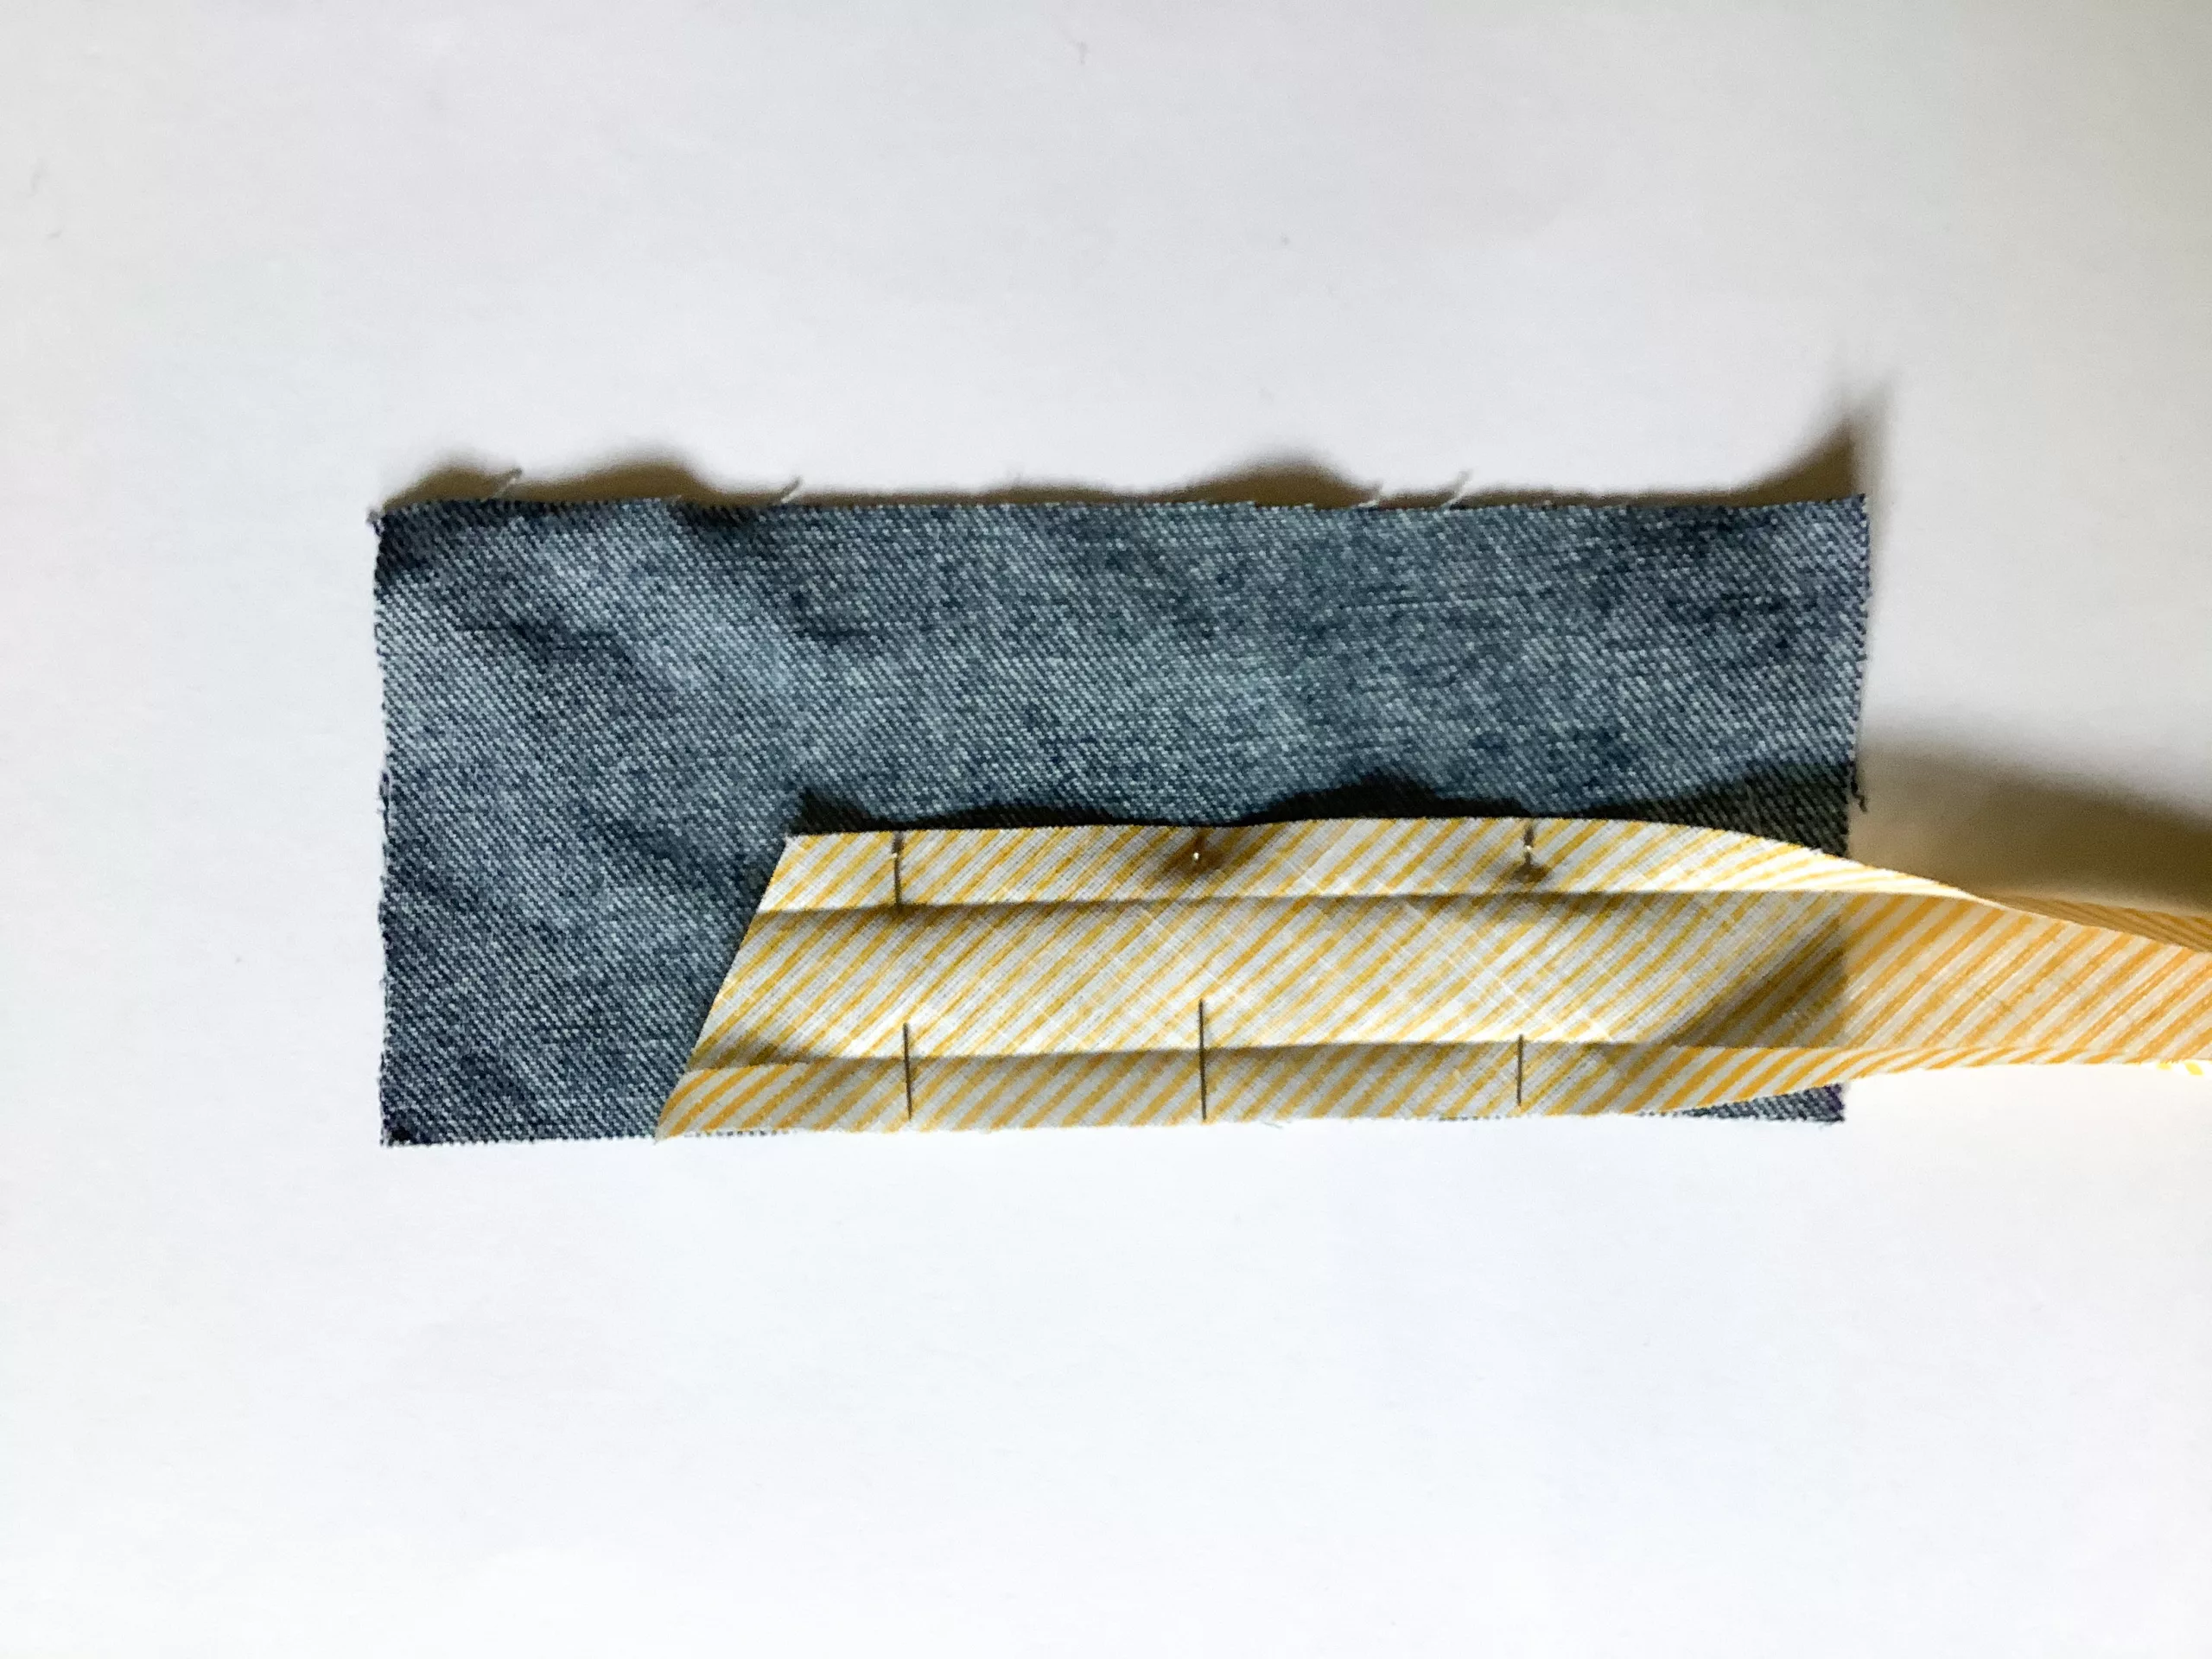
Step 2: Leave 2 or 3cm before you sew.
This will form an overlap at the end. Stitch along the fold line.
When you get to the end, stop about 6mm before the fabric edge.
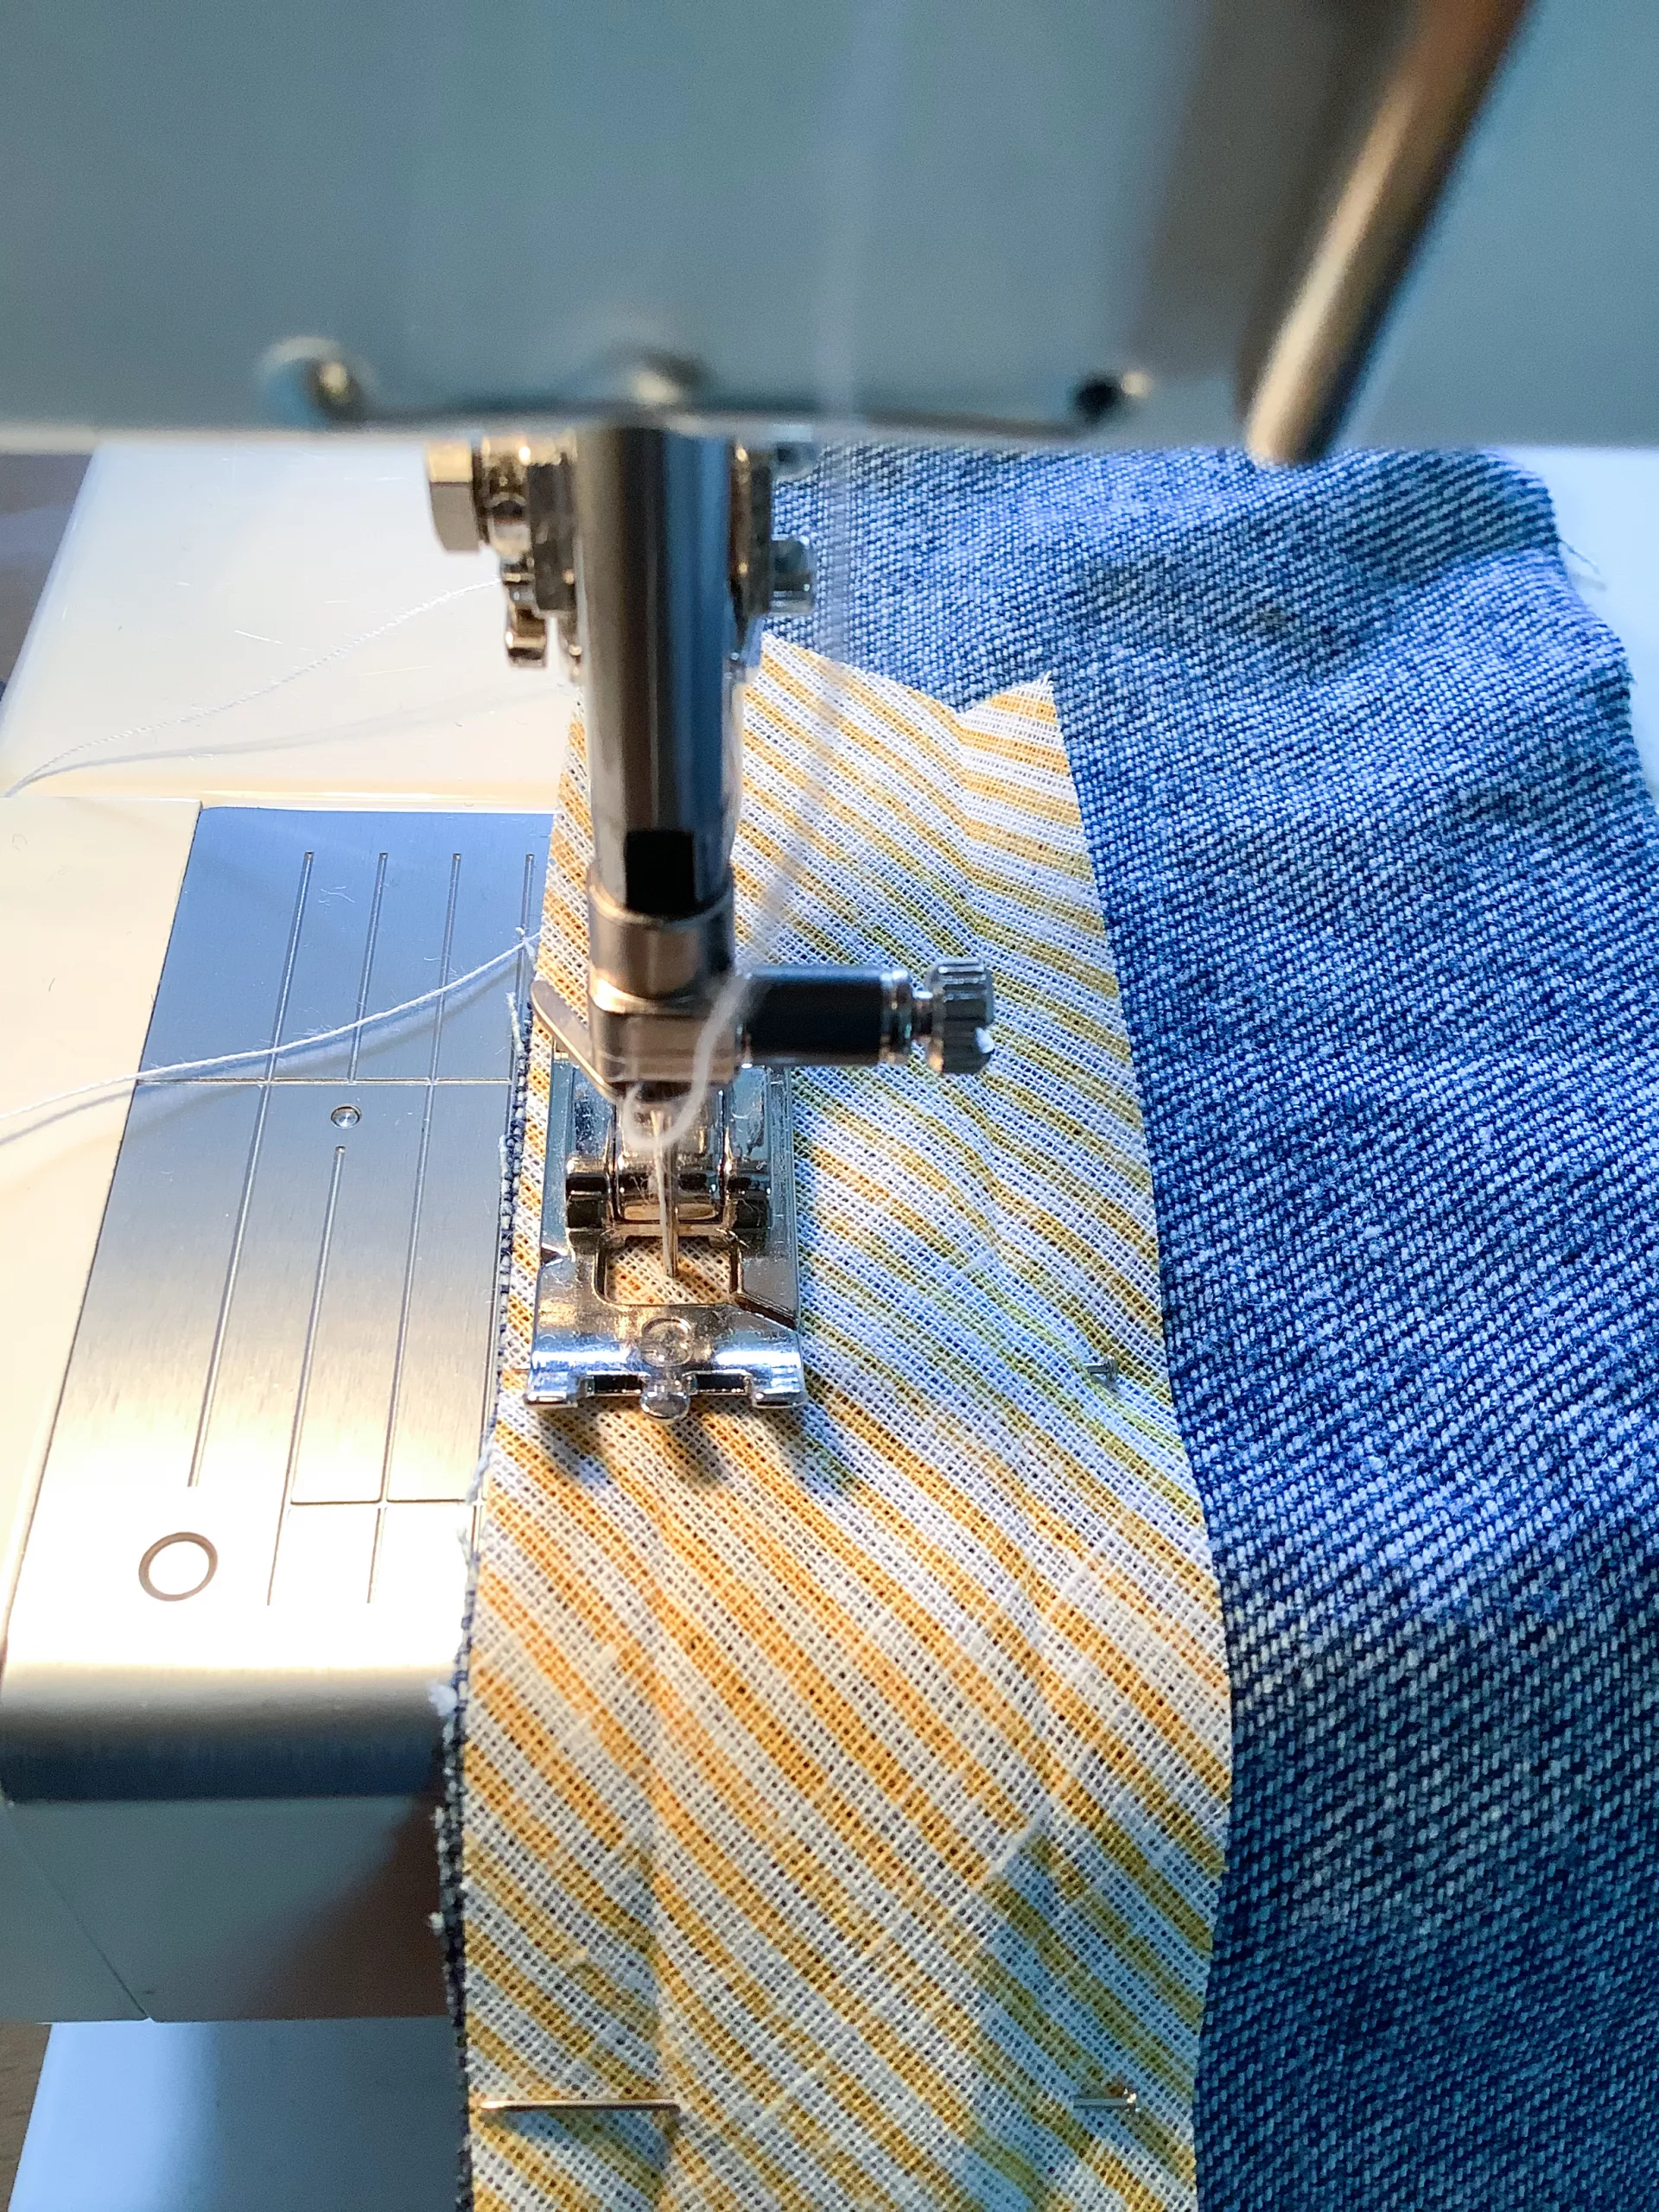
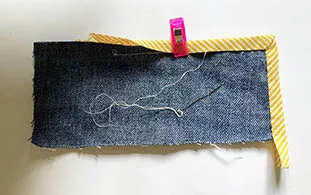
Step 3: Move your needle up and fold the bias tape up at a 90 degree angle and fold back down, this will give you a diagonal 45 degree angle at the corner.
Pin in place.
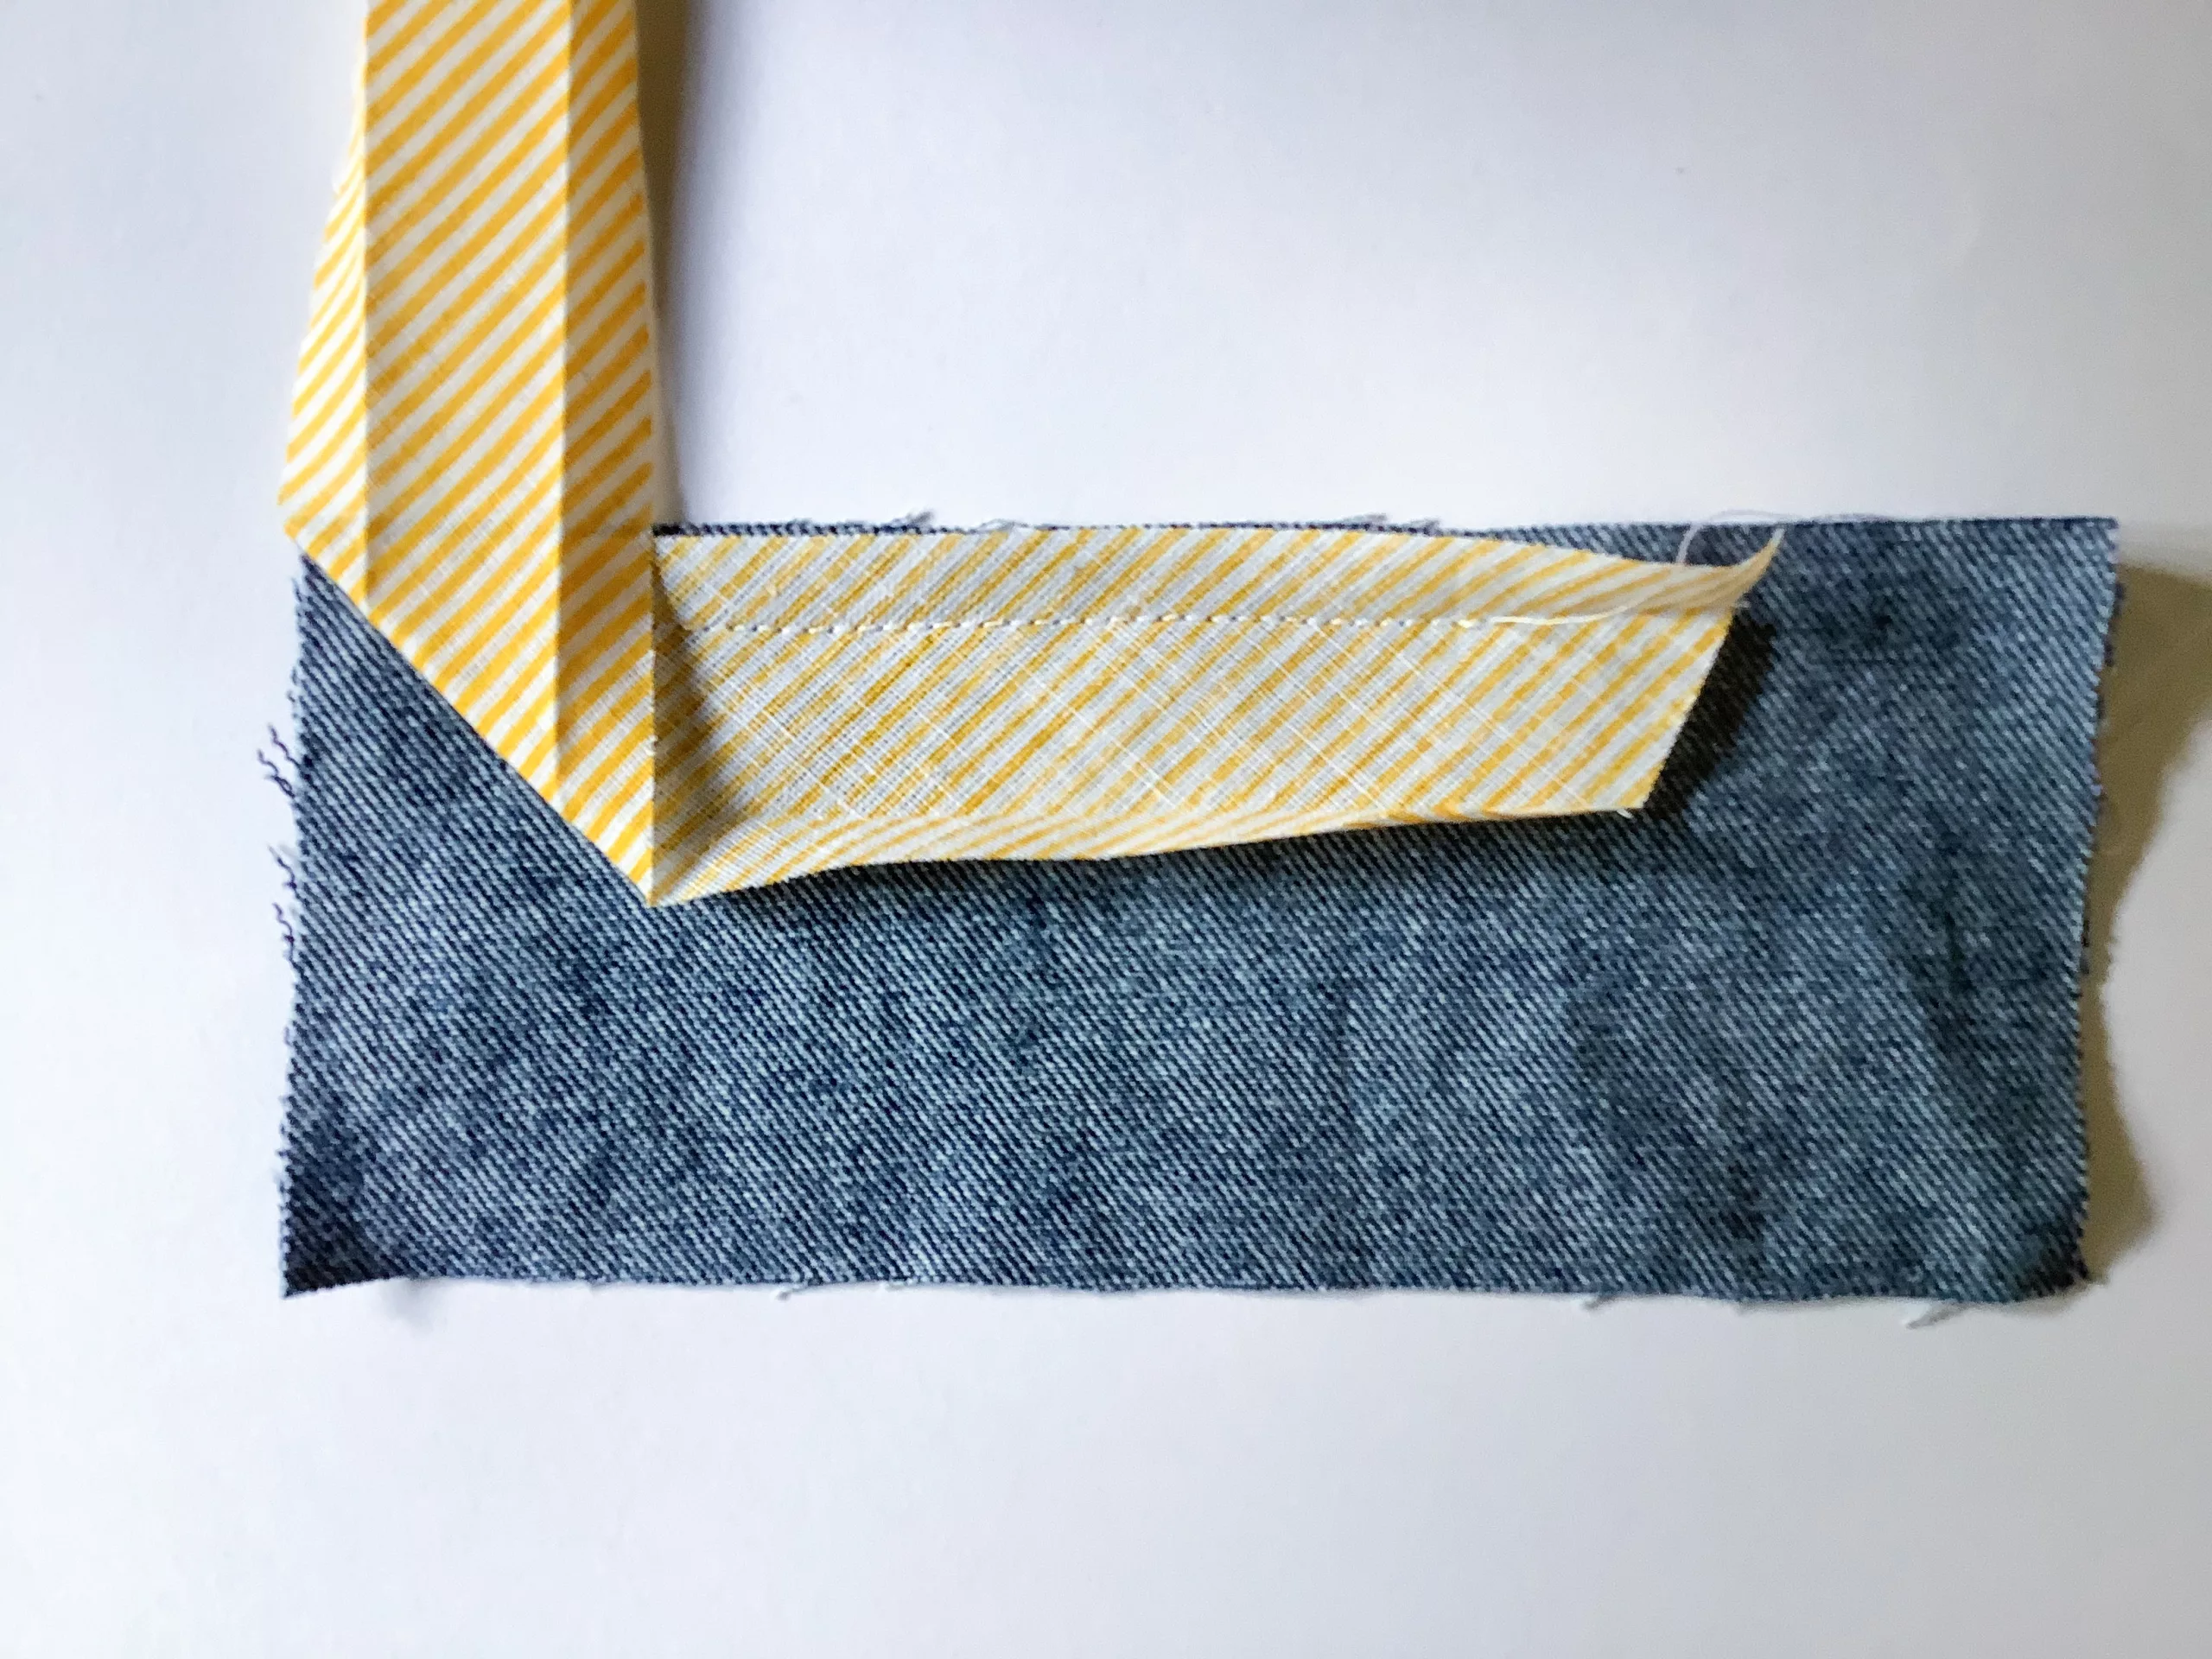
Step 4: Stitch all the way along the fold line.
Repeat these steps at every corner.
When you get to the end, you can cut your tape but leave enough to overlap.
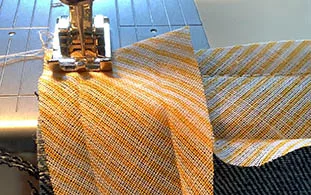
Step 5: Fold the bias tape over to the back.
Pin or clip the binding in place.
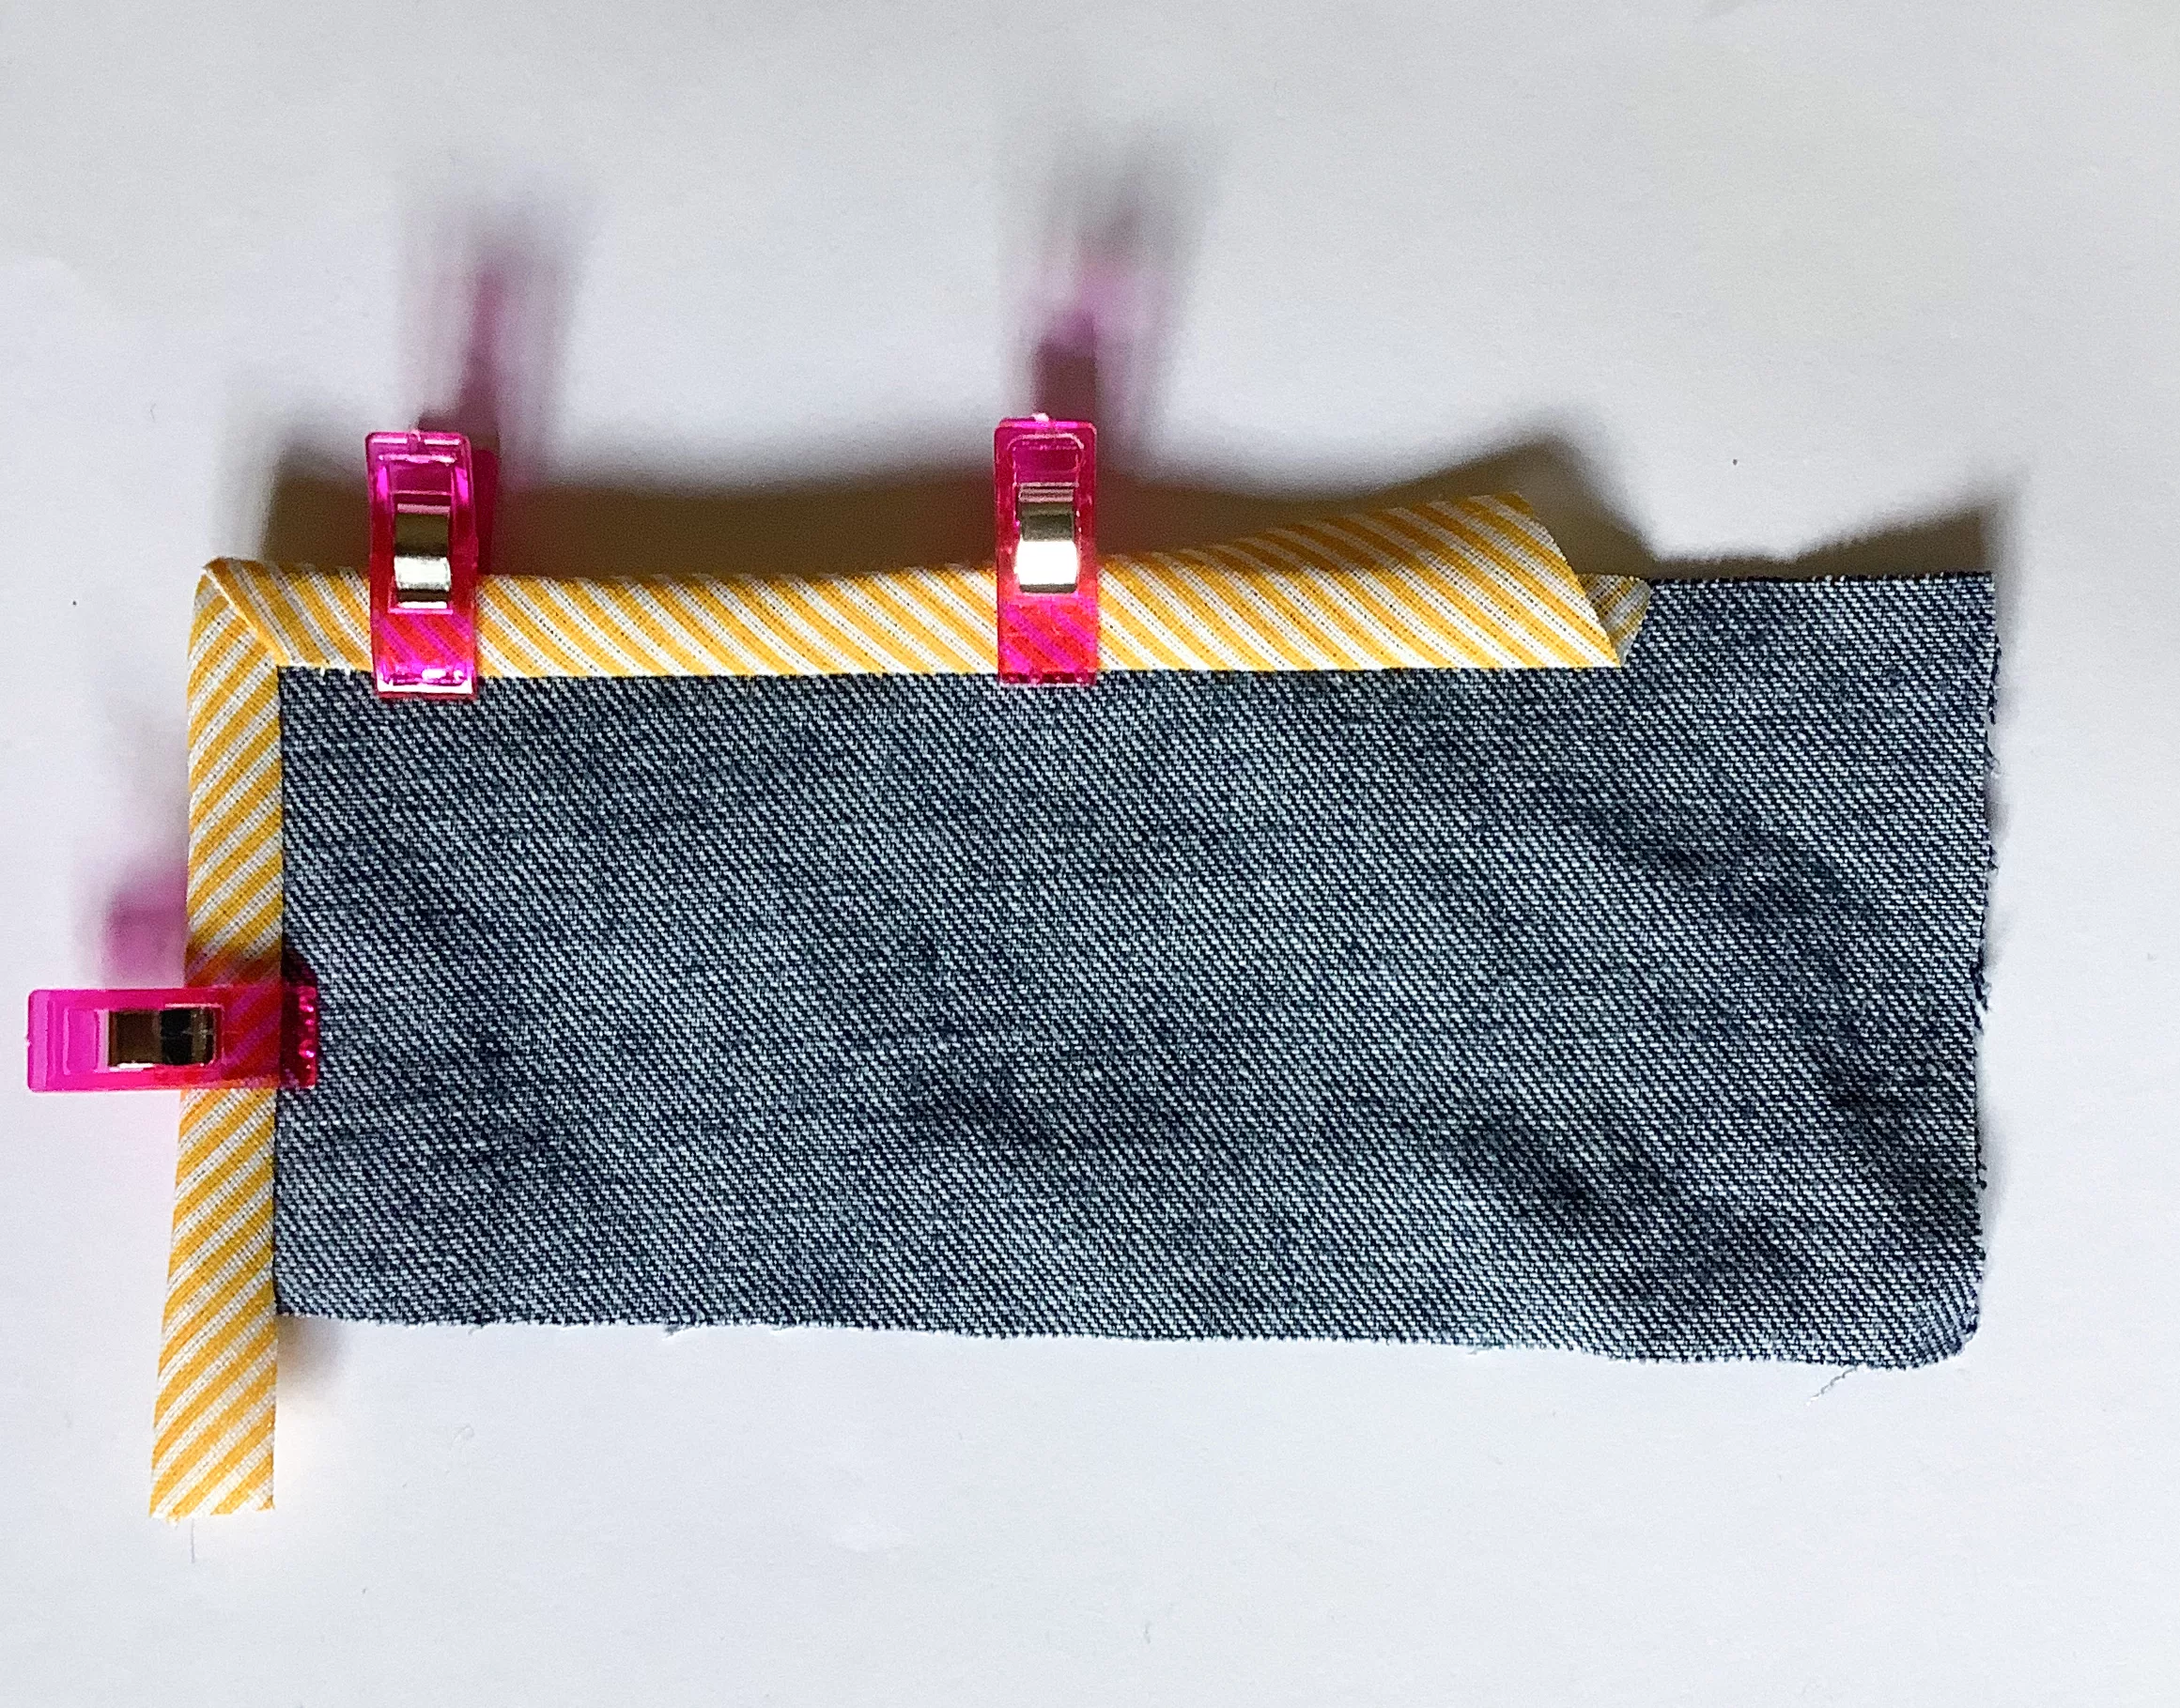
Step 6: If the binding doesn’t quite sit where you want it, you can trim it slightly.
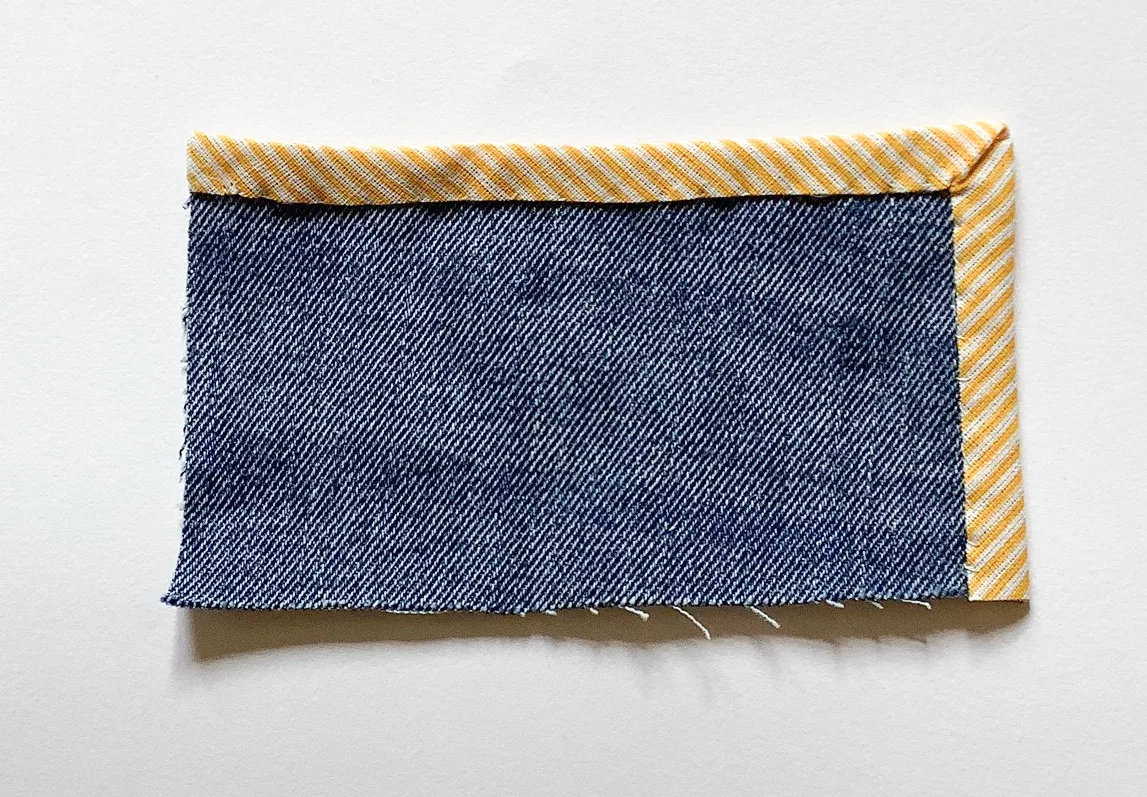
When it comes to corners, fold in one side, then the other and if the sides are nice and even, you should get a nice, neat 45-degree corner.
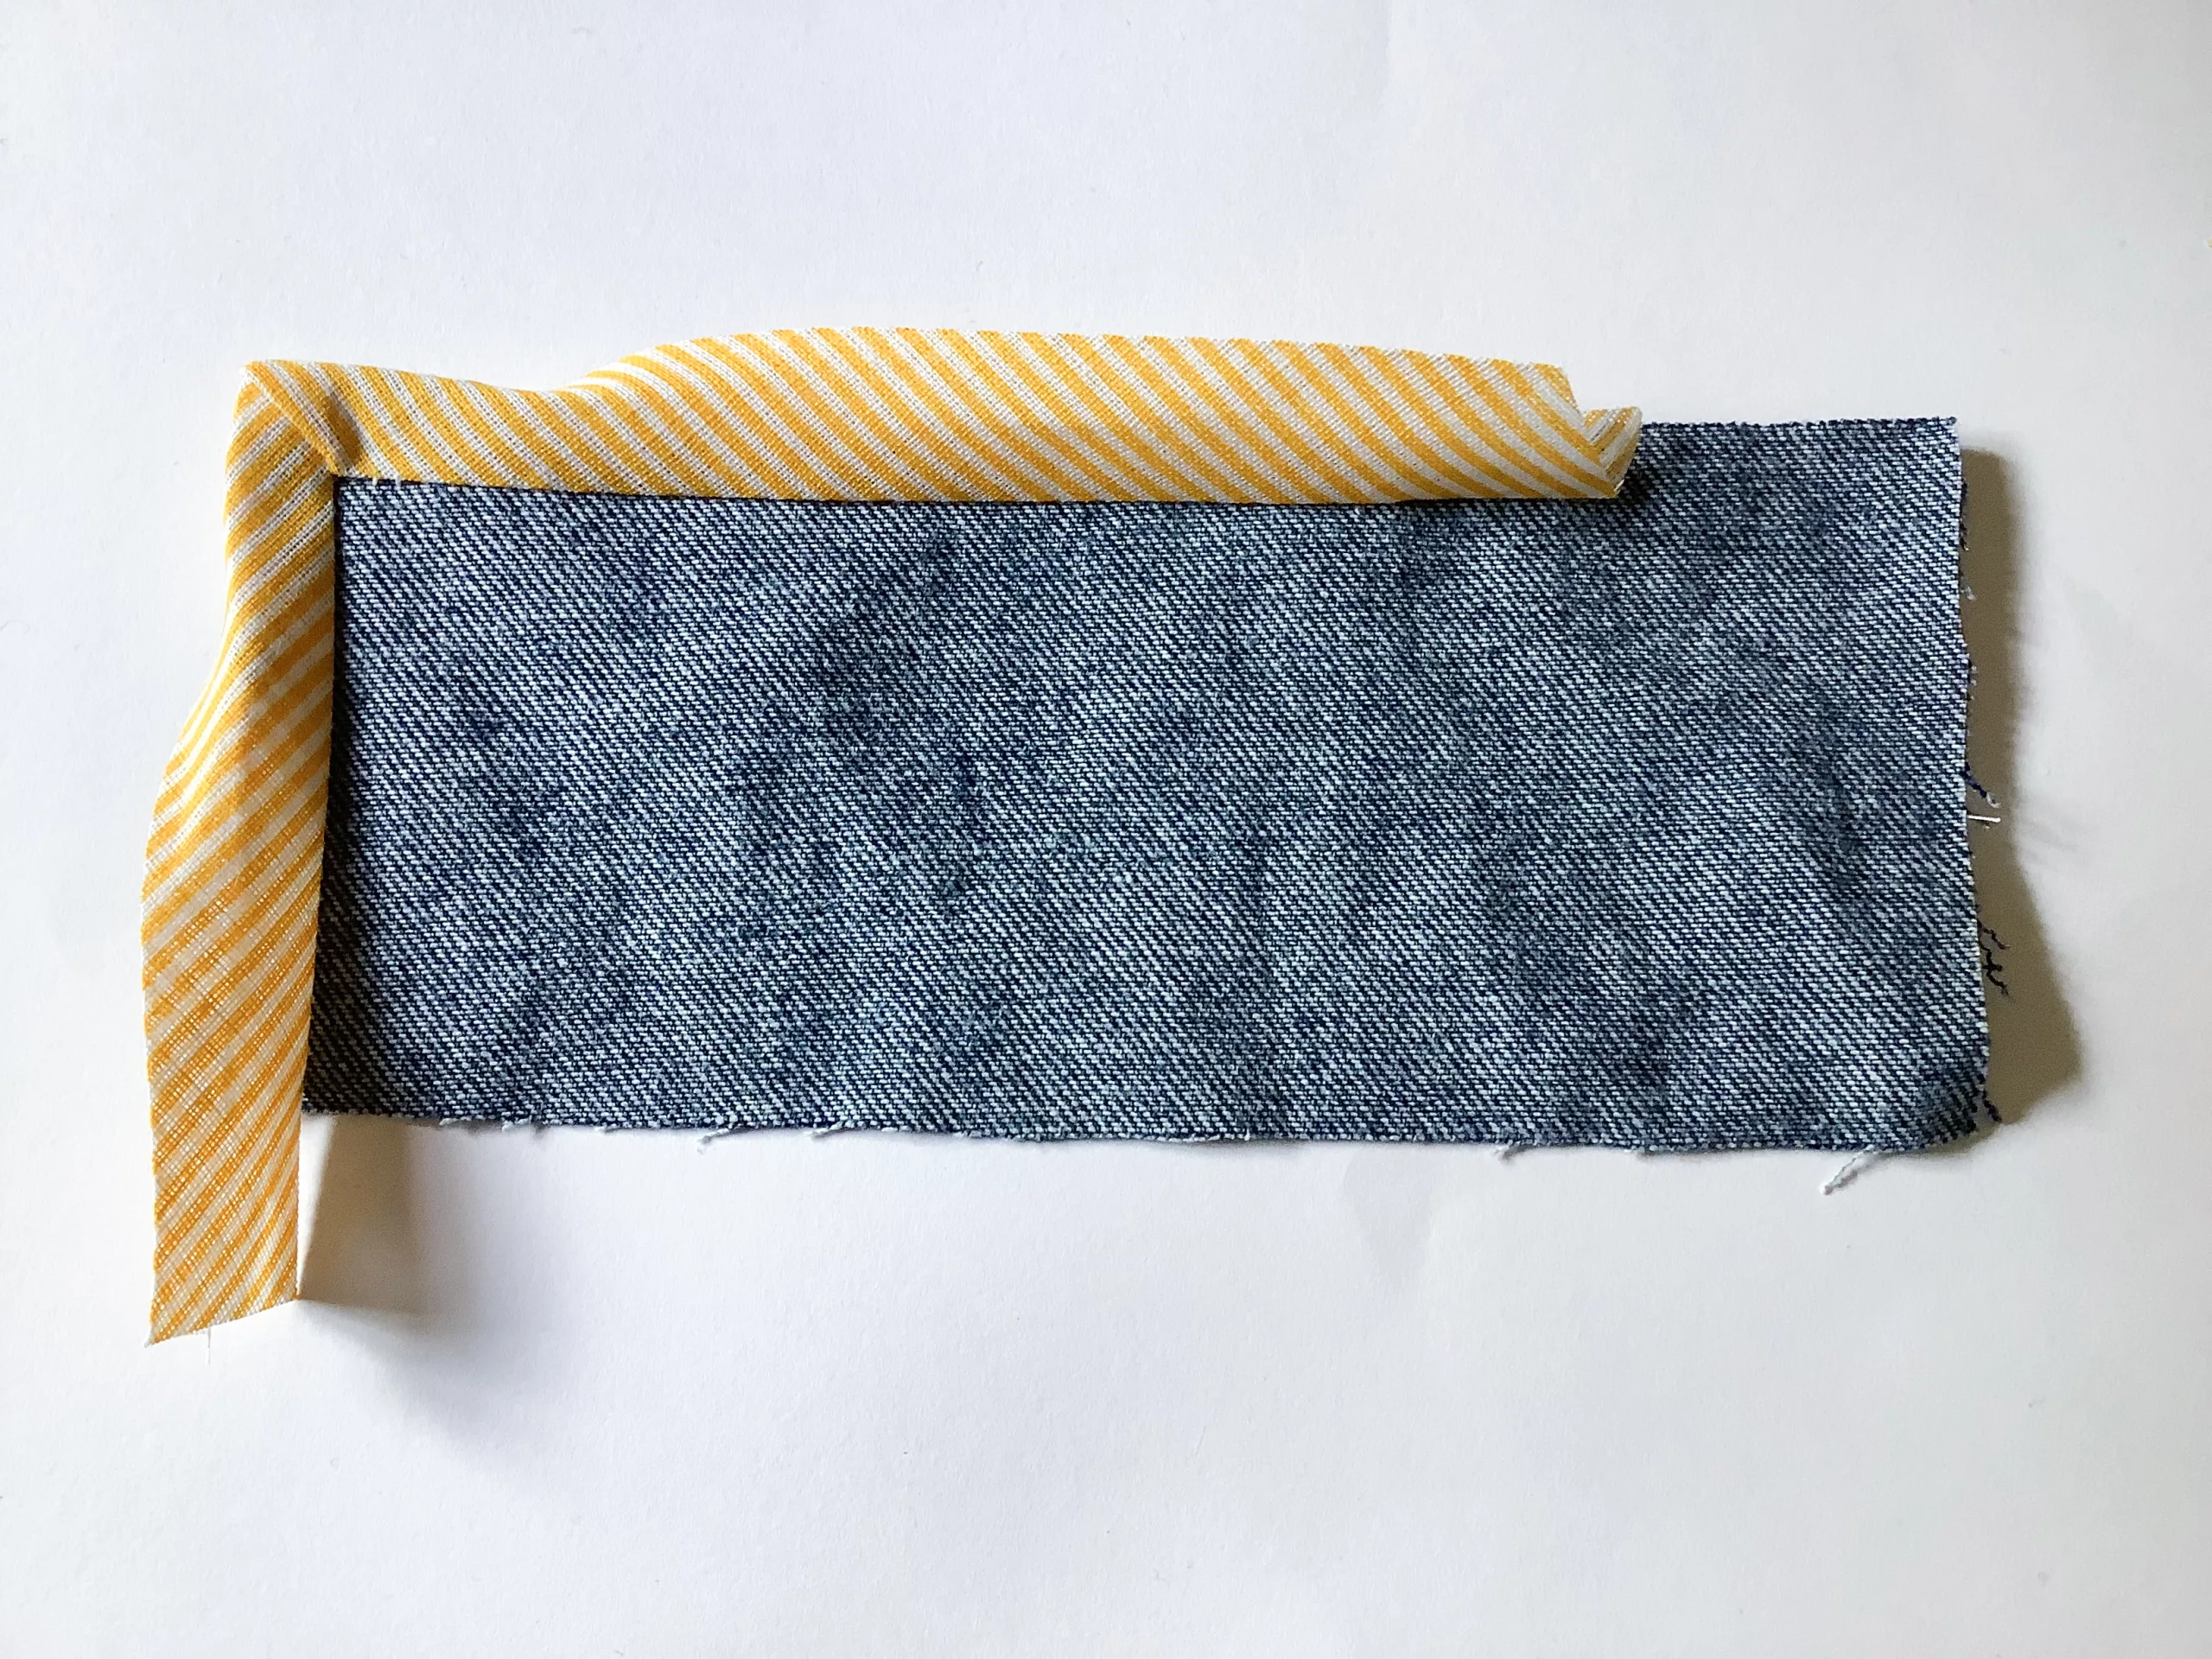
Step 7: You can topstitch the binding in place, but we recommend hand sewing it so there is no stitch line on the front.
You can also clip the seam allowance if you need to along the curve to remove the bulk.
Step 8: Give the binding a good press with the iron.
Never miss another tutorial or guide…
Stay up to date with the latest by signing up to our newsletter!
Click to join our mailing list!
Ready Made Bias Binding
Prefer to buy ready made bias binding?
We’ve got it!
There’s definitely advantages to buying pre-made bias binding vs learning how to make bias binding. It can save you time and also fabric!
Here at Plush Addict, we’re not only a fabric store but we’re also an online haberdashery! We stock a wide variety of bias binding in lots of finishes and sizes.
Our most versatile ready-made bias binding is made from polycotton in 13mm, 20mm, 25mm, 27mm and 50mm. This is the one we would recommend if you have never used ready made bias binding before.
If you’re looking for something bolder, we sell metallic, patterned and decorative bias binding, as well different textures and fabrics such as satin, velvet and leatherette.
We also have several ranges of piping bias to create a different finish, which is great for decorative projects such as cushions and detailing on clothes.
Did you find this guide helpful? Let us know in the comments below and tag us @PlushAddict we’d love to see how you used bias tape in your projects!
Pin For Later!
Follow Plush Addict on social media and keep an eye out for more tutorials!
We hope you found this tutorial useful! Let us know how you get along in the comments below.
10 Tips For Sewing With Chalk Cloth Fabric
In this comprehensive guide to sewing with Chalk Cloth, you will learn 10 tips for sewing with chalk cloth fabric. In addition, you will also learn the benefits of using it for your different projects.
Look at our amazing Chalk Cloth it is so much fun to stitch with.
It works exactly like a traditional chalk board but it is a fabric. You can write on it, draw on it and the great thing is, it’s wipe clean, so that you can use it again and again.


