

Tutorial: How To Sew French Seams
Boring Legal Bit: If you follow any tutorial or guidance found in this post, or on this blog, you agree to be bound by our disclaimer which can be viewed here
A sewing tutorial for Beginners
Once you’ve gained confidence in sewing straight lines, you may want to learn how to sew a French seam. French seam is a great step to add to your sewing projects to get them looking extra special.
French seams are most commonly used for fine fabrics:
- The seam is sewn twice, making the finished item more durable.
- Raw edges are enclosed in the finished seam, to give a neat finish.
- Some fine fabrics are sheer, making seams visible. A French seam is aesthetically pleasing.
If you’re new to sewing French seams the easiest start point is to practice with cotton fabrics; it’s easier to see your progress and they are much more forgiving when unpicked.
Jump To:
Never miss another tutorial or guide…
Stay up to date with the latest by signing up to our newsletter!
Click to join our mailing list!
Practicing French Seams With Cotton Fabric
Important notes:
For steps using machine sewing, straight stitch, backstitching at the start & end using stitch length 2.5 unless otherwise stated.
Prepare your fabrics as per manufacturer’s care advice.
You will need:
- 2 pieces of cotton fabric
Step-by-Step With Cotton Fabric
1. Pin 2 pieces of fabric wrong sides together

2. Sew with a 5mm seam allowance

3. Press the seam open with the seam allowances to one side, trim any loose threads.

4. Fold along the seam to bring the 2 fabrics right sides together and press.

5. Pin then sew with a 1cm seam allowance.

6. Press the seam allowance to one side

On fine fabrics the 1st sewn seam allowance is trimmed and a wider seam allowance is sometimes necessary for this step.
When using cotton, a 5mm seam can be usually be sewn on a domestic machine without the fabric being ‘chewed’. The seam allowances have not been trimmed in the cottons practice following the 1st sew, unless you wish to. The finished seams here will not be visible as per sheer fabrics, therefore a slightly bulkier finish does not present any aesthetic issues.
The final seam on fine fabrics is narrower.
Once you feel confident sewing a French seam with cotton fabrics, you may wish to practice on some delicate fabric:
Sewing French Seams With Fine Fabrics
Important notes:
For steps using machine sewing, straight stitch, backstitching at the start & end using stitch length 3 unless otherwise stated.
Prepare your fabrics as per manufacturers care advice.
You will need:
- 2 pieces of cotton fabric
Step-by-Step With Fine Fabrics
Prepare your fabrics as per manufacturers care advice.
1. Pin 2 pieces of fabric wrong sides together
2. Sew with a 1cm seam allowance
3. Press the seam open with the seam allowances to one side, trim the seam allowance to 2 or 3mm
4. Fold along the seam to bring the 2 fabrics right sides together and press.
5. Pin then sew with a 5mm seam allowance.
6. Press the seam allowance to one side
…And you’re finished, well done!
Never miss another tutorial or guide…
Stay up to date with the latest by signing up to our newsletter!
Click to join our mailing list!
Pin For Later!

Follow Plush Addict on social media and keep an eye out for more tutorials!

How To Use Odicoat Fabric Coating Gel
You will learn how to use Odicoat fabric coating gel in this tutorial. In addition, we will be guiding you on its various benefits and uses.
Ever found the perfect fabric with the wrong composition for your project? If the missing element was waterproofing then we have discovered a brilliant solution; Odicoat. This clever gel gives fabrics a waterproof coating that is machine washable.
This isn’t the only use for this clever product, Odicoat also works as a fabric glue; Fabric can be applied to objects for decorative purposes.
A product guide for beginners
There are a few ways to waterproof fabrics, depending on the finish you are looking for.
Below you’ll find both a video tutorial on how to use Odicoat fabric coating gel as well as a more detailed photo tutorial so you can learn all about Odicoat! We hope you this post helpful.. Do let us know in the comments.
You’ll also find a cheeky discount code for your next Odicoat purchase at the end of the tutorial…
Boring Legal Bit: If you follow any tutorial or guidance found in this post, or on this blog, you agree to be bound by our disclaimer which can be viewed here
Why use Odicoat?
Benefits of Odicoat
- Odicoat leaves fabric with a lightly rubberised feel; think of the finish (3 coats) as a more pliable oilcloth
- Once application is complete the fabric is machine washable up to 30 degrees
- Coated fabric is easier to cut, more durable and less prone to fraying
- The finished fabric can be sewn, as you would PUL or oilcloth fabrics. Check out our full Waterproof Fabric Guide for more info
- Waterproof fabrics offer greater stain resistance
- Odicoat is water based, BPA free and acid free
- Treated fabrics have a little more structure
Uses for Odicoat
- Aprons
- Tablecloths
- Placemats
- Wash bags
- Make up bags
- Embellishing decorative items
- Outdoor cushions
Additional information
- A single coat will give a matt finish, 2 or 3 coats will give a gloss finish:
1 coat – the fabric is protected, water repellent, with a matt finish
2 coats – the fabric is coated, with a gloss finish
3 coats – the fabric is waterproofed, with a high gloss finish
- Fabrics coated with Odicoat should only be washed at 30o
- Prepare your fabrics as per manufacturers care advice before applying Odicoat
- Use clips or pin within the seam allowance – pin holes will remain visible
- Treated fabrics will have less drape
- We recommend testing the suitability of Odicoat on spare pieces of the project fabric/ hidden area of an object before proceeding
- Not suitable for thick velvet, suede or embossed fabrics
- Foods must not make direct contact with Odicoat treated items
- Odicoat is made in France by Odif
Disclaimer
- Odicoat should only be used for it’s intended purpose
- Follow the usage instructions
- Always wash hands after use
- Not for consumption
- Keep out of the reach of children
- Odif cannot be responsible for dangerous storage conditions or misuse
How to apply Odicoat
You will need:
- Cotton fabric
- Odicoat
Here we used:
- A quilting cotton
- 3 coats of Odicoat
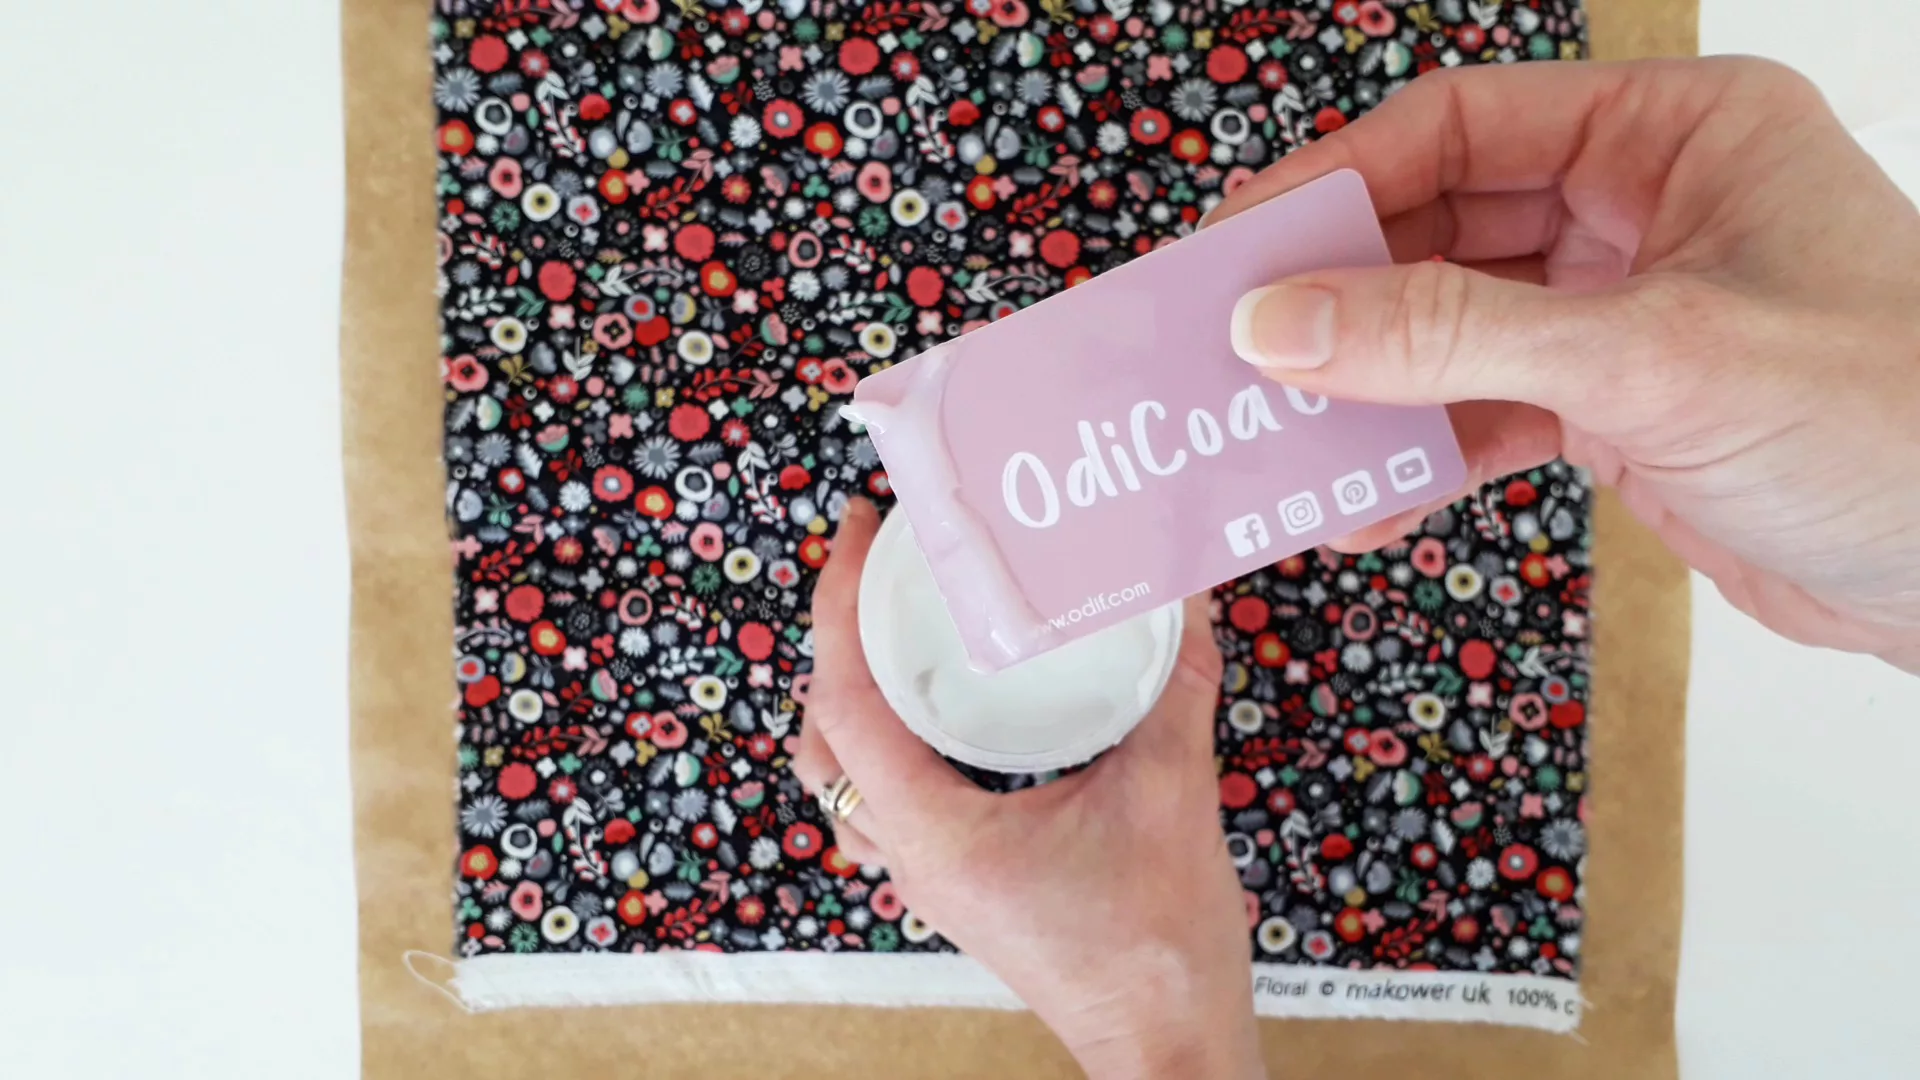
1. Before cutting fabrics to size, in case of shrinkage, apply the Odicoat to the right side of the fabric: Place your fabric right side up on a protected surface (greaseproof or plastic sheeting are ideal)
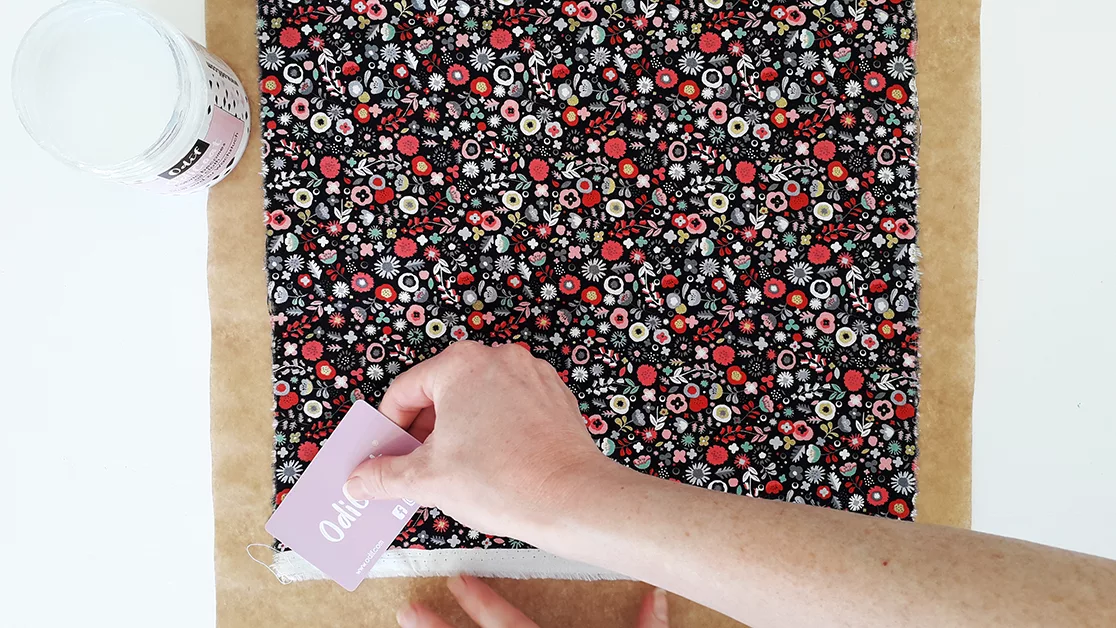
2. Using the card provided spread a thin layer of Odicoat onto the fabric; start from one corner and work outwards. Go back over the fabric with the card spreading out any thick patches/ streaks. Avoid moving the fabric until it is dry to prevent Odicoat getting onto the wrong side
3. Wait until the Odicoat is touch dry (20 to 30 minutes), cover with greaseproof and dry iron, heat setting 1/satin
4. Apply a second coat, as per steps 2. And 3. A third coat can be applied if required
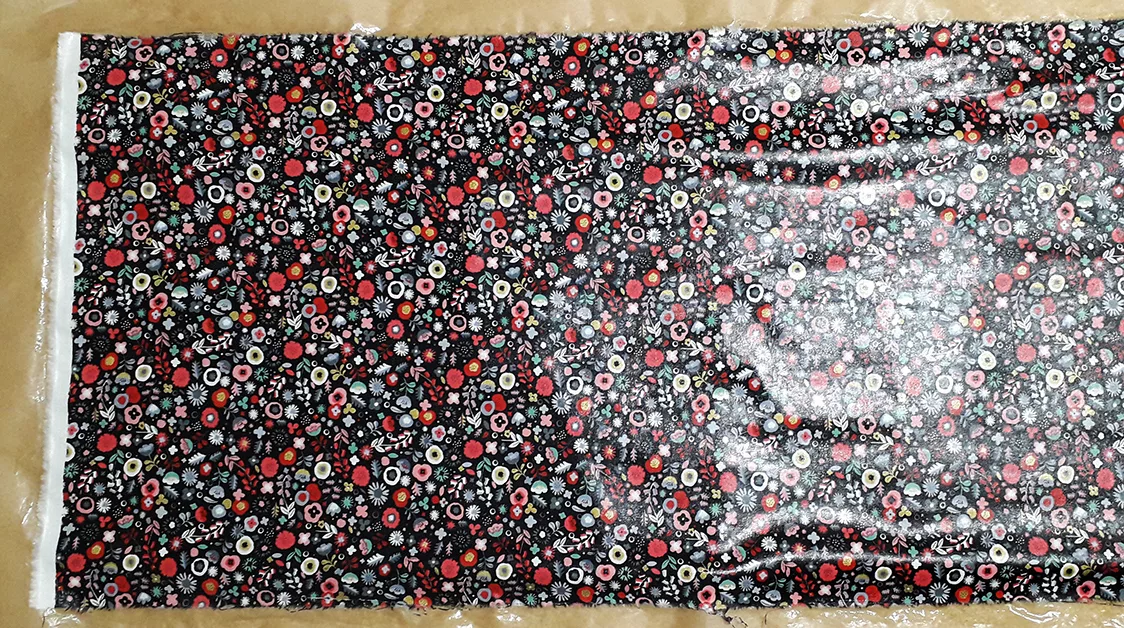
5. Allow 24 hours for the Odicoat to cure fully then carefully peel the fabric off
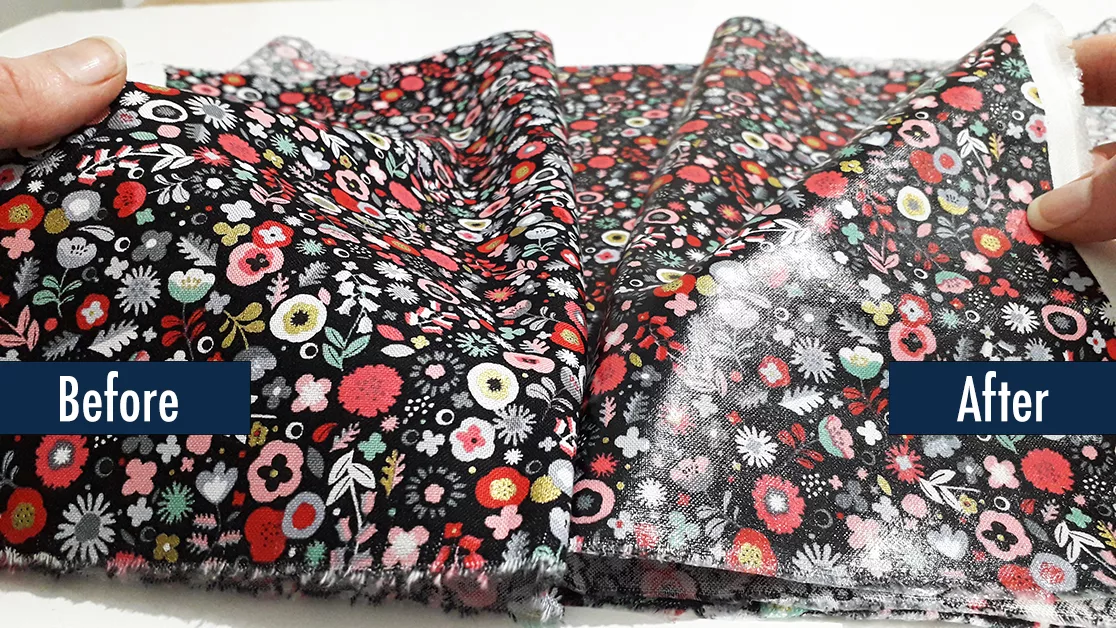
How to use Odicoat as a glue
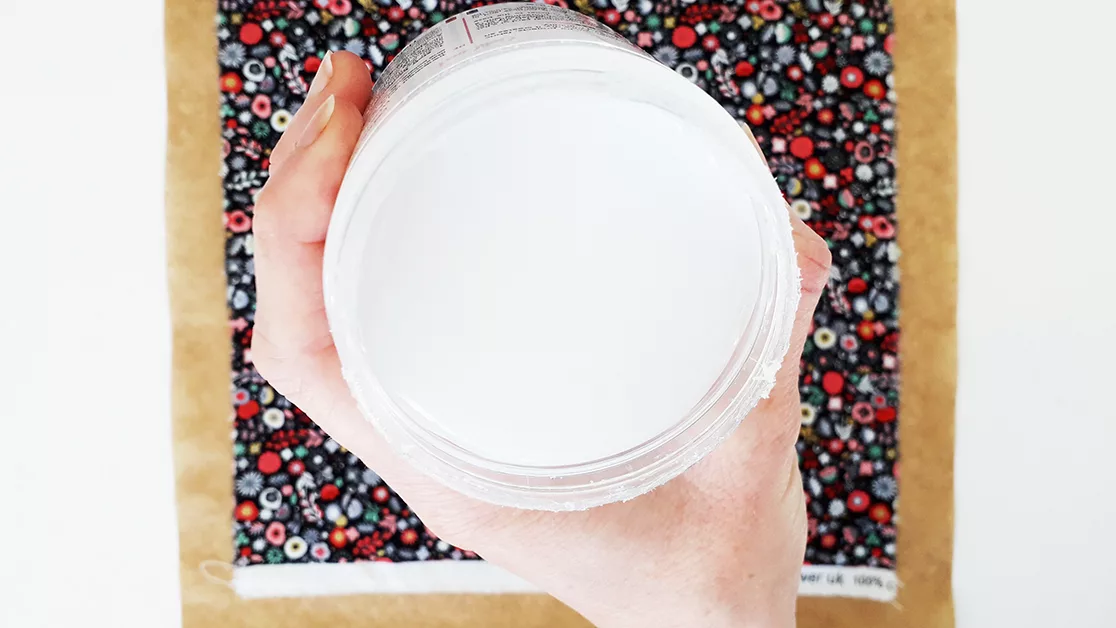
Odicoat can be used to stick fabric to wood, cardboard, metal, glass, ceramic, pottery, Styrofoam and stone. Once applied the Odicoat will give a water-resistant, satin finish:
1. Apply Odicoat to the back of the fabric being adhered with a flat brush
2. Position the fabric on the chosen surface
3. Apply another coat of Odicoat over the fabric
4. Wait 1 hour
5. Apply a second coat (optional)
6. Wait 24 hours
Check out our video below!
And you’re finished, well done!
Pin this for later!
We hope you found this tutorial useful!

How To Sew A Waterproof Mattress Protector
You never quite realise how much your child moves around in their sleep until you reach the toilet training stage. Once that plastic protector is on their bed every movement is exaggerated with the crunchy rustle of plastic! And if that isn’t enough, the poor lamb suddenly finds themselves overheating from the added insulation.
A mattress protector like this is designed to fit on top your main sheet to help you change your child’s bed quickly and easily in the middle of the night. Your child will sleep with cool cotton against their skin and when soiled just whip this protector off and replace with another OR if have a separate bed sized waterproof protector under the main sheet of the bed you can literally just whip this off and get back to sleep!
The finished mattress protector is machine washable; make 2 or more and there will always be a spare on hand for those blurry eyed bed changes. The top and sides are cotton, giving a huge number of styling options, and it fits over a bed sheet instead of under, for speedy switching in the middle of the night.
Another advantage if using this protector is that it will reduce the size of your laundry load as these are around half the size of a full sheet.
This tutorial runs you through how to make a mattress protector of any size. It combines absorbent bamboo velour, non-rustling and breathable waterproof PUL fabrics for a quieter, cooler night’s sleep along with some pretty quilting cotton to make it super pretty!

Boring Legal Bit: If you follow any tutorial or guidance found in this post, or on this blog, you agree to be bound by our disclaimer which can be viewed here
A Sewing Project for Confident Beginners
You will learn:
- How to sew bamboo velour fabric
- How to sew Waterproof fabric
You will need:
Measure the length, width and depth of the mattress in cms:
- Cotton top layer: Mattress width + 3cm x Length to be covered + 3cm
- Absorbent layer: As per topper
- Waterproof layer: Mattress width + 3cm x length being covered + 7cm
- Cotton side panels: Mattress depth + half Mattress width +3.5cm x Length being covered + 4cm
- Thread
- Walking foot
We used*
- Topper: 93 x 103cm Quilting Cotton
- Bamboo velour: 93x103cm
- PUL: 93x107cm
- Side panels: 68.5x104cm [20 + 45 +3.5] x [100+4] Dashwood studios: Twist – Pumpkin
- Thread
*The single mattress being covered was 190cm long, 90cm wide and 20cm deep
Never miss a guide or tutorial
Click to join our mailing list!
Important notes
1.5cm seam allowance throughout, unless directed.
For steps using machine sewing, straight stitch, backstitching at the start & end using stitch length 3.5 unless otherwise stated.
Prepare your fabrics as per manufacturers care advice – Bamboo velour should be prewashed without fabric softener.
DO NOT iron waterproof fabric.
Disclaimer: PUL and waterproof fabrics are a suffocation hazard, always check the sheet is firmly fitted before every use.
Tips on how to sew waterproof fabric:
- Use clips or pin within the seam allowance – pin holes will remain visible.
- Waterproof fabrics can slip; we recommend a walking foot is used for this project. Otherwise try a Teflon or roller foot, or a strip of Scotch ‘magic tape’ stuck to the bottom of a standard foot.
- Sew with tissue paper over the side that is slipping, and tear it away after.
- Use an 80/12 needle
How to make a Waterproof Mattress Protector
1. Cut out the following using the measurements calculated above:
- Topper
- Absorbent layer
- PUL
- Side panels
Prepare the hem
2. Hem the 2 short sides of the side panels and 1 long side: With the fabric facing wrong side up, turn over 2cm of fabric along each side and press.

3. Fold the raw edges under to the crease and press forming a 1cm border.
Mitre the corners
Never mitred corners before? Check out this video to help.

4. Mitre the 2 hem corners on each side panel: Starting at one corner, open out the 2cm hem on both sides with 1cm of fabric still folded.

5. Fold over the corner, the creases will have formed a small square. Align the 2 sides of the small square with the two 2cm creases on the underside of the panel.
6. Finger press along the crease.

7. Unfold the corner and mark out the fold line.
8. Fold the corner in half, bringing the 2 right sides together.

9. Pin and sew along the marked line.

10. Trim the seam allowance to 3mm and clip the end.
11. Turn out the corner, use a turner to shape the point

12. Press then sew around the inner edge of the hems to secure.
Never miss a guide or tutorial
Click to join our mailing list!
Assemble the Mattress Topper
13. Align the fabrics in the following order:
- Waterproof fabric: Shiny side up
- Topper: Right side down
- Absorbent fabric: right side down
Please note: the waterproof layer is longer to create a lip at the edges of the finished mat.

14. Align and clip the short edges of the 3 fabrics together, guiding the excess waterproof fabric toward the centre.
15. Sew the 3 layers of fabric together on each side.

16. Understitch the seam allowances 2mm from the seamline, seam allowances overlapping the waterproof fabric side.
17. Add the side panels: Working under the waterproof layer, align the raw edges of the side panel with the side seams of the topper, right sides facing.
18. Clip the side panel, topper and absorbent layers together.

19. Baste with a 1cm seam allowance then press the seam allowances toward the topper fabric. Take care to avoid ironing the waterproof fabric.
20. Repeat steps 17. To 19. on the other side panel.

21. Clip the waterproof fabric to the topper fabrics. 1.5cm of waterproof fabric should extend past each end of the topper.
22. Sew the 2 sides leaving a 30cm turning gap in the centre of one.
23. Turn the mattress protector out the right way.

24. Sew the opening closed.
And you’re finished, well done!
Would you love a duvet cover and pillow to match? Check out the tutorial here.
Pin this for later!

Don’t forget to sign up to the newsletter so you don’t miss any of our free tutorials and follow us on all the socials below.

How To Sew a Buttonhole Tutorial
How To Sew a Buttonhole
Sewing a buttonhole might look a little intimidating at first, but with this handy step by step guide, you will learn how to sew a buttonhole. As a result, you’ll be sewing on buttons with ease!
We’ve even included some troubleshooting tips…
Don’t miss the video showing you this technique which you can view at the end of the photo tutorial…

Boring Legal Bit: If you follow any tutorial or guidance found in this post, or on this blog, you agree to be bound by our disclaimer which can be viewed here
How to sew a buttonhole
1.. Every sewing machine varies in terms of the settings needed but the basic principles remain the same. Check the machine manual for how to set up the machine.
It will most likely advise the need for a buttonhole foot (not essential but makes it easier to track progress), the stitch selection needed and a tension adjustment (mark the normal tension setting with a sharpie/ take a picture for resetting the machine after)

For irregular shaped buttons; buttons pass through the hole from any direction so a narrower measurement can be used provided the button isn’t excessively long. If a longer measurement is used the button may come undone in use. If in doubt, practice on a scrap of fabric first.
3. Mark the length of the button parallel to the placket edge, central to a placement mark
Button holes allow movement; the direction of the hole is determined by the most likely direction the fastened button needs to move. The foot of a duvet won’t move much, therefore the button holes are positioned for best fit.

4. Extend the button hole line by approx. 2mm top and bottom to allow room for the top and bottom closing bar
5. Prepare the machine to sew a button hole, then wind the hand wheel until the needle is positioned to the inside of the button hole (the right)

6. Position the placket under the presser foot. Line up the front of a button hole marking under the needle. Move the hand wheel until the needle is in the fabric at the front of the marked line

7. Begin sewing the first part of the button hole; the column of small zig zag stitches on the left side. The fabric will move forwards instead of backwards. Stop sewing when the other end of the marked line is reached.
When sewing ensure the stitches run straight and follow alongside the marked line; this can be the trickiest part of sewing a button hole. The fabric will move slowly, do not be tempted to pull the fabric to speed it up, the stitches need to be close together, hence the fabric moving a small amount each time the needle raises.
8. With the needle raised, set the machine to sew the 2nd part of the button hole; the closing bar

9. Sew 4 stitches for the bar, forming the wider stitches that span the top of the button hole
10. With the needle raised, set the machine to sew the 3rd part of the button hole; the right column

11. Sew along the other side of the marked line, the fabric will move backwards. Follow alongside the marked line and don’t let the stitches overlap the 1st column
12. With the needle raised, set the machine to sew the 4th part of the button hole; the closing bar
13. Sew 4 stitches for the bar, forming the wider stitches that span the bottom of the button hole
14. With the needle raised, set the machine to sew the final, and easily forgotten, part of the button hole; lock stitch.

15. Sew 3 or 4 stitches to secure the thread ends then cast off.
16. Repeat for the other button holes, then reset the machine for normal sewing.
Opening the button hole
17. There are a number of ways to do this, with any method take care to avoid cutting through any stitches.
Before cutting a buttonhole place a button between the closing bars to check the button hole for size, if the buttonhole is too big/ small see the troubleshooting tips below.

- Fold the buttonhole in half lengthways and using small fabric or embroidery scissors make a small cut between the 2 columns of stitching. Unfold the button hole and cut up to, but not through, the closing bar at each end.

- Insert a seam ripper through the fabric between the 2 side columns and make a small hole. Using small fabric scissors cut between the 2 columns of stitching up to, but not through, the closing bar at each end. You can place a pin at the end of your button hole to ensure your seam ripper does not cut through your button hole stitches.
- TIP: Place a pin at either end of your button hole to ensure the seam ripper doesn’t cut your stitches

- Position a pin just below the top closing bar. Just above the bottom bar insert the point of a seam ripper and carefully cut between the columns with the ripper until the ripper blade meets the pin.
- Insert the point of the seam ripper close to the stitching of one closing bar and cut between the columns to the centre. Repeat from the other end of the button hole

Once the buttonhole is opened any loose threads can be trimmed
18. Test the button fits through the finished buttonhole.
Buttonhole troubleshooting
- Always practice buttonholes on a spare piece of the project fabric to check for adjustments
- Buttonholes are difficult to unpick but not impossible, ideally unpick a problem button hole before cutting it open. Though not impossible, it is harder to sew over an already cut button hole
- If a buttonhole is a little too big the closing bars could be extended inwards with a few more stitches. Set up the machine for a closing bar, line the buttonhole up under the needle and sew a few stitches, not forgetting to lockstitch start and end to secure. If a large adjustment is needed, add a few stitches to the top and bottom to even out the appearance, or consider unpicking and trying again.
- If a button hole is too small the easiest solution is to unpick and start again. Or the top closing bar can be unpicked, lock stitch overlapping the top stitches of the left column, extend the left column, sew a new closing bar, extend the right column overlapping the ends, then lockstitch
- If one column’s stitches are denser than the other, consult the manual. Many machines have a button hole balance adjustment. The balance needed can vary from fabric to fabric; a benefit of sewing a practice button hole for each project

- If the lines aren’t straight, practice by sewing along a drawn line. Go as slow as needed, occasionally lift the presser foot with the needle down to track progress
- If the column stitches are overlapping: Some machines will make a slightly wider column stitch depending on the position on the stitch width dial. If the width dial doesn’t ‘click’ into the buttonhole setting, turn it a little closer to 0 and sew another test button hole
Sew on the buttons
57. Check each button position mark lines up with the centre of the corresponding button hole
58. Sew the buttons on
How to sew quick and easy buttonholes: Video Tutorial
We hope you found this tutorial useful.
Let us know how you get along in the comments below!
Pin this for later!

Follow Plush Addict on social media and keep an eye out for more tutorials. Please tag us @PlushAddict on your fave social media channel… we love to see your makes!

A Zipper Guide: Everything You Need To Know About Zip Types
Welcome to this zippy edition of my sewing Substack I get SO many questions about zips… Separating zips… Close-ended zips… invisible zips… continuous zips… I hear ya! What zip do you need where and what exactly do those numbers mean?! This zipper guide has everything you need to know about zip types.
As simple as they might seem, zippers are the backbone of functionality and style in many sewing creations. But not all zippers are created equal, and choosing the right one can be the difference between a project that’s just good and one that’s great.
By the end of this installment, you’ll be equipped with the knowledge to not just choose the right zipper, but to do so with confidence and creativity.
And if reading isn’t your thing… You can watch a video I did talking you through all the different zip types here, but please leave me a comment or a ❤️ below if you’ve found this post helpful, I’d really appreciate it!
The Anatomy Of A Zip
First, let’s talk about the anatomy of a zip… You might find some of these terms in a tutorial and it’s useful to be aware of the parts, and the functions they serve in your zip
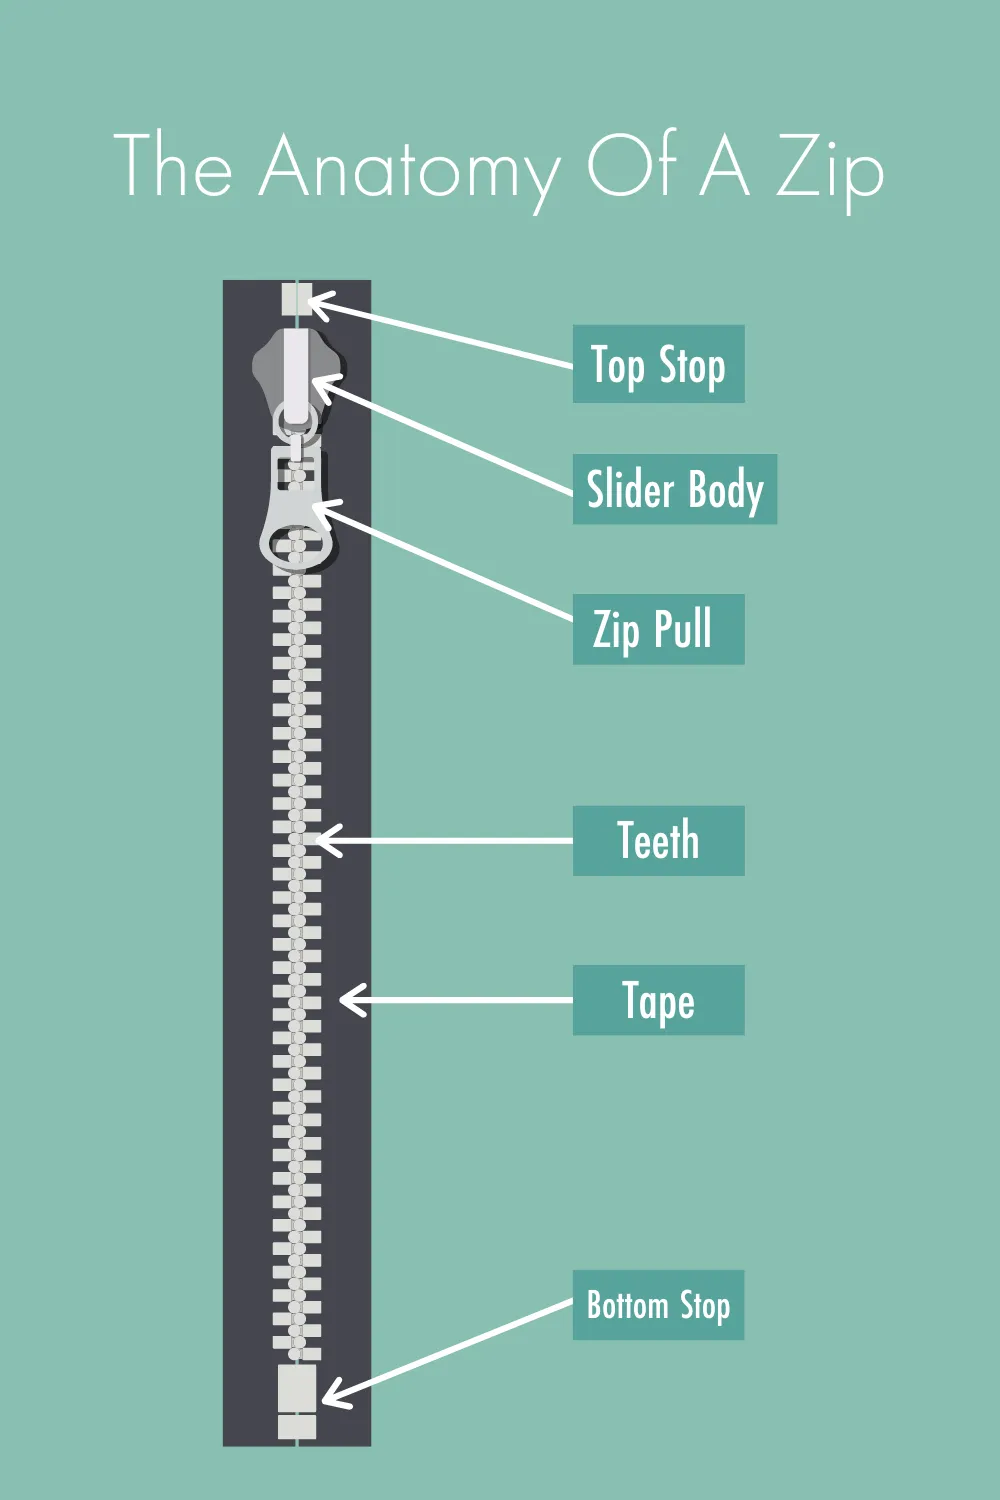
Top Stop: A small bar at the top that stops the slider from coming off of the top of zipper tracks.
Bottom Stop: A small bar at the bottom that stops the slider from coming off of the bottom of the zipper tracks.
Slider Body: The most common part of the zip, it separates and joins the tracks as you slide the pull tab up and down.
Pull Tab: The second part of the slider body, used to pull the zipper up and down.
Zipper Tape: This is the fabric part that gets sewn on to your project. The zipper teeth are attached to the zipper tape
Retainer Box: Secures it together and stops the slider from coming off of the bottom – this only applies to separating zips.
Insertion Pin: Holds the opposite side of the zipper in the retainer box – this only applies to separating zips.
Different Types Of Zips
Now you know your top stop from your slider let’s talk about the two basic zips types: Closed-ended zips & open ended zips…
On the left we see a closed-ended zipper – the zip is permanently closed on one end
On the right we see an open-ended or separating zipper. The zip completely separates in two. These zips are often found in jackets, coats and other garments.
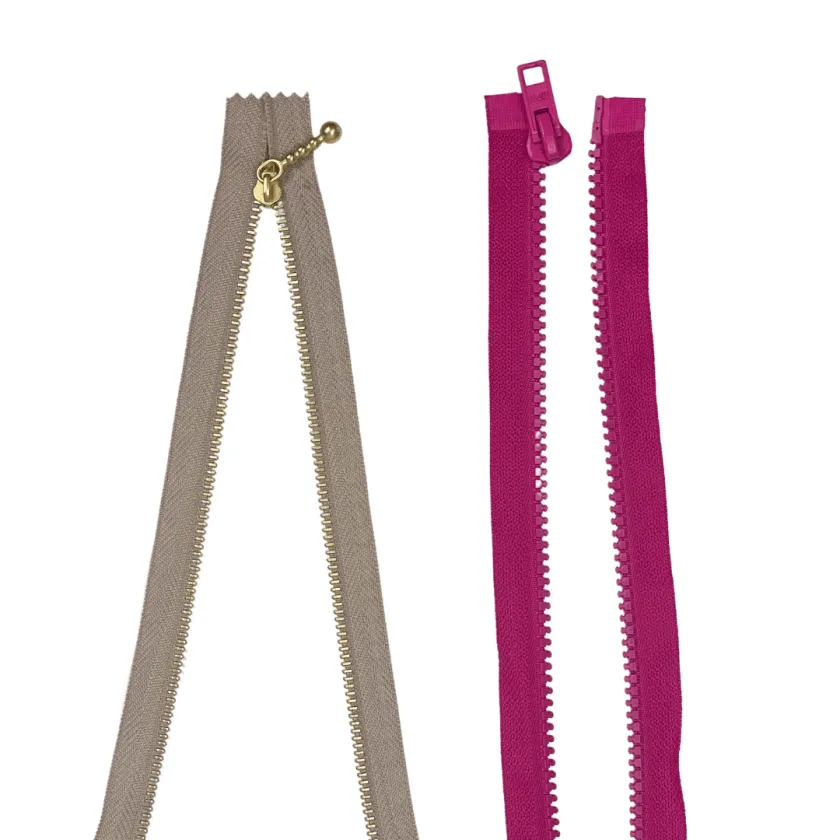
(Left: close ended zip – Right: open ended zip)
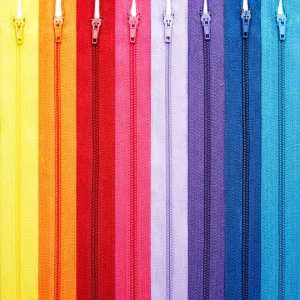
What is a closed-ended zip?
Closed-ended zips are a great jumping off point into the world of sewing zips – and they’re one of the easiest to get the hang of.
It has a bottom stop which is a metal bar that goes across both sides of the bottom of the zipper and holds it together in one piece.
These kinds of zips are really versatile as they come in a wide range of both colours and sizes
They can be used in making pouches, bags, dressmaking, cushions and lots more.
What is a separating or open-ended zip?
Does pretty much what it says on the tin, this zipper separates at the bottom – great for fastenings that require opening/closing.
Separating zippers are usually found in jackets and coats.
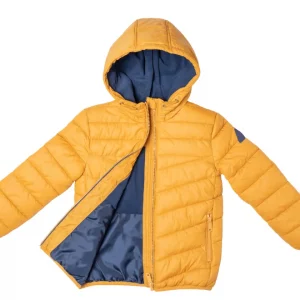
You can cheat and use these zips in place of a closed ended zip if you like the style… you simply just treat them as you would a closed ended zip and bury the separating end in a seam or cover with a zip tab!
What type of zip do I need?
The 4 most common types are nylon coil zip, plastic moulded zip, metal zip and invisible zip.
What type of zip do I need?
A nylon coil zip is one whose teeth are made from nylon, rather than hard plastic or metal. Made how it’s named, nylon monofilament is coiled and then stitched or woven into the zipper tape.
Nylon teeth zips are great to use as you can usually sew right over the teeth without your needle breaking!
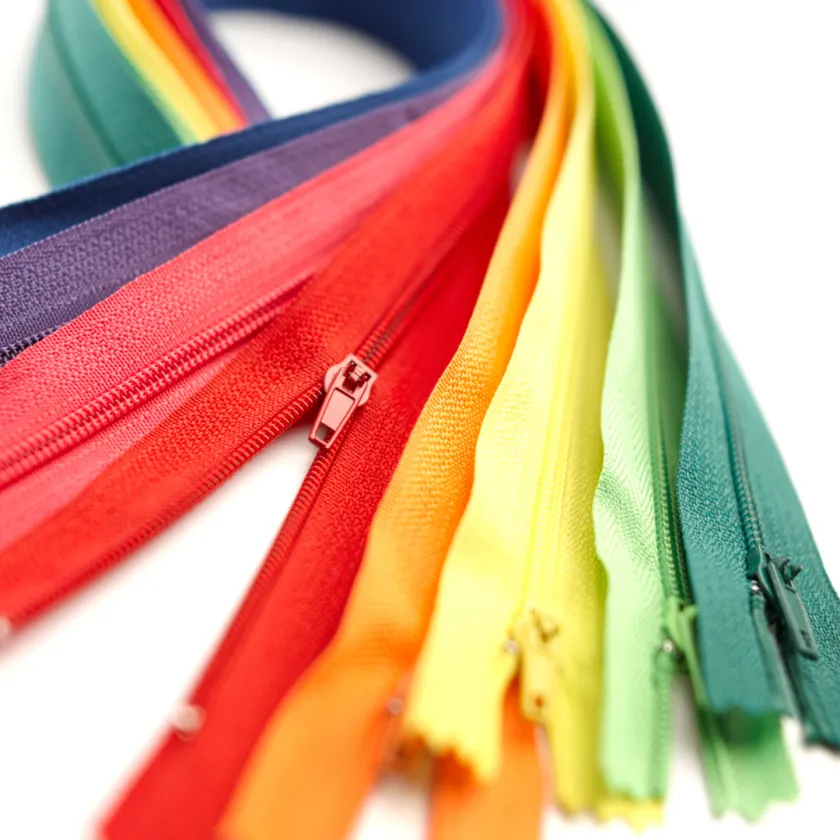
(Nylon coil zip)
Nylon zippers are also really flexible compared to other zip types. They have strong horizontal strength, this is ideal because they’re easily fixed if broken.
These are the zips of choice for luggage and outdoor products due to their strength, you’ll likely find them on suitcases, backpacks, tents or jackets! Thanks to this bad boy you can overpack your suitcase and STILL close it shut without ripping the whole thing apart!
Nylon zippers are also very forgiving if you sew over them – it’s unlikely your needle will break if it’s a size 80 or stronger.
What does an invisible zip look like?
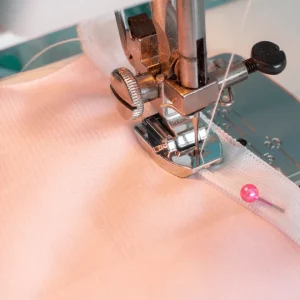
As the name might imply – these are (almost!) invisible! These zips are also known as concealed zips.
Usually with very fine teeth, they’re sewn into the seam in garments to give a clean finish – with only the pull tab showing (if installed correctly!).

You ideally need an invisible zipper foot to insert this zip type more easily and accurately.
Where to use a moulded plastic/chunky zip?
These zippers are usually constructed from acetal polymer plastic and have symmetrical teeth that interlock together. They also have more substantial & defined zip teeth than other zips – hence the name chunky! These are most commonly seen on clothes like jackets and also handbags.
Sadly, if one of the teeth breaks over time it’s very difficult to fix.
However the shape of the teeth makes them slightly stiffer/stronger than nylon coil ones – it’s a balance!
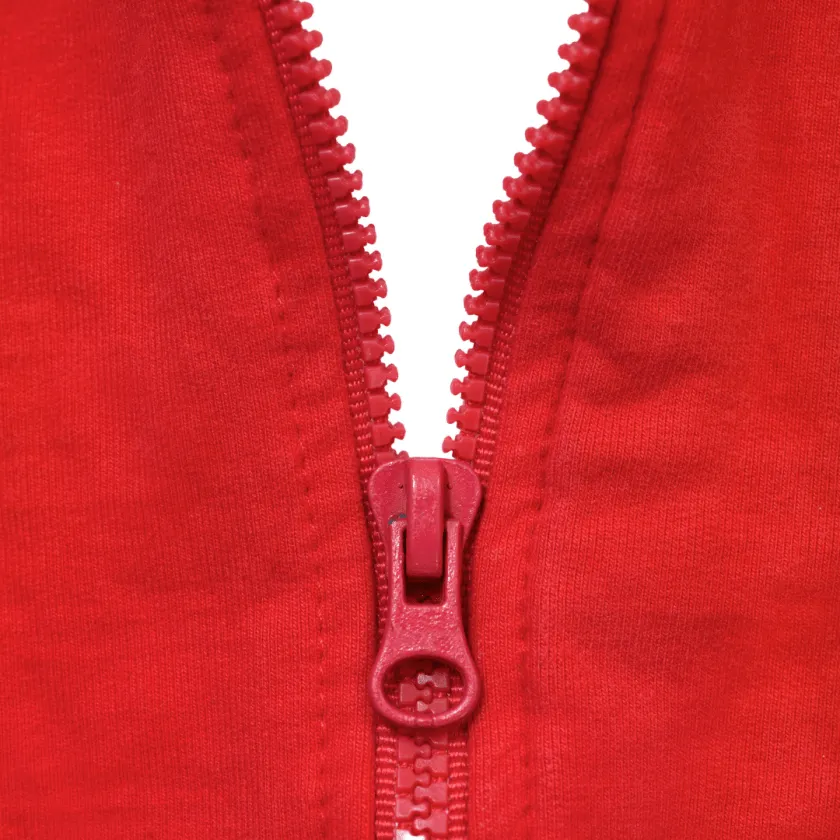
Plastic moulded or chunky zip
What are metal teeth zips?
Probably the most sturdy and durable of the bunch, they have teeth made out of metal that are clamped onto the zipper tape, however they can be relatively heavy and are a lot more difficult to shorten.
Often seen on denim jeans due to their resistance to withstand multiple washes, and due to the rough nature of how people wear/treat their jeans. This style is also used for heavy-duty items such as duffle bags, leather products and suitcases.
There is a huge trend towards adding metal teeth zippers to pouches – they add a feeling of luxury.
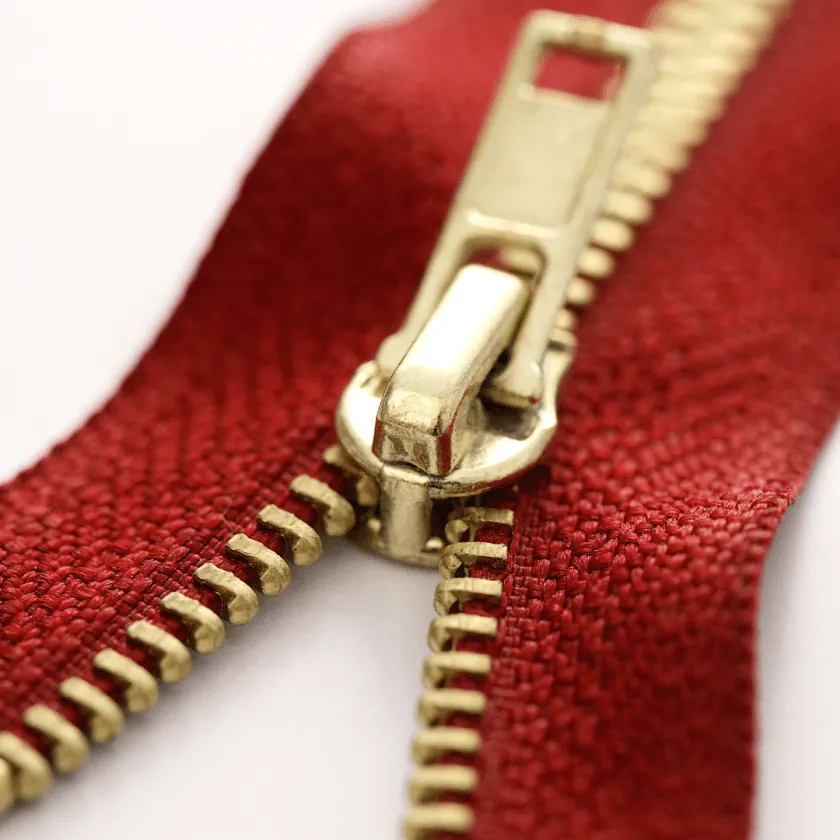
(Metal teeth zip)
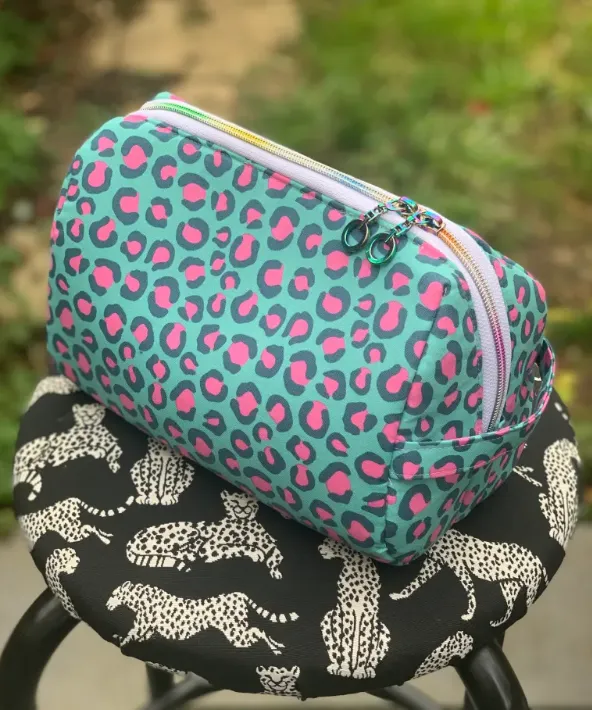
What are continuous zips?
These zips don’t have a beginning or end, you can cut them to the length you need as there’s no pull tab or bottom stop and you can purchase the zipper tape by the metre.
Zip pulls are purchased and added separately giving you more control over the look and design of your project.
These are great if you need a very long zip. Perfect to reduce waste and for those niche projects, you can also customise it to your needs and add zip pulls to either side!
(Continuous zips)
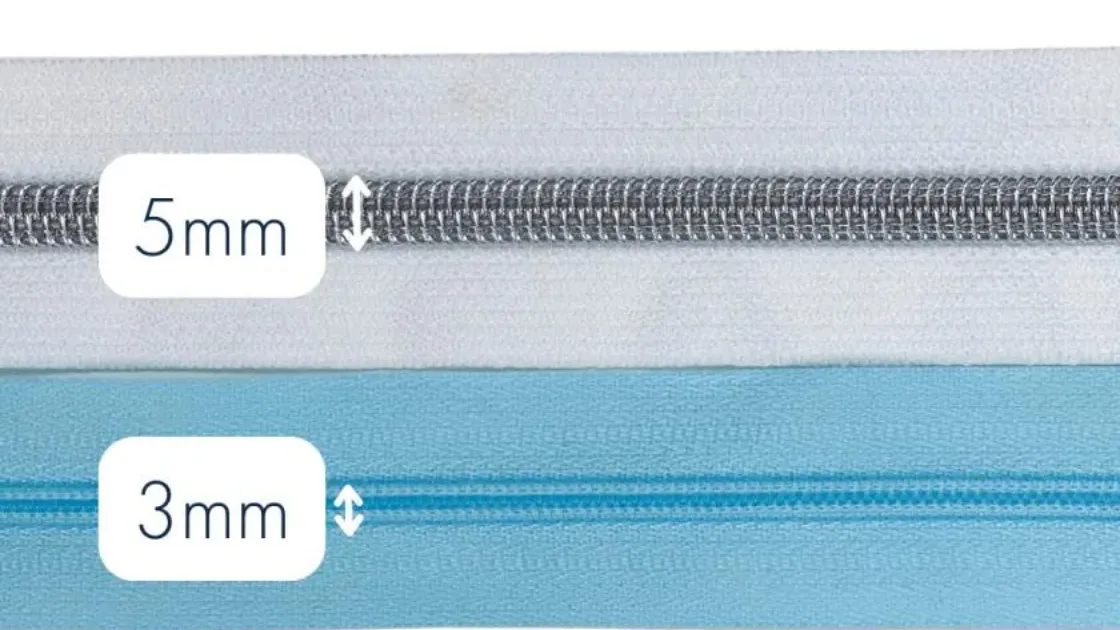
What does a #3 or #5 Zip look like?
I’d be thrilled to hear that you appreciate my work! I’d love it if you bought me a coffee to support my work if it has helped you and offered you value☕️
In most cases the overall size is an approximation of the zipper teeth width in millimeters when the zip is closed.
When sewing your makes, if your project doesn’t include a recommendation for the size of the zipper, you can use the table below:
ZIPPER SIZE CHART

Don’t forget when it comes to measuring the length of your zip, you should start measuring from the top stop and finish measuring when you reach bottom stop, this will give you the most accurate measurement of your zip.
How heavy are zips?
Weight is an important factor to consider as you want to match a suitable weight to the project you’re working on.
Usually metal zippers will weigh a lot more than moulded plastic ones.
So for example if you’re sewing some children’s clothes with a zip on the front, metal may not be suitable as it would be too heavy and weigh the whole garment down.
Zipper Tools
Grab the tools below to help you with your zip sewing!
What does a zipper foot look like?
A recommended prerequisite before you start sewing zips is getting yourself a zipper foot. Although some seam-stars agree it’s not a necessity – it does make life a lot easier and you are more likely to get a nice finish.
You can get 2 different zipper foots, an invisible zipper foot and a regular zipper foot.
The difference between both is self-explanatory, the invisible zipper foot is to be used when sewing invisible zips, and the regular zipper foot is to be used with all other types.
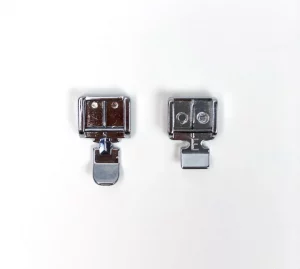
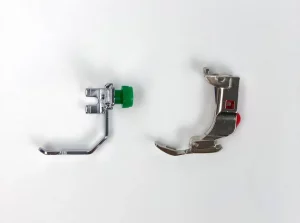
(Two different types of regular feet)
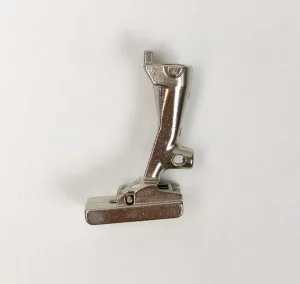
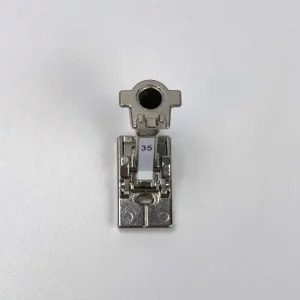
(Invisible zipper foot)
Pliers
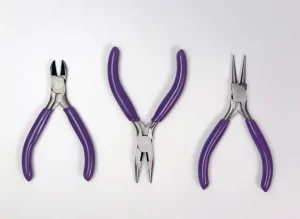
Some zippers such as nylon coil and chunky zips can be cut with scissors to shorten, however metal ones need a little more work to shorten & pliers are the perfect tool for this.
All you need to do is snip & pull off some of the metal teeth with pliers.
Clear Tape
An easy tool most of us have in our homes, the same sellotape we use with wrapping paper! I like Scotch Magic Tape as it doesn’t leave a residue on your project.
Use this to stick down the zip whilst sewing for ease to keep it from slipping.
Ideal for holding together seams, zips or hems when stitching knit fabric, it’ll also keep the fabric from stretching as you sew.
Even better… this tape disappears after the first wash!
If you prefer watching rather than reading, check out our video version of this guide over on our Youtube
Did this guide help you? If it did I’d appreciate it if you’d leave a comment or a ❤️ on this post to help other people find my work! And if you’d like to hear more from me I’d love it if you would subscribe below… thanks so much!

