Toy Storage Basket and Play Mat Sewing Tutorial
Boring Legal Bit: If you follow any tutorial or guidance found in this post, or on this blog, you agree to be bound by our disclaimer which can be viewed here
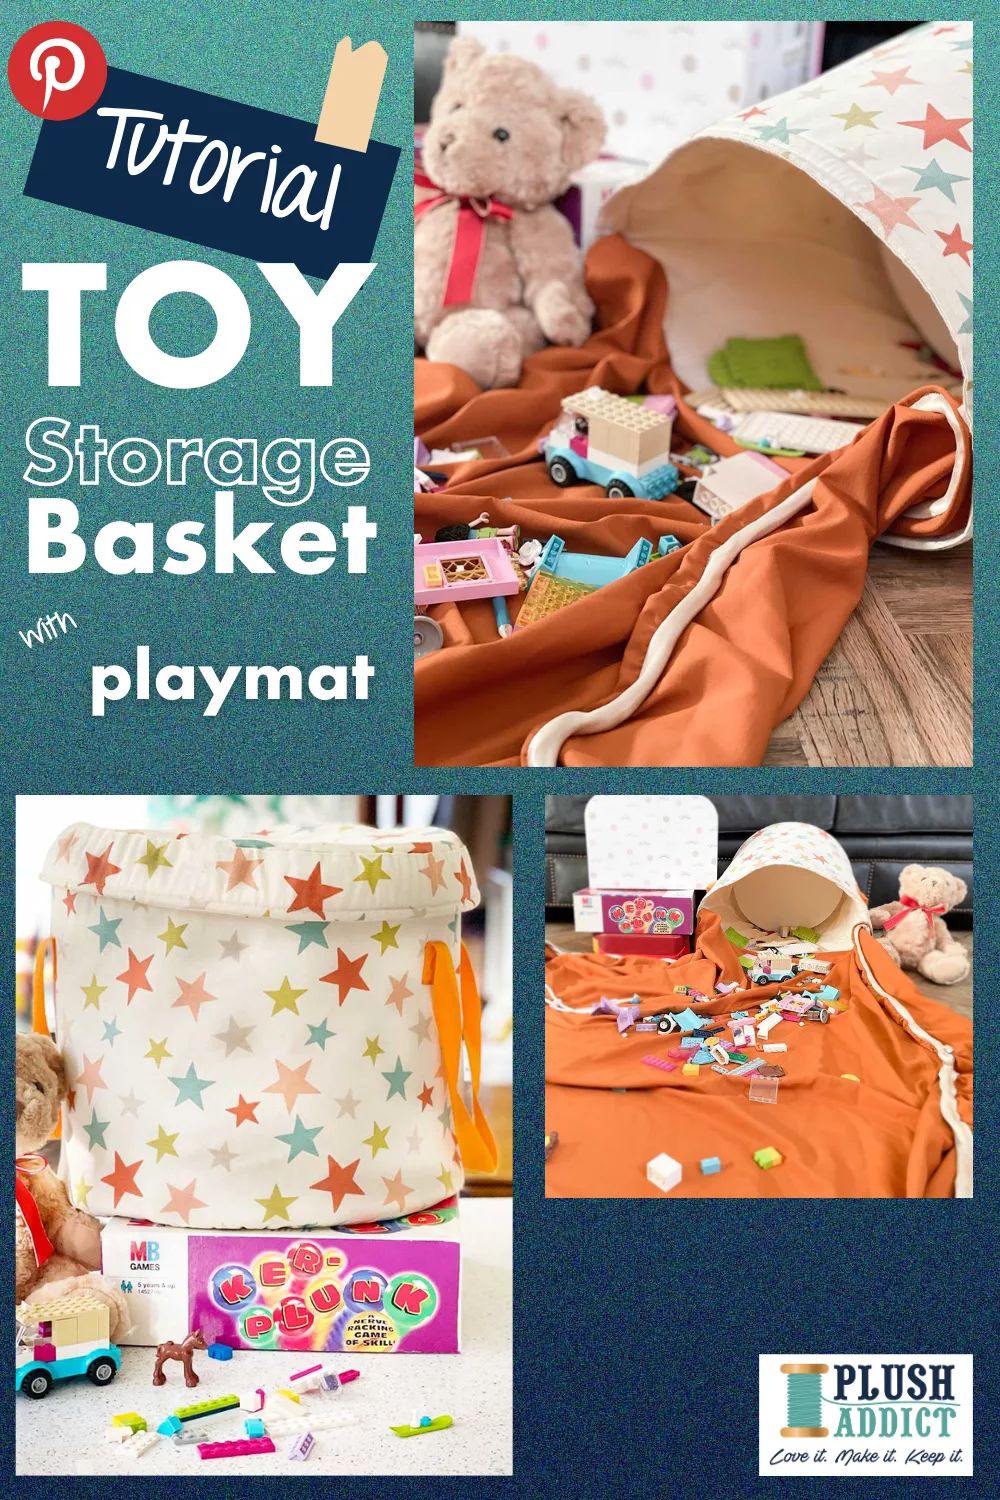
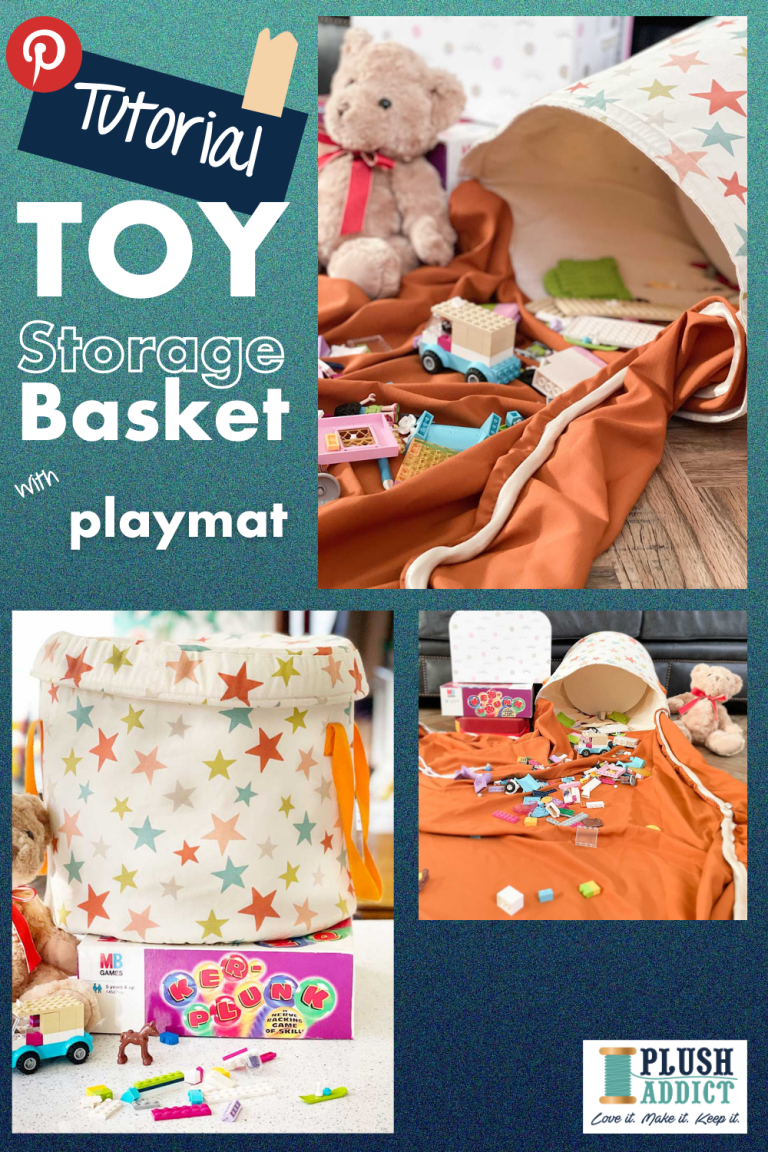
You can never have too much storage & this innovative toy storage little basket and play mat won’t only keep toys, such as Lego, stored away – it can also help with the tidying up in a flash!
To complete this project you will need to feel comfortable sewing curves through multiple, sometimes thick, layers & be accurate in your measuring & cutting.
Skill Level: Intermediate seam-star
Skills you will learn:
- How to draft and cut circles of any size
- How to sew curves
- How to use foam as structure
- Adding bias cord casing
- How to Blind Stitch
- How to Ladder Stitch
You Will Need:
For the basket:
- Outer fabric: 1m 145cm Width canvas/ upholstery fabric
- Lining fabric: 1m 150cm Width lightweight calico
- Structure: 1.5m Style-vil [See the intro below for more info on Style-vil ⤵️]
- Handles: 1m 25mm Acrylic webbing
- Solid base: 0.5m Buckram
For the playmat:
- Mat: 1.5m 150cm width very light weight fabric. We used Ripstop nylon
- Cord channel: 5m 30mm Satin bias binding
- Draw cord: 10m Polyester woven cord
Sundries:
Never miss a tutorial or fabric guide…
Stay up to date with the latest by signing up to our newsletter!
Click to join our mailing list!
An introduction to Style-vil foam
Vlieseline Style-vil is a great product to have in your sewing stash. It’s a thin foam layer which is lightweight whilst adding structure to your projects. We’ve used it here in the Toy Storage Basket to enable the fabric basket to stand up on it’s own.
Style-vil is the perfect choice for three-dimensional effects; for the padding of protective cases for mobile phones and glasses cases and it’s perfect for stabilising bags, pieces of clothing (e.g. shoulder pads) caps, hats etc.
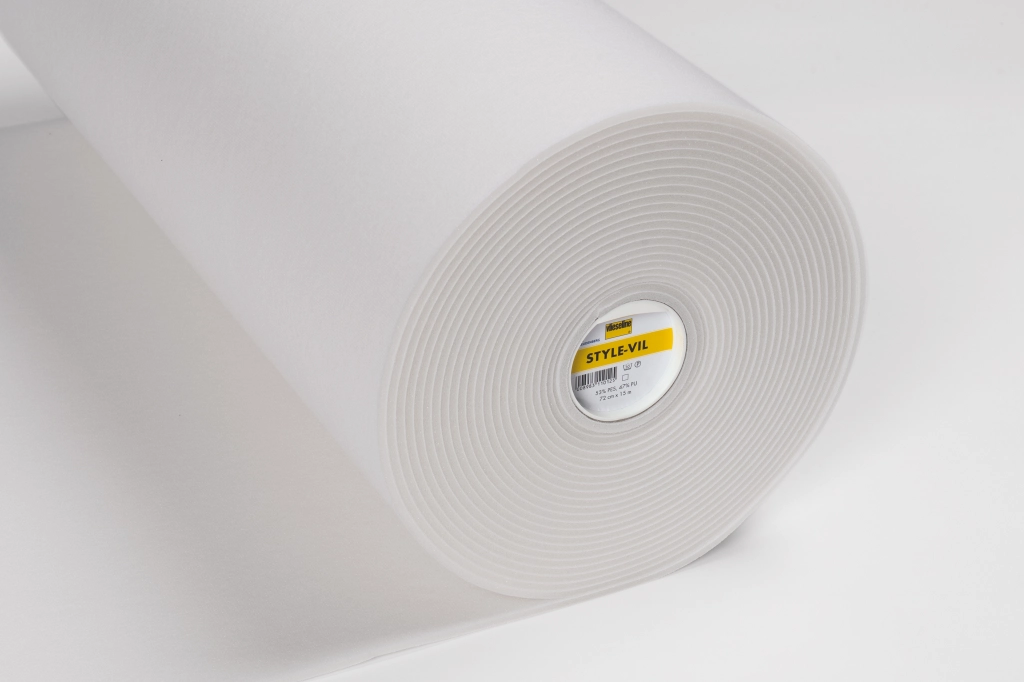
Style-vil foam is another choice to use in place of fusible fleece or wadding in projects and gives a very professional finish to your bag or pouch, especially when teamed up with woven interfacing, like in the project below ⤵️
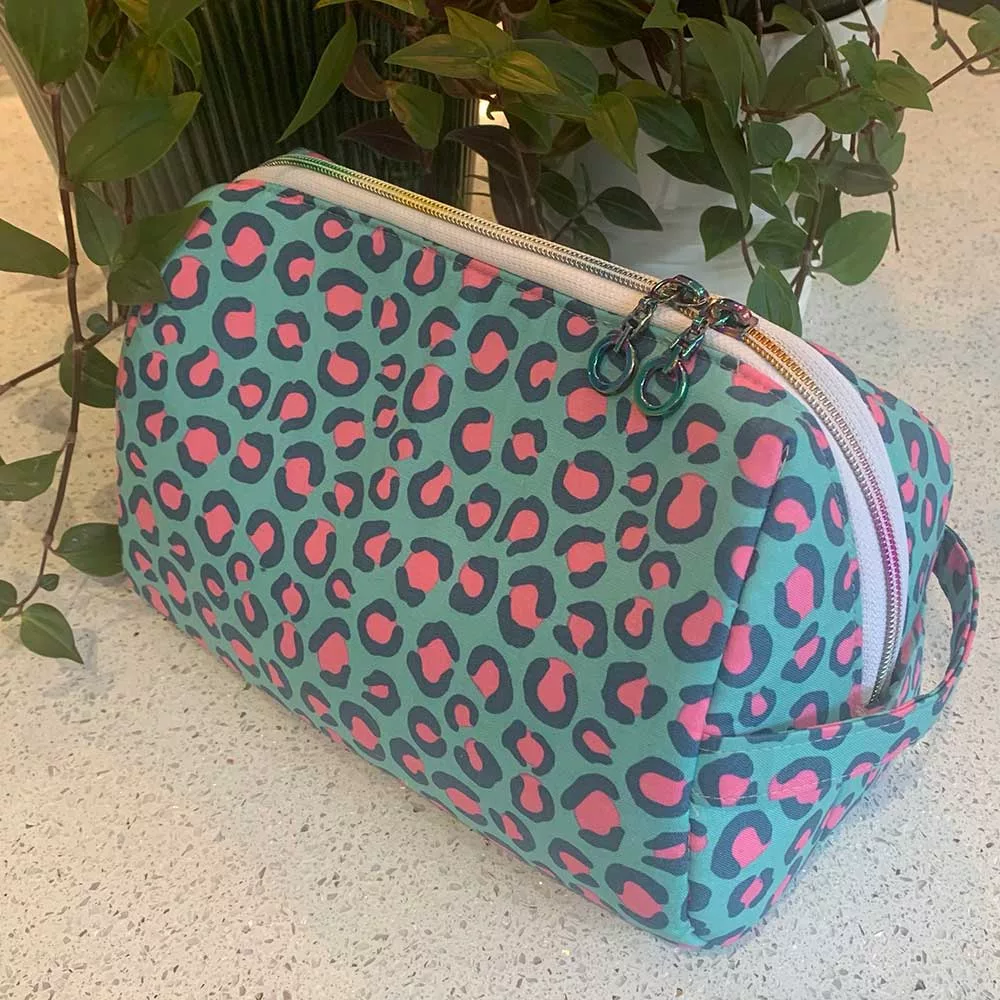
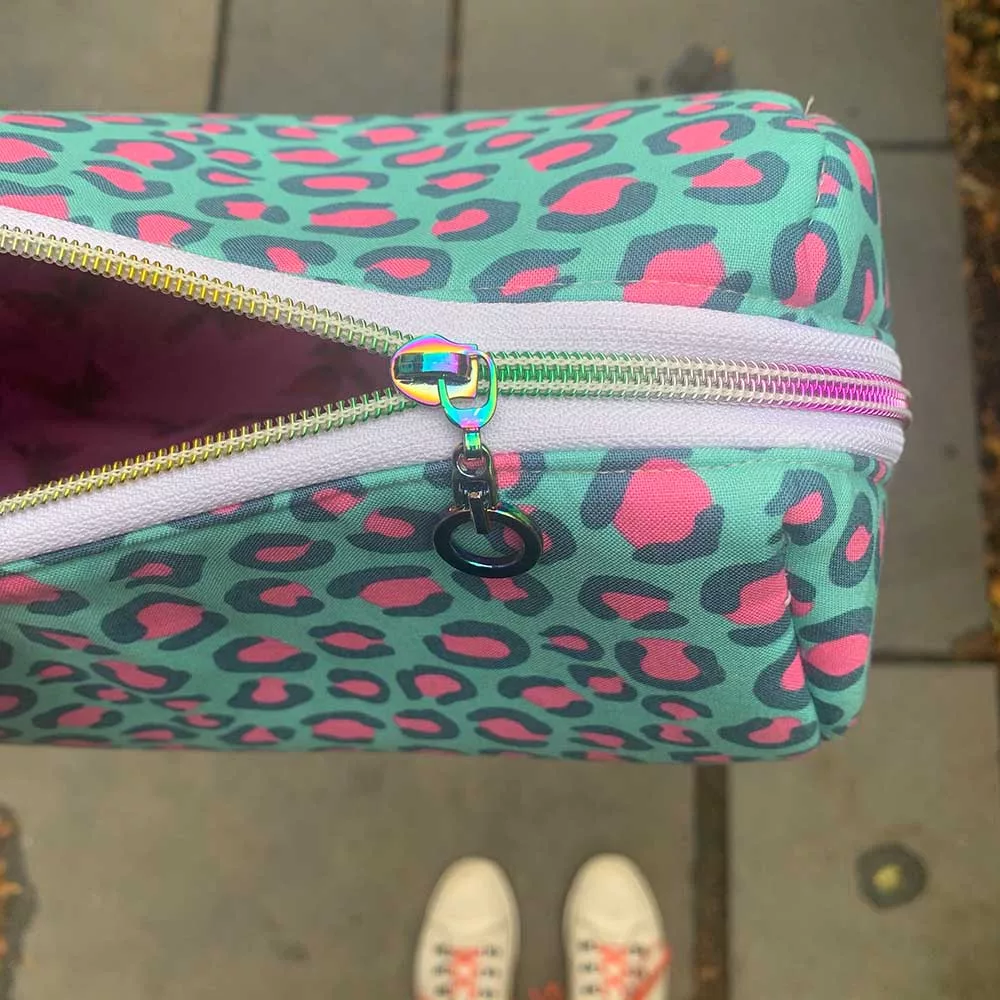
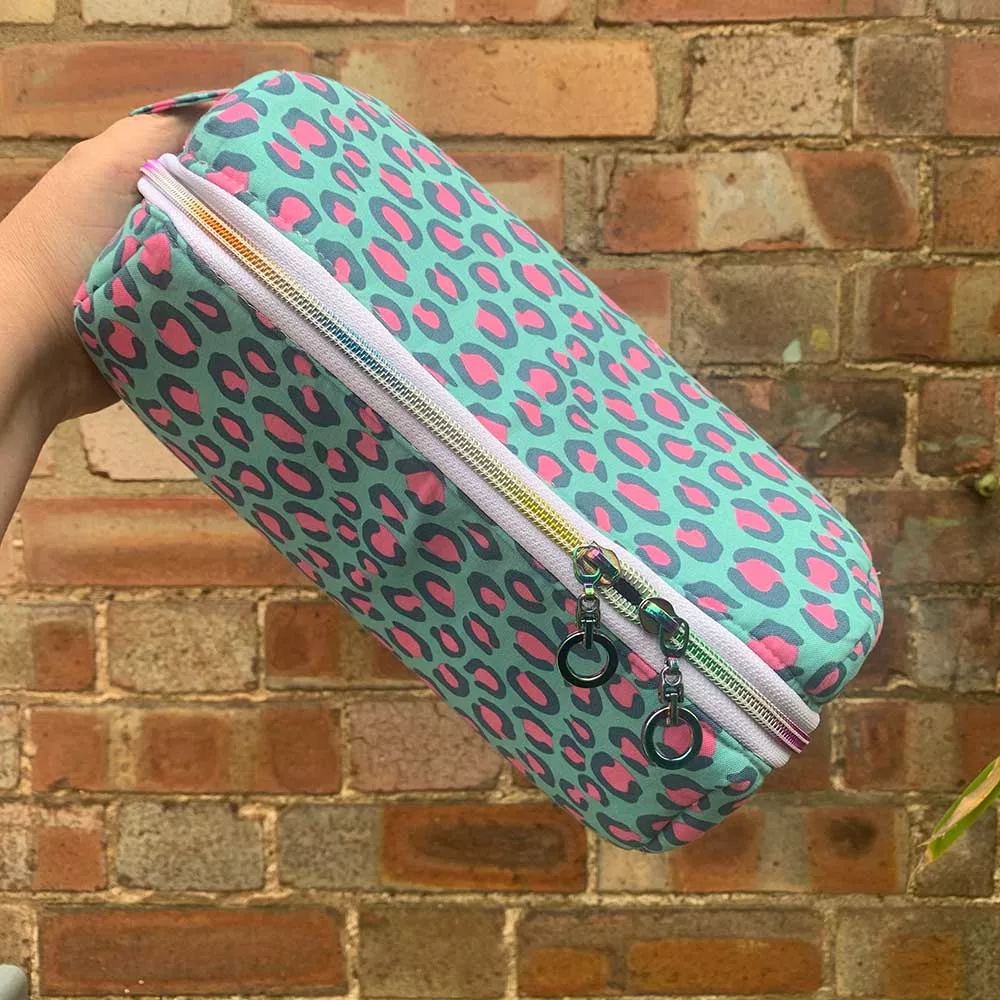
Check out the Vliseline blog to learn how to use Styl-vil in these cosmetic bags ⤵️

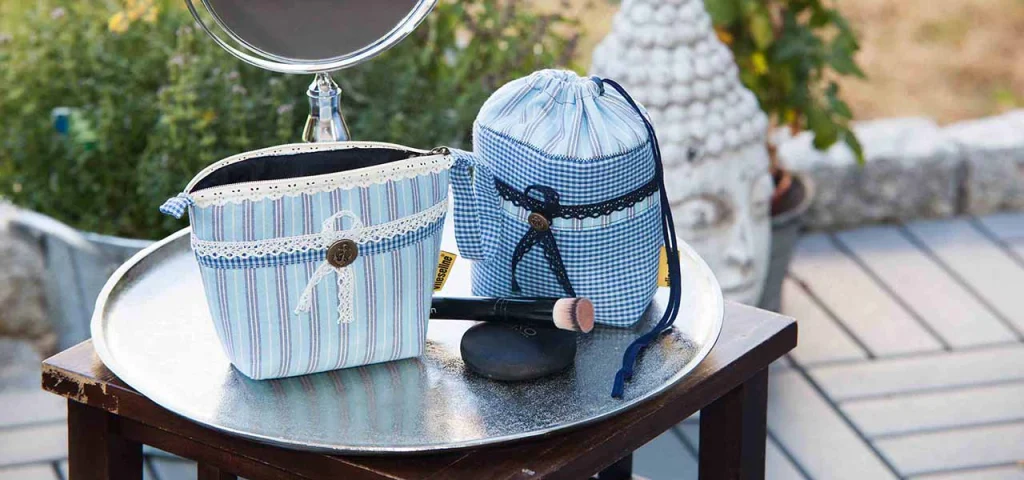
Style-vil used in cosmetic bags
Important notes for sewing the Toy Storage Basket:
1.5 cm seam allowance throughout, unless directed.
For steps using machine sewing, always backstitch at the start & end unless otherwise stated.
Pre-wash your fabrics
Warning – Strangulation hazard, never leave children to play unattended.
Part 1: Making the storage basket
1. Cut out the following:
FROM BOTH THE OUTER & LINING FABRICS
- 1 Basket side panel 107x33cm
- 1 Lid side panel 113x8cm
- 1 Base circle 33cm diameter*
- 1 Lid circle 35cm diameter*
Style-Vil Foam
- 1 Basket side panel 104x30cm
- 1 Lid side panel 110x5cm
- 1 Base circle 30cm diameter*
- 1 Lid circle 32cm diameter*
Buckram
- 1 base circle 30cm diameter*
* How to draft and cut circles
This example is for one of the base circles, but is easily adjusted for any size circle.
a) Calculate the radius of the circle (diameter, the width of a circle, divided by 2). 33 ÷ 2 = 16.5
b) Lay the fabric out flat and fold over approx. 16.5cm of the cut edge and hand press along the crease.
c) Fold over the selvedge edge approx. 16.5cm – DO NOT include the selvedge in the measurement. Hand press the crease.
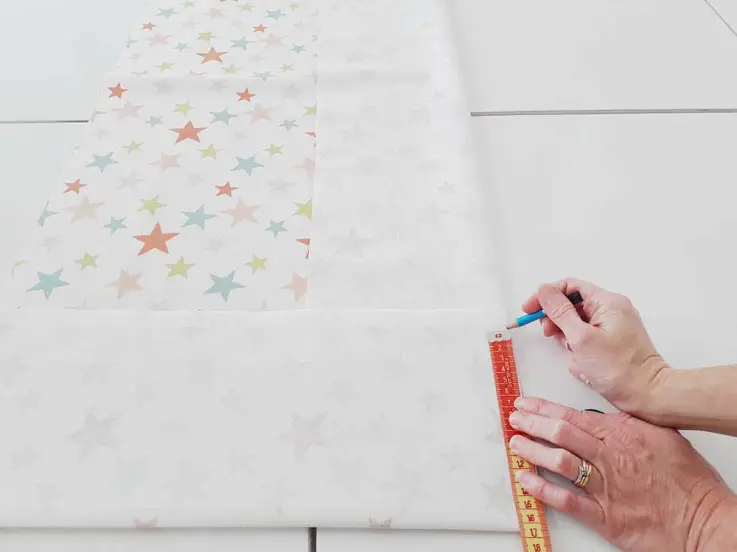
d) Position the end of a tape measure in the corner where the 4 layers of fabric meet.
Step d)
e) From that point, measure and make a mark 16.5cm along one of the creased edges.
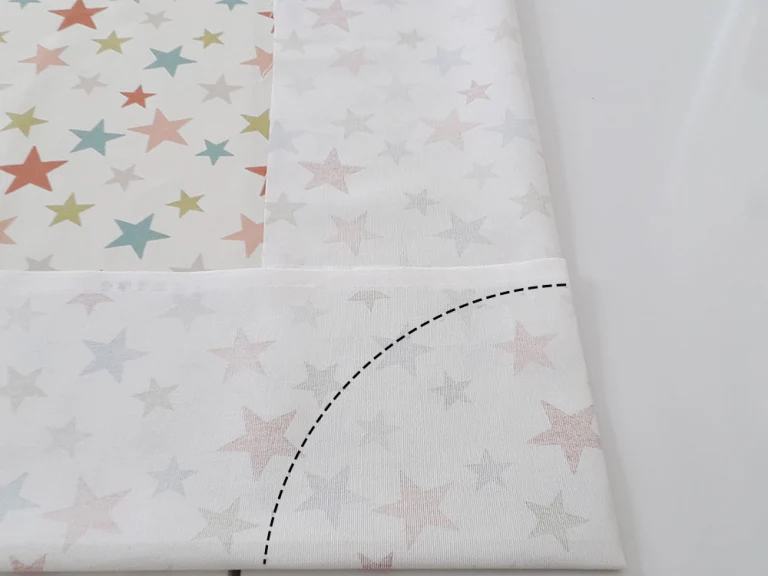
f) Pivoting the tape measure with the end always in the corner, move the 16.5cm measurement about 2cm away from the fold and make another mark. Continue to make marks at 2cm intervals until the tape lies along the other folded edge. The marks will form a quarter circle shape
Step f)
g) Pressing down firmly on the 4 layers to hold them in place, cut out the marked quarter circle.
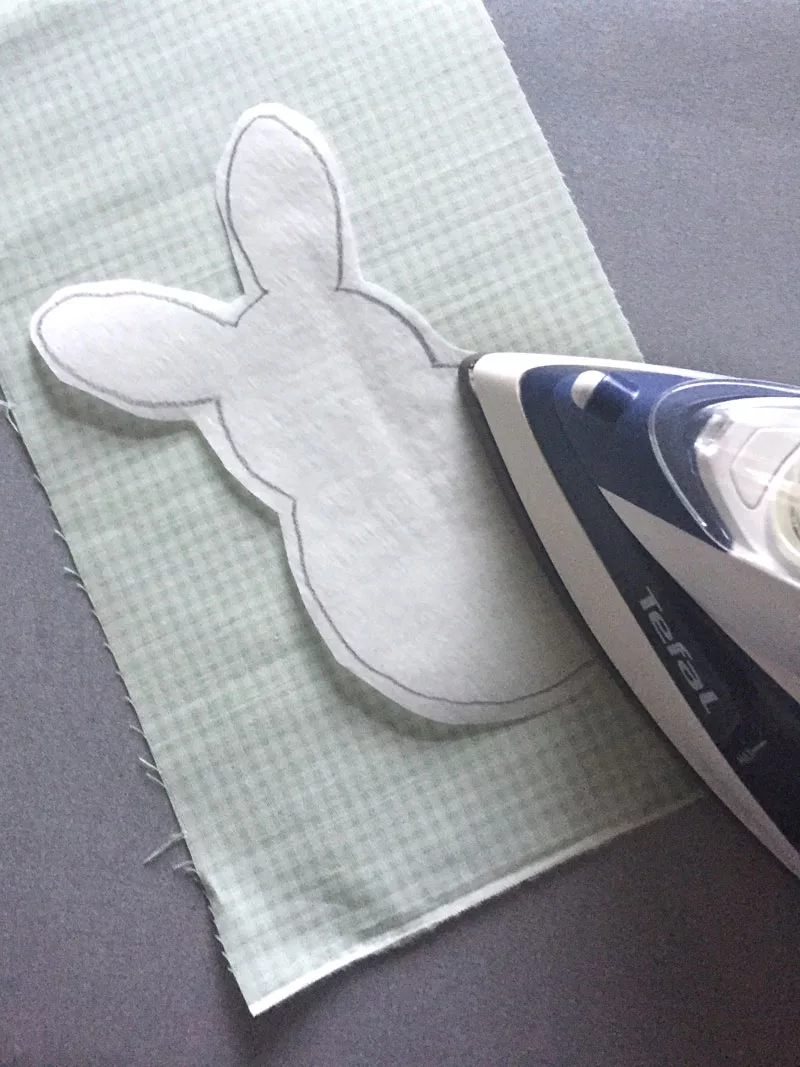
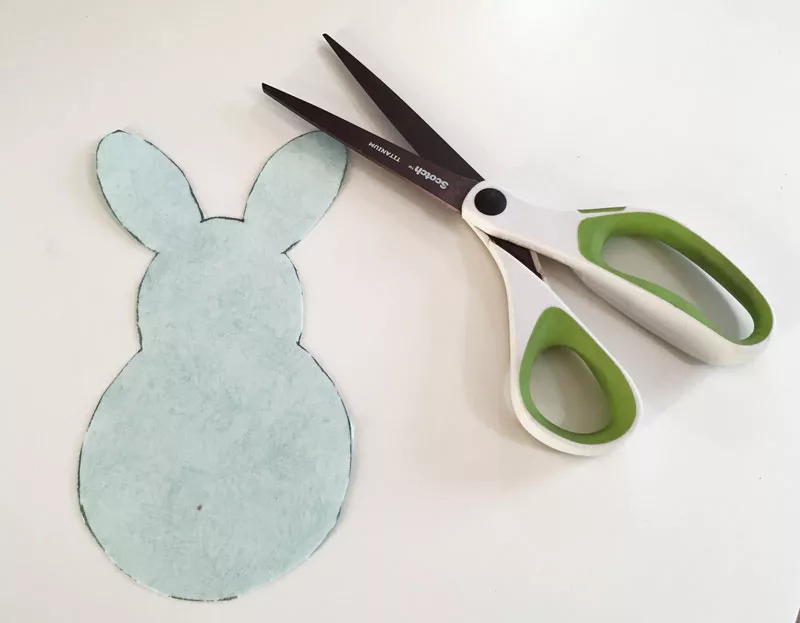
Cutting Style-vil circles
For bulky materials, for example; Style-vil, fold the fabric once allowing enough room to form a half circle of markings instead of a quarter circle. The top layer can be cut and then used as a template to cut the bottom layer.
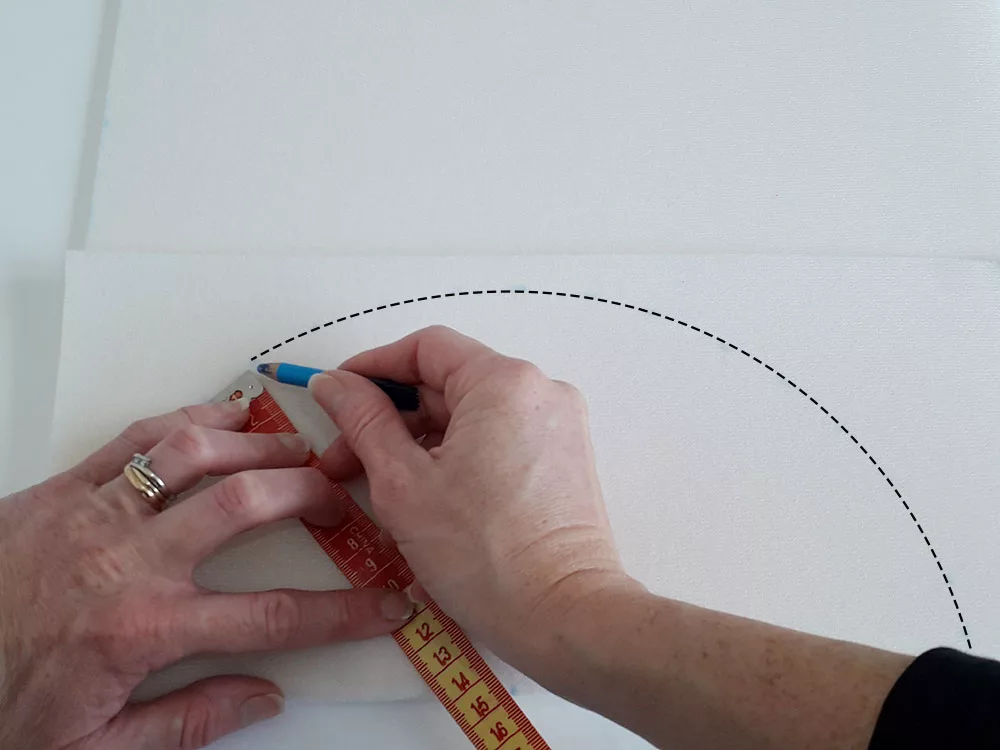
Cutting Style-Vil
Cutting Buckram
Draw around the cut Style-vil base circle as a template for the Buckram
NB – Do not cut Buckram with fabric scissors as it can dull the blade!
2. Sew the main basket
Follow steps 2. – 10. for BOTH the outer & lining fabrics
2. Take the basket side panel piece & lid side panel piece and fold each piece of fabric in half, align the 2 short edges right sides together and pin.
3. Sew along the edge using a 2.5 length straight stitch.
4. Press the seams to one side.
5. Mark 1/4 points on the bottom edge of basket side panel, top of the lid side panel and around the edge of the base and lid circles.
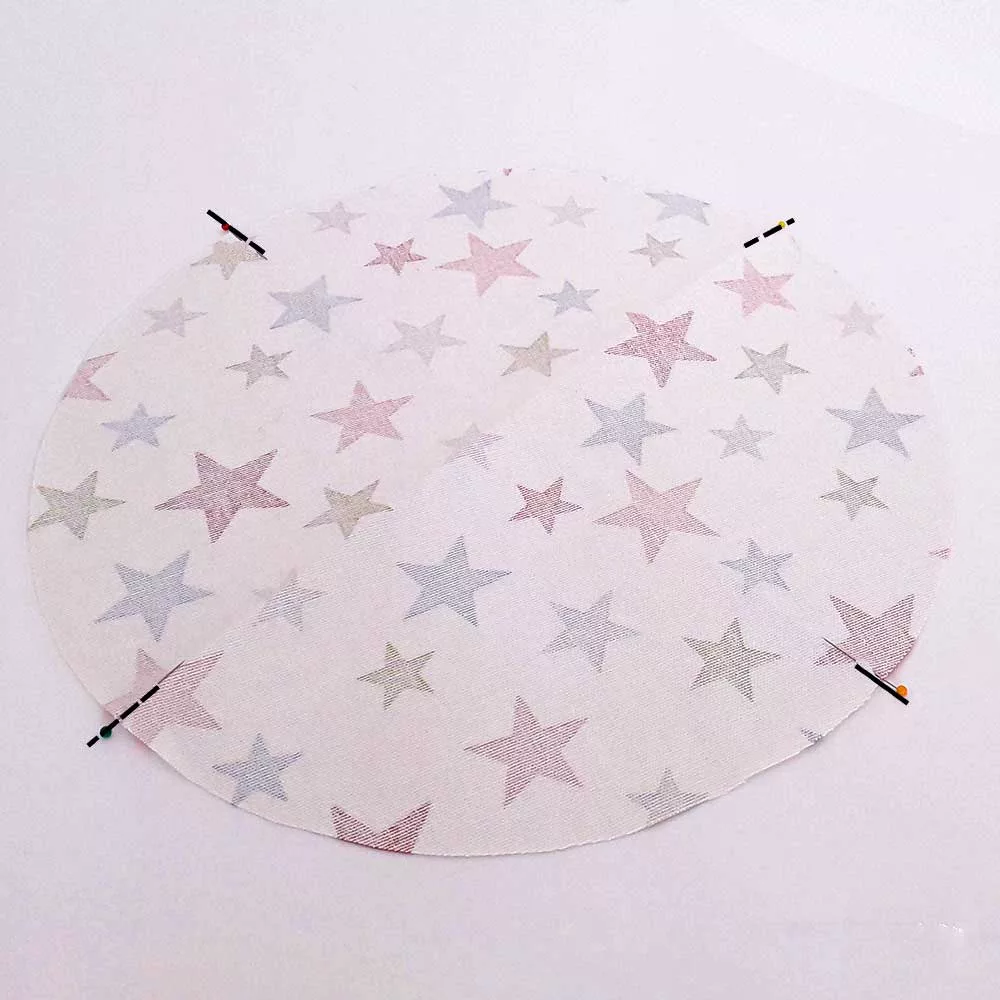
Step 1.5
6. Pin the 1/4 points on the base circle to the 1/4 points on the basket side panel right sides together. Then pin between the points to hold the 2 pieces together.
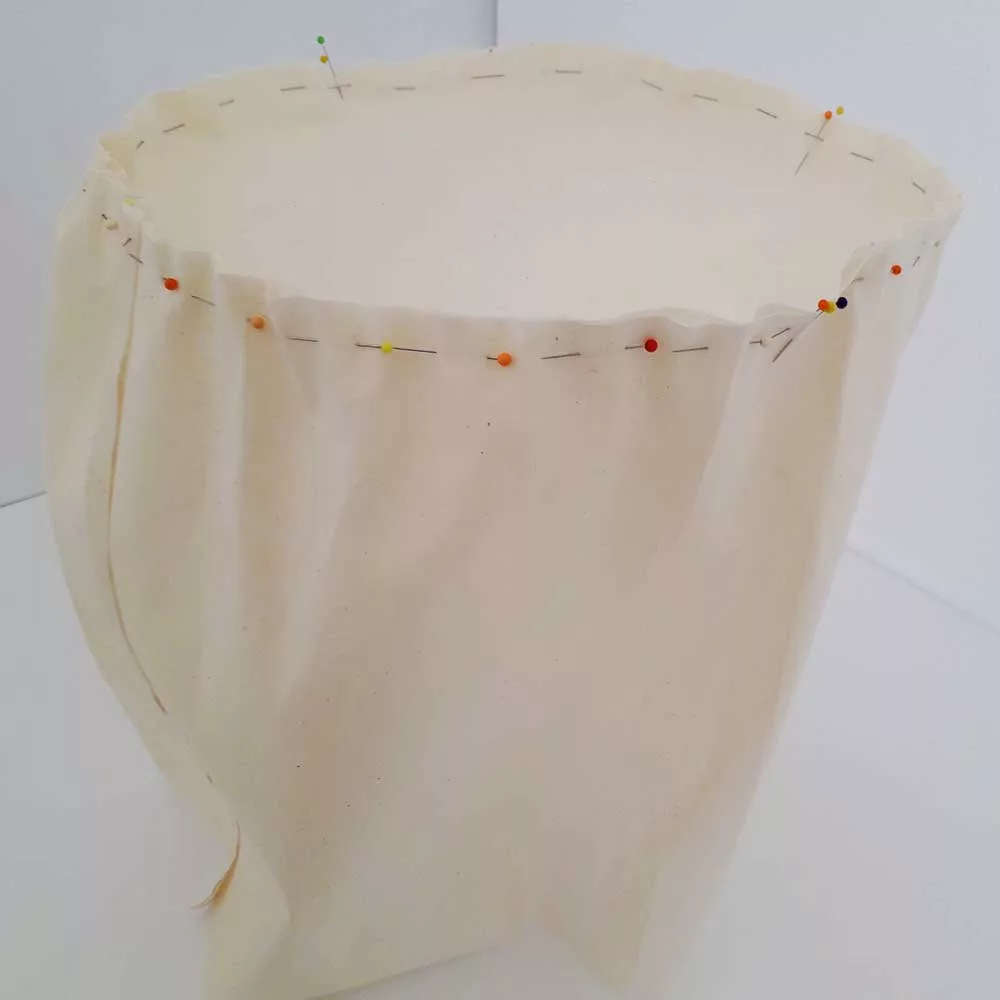
Step 1.6
7. Repeat step 5 for the lid side panel and lid circle.
8. Sew the pinned edges together using a 2.5 length straight stitch.
9. Clip V shaped notches* in the seam allowance at 2cm intervals on all 4 pieces (basket outer and lining, lid outer and lining).
*notches are usually around 5mm wide narrowing to a point stopping just before the seam line.
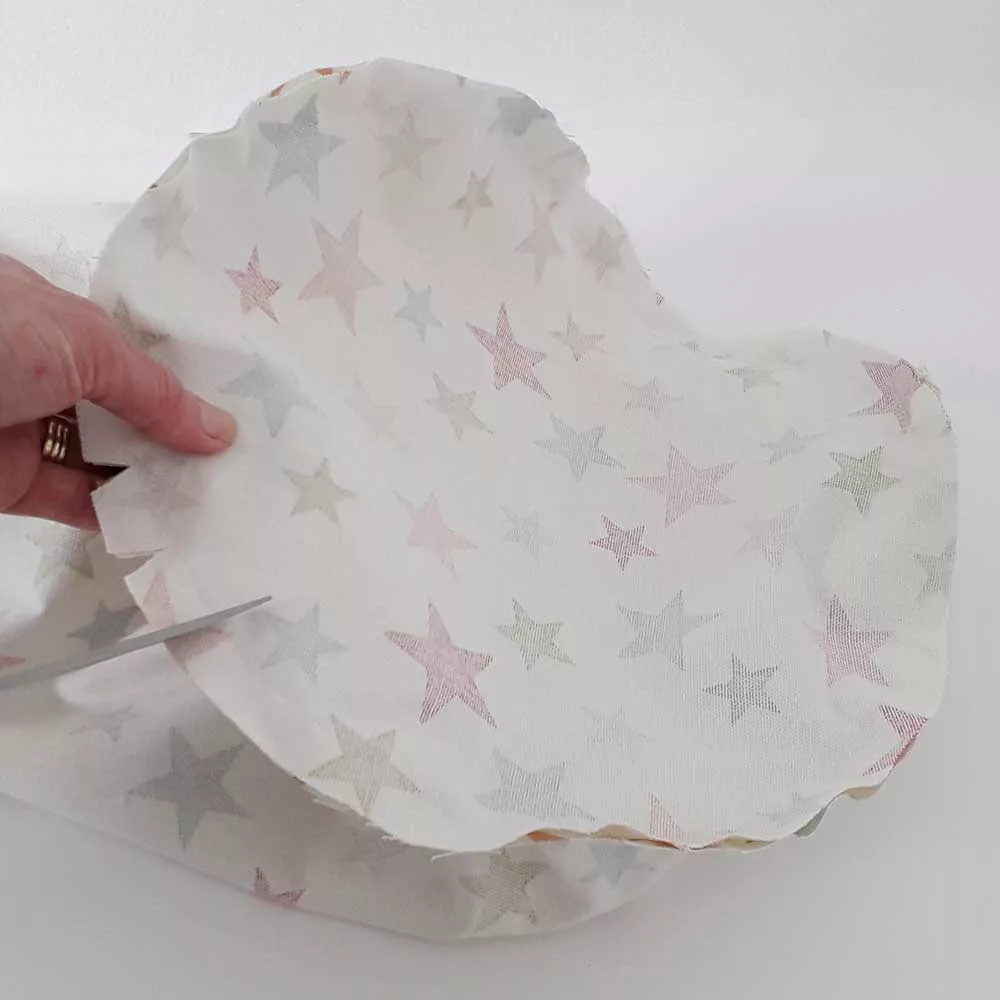
Step 1.9
10. Smooth the seam allowance over to the side panel. Understitch by sewing along the seam allowance 2mm from the seamline using a 2.5 length straight stitch. Watch the video below
Step 1.10 Understitching
Why understitch?
Assemble the basket
Follow these steps for BOTH the lid and basket
11. Turn the lining pieces so the seam allowances are on the inside of the cylinders.
12. Put the lining inside the outer piece right sides together. Line up the side seams then pin the raw edges together.
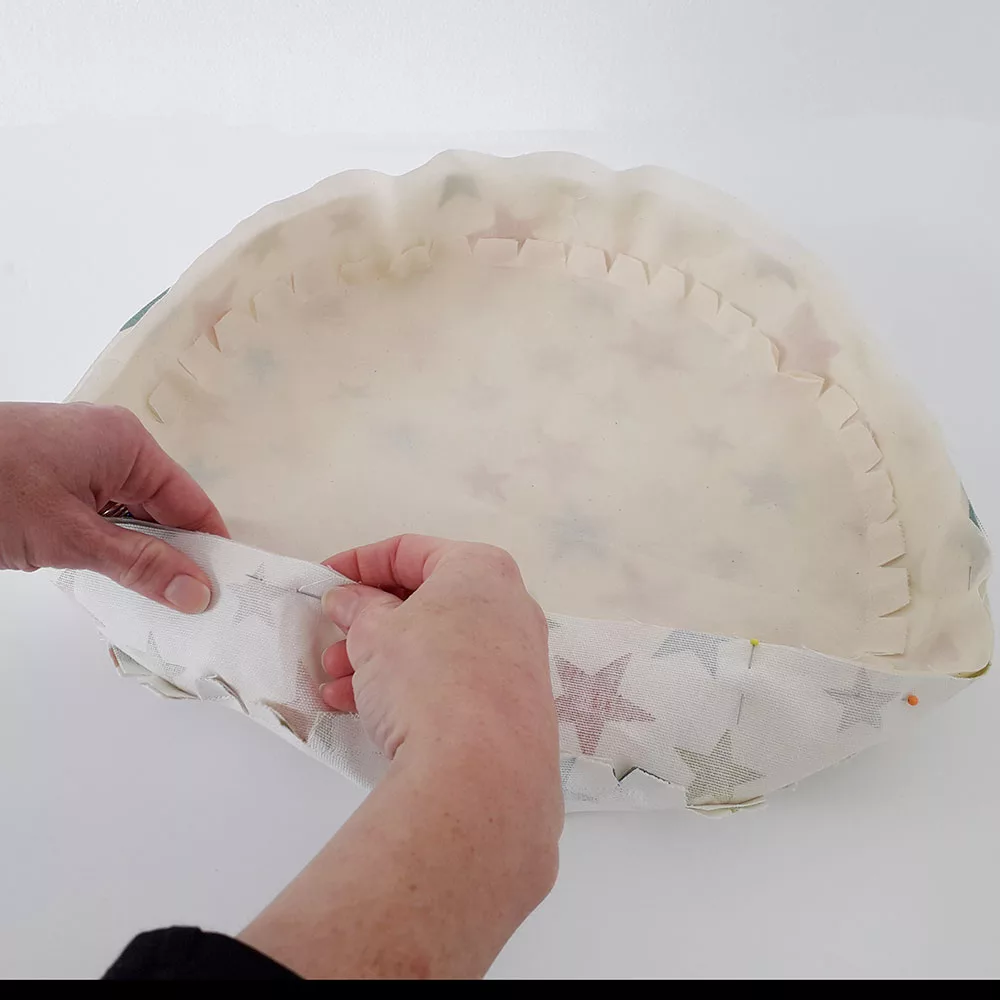
Step 1.12
13. Sew around the pinned edges leaving a 10cm opening for turning. Use a 2.5 length straight stitch.
14.Turn the basket and lid out the right way and press. Tuck the 1.5cm seam allowances around the openings in and press.
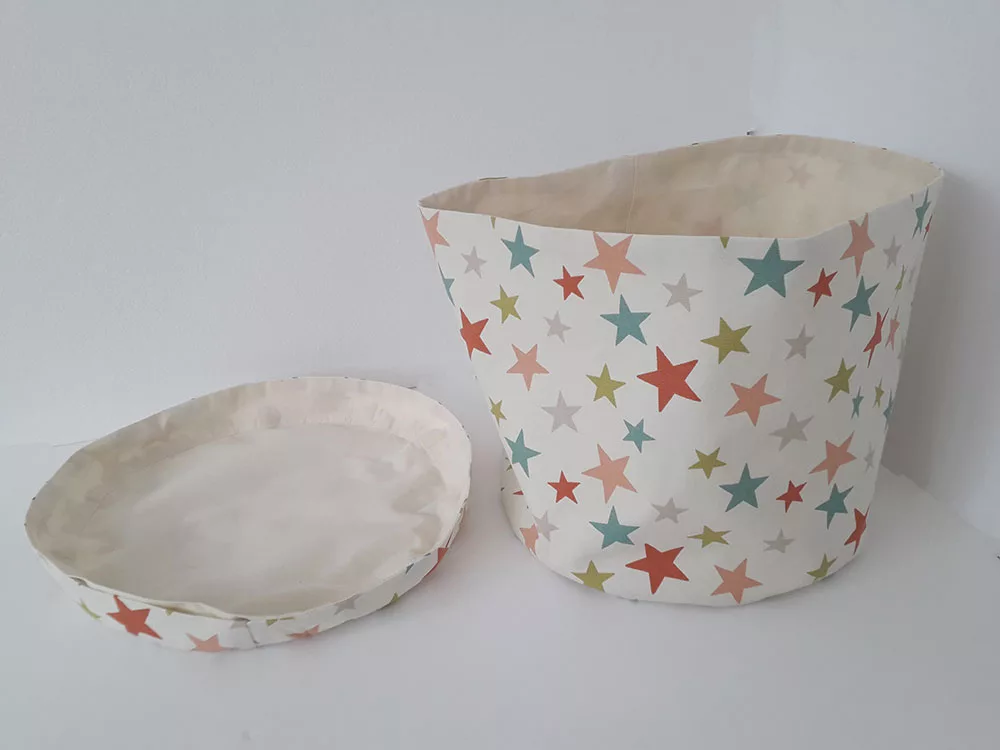
Step 1.14
Add the Style-vil foam
15. Starting with the circles pieces (the lid being the larger of the 2). Roll up the Style-Vil tight enough to fit through the opening. Once the Styl-Vil is inside, manoeuvre the Style-vil to the correct position, then unroll the piece and smooth it out against the outer fabric. Watch the video below:
Step 1.15
16. Feed the side panel piece through the opening, the piece for the basket will need rolling up as per step 15. Align the short edge of the Style-vil with the side seam then unroll it, guiding the padding around the sides of the basket. Once in place, push the seam allowance around the top edge towards the lining and tuck the Style-vil behind it.
Step 1.16
Step 1.16
17. Starting at the side seams smooth down the outer and lining fabrics from the top edge toward the lid/ base circle to ease any twisting between the layers.
18. Hand sew around the Style-vil circles using blind stitch. Hide the stitches within the lining and outer seam lines.
Step 1.18 Blindstitching: Use a complementary thread and cast on by the side seam. The contast thread here is for demonstration purposes.
19. To hold the Style-vil side panels in place, hand sew along the lining and outer side seams using blindstitch.
20. Hand sew the openings in the lid and basket closed using ladder stitch.
Step 1.20 Ladder stitch: Use a complementary thread and cast on inside the opening. The contast thread here is for demonstration purposes.
5. Finishing touches
21. Top stitch around the lip of the lid, 1cm from the edge. Use a straight stitch with a length of 3 or greater.
22. On the inside of the basket pin or clip the hook side of the Velcro 8mm from the top. Centralise it over the side seam.
23. Sew a line of top stitching 1cm from the rim of the basket, sewing the top of the Velcro when that section is reached. Use a straight stitch with a length of 3 or greater.
24. Sew a second line of top stitching around the basket rim at the same depth as the bottom of the Velcro.
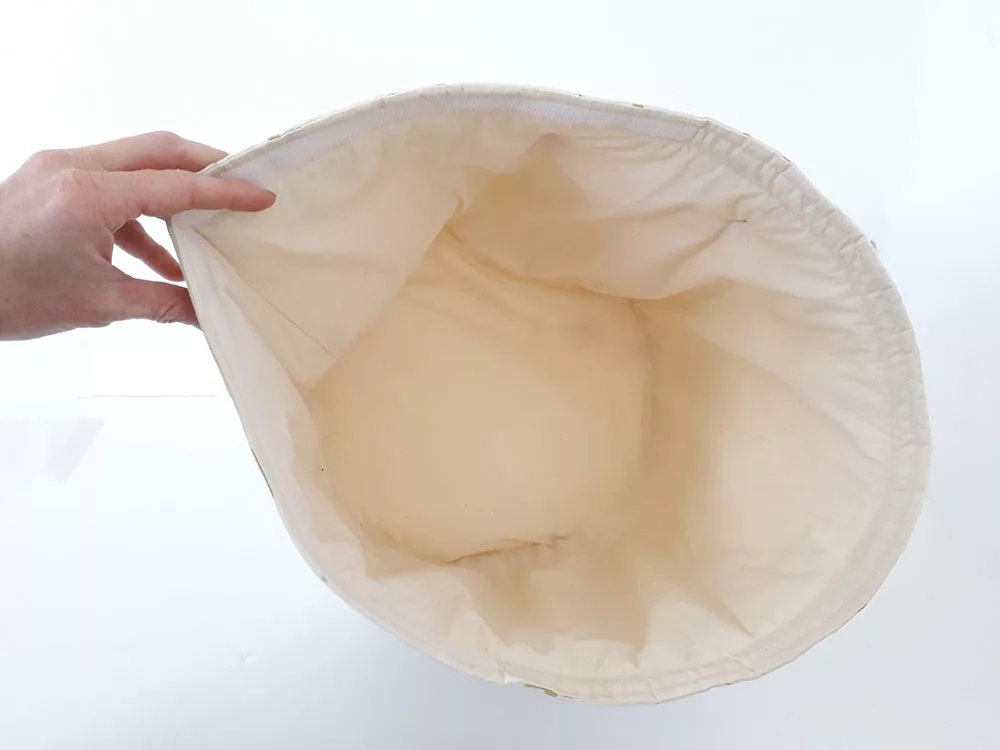
Step 1.24
6. Adding straps
25. Find the side quarter points: Fold the storage basket in half with one crease along the side seam and the other on the opposite side of the basket. Open out the basket then bring the 2 creases together. With the 2 creases aligned, flatten the bag to create 2 creases at the quarter points. Mark the top of the creases with pins, clips or a temporary fabric marker.
24. To make the straps, cut the webbing in half and hem/ seal the ends.
26. Working on 1 Strap at a time: align the 2 ends of the strap so they sit either side of the crease and are 10cm below the rim of the basket. Move the ends apart until they are each 5cm away from the crease, 10cm away from each other. Pin the ends in place
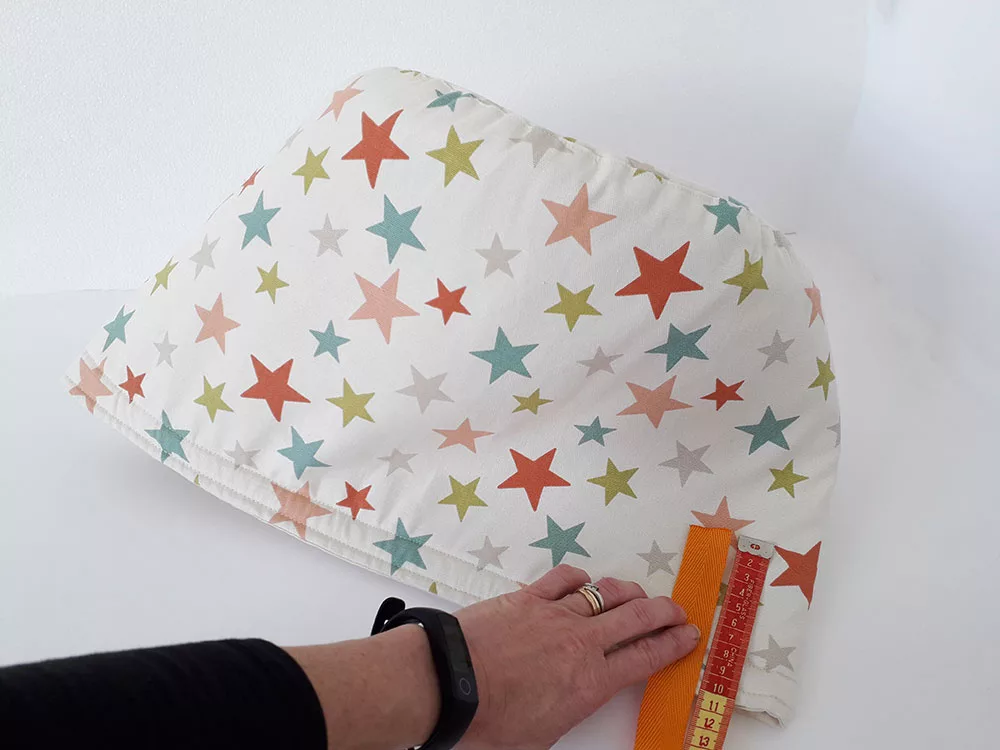
Step 1.26
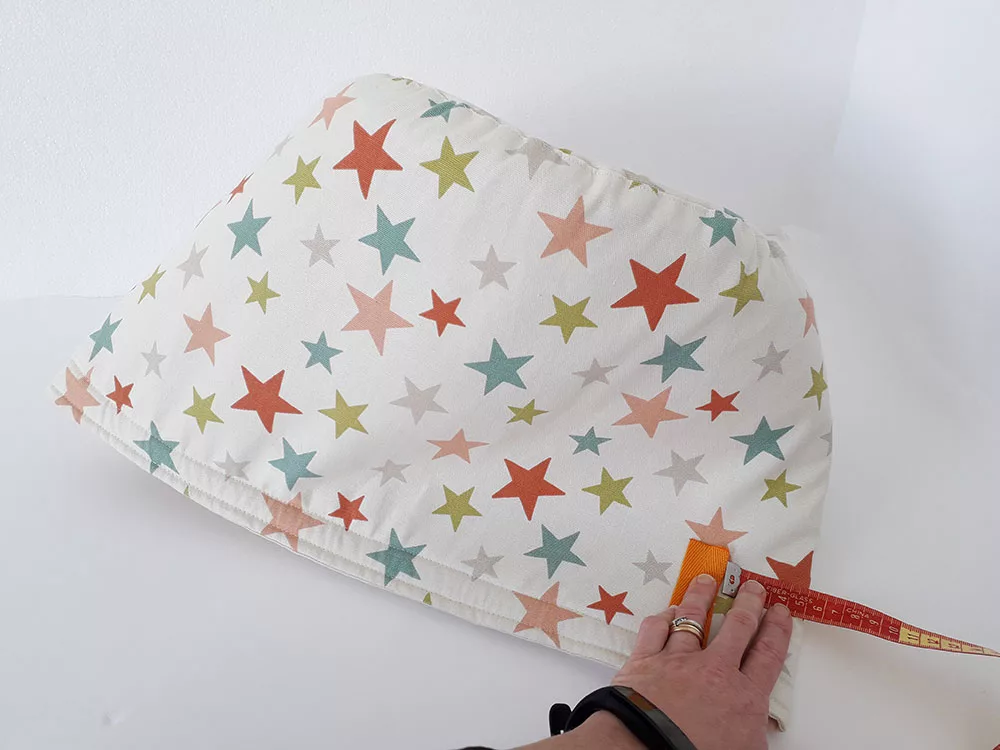
Step 1.26
27. At the end of each strap sew a 3cm high box. The stitch lines along the sides and bottom needs to be approx. 2mm from the edge. For added strength sew from one corner of the box to the opposite one, repeat with the other 2 corners to form a stitched X within the box.
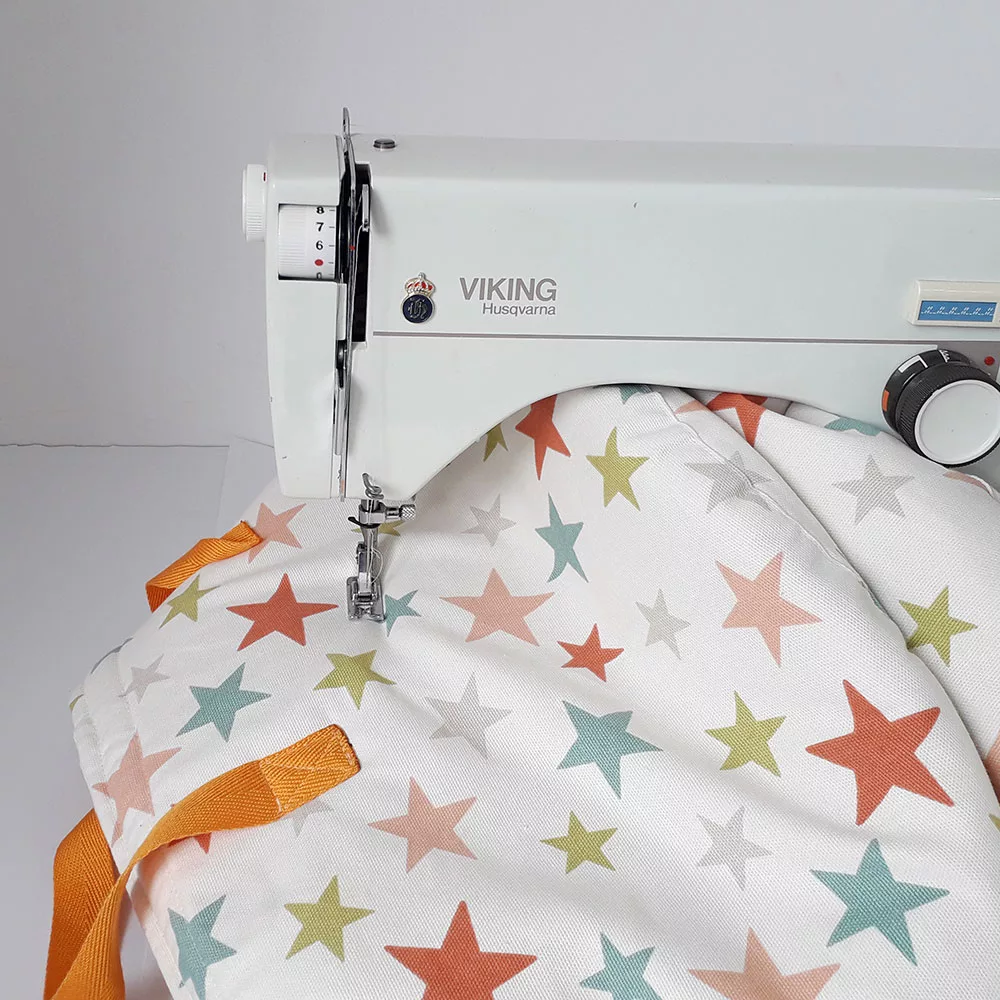
Step 1.27
Stay up to date with the latest from Plush Addict
Click to join our mailing list!
Part 2: Sewing the playmat
1. Cut out the following:
From the Ripstop nylon
- 1 Play mat 150cm diameter* [Refer to earlier step 1.1 “How to draft and cut circles & watch video below]
Marking & cutting circles
2. Sew the cord casing
1. Hem the end of the bias tape: Open out the end of the bias tape and fold 1cm of the short edge over and press. Tuck the raw edge under to meet the pressed crease and press again to form a 5mm pressed hem. Straight stitch along the edge of the hem with a stitch length of 2.5.
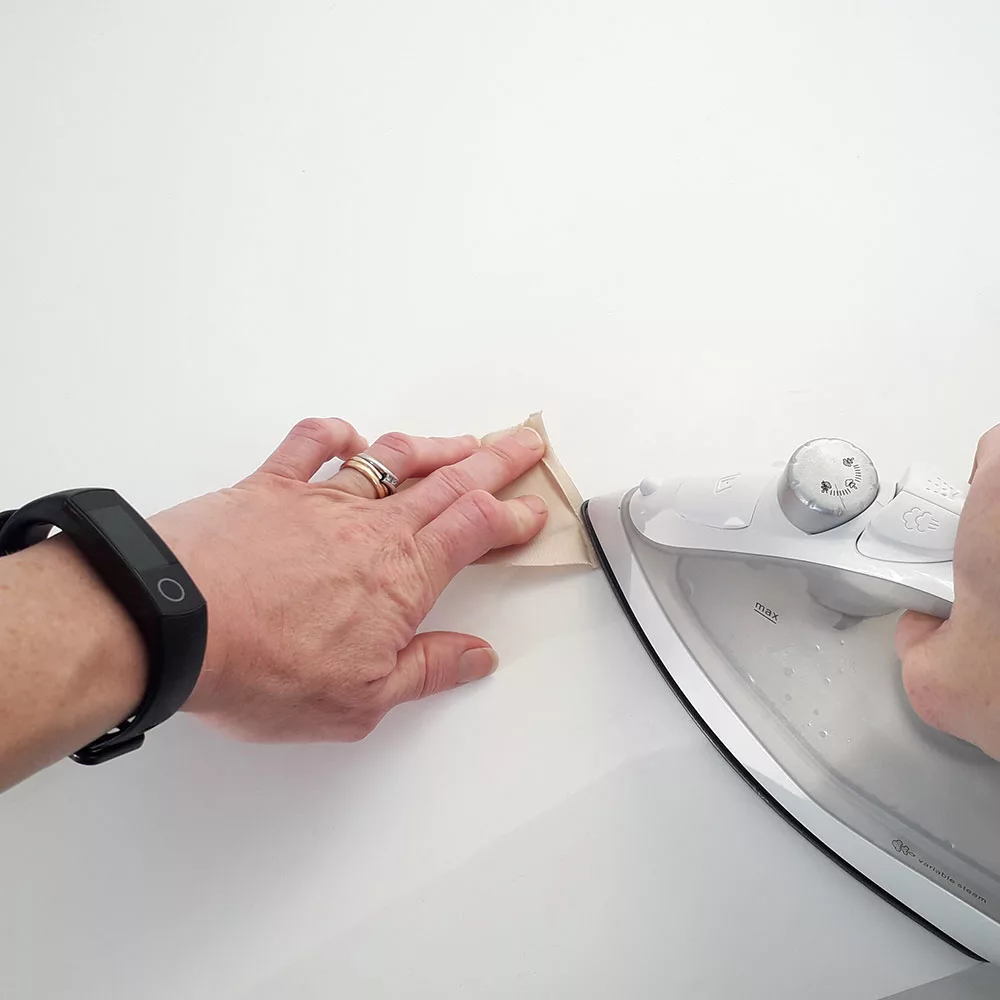
Step 2.1
2. Find the position of the casing openings: spread the playmat out flat. Fold over 1 edge of the circle far enough to create a straight edge 1 metre in length. Hand press along the crease then mark the fabric at each end.
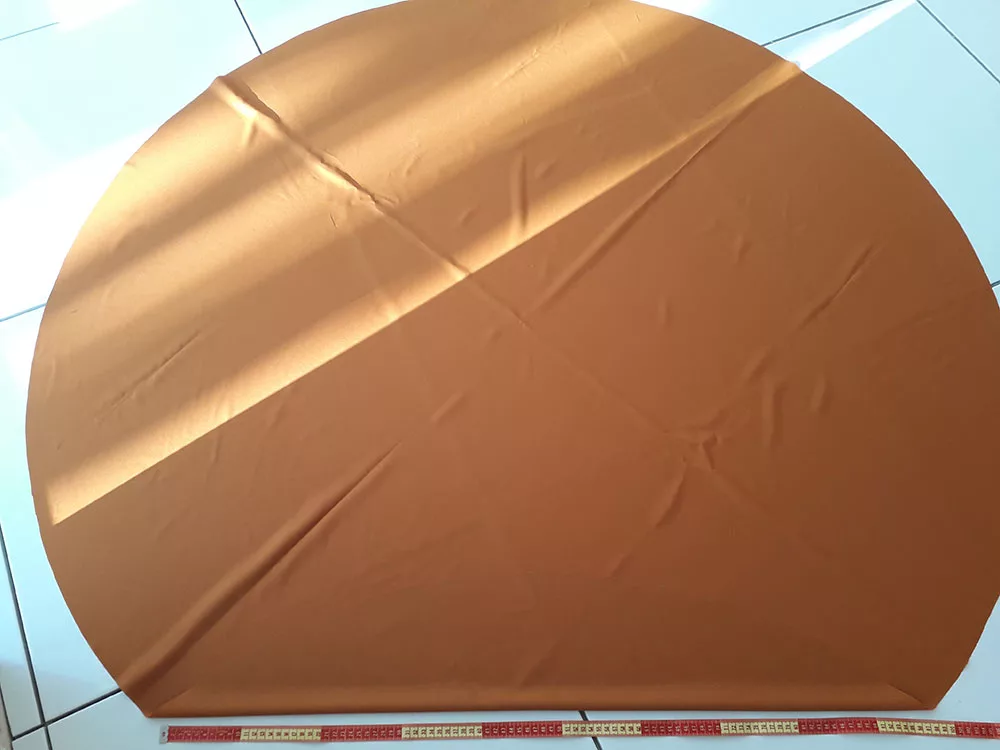
Step 2.2
3. Spread the playmat out flat again. Identify the shortest and longest distance between the 2 markings around the edge of the playmat.
4. From the mark at the start of the long section, open the outer fold in the bias and pin the bias around the edge of the playmat with right sides facing, edges aligned. Stop when the 2nd mark is reached.
5. At the second mark, cut the bias tape 1cm longer than the marked point. Fold over and press the 1cm and hem as per step 1. Keep the leftover tape to 1 side.
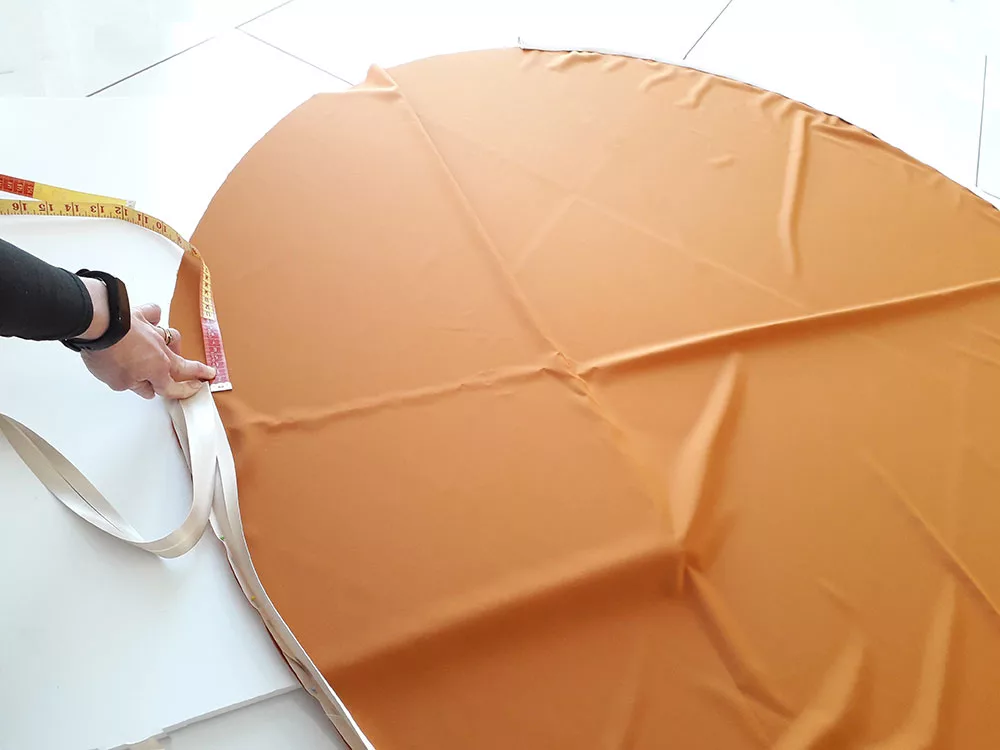
Step 2.5
6. Sew along the crease in the bias closest to the outer edge of the playmat. Use a straight stitch, 2.5 stitch length.
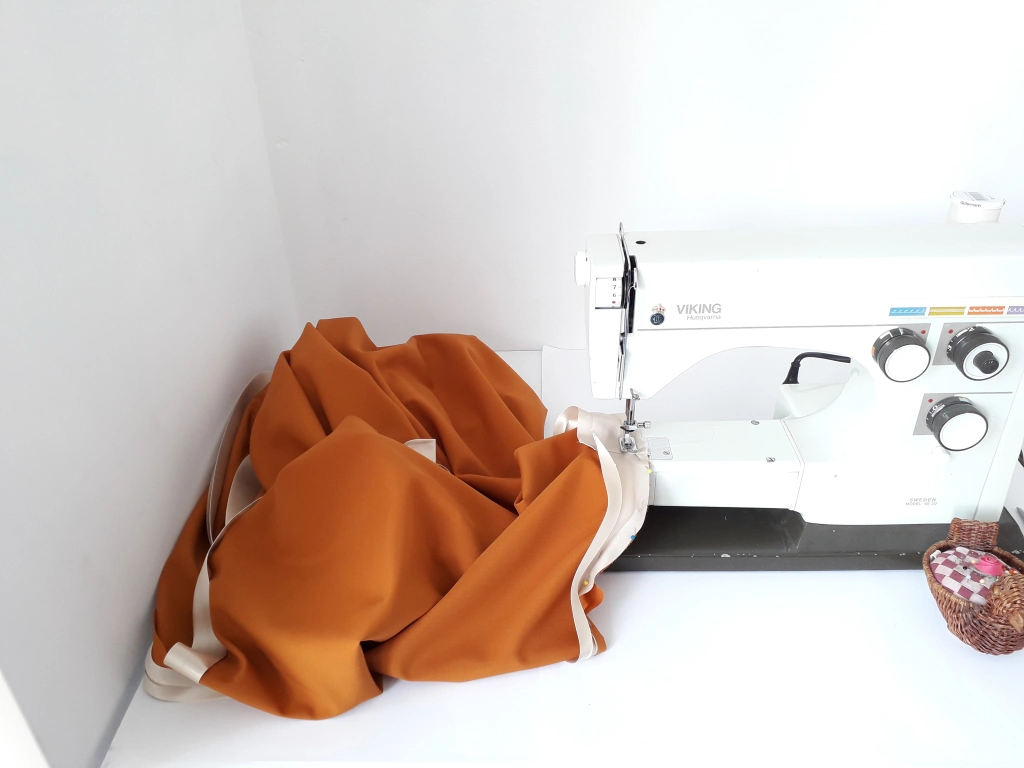
Step 2.6
7. Hem (see step 1) the end of the leftover bias tape from step 5.
8. At the start of the short section open out the bias tape and overlap the hem with that of the bias sewn in step 6. Pin the bias around the edge of the playmat with right sides facing, edges aligned. Overlap the hem with that of the attached bias. Do not trim the excess, leave an overlap.
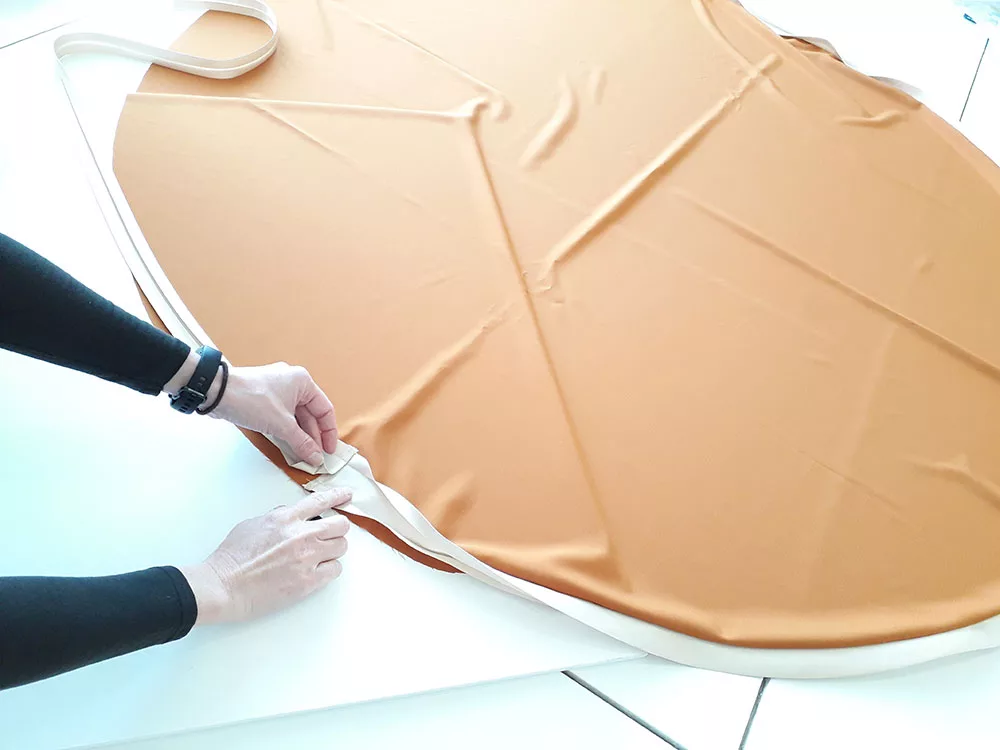
Step 2.8
9. Starting at the hemmed end, sew the bias tape for the short section as per step 6. Stop sewing 5cm before the long section.
10. Trim the bias tape 1cm past the hem at the start of the long section. Fold over and press the 1cm excess then hem as per step 1. Pin and sew the last section of bias tape in place, the 2 hems should overlap.
11. At the 2 overlap points, press the 4 tips of the bias tape inwards at 450 angles.
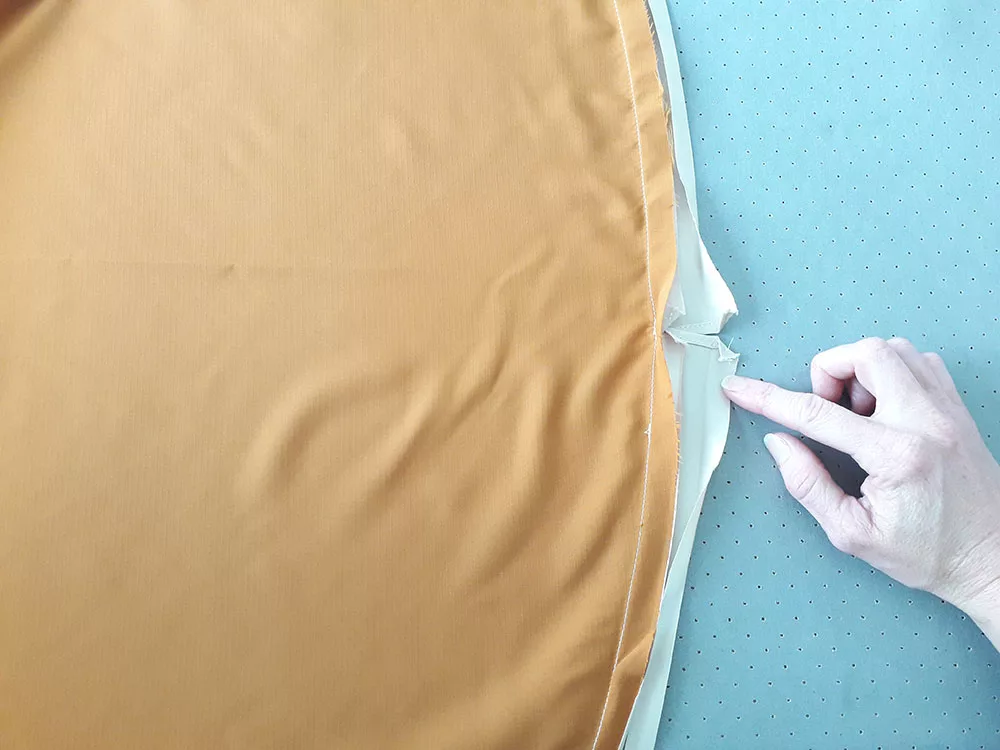
Step 2.11
12. To finish forming the casing, start from one marking and fold the bias over to encase the raw edge of the playmat. The creased edge of the bias needs to overlap the sewn seam by 2mm. Pin the tape in place from the top of the mat. Ensure the 2 sets of hem ends overlap, these form the entry points for the draw cords.
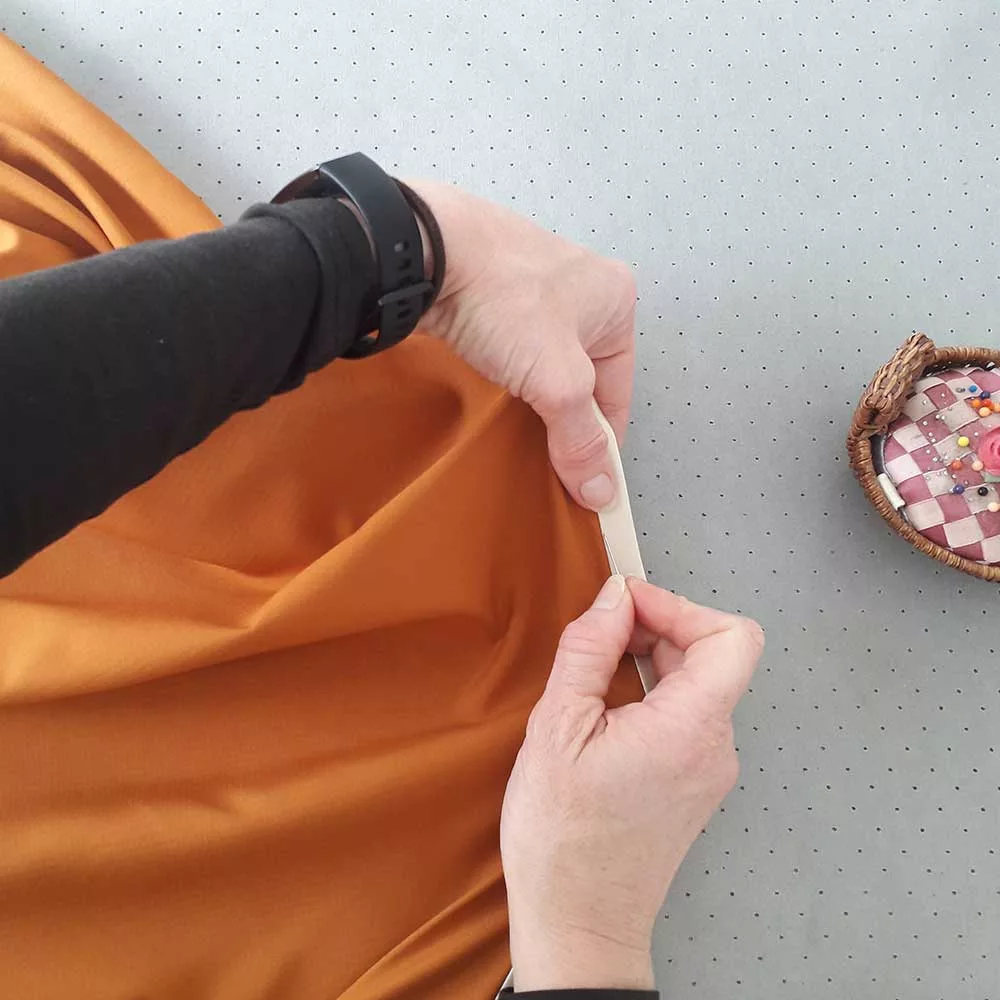
Step 2.12
13. Machine sew ‘stitch in a ditch’ from the pinned side to form a casing: Consider top/ bobbin thread colours, sew with the stitch line at the back catching the bottom edge of the bias tape and at the front, sew along the existing seam line (steps 6 and 9) tight to the edge of the bias tape ‘the ditch’. Use a straight stitch, stitch length 2.5.
3. Add the velcro
14. Mark the position for the velcro: Align the 2 draw cord entry points, hold/ clip them together, then fold the playmat in half.
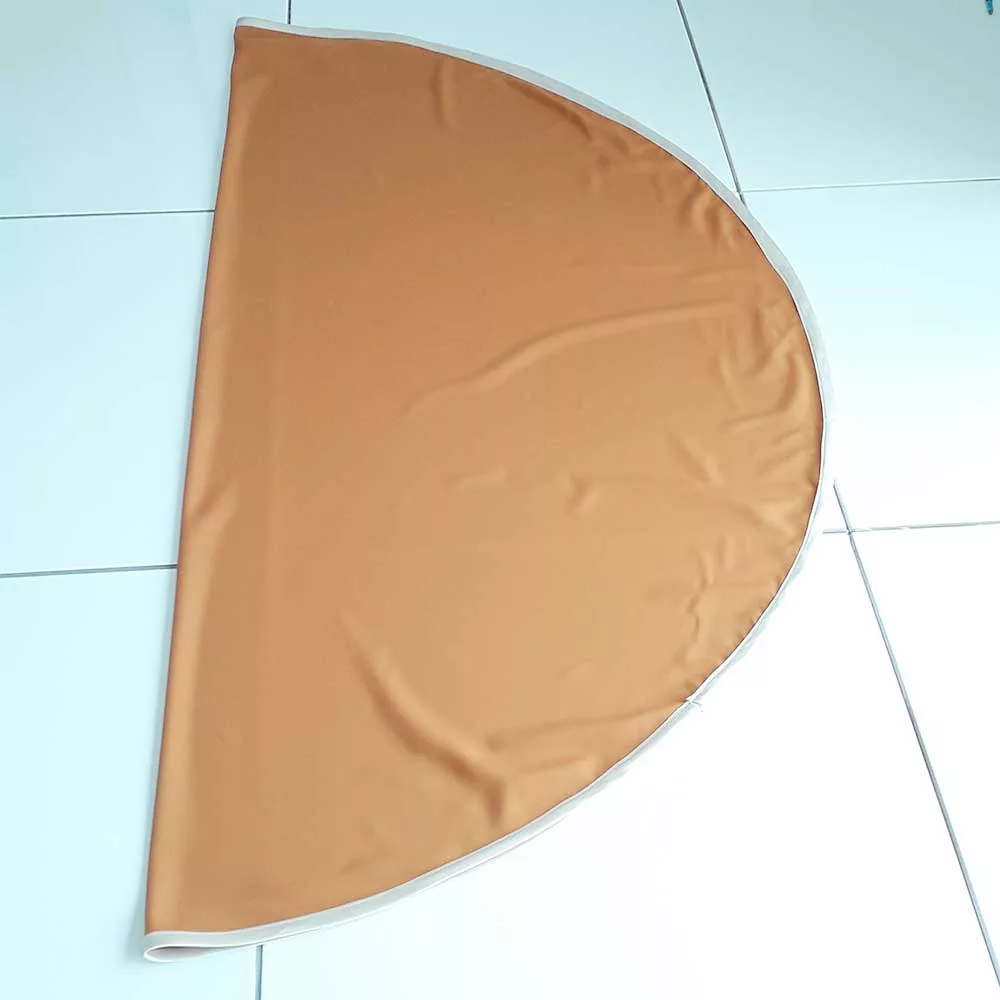
Step 2.14
15. Hand press the crease at the end furthest from the entry points, this is the halfway point in the long casing section.
16. Lay the mat out bottom side up (which is the bottom/ top is based on personal preference). Position the centre of the Velcro’s loop side across the crease forming a + shape. The velcro strip needs to be close enough to the edge of the mat for each end to touch the bias casing without overlapping it, move it further up or down the crease until the correct position is achieved.
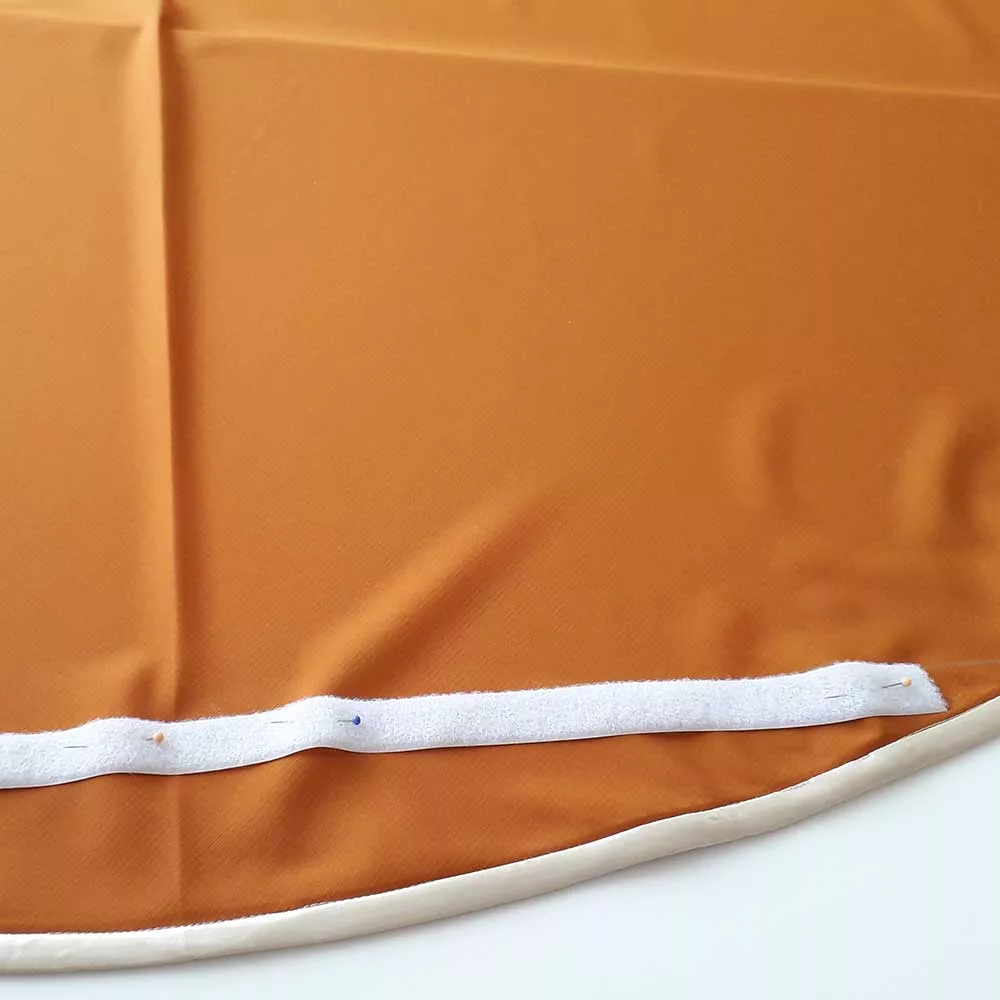
Step 2.16
17. Sew one long edge of the Velcro from the centre outwards in each direction. Use a straight stitch, stitch length 3.
18. Sew the other side of the Velcro from one end to the other.
4. Thread the cord
19. Cut the polyester woven cord in half and seal the ends.
20. Start at one of the draw cord entry points; using a bodkin or safety pin thread one of the cords through both the short and long casing sections and exit at the start point.
21. Secure the ends together with a knot.
22. Repeat step 20 from the other entry point to create 2 rings of draw cord within the casing. Secure the ends as per step 21.
Part 3: Setting up the toy tidy
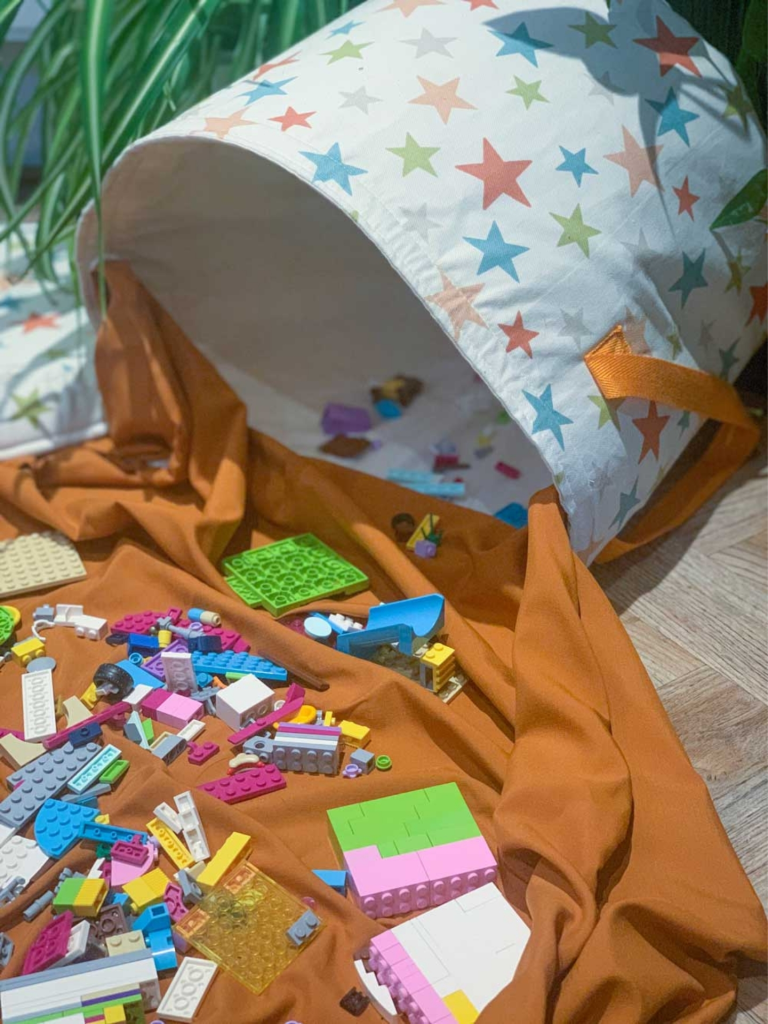
1. Place the buckram in the bottom of the basket.
2. Align and stick the Velcro on the mat and bag together. And the Toy Tidy is complete!
Never miss a tutorial or fabric guide…
Stay up to date with the latest by signing up to our newsletter!
Click to join our mailing list
Pin For Later!
We hope you found this tutorial useful
Let us know how you get along in the comments below 🙂
Follow Plush Addict on social media and keep an eye out for more tutorials. Please tag us @PlushAddict on your fave social media channel… we’d love to see your makes!